.png)
We are a small, dynamic team of the best designers, project managers & construction crews in the Bay Area. We pride ourselves on efficiency, beautiful design & streamlined construction and exceptional communication.

Bayside Pavers crafts exquisite paver pool decks that transform your pool or hot tub area into a Bay Area masterpiece, merging safety, beauty, and practicality. We use pavers or natural stone to create slip-resistant surfaces, perfect for bare feet, ensuring a clean and secure space for entertaining. The process starts with site prep, followed by a compacted crushed stone base for stability and drainage. Pavers like Belgard or Calstone, or elegant natural stone, are laid in a custom design—from classic grids to intricate mosaics—accented with coping to frame the pool edge with a beautiful finish. These materials withstand water and wear, offering a clean, low-maintenance deck that prioritizes safety. Ideal for gatherings or quiet dips, our paver decks elevate your outdoor oasis.


We believe in a collaborative process with all of our clients, gathering as much information as possible, then delivering exact quotes (not estimates). Our construction team operates efficiently with most projects initiating within 2 weeks of the agreement.
Schedule an initial consultation with one of our exceptional designers to take your dreams and ideals and turn them into reality.
After the appointment, our designers will work diligently on crafting a design that meets all your criteria and stays within your budget.
We will meet you back at your home to discuss the final design, play with pricing/project scope to fit your budget, then schedule an install date.
Construction for most projects can start within 2 weeks. Our English-speaking project managers will streamline the process from start to finish.
<iframe id="form-Acuity" src="https://app.acuityscheduling.com/schedule.php?owner=14814513&ref=embedded_csp" title="Schedule Appointment" width="100%" height="800" frameBorder="0"></iframe><script src="https://embed.acuityscheduling.com/js/embed.js" type="text/javascript"></script>
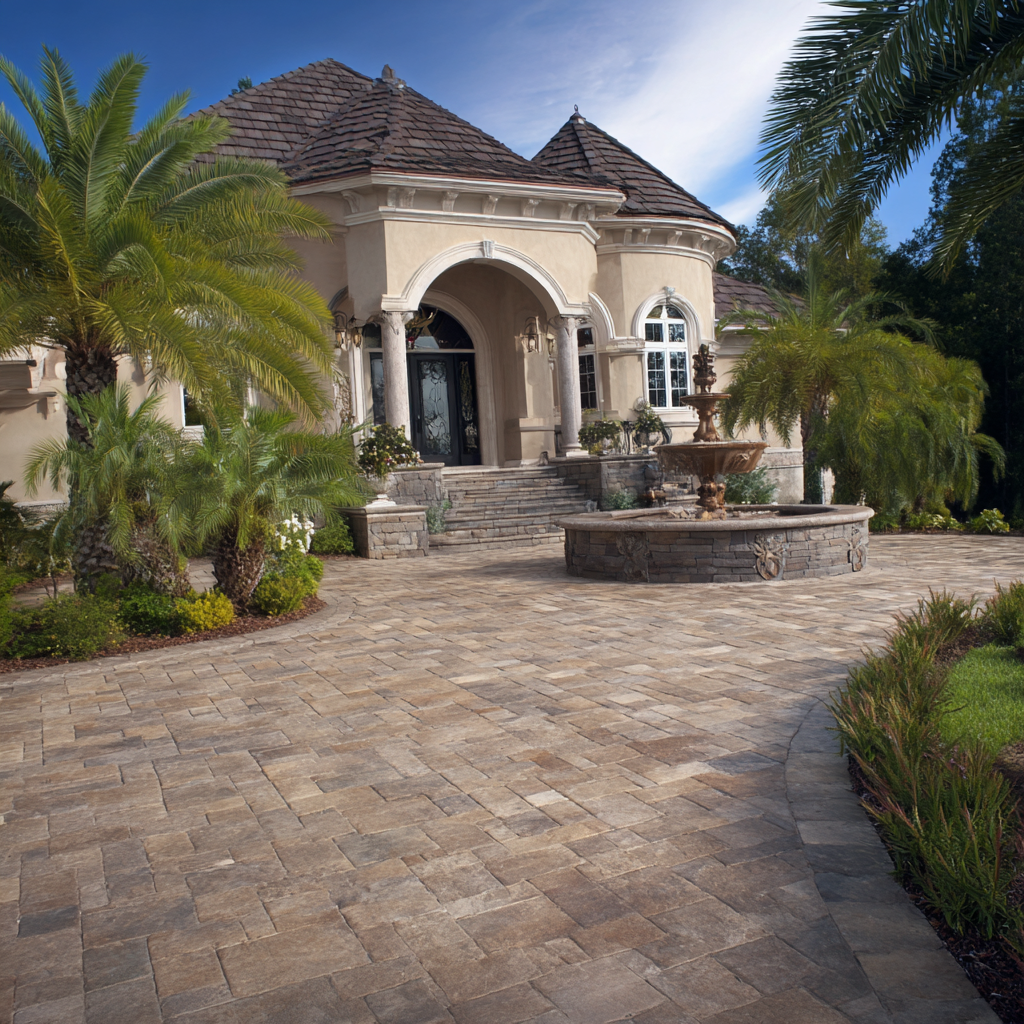
Understanding the fluctuating prices of pavers can help homeowners budget effectively for their landscaping projects, especially in a rapidly changing economy. In California, various factors impact the average paver cost trends, making it essential for homeowners to stay informed. This article will delve into the specifics of paver costs, the types available, and how to navigate these costs effectively.
Pavers are a popular choice for outdoor landscaping due to their durability and aesthetic appeal. However, the costs associated with purchasing and installing pavers can vary significantly based on several factors. Homeowners should be aware that the average paver cost trends in California can fluctuate due to market demand, material availability, and regional differences in labor costs.
Pavers are flat pieces of stone, brick, or concrete used to create outdoor surfaces such as patios, walkways, and driveways. Their versatility allows for various designs and configurations, making them a favored choice among homeowners.
Several key factors influence the average paver cost trends in California. Understanding these can help you make informed decisions when budgeting for your landscaping project.
To provide a clearer picture of the average paver cost trends in California, we can break down costs by type of paver. The following table summarizes the approximate costs per square foot for various types of pavers:
| Type of Paver | Cost per Square Foot |
|---|---|
| Concrete Pavers | $3 - $7 |
| Brick Pavers | $4 - $10 |
| Natural Stone Pavers | $10 - $20 |
| Porcelain Pavers | $5 - $15 |
Choosing the right paver involves considering your budget, the style of your home, and the intended use of the space. Concrete pavers are often a cost-effective and versatile choice, while natural stone offers a unique aesthetic but at a higher price point.
To further illustrate the average paver cost trends in California, let's examine a couple of real-world examples.
A homeowner in Los Angeles decided to install a new patio using concrete pavers. The project involved an area of 300 square feet, with an estimated material cost of $2,100 and labor costs of $1,500. The total project cost came to approximately $3,600.
In San Francisco, another homeowner opted for a natural stone paver driveway. The project covered 500 square feet, with material costs around $10,000 and labor costs of $4,000. The total expenditure was $14,000, highlighting the premium associated with natural stone.
The average cost of pavers in California ranges from $3 to $20 per square foot, depending on the type of paver selected.
To reduce costs, consider choosing more affordable materials like concrete, simplify the design, and shop around for competitive labor rates.
Understanding the average paver cost trends in California is crucial for effective budgeting in landscaping projects. By considering factors such as material type, installation complexity, and regional differences, homeowners can make informed decisions that align with their financial plans.
Concrete pavers are typically the most affordable option, with costs ranging from $3 to $7 per square foot.
While some homeowners may choose to install pavers themselves, hiring a professional is recommended for complex designs to ensure proper installation and longevity.
With proper maintenance, pavers can last for decades, making them a durable choice for outdoor spaces.
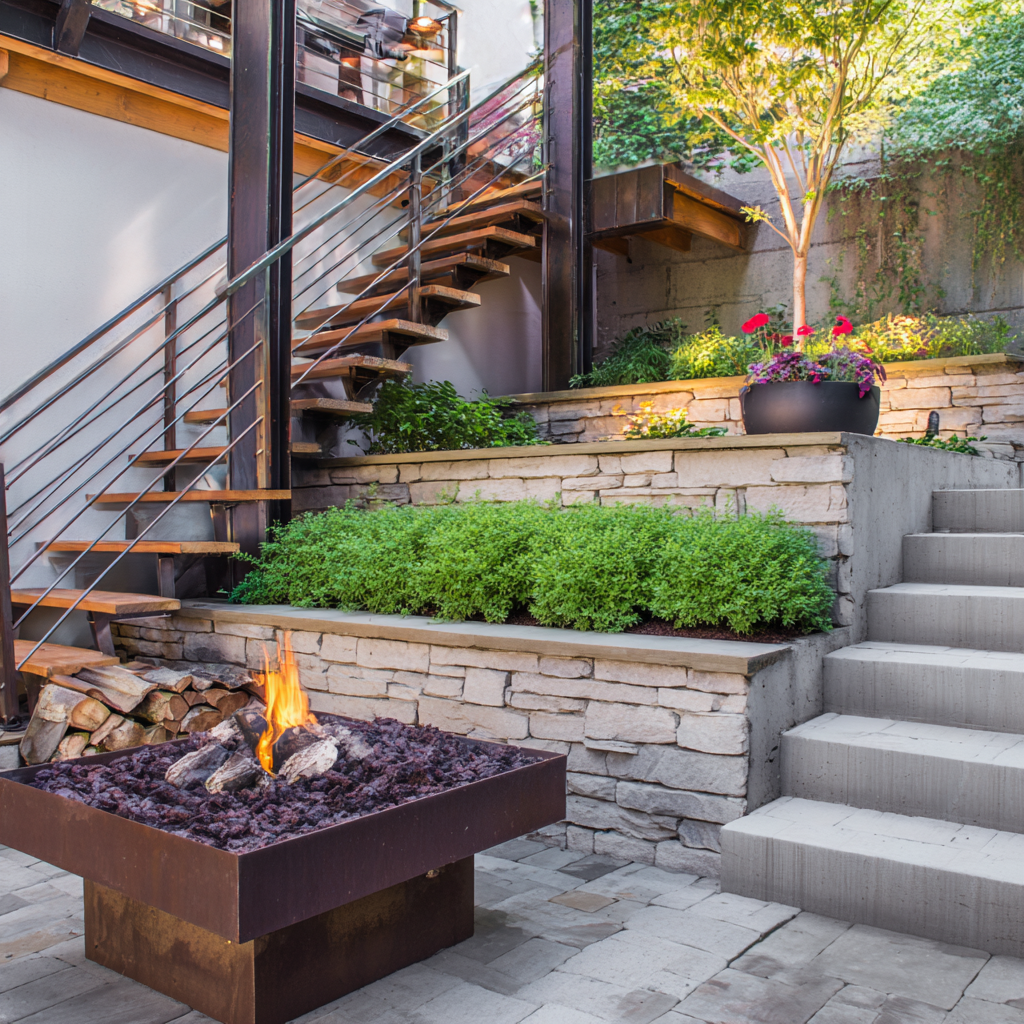
As homeowners become increasingly aware of the importance of sustainability, the demand for eco-friendly construction materials is on the rise. One area where this shift is particularly prominent is in the construction of retaining walls. Eco-friendly retaining wall options not only enhance the aesthetic appeal of your landscape but also contribute positively to the environment. In this article, we will explore various eco-friendly materials such as reclaimed wood and recycled concrete, their benefits, and practical applications.
Eco-friendly retaining walls are structures made from sustainable materials that minimize environmental impact while providing the necessary support for soil and landscape. These walls can be constructed using a variety of materials, including:
These materials are chosen for their low environmental impact and their ability to blend seamlessly into natural landscapes.
Common Question: What makes a retaining wall eco-friendly?
Answer: An eco-friendly retaining wall is made from sustainable materials that have a lower carbon footprint and utilize recycling or repurposing processes.
The benefits of incorporating eco-friendly materials in your retaining wall construction are numerous:
These advantages make eco-friendly retaining walls a smart choice for homeowners seeking to beautify their properties while being responsible stewards of the environment.
Common Question: Are eco-friendly retaining walls more expensive?
Answer: While some eco-friendly materials may have a higher upfront cost, they often result in long-term savings due to lower maintenance and replacement needs.
Here are some of the most popular eco-friendly materials used in retaining wall construction:
Reclaimed wood is sourced from old structures and provides a rustic, natural look. It is an excellent choice for homeowners looking for unique aesthetics while contributing to sustainability.
Recycled concrete is created by crushing existing concrete structures, making it a strong and durable option. This material not only reduces waste but also offers cost savings.
Natural stones can be sourced sustainably and require minimal processing. They offer a timeless look and exceptional durability.
Rammed earth walls are made by compacting a mixture of soil and other materials. This method is energy-efficient and offers excellent thermal properties.
Green concrete incorporates recycled materials and has a lower carbon footprint compared to traditional concrete. It is strong and environmentally friendly.
Common Question: What materials are best for an eco-friendly retaining wall?
Answer: The best materials include reclaimed wood, recycled concrete, natural stone, rammed earth, and green concrete, all of which offer sustainability and durability.
Understanding how eco-friendly retaining walls have been successfully implemented can provide valuable insights:
A homeowner in Oregon used reclaimed wood from a local barn to create a stunning retaining wall that not only supported their garden but also preserved the local history.
In an urban renewal project, a city used recycled concrete to create retaining walls in public parks, significantly reducing construction waste and enhancing green spaces.
At a historic property in Virginia, natural stone was used for retaining walls to blend with the surrounding landscape while ensuring structural integrity.
Common Question: Can you provide examples of eco-friendly retaining walls?
Answer: Yes, examples include reclaimed wood walls in rural settings and recycled concrete walls in urban parks.
| Material | Initial Cost | Durability | Maintenance Cost |
|---|---|---|---|
| Reclaimed Wood | Moderate | 10-20 years | Low |
| Recycled Concrete | Low | 50+ years | Very Low |
| Natural Stone | High | Lifetime | Very Low |
| Rammed Earth | Moderate | 50+ years | Low |
| Green Concrete | Moderate | 50+ years | Low |
This table illustrates the cost-effectiveness and durability of various eco-friendly materials, helping homeowners make informed decisions.
Common Question: How do the costs of eco-friendly materials compare?
Answer: Initial costs vary, but many eco-friendly materials, like recycled concrete, offer long-term savings due to low maintenance needs.
In this section, we address some frequently asked questions about eco-friendly retaining walls:
The lifespan varies by material, with options like natural stone lasting a lifetime, while others like reclaimed wood may last 10-20 years.
Not necessarily. Many eco-friendly materials are easy to work with, although some, like natural stone, may require more skill for installation.
Yes, many eco-friendly retaining wall options can be DIY projects, particularly those made from reclaimed wood or small stone.
In conclusion, choosing eco-friendly retaining wall options is a sustainable approach that not only enhances your landscape but also supports the environment. With materials like reclaimed wood and recycled concrete, you can create beautiful and functional retaining walls that stand the test of time. Embracing these eco-friendly solutions reflects a commitment to sustainability and responsible landscaping.
What are the best eco-friendly materials for retaining walls?
The best materials include reclaimed wood, recycled concrete, natural stone, rammed earth, and green concrete.
How long do eco-friendly retaining walls last?
Lifespan varies by material, with natural stone lasting a lifetime and reclaimed wood lasting 10-20 years.
Are eco-friendly retaining walls more expensive?
While some may have higher upfront costs, they often result in long-term savings due to lower maintenance needs.
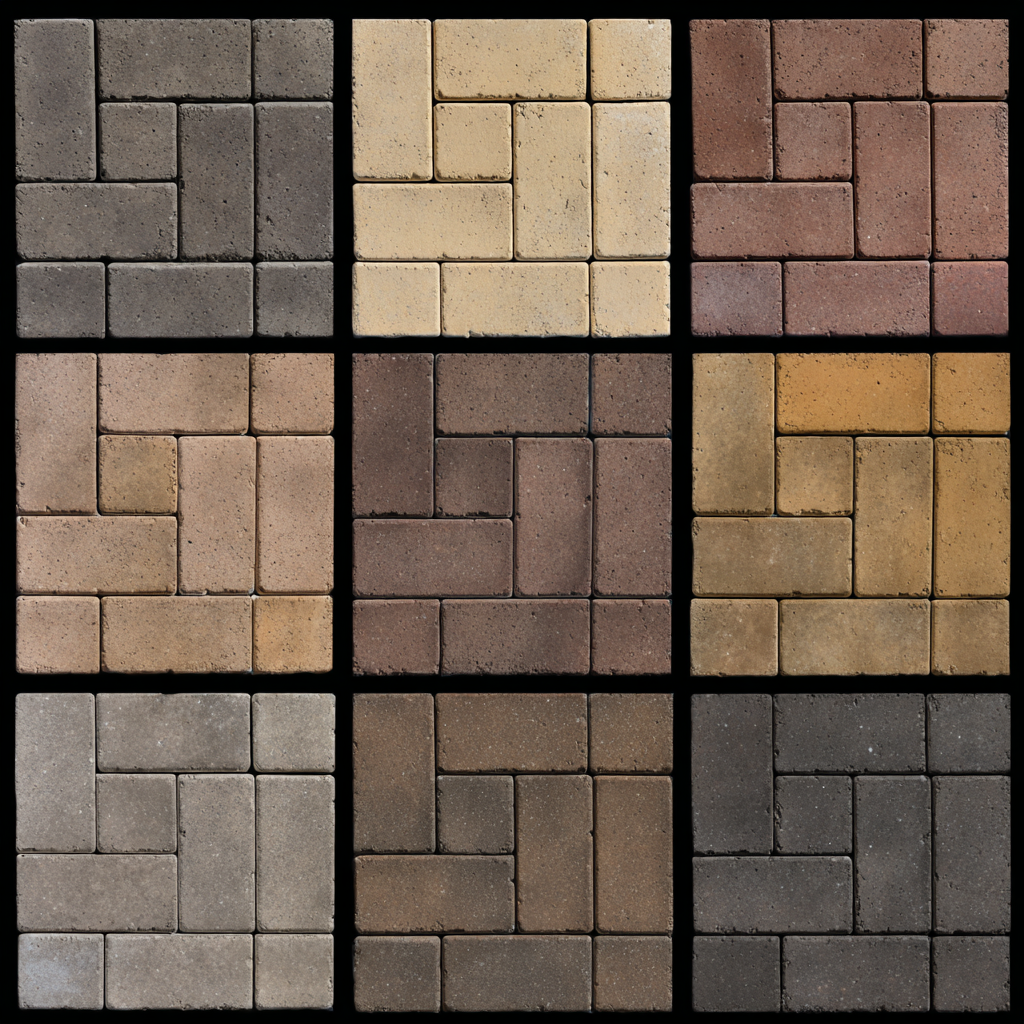
In 2023, the outdoor aesthetic landscape is evolving rapidly, and homeowners and designers alike are looking for the latest trends to enhance their spaces. One of the standout players in this field is Angelus Pavers, renowned for their high-quality paving solutions. This article explores the Angelus Pavers Color Trends 2023, focusing on the latest color options that not only enhance outdoor aesthetics but also align with current design trends.
Colors play a crucial role in setting the mood and tone of outdoor spaces. They can create a sense of warmth, tranquility, or vibrancy, depending on the choices made. The right color can complement the architectural style of a home, enhance landscaping features, and even influence the perceived size of the space. For instance, lighter colors can make a small area feel larger, while darker shades can add depth and coziness.
Choosing the right color involves considering the existing elements in your landscape, such as plants, flowers, and home exteriors. It’s also important to think about the overall vibe you want to create. Neutral colors offer versatility, while bold colors can make a statement.
Color trends are influenced by various factors including fashion, interior design, and even cultural movements. In 2023, we see a shift towards more natural and earthy tones inspired by sustainability and the desire for harmony with nature. This trend is evident in the palette offered by Angelus Pavers, which reflects these contemporary desires.
Color trends are influenced by societal changes, technological advancements in materials, and shifts in consumer preferences. Designers and manufacturers often look to fashion and interior design for inspiration, leading to a cohesive trend across multiple industries.
As we delve into 2023, the Angelus Pavers collection showcases several key color trends that resonate with homeowners and designers:
Incorporating color trends can be as simple as choosing pavers in trending colors for patios or walkways. You can also consider adding colorful furniture or plantings that complement your chosen paver colors.
Angelus Pavers offers a diverse range of colors that align with the trends highlighted above. Here are some standout options:
| Color | Description | Best Use |
|---|---|---|
| Terracotta | A warm, earthy hue that blends beautifully with natural landscapes. | Patios, walkways, and garden borders. |
| Olive Green | A muted green that evokes tranquility and harmony. | Garden paths and outdoor seating areas. |
| Soft Blue | A light, airy color that adds a refreshing touch. | Pool decks and outdoor lounges. |
| Deep Emerald | A bold, rich color that creates a striking visual impact. | Feature walls and prominent pathways. |
Yes, the colors offered by Angelus Pavers are designed to withstand various weather conditions while maintaining their vibrancy. However, it's important to consider how the color may appear in different lighting conditions.
To illustrate the impact of color choices, let’s review a few case studies of outdoor spaces transformed using Angelus Pavers:
A homeowner in a suburban area opted for terracotta pavers to create a warm, inviting patio. The earthy tone complemented their existing landscaping and provided a seamless transition from the garden to the outdoor living space. As a result, their outdoor area became a focal point for family gatherings.
A local business used soft blue pavers for their entrance walkway, which not only enhanced the appeal of the property but also created a calming atmosphere for customers. The choice of color increased foot traffic and improved the overall customer experience.
When investing in outdoor paving, it’s essential to consider both the costs and benefits associated with different color options. Below is a comparison table highlighting the potential costs and benefits:
| Color Option | Initial Cost | Long-term Benefits |
|---|---|---|
| Terracotta | $$ | Timeless appeal, blends with nature. |
| Olive Green | $$ | Creates a serene environment, works well with greenery. |
| Soft Blue | $$$ | Refreshing look, enhances outdoor living spaces. |
| Deep Emerald | $$$ | Bold statement, increases property value. |
Angelus Pavers are designed to last for decades with proper maintenance, making them a worthwhile investment for any outdoor space.
The best color depends on your personal preference and the overall design of your outdoor space. Earthy tones are popular for a natural look, while bold colors can add a dramatic flair.
Yes, mixing colors can create unique patterns and enhance visual interest in your outdoor space.
Regular cleaning and sealing can help maintain the vibrancy of your pavers and protect them from fading over time.
In conclusion, the Angelus Pavers Color Trends 2023 offer a diverse and stylish palette that can significantly enhance outdoor aesthetics. By understanding current trends and selecting the right colors, homeowners can create beautiful, inviting spaces that reflect their personal style and align with modern design principles. As you explore these options, consider how different colors can transform your outdoor living environment into a harmonious retreat.
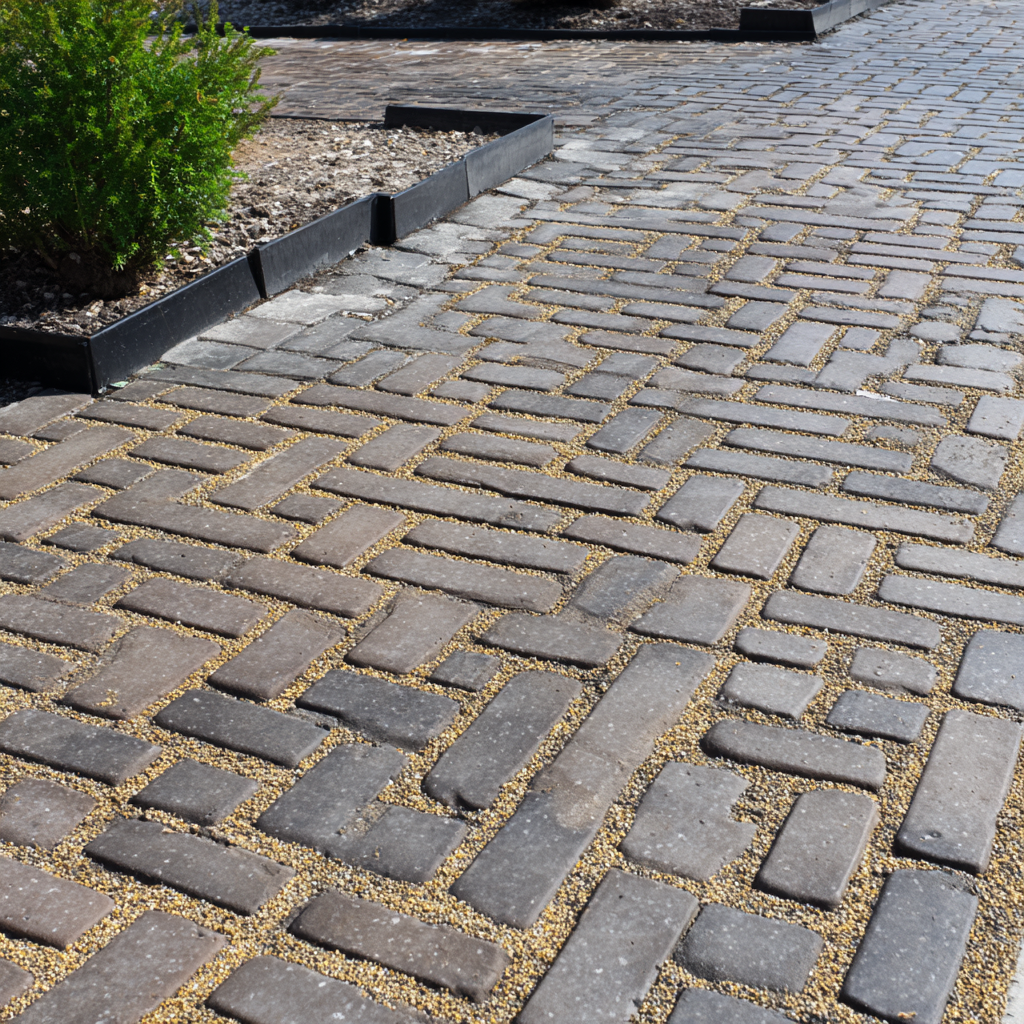
In today's world, the importance of sustainable practices cannot be overstated. One such practice gaining momentum is eco-friendly permeable paving. These innovative solutions not only enhance the aesthetic appeal of properties but also significantly contribute to environmental preservation. In this article, we will explore the various eco-friendly permeable paving benefits, including their role in reducing stormwater runoff and improving groundwater recharge.
Permeable paving refers to a range of materials and techniques designed to allow water to pass through surfaces, thereby minimizing runoff. Traditional paving materials, such as concrete and asphalt, create impermeable surfaces that lead to increased stormwater runoff, which can cause flooding and water pollution. In contrast, permeable paving systems utilize porous materials that facilitate the natural absorption of rainwater into the ground.
Permeable paving systems typically consist of materials with voids or spaces that allow water to flow through. When rain falls on these surfaces, the water seeps through the pores and is directed into a sub-base layer, where it can be filtered and absorbed into the ground. This process not only reduces surface runoff but also aids in recharging groundwater supplies.
The advantages of implementing eco-friendly permeable paving solutions are numerous and impactful. Below are some of the most significant benefits:
Permeable paving can be constructed from various materials, including permeable concrete, porous asphalt, interlocking pavers, and gravel. Each material has unique properties and benefits, allowing for flexibility in design and application.
When considering the implementation of eco-friendly permeable paving, it's essential to evaluate the cost versus benefits. Below is a comparison table that outlines the potential costs and benefits associated with permeable paving.
| Aspect | Cost | Benefit |
|---|---|---|
| Installation | Higher initial investment compared to traditional paving | Long-term savings on stormwater management and maintenance |
| Maintenance | Regular maintenance required to prevent clogging | Reduced flooding and erosion costs |
| Aesthetic Value | Varies by design | Increased property value and curb appeal |
| Regulatory Compliance | Potential fines for non-compliance | Avoidance of fines and improved community relations |
Yes, while the initial installation cost may be higher than traditional paving, the long-term savings can be substantial. These savings come from reduced stormwater management costs, lower maintenance expenses, and potential increases in property value.
Several communities and businesses have successfully implemented eco-friendly permeable paving solutions, showcasing their benefits in real-world applications. Below are two notable case studies:
The City of Seattle implemented permeable paving in one of its urban parks to manage stormwater effectively. The project involved replacing traditional concrete pathways with permeable pavers. As a result, the park experienced a significant reduction in surface runoff, leading to improved water quality in nearby streams. Additionally, the aesthetic appeal of the park increased, attracting more visitors.
A popular retail center in Austin decided to install permeable paving in its parking lot. The project aimed to comply with local stormwater regulations while enhancing the shopping experience. The permeable paving allowed rainwater to infiltrate, reducing flooding during heavy rains. The retail center reported increased foot traffic and customer satisfaction due to the improved landscape.
Regular maintenance includes cleaning to prevent debris buildup, which can clog the pores of the paving. This may involve vacuuming or pressure washing to maintain functionality.
Yes, permeable paving is suitable for driveways, providing both aesthetic appeal and functional benefits, such as stormwater management.
While the initial costs may be higher, the long-term savings on stormwater management and increased property value can make permeable paving a cost-effective choice.
In conclusion, the eco-friendly permeable paving benefits extend far beyond mere aesthetics. By reducing stormwater runoff, improving groundwater recharge, and enhancing water quality, these solutions play a vital role in sustainable property management. As communities continue to face environmental challenges, embracing permeable paving can lead to a more resilient and sustainable future. If you're considering a paving solution that aligns with eco-friendly practices, permeable paving should be at the top of your list.
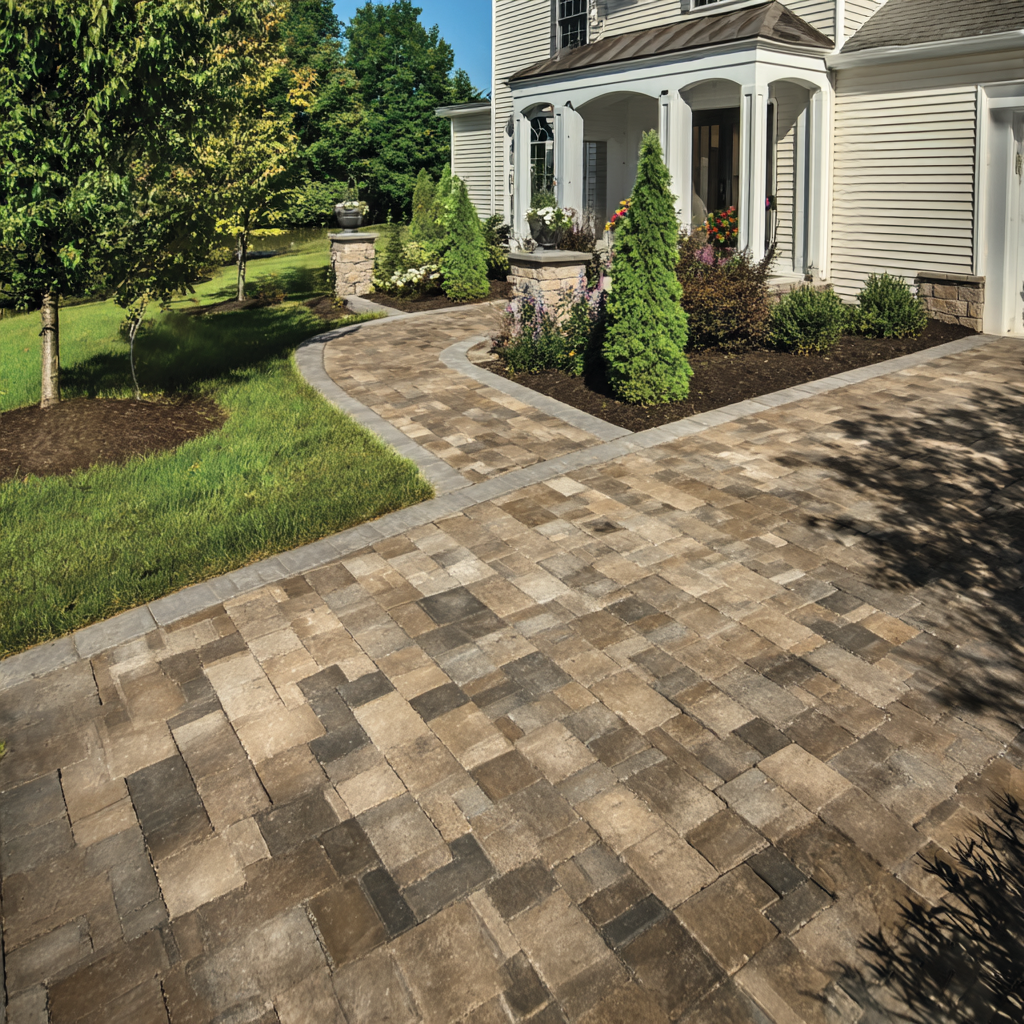
Understanding how to use a paver cost calculator helps homeowners budget more effectively for their hardscaping projects, ensuring they make informed decisions. In the realm of landscaping, particularly when it comes to installing pavers, the costs can quickly add up. A paver cost calculator serves as a vital tool that enables homeowners to estimate expenses accurately, allowing for better financial planning and project execution.
A paver cost calculator is an online tool designed to help individuals estimate the costs associated with installing pavers for patios, walkways, driveways, and more. By inputting various parameters such as the area size, type of pavers, and installation complexity, users can receive a detailed breakdown of potential costs.
The calculator typically requires inputs like dimensions of the area, paver type (e.g., concrete, brick, stone), and any additional features like borders or patterns. After entering these details, it computes the estimated cost based on current market prices and average installation fees.
Utilizing a paver cost calculator comes with numerous advantages for homeowners planning hardscaping projects. Here are some of the key benefits:
Absolutely! A paver cost calculator is beneficial for both DIY enthusiasts and those hiring professionals. It provides essential cost insights regardless of whether the work is done by the homeowner or a contractor.
Using a paver cost calculator is straightforward. Here’s a step-by-step guide:
While most online paver cost calculators are based on industry standards and average pricing, it’s essential to remember that actual costs can vary based on location, labor rates, and material availability. Always consult local contractors for the most accurate quotes.
To illustrate the benefits of using a paver cost calculator, here are a couple of case studies showcasing real-world applications:
A homeowner in suburban Chicago wanted to install a 400 square foot patio using concrete pavers. By using a paver cost calculator, they estimated the total cost to be around $3,200, including materials and labor. After reviewing the breakdown, they decided to opt for a DIY installation, which saved them $800.
Another homeowner in Florida needed to replace their driveway with brick pavers. The calculator provided an estimate of $7,500 for professional installation. Upon learning this, they opted for a less expensive paver type, reducing the total to $5,500. This decision was made easier with the cost comparison feature of the calculator.
Several factors influence paver installation costs, including the type of pavers, the complexity of the design, labor costs in your area, and any additional features such as borders or patterns.
To save money, consider DIY installation, choose less expensive paver materials, and compare quotes from multiple contractors to find the best deal.
A paver cost calculator is a tool that helps estimate the costs associated with installing pavers for various hardscaping projects.
While they provide good estimates based on average costs, actual prices may vary due to local factors.
Yes, it’s beneficial for both DIYers and those hiring professionals to get a clear financial picture.
Utilizing a paver cost calculator can significantly enhance your budgeting and planning for hardscaping projects. Key benefits include:
By leveraging these tools, homeowners can confidently embark on their hardscaping projects, ensuring they stay within budget while achieving their desired aesthetic.
By [Author Name], Landscaping Expert
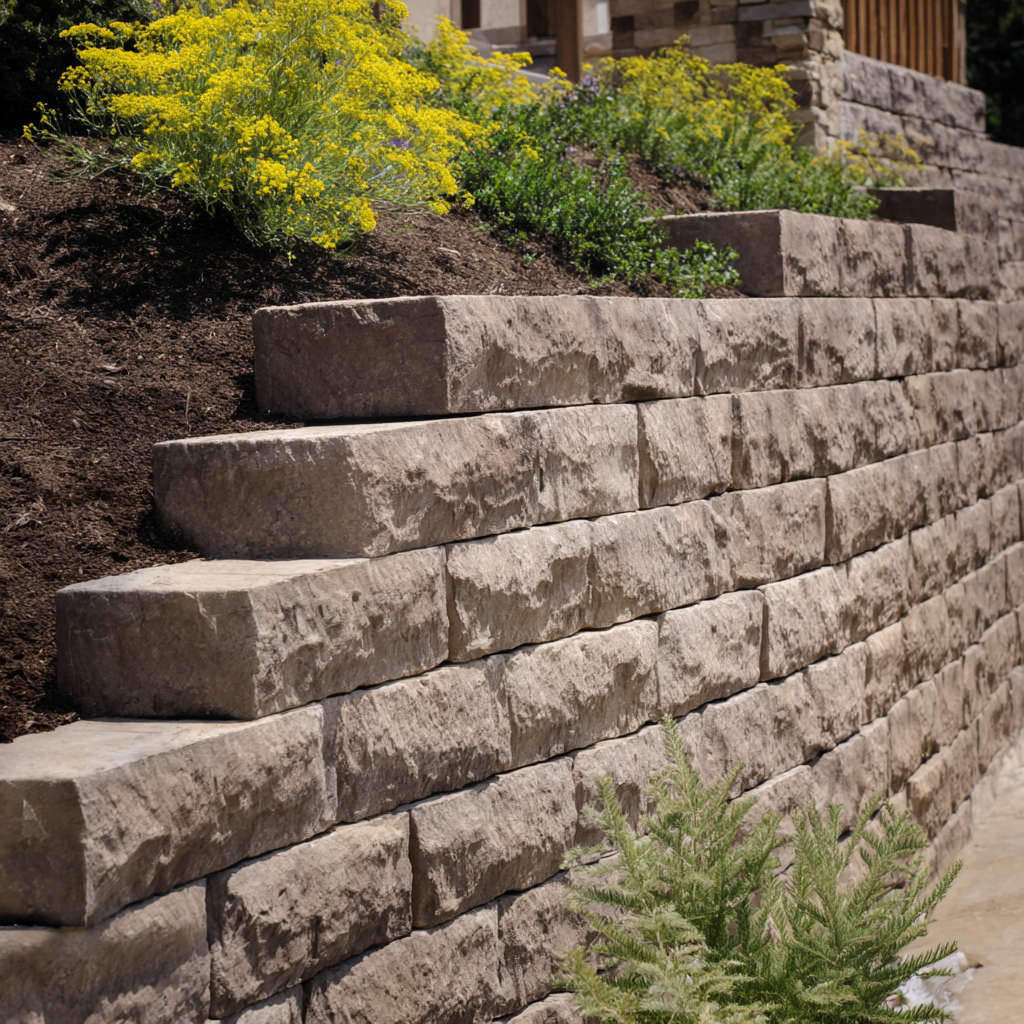
As environmental concerns continue to rise, homeowners are increasingly focused on sustainability in their landscaping projects. One critical aspect of landscape design is the use of retaining walls, which serve both functional and aesthetic purposes. However, the choice of materials can significantly impact the environment. In this article, we will explore eco-friendly retaining wall materials that not only enhance the beauty of your property but also contribute to a more sustainable future. We will delve into various options, their benefits, and practical applications, ensuring you make informed choices for your landscaping needs.
Retaining walls are structures designed to hold back soil and prevent erosion, especially on sloped landscapes. They can also create level areas for planting, patios, and walkways. The materials used for constructing retaining walls vary widely, from concrete and brick to natural stones and recycled materials. Each option has its own set of environmental impacts, which is why eco-friendly alternatives are becoming increasingly popular.
The primary purpose of a retaining wall is to support soil laterally so that it can be retained at different levels on the two sides. This is particularly important for preventing soil erosion, managing water runoff, and creating usable outdoor spaces.
Choosing eco-friendly retaining wall materials is crucial for several reasons:
Opting for eco-friendly materials not only supports environmental sustainability but also enhances the aesthetic value of your landscape. Additionally, it can lead to long-term cost savings and improved property value.
There are several eco-friendly materials that you can choose from for your retaining wall projects:
Recycled concrete is made from crushed concrete debris, reducing the need for new concrete production. This material is durable, cost-effective, and can be used in various applications.
Natural stone is a timeless choice for retaining walls. It is durable and blends seamlessly with the natural landscape. Sourcing local stone can further reduce environmental impact.
Rammed earth walls are made by compacting a mixture of soil, sand, and gravel. This method is highly sustainable as it uses natural materials and has a low carbon footprint.
Using timber from sustainably managed forests ensures that your retaining wall is eco-friendly. Look for certifications like FSC (Forest Stewardship Council) to ensure responsible sourcing.
Gabion walls are made from wire mesh cages filled with rocks or recycled materials. They are highly effective for erosion control and can be visually appealing when filled with colorful stones.
Straw bales can be used as an innovative and sustainable option for retaining walls. They are biodegradable and provide excellent insulation.
The benefits of utilizing eco-friendly materials for retaining walls are manifold:
Eco-friendly materials contribute to sustainability by reducing resource depletion, minimizing pollution, and promoting biodiversity. They often use renewable resources and can be recycled at the end of their life cycle.
When considering eco-friendly retaining wall materials, it's essential to weigh the costs against the benefits. The following table summarizes the average costs and benefits of various eco-friendly materials:
| Material | Average Cost per Square Foot | Longevity (Years) | Environmental Impact |
|---|---|---|---|
| Recycled Concrete | $10 | 30 | Low |
| Natural Stone | $15 | 50+ | Moderate |
| Rammed Earth | $12 | 100 | Very Low |
| Sustainable Timber | $8 | 20 | Moderate |
| Gabion Walls | $9 | 30 | Low |
| Straw Bales | $6 | 5-10 | Very Low |
When evaluating costs, consider the initial purchase price, installation costs, longevity, maintenance requirements, and potential environmental benefits. This comprehensive approach will help you make the most informed decision.
To illustrate the effectiveness of eco-friendly retaining wall materials, here are a few case studies:
A community park in California utilized recycled concrete for its retaining walls. The project not only saved costs but also contributed to a significant reduction in waste, diverting over 500 tons of concrete from landfills.
A homeowner in Oregon chose natural stone for their retaining wall, enhancing the property's aesthetic appeal while ensuring durability. The local sourcing of materials minimized transportation emissions.
The best eco-friendly materials include recycled concrete, natural stone, rammed earth, sustainable timber, gabion walls, and straw bales. Each material has its unique benefits and applications.
To ensure your retaining wall is environmentally friendly, choose materials that are locally sourced, renewable, or recycled. Additionally, consider the installation methods to minimize environmental impact.
As homeowners become more environmentally conscious, the demand for eco-friendly retaining wall materials continues to grow. By selecting sustainable options, you not only enhance your landscape's beauty but also contribute to a healthier planet. Whether you opt for recycled concrete, natural stone, or innovative materials like rammed earth, each choice plays a role in promoting sustainability. Make informed decisions, and your landscaping projects can reflect your commitment to the environment.
• Eco-friendly retaining wall materials contribute to sustainability and enhance landscape aesthetics.
• Options include recycled concrete, natural stone, rammed earth, sustainable timber, gabion walls, and straw bales.
• Consider the long-term benefits and costs when selecting materials for your retaining wall projects.
By: Eco Landscaping Expert
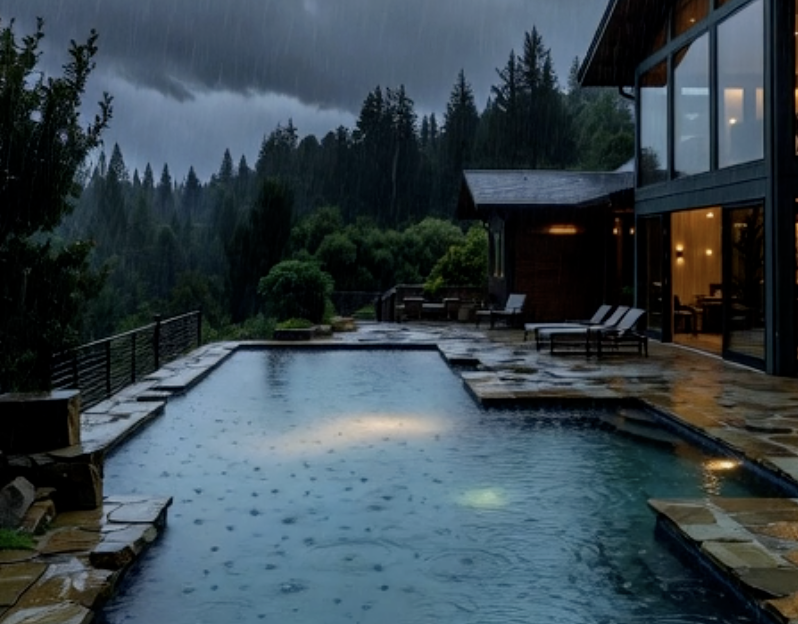
La Niña + king tides + potential triple atmospheric rivers Dec 2025–Jan 2026. Free 20-min drainage assessment prevents $20K–$40K in paver damage. Book before slots gone.
Understanding the 2025-2026 La Niña-Driven Atmospheric River Threat
Why Paver and Hardscape Drainage Fails First in Bay Area Winter Storms
Current December 2025 Warnings: King Tides Are Just the Opening Act
The Silent Saturation: What’s Already Happening Under Your Driveway and Pool Deck
Real Bay Area Case Studies from Recent Atmospheric Rivers
Early Warning Signs Your Drainage System Is About to Collapse
How Much Rain Your Specific Hardscape Can Actually Survive
Our Exclusive 20-Minute Drainage Risk Assessment Process
The Bayside No-Storm-Damage Guarantee – Only Available This December
Complete Action Plan to Protect Your Property Before the Next Storm Hits
Right now, on December 3, 2025, the National Weather Service and NOAA confirm La Niña conditions are locked in place through at least February 2026. This pattern dramatically increases the likelihood of repeated, high-intensity atmospheric river events hitting Northern California. While the first half of December is starting drier than normal, meteorologists are already watching three potential storm systems that could deliver the wettest 4–6 week stretch since 2017.
At Bayside Pavers, we specialize in one thing: making sure your pavers, driveways, patios, and pool decks survive these exact events. After rescuing hundreds of failed installations and performing over 500 drainage assessments in the past 24 months, one statistic has never changed: not a single client who completed our pre-storm drainage assessment has ever suffered major storm-related damage.
La Niña winters historically produce sharper contrasts: longer dry periods broken by extremely intense wet episodes. The current NOAA outlook shows elevated chances for above-normal precipitation across Northern California from January through March 2026, with the strongest signal in coastal and Bay Area counties.
Current modeling suggests three major atmospheric river events are possible between mid-December 2025 and late January 2026:
When these systems align with king tides — which we are experiencing right now, December 1–5, 2025 — flood risk becomes extreme even with moderate rainfall.
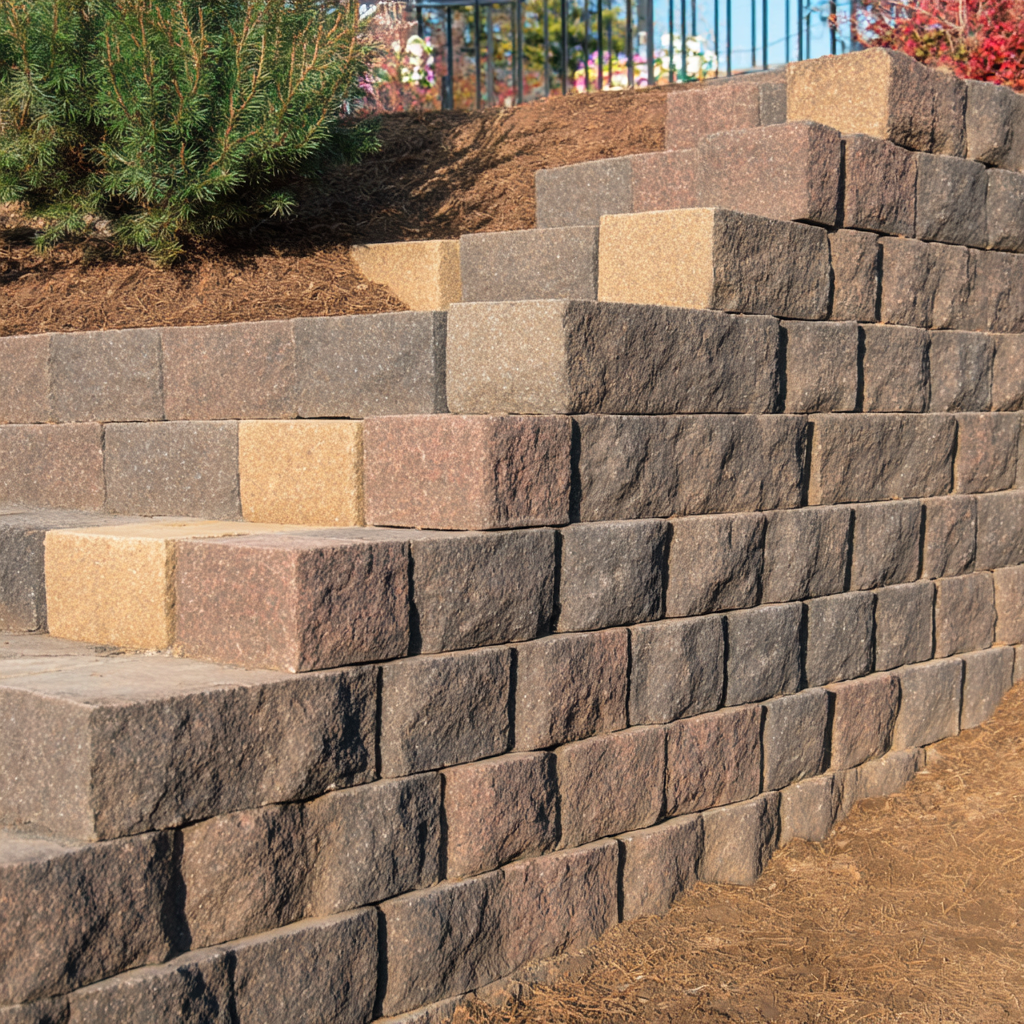
Discover the latest Basalite retaining wall design trends to enhance your California landscape's aesthetics and functionality.
Retaining walls are more than just functional structures; they are essential elements of landscape design that can enhance the beauty and usability of outdoor spaces. Among the various materials available, Basalite blocks have emerged as a popular choice in California, owing to their durability and aesthetic appeal. In this article, we will delve into the latest Basalite Retaining Wall Design Trends that are shaping landscapes across the state, exploring how these trends not only elevate aesthetics but also improve functionality.
Basalite is a leading manufacturer of concrete masonry products, renowned for its quality and innovation. Their retaining wall blocks are designed to withstand the test of time while offering a range of styles and finishes. Here are some key features of Basalite products:
Common question: What are the benefits of using Basalite blocks for retaining walls? Basalite blocks offer durability, aesthetic appeal, and ease of installation, making them an excellent choice for both residential and commercial projects.
As landscape design evolves, so do the trends associated with retaining walls. Here are some of the most prominent trends in Basalite retaining wall design:
One of the leading trends is the use of Basalite blocks that mimic the appearance of natural stone. This design integrates seamlessly into outdoor environments, providing a rustic yet refined look.
Color variation in retaining walls is gaining popularity. Homeowners are opting for blocks that come in multiple hues to create visually appealing patterns and designs.
Incorporating greenery into retaining walls has become a popular trend. Basalite blocks can be designed to support vertical gardens, enhancing both beauty and air quality.
Geometric patterns and shapes are also in vogue. Unique designs can create dynamic landscapes that stand out.
Common question: How do color variations enhance the design of retaining walls? Color variations can add depth and visual interest, making retaining walls more attractive and harmonious with the surrounding landscape.
While aesthetics are crucial, the functionality of retaining walls cannot be overlooked. Basalite retaining walls serve multiple purposes:
Common question: What are the primary functions of retaining walls? Retaining walls primarily retain soil, manage drainage, and can also serve as functional outdoor seating.
To illustrate the impact of Basalite retaining walls, let's look at a few case studies:
A homeowner in San Diego used Basalite blocks to create a terraced garden. By integrating color variations and natural stone aesthetics, the garden became a focal point, attracting compliments from neighbors.
A commercial property in Los Angeles utilized Basalite retaining walls to manage a steep slope. The walls not only provided necessary soil retention but also created an attractive landscape that enhanced the property's curb appeal.
A community park in San Francisco incorporated Basalite blocks to create seating areas around a playground. The walls provided safety while also serving as a gathering space for families.
Common question: How can Basalite retaining walls be used in commercial landscaping? Basalite retaining walls can enhance aesthetics, manage slopes, and create usable spaces in commercial landscapes.
Basalite retaining walls require minimal maintenance. Regular inspections for cracks or damage are advisable, along with occasional cleaning to remove debris.
While DIY installation is possible, hiring a professional is recommended to ensure proper drainage and structural integrity.
With proper installation and maintenance, Basalite retaining walls can last for decades, making them a durable choice for landscaping.
The latest Basalite Retaining Wall Design Trends not only enhance the visual appeal of landscapes but also provide essential functionality. From natural stone aesthetics to innovative designs that incorporate greenery, these trends reflect a growing appreciation for both beauty and utility in outdoor spaces. As you consider your next landscaping project, keep these trends in mind to create a stunning and practical environment.
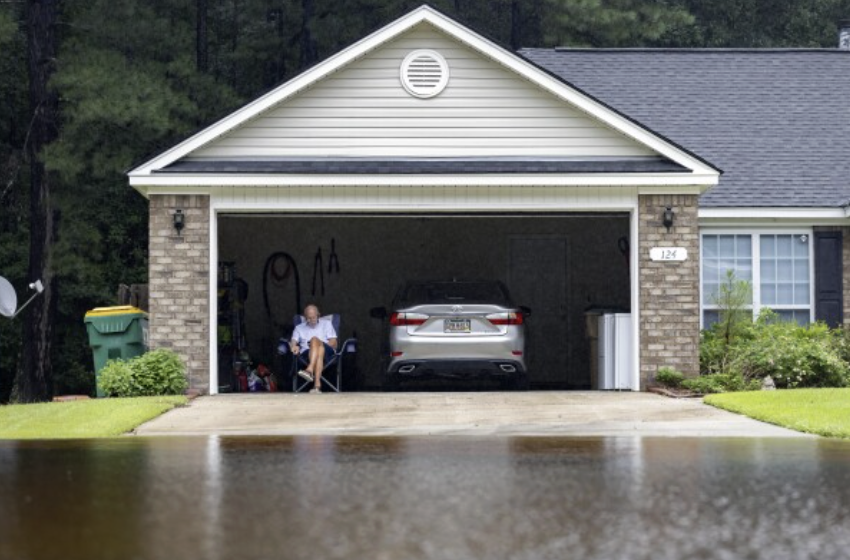
Tackle home drainage problems during California storms—gutters, backups & more. Bay Area tips + free Bayside assessment. Stay dry in 2025!
Table of Contents

Stop soggy lawns and backyard flooding in the Bay Area for good. Proven fixes + free drainage assessment from Bayside Pavers.
Table of Contents

As a licensed geotechnical and structural engineer specializing in Bay Area hillsides for the last 18 years, I can tell you the November 13–15 atmospheric river was the exact type of long-duration, moderate-intensity event that triggers the majority of our region’s shallow debris flows and slow earth movement. The combination of antecedent moisture from earlier rains, followed by 2–4 inches in 48 hours on steep, clay-rich soils and burn-scar areas, created perfect conditions for slope instability across San Mateo County’s coastal mountains.
If you own a home in Woodside, Portola Valley, Hillsborough, Emerald Hills, or the San Mateo Highlands, your lot is almost certainly governed by the same Franciscan bedrock and colluvial soils that lose strength dramatically when saturated. The good news: properly designed retaining walls and sub-drainage can reduce risk by 95% or more.
Shallow rapid landslides on the Peninsula rarely happen in one cinematic moment. Instead, pore-water pressure builds inside the soil mantle until effective stress drops to zero. The top 3–12 feet of soil then begins to move downslope as a translational slide or earthflow, typically at rates of inches to feet per day. Once that sliding plane reaches the toe of an undersized or poorly drained retaining wall, the wall rotates or overturns — and everything upslope, including your foundation, deck, and pool, starts moving with it.
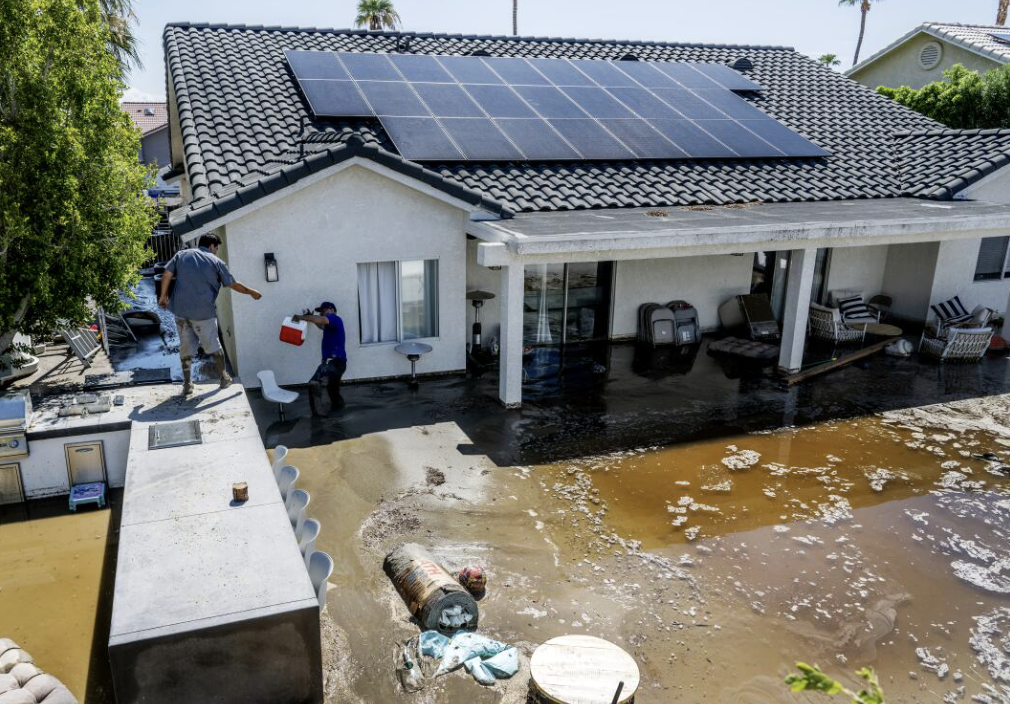
While the news has moved on from the November 13–15 atmospheric river, structural engineers and foundation contractors are completely slammed. Thousands of single-family homes across San Francisco, Oakland, Marin, and the Peninsula now have new cracks, settling, or hydrostatic damage that won’t show up until walls start separating or floors slope noticeably — often months from now.
The average repair bill we’re quoting this week is $28,000–$115,000 depending on the foundation type and how long water sat against it. Most standard homeowner policies exclude this entirely. The good news: 85–90% of the damage we’re seeing could have been prevented with upgrades that cost 10–20% of the repair.
.png)
We are a small, dynamic team of the best designers, project managers & construction crews in the Bay Area. We pride ourselves on efficiency, beautiful design & streamlined construction and exceptional communication.


