.png)
We are a small, dynamic team of the best designers, project managers & construction crews in the Bay Area. We pride ourselves on efficiency, beautiful design & streamlined construction and exceptional communication.
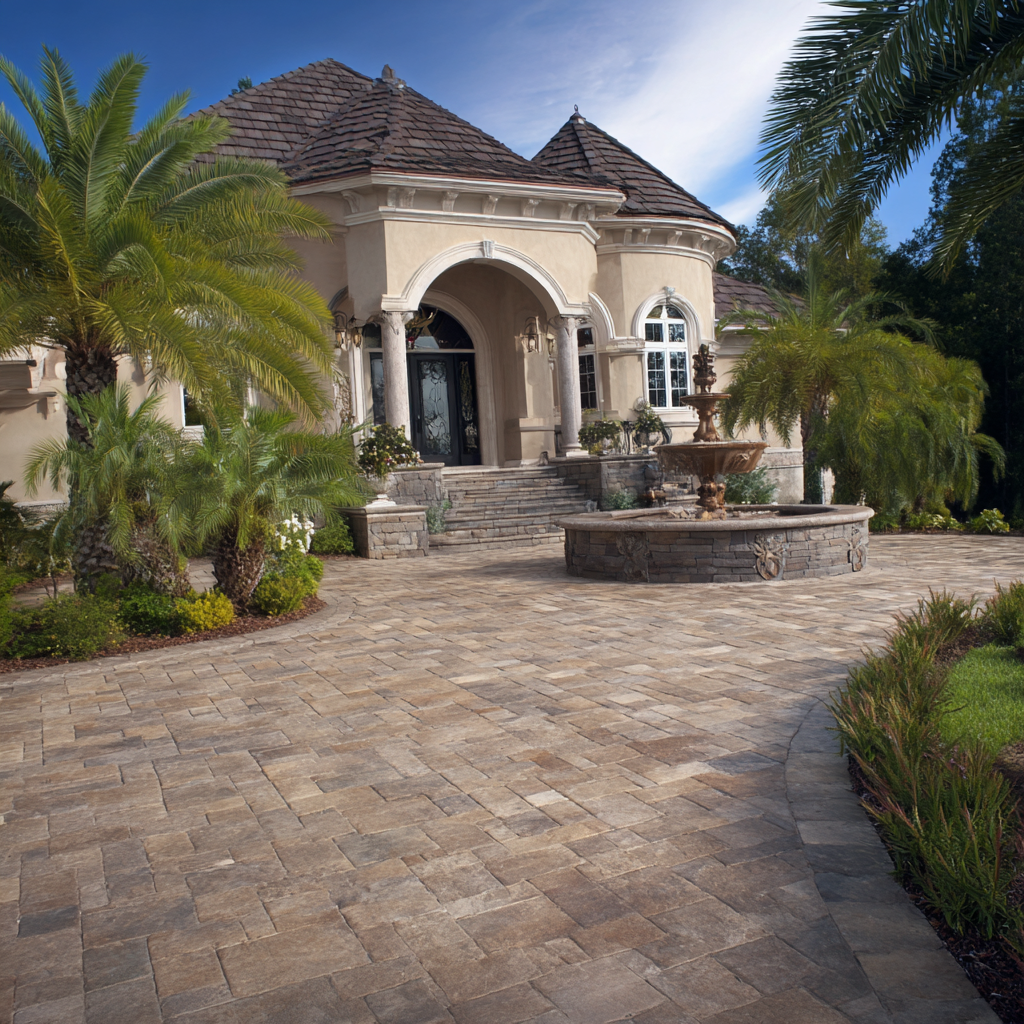
Understanding the fluctuating prices of pavers can help homeowners budget effectively for their landscaping projects, especially in a rapidly changing economy. In California, various factors impact the average paver cost trends, making it essential for homeowners to stay informed. This article will delve into the specifics of paver costs, the types available, and how to navigate these costs effectively.
Pavers are a popular choice for outdoor landscaping due to their durability and aesthetic appeal. However, the costs associated with purchasing and installing pavers can vary significantly based on several factors. Homeowners should be aware that the average paver cost trends in California can fluctuate due to market demand, material availability, and regional differences in labor costs.
Pavers are flat pieces of stone, brick, or concrete used to create outdoor surfaces such as patios, walkways, and driveways. Their versatility allows for various designs and configurations, making them a favored choice among homeowners.
Several key factors influence the average paver cost trends in California. Understanding these can help you make informed decisions when budgeting for your landscaping project.
To provide a clearer picture of the average paver cost trends in California, we can break down costs by type of paver. The following table summarizes the approximate costs per square foot for various types of pavers:
| Type of Paver | Cost per Square Foot |
|---|---|
| Concrete Pavers | $3 - $7 |
| Brick Pavers | $4 - $10 |
| Natural Stone Pavers | $10 - $20 |
| Porcelain Pavers | $5 - $15 |
Choosing the right paver involves considering your budget, the style of your home, and the intended use of the space. Concrete pavers are often a cost-effective and versatile choice, while natural stone offers a unique aesthetic but at a higher price point.
To further illustrate the average paver cost trends in California, let's examine a couple of real-world examples.
A homeowner in Los Angeles decided to install a new patio using concrete pavers. The project involved an area of 300 square feet, with an estimated material cost of $2,100 and labor costs of $1,500. The total project cost came to approximately $3,600.
In San Francisco, another homeowner opted for a natural stone paver driveway. The project covered 500 square feet, with material costs around $10,000 and labor costs of $4,000. The total expenditure was $14,000, highlighting the premium associated with natural stone.
The average cost of pavers in California ranges from $3 to $20 per square foot, depending on the type of paver selected.
To reduce costs, consider choosing more affordable materials like concrete, simplify the design, and shop around for competitive labor rates.
Understanding the average paver cost trends in California is crucial for effective budgeting in landscaping projects. By considering factors such as material type, installation complexity, and regional differences, homeowners can make informed decisions that align with their financial plans.
Concrete pavers are typically the most affordable option, with costs ranging from $3 to $7 per square foot.
While some homeowners may choose to install pavers themselves, hiring a professional is recommended for complex designs to ensure proper installation and longevity.
With proper maintenance, pavers can last for decades, making them a durable choice for outdoor spaces.
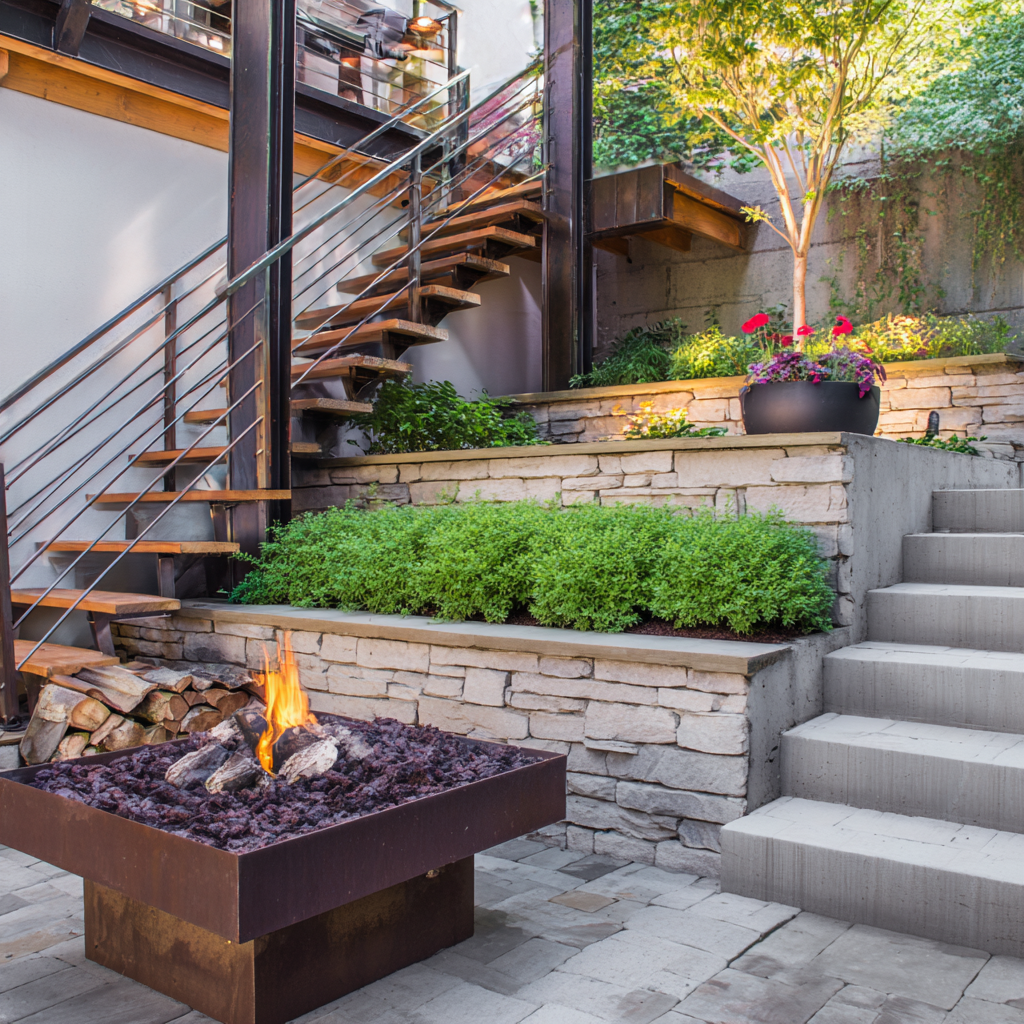
As homeowners become increasingly aware of the importance of sustainability, the demand for eco-friendly construction materials is on the rise. One area where this shift is particularly prominent is in the construction of retaining walls. Eco-friendly retaining wall options not only enhance the aesthetic appeal of your landscape but also contribute positively to the environment. In this article, we will explore various eco-friendly materials such as reclaimed wood and recycled concrete, their benefits, and practical applications.
Eco-friendly retaining walls are structures made from sustainable materials that minimize environmental impact while providing the necessary support for soil and landscape. These walls can be constructed using a variety of materials, including:
These materials are chosen for their low environmental impact and their ability to blend seamlessly into natural landscapes.
Common Question: What makes a retaining wall eco-friendly?
Answer: An eco-friendly retaining wall is made from sustainable materials that have a lower carbon footprint and utilize recycling or repurposing processes.
The benefits of incorporating eco-friendly materials in your retaining wall construction are numerous:
These advantages make eco-friendly retaining walls a smart choice for homeowners seeking to beautify their properties while being responsible stewards of the environment.
Common Question: Are eco-friendly retaining walls more expensive?
Answer: While some eco-friendly materials may have a higher upfront cost, they often result in long-term savings due to lower maintenance and replacement needs.
Here are some of the most popular eco-friendly materials used in retaining wall construction:
Reclaimed wood is sourced from old structures and provides a rustic, natural look. It is an excellent choice for homeowners looking for unique aesthetics while contributing to sustainability.
Recycled concrete is created by crushing existing concrete structures, making it a strong and durable option. This material not only reduces waste but also offers cost savings.
Natural stones can be sourced sustainably and require minimal processing. They offer a timeless look and exceptional durability.
Rammed earth walls are made by compacting a mixture of soil and other materials. This method is energy-efficient and offers excellent thermal properties.
Green concrete incorporates recycled materials and has a lower carbon footprint compared to traditional concrete. It is strong and environmentally friendly.
Common Question: What materials are best for an eco-friendly retaining wall?
Answer: The best materials include reclaimed wood, recycled concrete, natural stone, rammed earth, and green concrete, all of which offer sustainability and durability.
Understanding how eco-friendly retaining walls have been successfully implemented can provide valuable insights:
A homeowner in Oregon used reclaimed wood from a local barn to create a stunning retaining wall that not only supported their garden but also preserved the local history.
In an urban renewal project, a city used recycled concrete to create retaining walls in public parks, significantly reducing construction waste and enhancing green spaces.
At a historic property in Virginia, natural stone was used for retaining walls to blend with the surrounding landscape while ensuring structural integrity.
Common Question: Can you provide examples of eco-friendly retaining walls?
Answer: Yes, examples include reclaimed wood walls in rural settings and recycled concrete walls in urban parks.
| Material | Initial Cost | Durability | Maintenance Cost |
|---|---|---|---|
| Reclaimed Wood | Moderate | 10-20 years | Low |
| Recycled Concrete | Low | 50+ years | Very Low |
| Natural Stone | High | Lifetime | Very Low |
| Rammed Earth | Moderate | 50+ years | Low |
| Green Concrete | Moderate | 50+ years | Low |
This table illustrates the cost-effectiveness and durability of various eco-friendly materials, helping homeowners make informed decisions.
Common Question: How do the costs of eco-friendly materials compare?
Answer: Initial costs vary, but many eco-friendly materials, like recycled concrete, offer long-term savings due to low maintenance needs.
In this section, we address some frequently asked questions about eco-friendly retaining walls:
The lifespan varies by material, with options like natural stone lasting a lifetime, while others like reclaimed wood may last 10-20 years.
Not necessarily. Many eco-friendly materials are easy to work with, although some, like natural stone, may require more skill for installation.
Yes, many eco-friendly retaining wall options can be DIY projects, particularly those made from reclaimed wood or small stone.
In conclusion, choosing eco-friendly retaining wall options is a sustainable approach that not only enhances your landscape but also supports the environment. With materials like reclaimed wood and recycled concrete, you can create beautiful and functional retaining walls that stand the test of time. Embracing these eco-friendly solutions reflects a commitment to sustainability and responsible landscaping.
What are the best eco-friendly materials for retaining walls?
The best materials include reclaimed wood, recycled concrete, natural stone, rammed earth, and green concrete.
How long do eco-friendly retaining walls last?
Lifespan varies by material, with natural stone lasting a lifetime and reclaimed wood lasting 10-20 years.
Are eco-friendly retaining walls more expensive?
While some may have higher upfront costs, they often result in long-term savings due to lower maintenance needs.
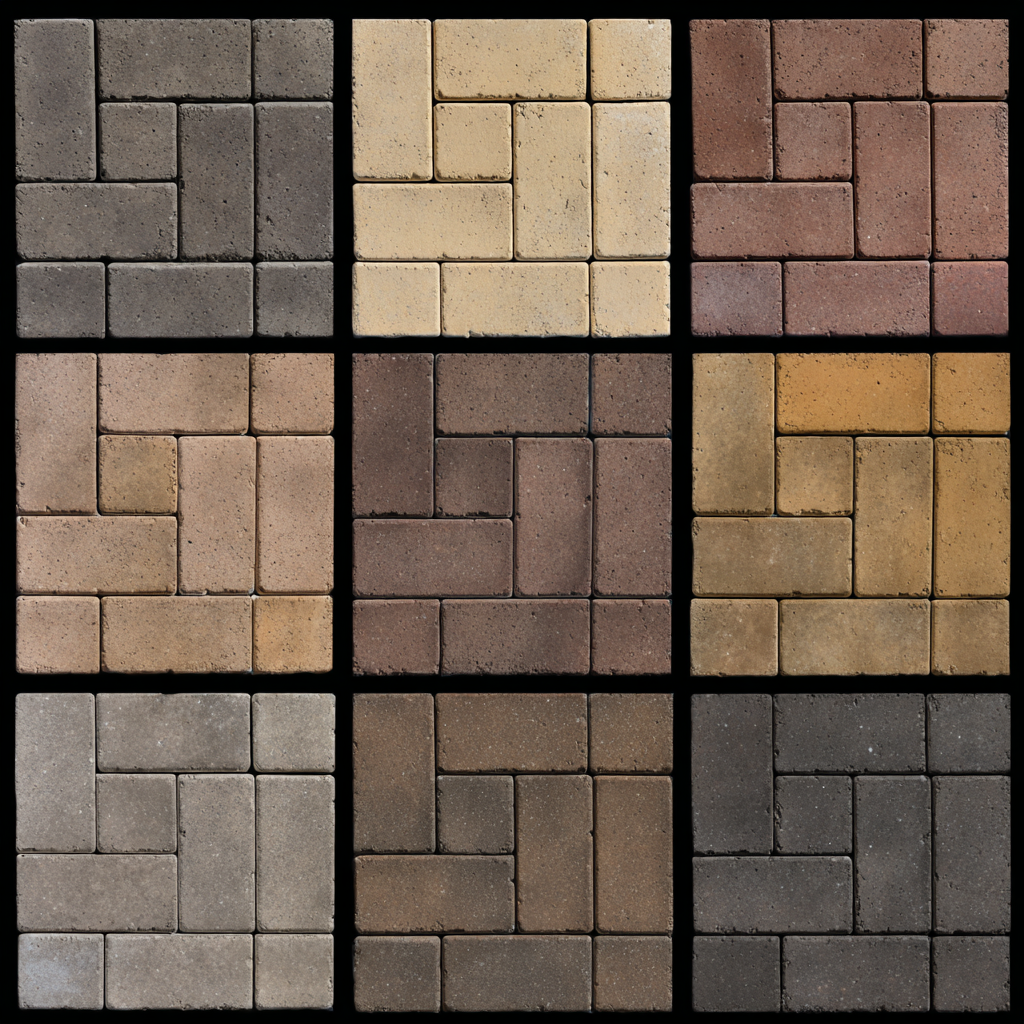
In 2023, the outdoor aesthetic landscape is evolving rapidly, and homeowners and designers alike are looking for the latest trends to enhance their spaces. One of the standout players in this field is Angelus Pavers, renowned for their high-quality paving solutions. This article explores the Angelus Pavers Color Trends 2023, focusing on the latest color options that not only enhance outdoor aesthetics but also align with current design trends.
Colors play a crucial role in setting the mood and tone of outdoor spaces. They can create a sense of warmth, tranquility, or vibrancy, depending on the choices made. The right color can complement the architectural style of a home, enhance landscaping features, and even influence the perceived size of the space. For instance, lighter colors can make a small area feel larger, while darker shades can add depth and coziness.
Choosing the right color involves considering the existing elements in your landscape, such as plants, flowers, and home exteriors. It’s also important to think about the overall vibe you want to create. Neutral colors offer versatility, while bold colors can make a statement.
Color trends are influenced by various factors including fashion, interior design, and even cultural movements. In 2023, we see a shift towards more natural and earthy tones inspired by sustainability and the desire for harmony with nature. This trend is evident in the palette offered by Angelus Pavers, which reflects these contemporary desires.
Color trends are influenced by societal changes, technological advancements in materials, and shifts in consumer preferences. Designers and manufacturers often look to fashion and interior design for inspiration, leading to a cohesive trend across multiple industries.
As we delve into 2023, the Angelus Pavers collection showcases several key color trends that resonate with homeowners and designers:
Incorporating color trends can be as simple as choosing pavers in trending colors for patios or walkways. You can also consider adding colorful furniture or plantings that complement your chosen paver colors.
Angelus Pavers offers a diverse range of colors that align with the trends highlighted above. Here are some standout options:
| Color | Description | Best Use |
|---|---|---|
| Terracotta | A warm, earthy hue that blends beautifully with natural landscapes. | Patios, walkways, and garden borders. |
| Olive Green | A muted green that evokes tranquility and harmony. | Garden paths and outdoor seating areas. |
| Soft Blue | A light, airy color that adds a refreshing touch. | Pool decks and outdoor lounges. |
| Deep Emerald | A bold, rich color that creates a striking visual impact. | Feature walls and prominent pathways. |
Yes, the colors offered by Angelus Pavers are designed to withstand various weather conditions while maintaining their vibrancy. However, it's important to consider how the color may appear in different lighting conditions.
To illustrate the impact of color choices, let’s review a few case studies of outdoor spaces transformed using Angelus Pavers:
A homeowner in a suburban area opted for terracotta pavers to create a warm, inviting patio. The earthy tone complemented their existing landscaping and provided a seamless transition from the garden to the outdoor living space. As a result, their outdoor area became a focal point for family gatherings.
A local business used soft blue pavers for their entrance walkway, which not only enhanced the appeal of the property but also created a calming atmosphere for customers. The choice of color increased foot traffic and improved the overall customer experience.
When investing in outdoor paving, it’s essential to consider both the costs and benefits associated with different color options. Below is a comparison table highlighting the potential costs and benefits:
| Color Option | Initial Cost | Long-term Benefits |
|---|---|---|
| Terracotta | $$ | Timeless appeal, blends with nature. |
| Olive Green | $$ | Creates a serene environment, works well with greenery. |
| Soft Blue | $$$ | Refreshing look, enhances outdoor living spaces. |
| Deep Emerald | $$$ | Bold statement, increases property value. |
Angelus Pavers are designed to last for decades with proper maintenance, making them a worthwhile investment for any outdoor space.
The best color depends on your personal preference and the overall design of your outdoor space. Earthy tones are popular for a natural look, while bold colors can add a dramatic flair.
Yes, mixing colors can create unique patterns and enhance visual interest in your outdoor space.
Regular cleaning and sealing can help maintain the vibrancy of your pavers and protect them from fading over time.
In conclusion, the Angelus Pavers Color Trends 2023 offer a diverse and stylish palette that can significantly enhance outdoor aesthetics. By understanding current trends and selecting the right colors, homeowners can create beautiful, inviting spaces that reflect their personal style and align with modern design principles. As you explore these options, consider how different colors can transform your outdoor living environment into a harmonious retreat.
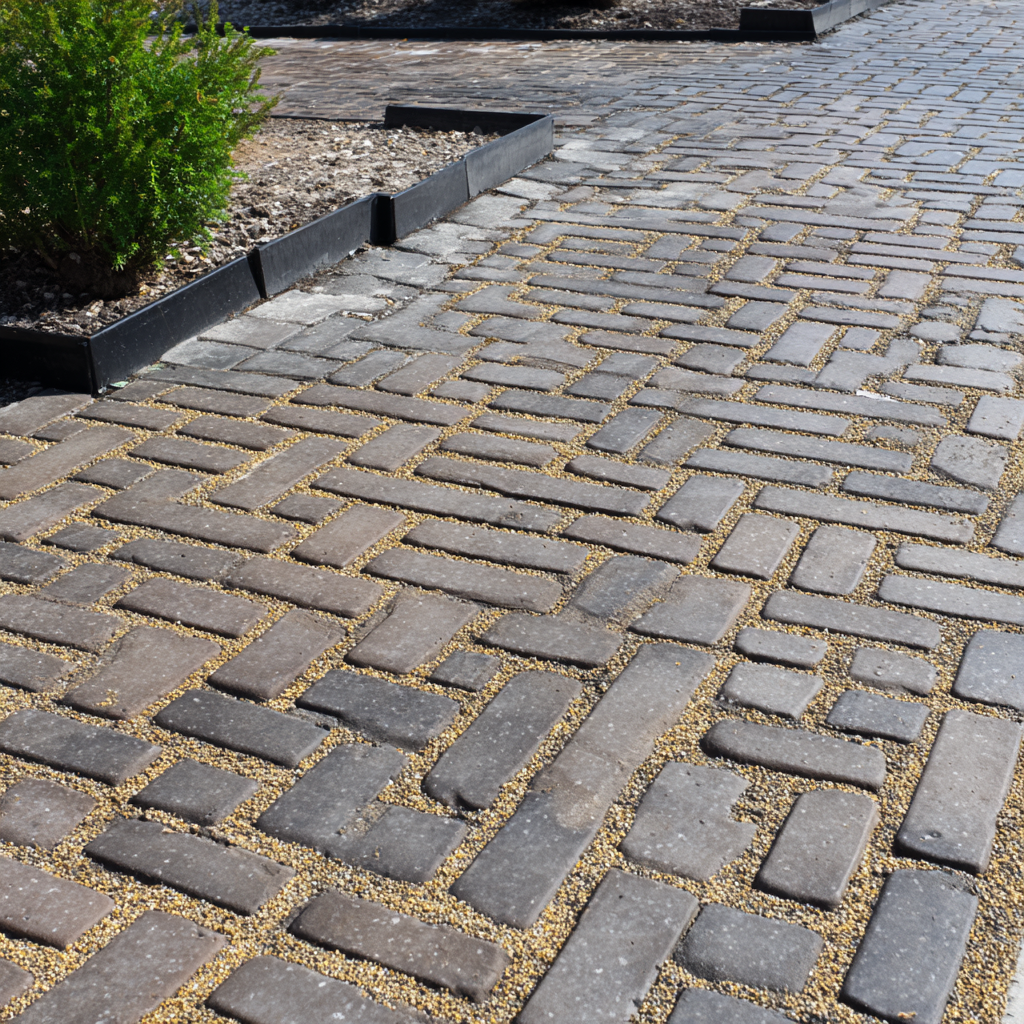
In today's world, the importance of sustainable practices cannot be overstated. One such practice gaining momentum is eco-friendly permeable paving. These innovative solutions not only enhance the aesthetic appeal of properties but also significantly contribute to environmental preservation. In this article, we will explore the various eco-friendly permeable paving benefits, including their role in reducing stormwater runoff and improving groundwater recharge.
Permeable paving refers to a range of materials and techniques designed to allow water to pass through surfaces, thereby minimizing runoff. Traditional paving materials, such as concrete and asphalt, create impermeable surfaces that lead to increased stormwater runoff, which can cause flooding and water pollution. In contrast, permeable paving systems utilize porous materials that facilitate the natural absorption of rainwater into the ground.
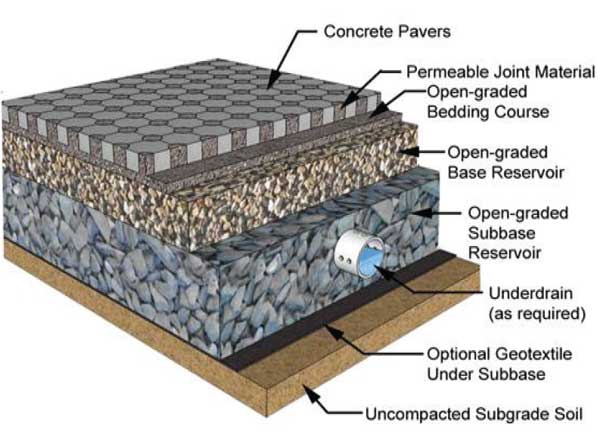
Permeable paving systems typically consist of materials with voids or spaces that allow water to flow through. When rain falls on these surfaces, the water seeps through the pores and is directed into a sub-base layer, where it can be filtered and absorbed into the ground. This process not only reduces surface runoff but also aids in recharging groundwater supplies.
The advantages of implementing eco-friendly permeable paving solutions are numerous and impactful. Below are some of the most significant benefits:
Permeable paving can be constructed from various materials, including permeable concrete, porous asphalt, interlocking pavers, and gravel. Each material has unique properties and benefits, allowing for flexibility in design and application.
When considering the implementation of eco-friendly permeable paving, it's essential to evaluate the cost versus benefits. Below is a comparison table that outlines the potential costs and benefits associated with permeable paving.
| Aspect | Cost | Benefit |
|---|---|---|
| Installation | Higher initial investment compared to traditional paving | Long-term savings on stormwater management and maintenance |
| Maintenance | Regular maintenance required to prevent clogging | Reduced flooding and erosion costs |
| Aesthetic Value | Varies by design | Increased property value and curb appeal |
| Regulatory Compliance | Potential fines for non-compliance | Avoidance of fines and improved community relations |
Yes, while the initial installation cost may be higher than traditional paving, the long-term savings can be substantial. These savings come from reduced stormwater management costs, lower maintenance expenses, and potential increases in property value.
Several communities and businesses have successfully implemented eco-friendly permeable paving solutions, showcasing their benefits in real-world applications. Below are two notable case studies:
The City of Seattle implemented permeable paving in one of its urban parks to manage stormwater effectively. The project involved replacing traditional concrete pathways with permeable pavers. As a result, the park experienced a significant reduction in surface runoff, leading to improved water quality in nearby streams. Additionally, the aesthetic appeal of the park increased, attracting more visitors.
A popular retail center in Austin decided to install permeable paving in its parking lot. The project aimed to comply with local stormwater regulations while enhancing the shopping experience. The permeable paving allowed rainwater to infiltrate, reducing flooding during heavy rains. The retail center reported increased foot traffic and customer satisfaction due to the improved landscape.
Regular maintenance includes cleaning to prevent debris buildup, which can clog the pores of the paving. This may involve vacuuming or pressure washing to maintain functionality.
Yes, permeable paving is suitable for driveways, providing both aesthetic appeal and functional benefits, such as stormwater management.
While the initial costs may be higher, the long-term savings on stormwater management and increased property value can make permeable paving a cost-effective choice.
In conclusion, the eco-friendly permeable paving benefits extend far beyond mere aesthetics. By reducing stormwater runoff, improving groundwater recharge, and enhancing water quality, these solutions play a vital role in sustainable property management. As communities continue to face environmental challenges, embracing permeable paving can lead to a more resilient and sustainable future. If you're considering a paving solution that aligns with eco-friendly practices, permeable paving should be at the top of your list.

Understanding the fluctuating prices of pavers can help homeowners budget effectively for their landscaping projects, especially in a rapidly changing economy. In California, various factors impact the average paver cost trends, making it essential for homeowners to stay informed. This article will delve into the specifics of paver costs, the types available, and how to navigate these costs effectively.
Pavers are a popular choice for outdoor landscaping due to their durability and aesthetic appeal. However, the costs associated with purchasing and installing pavers can vary significantly based on several factors. Homeowners should be aware that the average paver cost trends in California can fluctuate due to market demand, material availability, and regional differences in labor costs.
Pavers are flat pieces of stone, brick, or concrete used to create outdoor surfaces such as patios, walkways, and driveways. Their versatility allows for various designs and configurations, making them a favored choice among homeowners.
Several key factors influence the average paver cost trends in California. Understanding these can help you make informed decisions when budgeting for your landscaping project.
To provide a clearer picture of the average paver cost trends in California, we can break down costs by type of paver. The following table summarizes the approximate costs per square foot for various types of pavers:
| Type of Paver | Cost per Square Foot |
|---|---|
| Concrete Pavers | $3 - $7 |
| Brick Pavers | $4 - $10 |
| Natural Stone Pavers | $10 - $20 |
| Porcelain Pavers | $5 - $15 |
Choosing the right paver involves considering your budget, the style of your home, and the intended use of the space. Concrete pavers are often a cost-effective and versatile choice, while natural stone offers a unique aesthetic but at a higher price point.
To further illustrate the average paver cost trends in California, let's examine a couple of real-world examples.
A homeowner in Los Angeles decided to install a new patio using concrete pavers. The project involved an area of 300 square feet, with an estimated material cost of $2,100 and labor costs of $1,500. The total project cost came to approximately $3,600.
In San Francisco, another homeowner opted for a natural stone paver driveway. The project covered 500 square feet, with material costs around $10,000 and labor costs of $4,000. The total expenditure was $14,000, highlighting the premium associated with natural stone.
The average cost of pavers in California ranges from $3 to $20 per square foot, depending on the type of paver selected.
To reduce costs, consider choosing more affordable materials like concrete, simplify the design, and shop around for competitive labor rates.
Understanding the average paver cost trends in California is crucial for effective budgeting in landscaping projects. By considering factors such as material type, installation complexity, and regional differences, homeowners can make informed decisions that align with their financial plans.
Concrete pavers are typically the most affordable option, with costs ranging from $3 to $7 per square foot.
While some homeowners may choose to install pavers themselves, hiring a professional is recommended for complex designs to ensure proper installation and longevity.
With proper maintenance, pavers can last for decades, making them a durable choice for outdoor spaces.

As homeowners become increasingly aware of the importance of sustainability, the demand for eco-friendly construction materials is on the rise. One area where this shift is particularly prominent is in the construction of retaining walls. Eco-friendly retaining wall options not only enhance the aesthetic appeal of your landscape but also contribute positively to the environment. In this article, we will explore various eco-friendly materials such as reclaimed wood and recycled concrete, their benefits, and practical applications.
Eco-friendly retaining walls are structures made from sustainable materials that minimize environmental impact while providing the necessary support for soil and landscape. These walls can be constructed using a variety of materials, including:
These materials are chosen for their low environmental impact and their ability to blend seamlessly into natural landscapes.
Common Question: What makes a retaining wall eco-friendly?
Answer: An eco-friendly retaining wall is made from sustainable materials that have a lower carbon footprint and utilize recycling or repurposing processes.
The benefits of incorporating eco-friendly materials in your retaining wall construction are numerous:
These advantages make eco-friendly retaining walls a smart choice for homeowners seeking to beautify their properties while being responsible stewards of the environment.
Common Question: Are eco-friendly retaining walls more expensive?
Answer: While some eco-friendly materials may have a higher upfront cost, they often result in long-term savings due to lower maintenance and replacement needs.
Here are some of the most popular eco-friendly materials used in retaining wall construction:
Reclaimed wood is sourced from old structures and provides a rustic, natural look. It is an excellent choice for homeowners looking for unique aesthetics while contributing to sustainability.
Recycled concrete is created by crushing existing concrete structures, making it a strong and durable option. This material not only reduces waste but also offers cost savings.
Natural stones can be sourced sustainably and require minimal processing. They offer a timeless look and exceptional durability.
Rammed earth walls are made by compacting a mixture of soil and other materials. This method is energy-efficient and offers excellent thermal properties.
Green concrete incorporates recycled materials and has a lower carbon footprint compared to traditional concrete. It is strong and environmentally friendly.
Common Question: What materials are best for an eco-friendly retaining wall?
Answer: The best materials include reclaimed wood, recycled concrete, natural stone, rammed earth, and green concrete, all of which offer sustainability and durability.
Understanding how eco-friendly retaining walls have been successfully implemented can provide valuable insights:
A homeowner in Oregon used reclaimed wood from a local barn to create a stunning retaining wall that not only supported their garden but also preserved the local history.
In an urban renewal project, a city used recycled concrete to create retaining walls in public parks, significantly reducing construction waste and enhancing green spaces.
At a historic property in Virginia, natural stone was used for retaining walls to blend with the surrounding landscape while ensuring structural integrity.
Common Question: Can you provide examples of eco-friendly retaining walls?
Answer: Yes, examples include reclaimed wood walls in rural settings and recycled concrete walls in urban parks.
| Material | Initial Cost | Durability | Maintenance Cost |
|---|---|---|---|
| Reclaimed Wood | Moderate | 10-20 years | Low |
| Recycled Concrete | Low | 50+ years | Very Low |
| Natural Stone | High | Lifetime | Very Low |
| Rammed Earth | Moderate | 50+ years | Low |
| Green Concrete | Moderate | 50+ years | Low |
This table illustrates the cost-effectiveness and durability of various eco-friendly materials, helping homeowners make informed decisions.
Common Question: How do the costs of eco-friendly materials compare?
Answer: Initial costs vary, but many eco-friendly materials, like recycled concrete, offer long-term savings due to low maintenance needs.
In this section, we address some frequently asked questions about eco-friendly retaining walls:
The lifespan varies by material, with options like natural stone lasting a lifetime, while others like reclaimed wood may last 10-20 years.
Not necessarily. Many eco-friendly materials are easy to work with, although some, like natural stone, may require more skill for installation.
Yes, many eco-friendly retaining wall options can be DIY projects, particularly those made from reclaimed wood or small stone.
In conclusion, choosing eco-friendly retaining wall options is a sustainable approach that not only enhances your landscape but also supports the environment. With materials like reclaimed wood and recycled concrete, you can create beautiful and functional retaining walls that stand the test of time. Embracing these eco-friendly solutions reflects a commitment to sustainability and responsible landscaping.
What are the best eco-friendly materials for retaining walls?
The best materials include reclaimed wood, recycled concrete, natural stone, rammed earth, and green concrete.
How long do eco-friendly retaining walls last?
Lifespan varies by material, with natural stone lasting a lifetime and reclaimed wood lasting 10-20 years.
Are eco-friendly retaining walls more expensive?
While some may have higher upfront costs, they often result in long-term savings due to lower maintenance needs.

In 2023, the outdoor aesthetic landscape is evolving rapidly, and homeowners and designers alike are looking for the latest trends to enhance their spaces. One of the standout players in this field is Angelus Pavers, renowned for their high-quality paving solutions. This article explores the Angelus Pavers Color Trends 2023, focusing on the latest color options that not only enhance outdoor aesthetics but also align with current design trends.
Colors play a crucial role in setting the mood and tone of outdoor spaces. They can create a sense of warmth, tranquility, or vibrancy, depending on the choices made. The right color can complement the architectural style of a home, enhance landscaping features, and even influence the perceived size of the space. For instance, lighter colors can make a small area feel larger, while darker shades can add depth and coziness.
Choosing the right color involves considering the existing elements in your landscape, such as plants, flowers, and home exteriors. It’s also important to think about the overall vibe you want to create. Neutral colors offer versatility, while bold colors can make a statement.
Color trends are influenced by various factors including fashion, interior design, and even cultural movements. In 2023, we see a shift towards more natural and earthy tones inspired by sustainability and the desire for harmony with nature. This trend is evident in the palette offered by Angelus Pavers, which reflects these contemporary desires.
Color trends are influenced by societal changes, technological advancements in materials, and shifts in consumer preferences. Designers and manufacturers often look to fashion and interior design for inspiration, leading to a cohesive trend across multiple industries.
As we delve into 2023, the Angelus Pavers collection showcases several key color trends that resonate with homeowners and designers:
Incorporating color trends can be as simple as choosing pavers in trending colors for patios or walkways. You can also consider adding colorful furniture or plantings that complement your chosen paver colors.
Angelus Pavers offers a diverse range of colors that align with the trends highlighted above. Here are some standout options:
| Color | Description | Best Use |
|---|---|---|
| Terracotta | A warm, earthy hue that blends beautifully with natural landscapes. | Patios, walkways, and garden borders. |
| Olive Green | A muted green that evokes tranquility and harmony. | Garden paths and outdoor seating areas. |
| Soft Blue | A light, airy color that adds a refreshing touch. | Pool decks and outdoor lounges. |
| Deep Emerald | A bold, rich color that creates a striking visual impact. | Feature walls and prominent pathways. |
Yes, the colors offered by Angelus Pavers are designed to withstand various weather conditions while maintaining their vibrancy. However, it's important to consider how the color may appear in different lighting conditions.
To illustrate the impact of color choices, let’s review a few case studies of outdoor spaces transformed using Angelus Pavers:
A homeowner in a suburban area opted for terracotta pavers to create a warm, inviting patio. The earthy tone complemented their existing landscaping and provided a seamless transition from the garden to the outdoor living space. As a result, their outdoor area became a focal point for family gatherings.
A local business used soft blue pavers for their entrance walkway, which not only enhanced the appeal of the property but also created a calming atmosphere for customers. The choice of color increased foot traffic and improved the overall customer experience.
When investing in outdoor paving, it’s essential to consider both the costs and benefits associated with different color options. Below is a comparison table highlighting the potential costs and benefits:
| Color Option | Initial Cost | Long-term Benefits |
|---|---|---|
| Terracotta | $$ | Timeless appeal, blends with nature. |
| Olive Green | $$ | Creates a serene environment, works well with greenery. |
| Soft Blue | $$$ | Refreshing look, enhances outdoor living spaces. |
| Deep Emerald | $$$ | Bold statement, increases property value. |
Angelus Pavers are designed to last for decades with proper maintenance, making them a worthwhile investment for any outdoor space.
The best color depends on your personal preference and the overall design of your outdoor space. Earthy tones are popular for a natural look, while bold colors can add a dramatic flair.
Yes, mixing colors can create unique patterns and enhance visual interest in your outdoor space.
Regular cleaning and sealing can help maintain the vibrancy of your pavers and protect them from fading over time.
In conclusion, the Angelus Pavers Color Trends 2023 offer a diverse and stylish palette that can significantly enhance outdoor aesthetics. By understanding current trends and selecting the right colors, homeowners can create beautiful, inviting spaces that reflect their personal style and align with modern design principles. As you explore these options, consider how different colors can transform your outdoor living environment into a harmonious retreat.

In today's world, the importance of sustainable practices cannot be overstated. One such practice gaining momentum is eco-friendly permeable paving. These innovative solutions not only enhance the aesthetic appeal of properties but also significantly contribute to environmental preservation. In this article, we will explore the various eco-friendly permeable paving benefits, including their role in reducing stormwater runoff and improving groundwater recharge.
Permeable paving refers to a range of materials and techniques designed to allow water to pass through surfaces, thereby minimizing runoff. Traditional paving materials, such as concrete and asphalt, create impermeable surfaces that lead to increased stormwater runoff, which can cause flooding and water pollution. In contrast, permeable paving systems utilize porous materials that facilitate the natural absorption of rainwater into the ground.
Permeable paving systems typically consist of materials with voids or spaces that allow water to flow through. When rain falls on these surfaces, the water seeps through the pores and is directed into a sub-base layer, where it can be filtered and absorbed into the ground. This process not only reduces surface runoff but also aids in recharging groundwater supplies.
The advantages of implementing eco-friendly permeable paving solutions are numerous and impactful. Below are some of the most significant benefits:
Permeable paving can be constructed from various materials, including permeable concrete, porous asphalt, interlocking pavers, and gravel. Each material has unique properties and benefits, allowing for flexibility in design and application.
When considering the implementation of eco-friendly permeable paving, it's essential to evaluate the cost versus benefits. Below is a comparison table that outlines the potential costs and benefits associated with permeable paving.
| Aspect | Cost | Benefit |
|---|---|---|
| Installation | Higher initial investment compared to traditional paving | Long-term savings on stormwater management and maintenance |
| Maintenance | Regular maintenance required to prevent clogging | Reduced flooding and erosion costs |
| Aesthetic Value | Varies by design | Increased property value and curb appeal |
| Regulatory Compliance | Potential fines for non-compliance | Avoidance of fines and improved community relations |
Yes, while the initial installation cost may be higher than traditional paving, the long-term savings can be substantial. These savings come from reduced stormwater management costs, lower maintenance expenses, and potential increases in property value.
Several communities and businesses have successfully implemented eco-friendly permeable paving solutions, showcasing their benefits in real-world applications. Below are two notable case studies:
The City of Seattle implemented permeable paving in one of its urban parks to manage stormwater effectively. The project involved replacing traditional concrete pathways with permeable pavers. As a result, the park experienced a significant reduction in surface runoff, leading to improved water quality in nearby streams. Additionally, the aesthetic appeal of the park increased, attracting more visitors.
A popular retail center in Austin decided to install permeable paving in its parking lot. The project aimed to comply with local stormwater regulations while enhancing the shopping experience. The permeable paving allowed rainwater to infiltrate, reducing flooding during heavy rains. The retail center reported increased foot traffic and customer satisfaction due to the improved landscape.
Regular maintenance includes cleaning to prevent debris buildup, which can clog the pores of the paving. This may involve vacuuming or pressure washing to maintain functionality.
Yes, permeable paving is suitable for driveways, providing both aesthetic appeal and functional benefits, such as stormwater management.
While the initial costs may be higher, the long-term savings on stormwater management and increased property value can make permeable paving a cost-effective choice.
In conclusion, the eco-friendly permeable paving benefits extend far beyond mere aesthetics. By reducing stormwater runoff, improving groundwater recharge, and enhancing water quality, these solutions play a vital role in sustainable property management. As communities continue to face environmental challenges, embracing permeable paving can lead to a more resilient and sustainable future. If you're considering a paving solution that aligns with eco-friendly practices, permeable paving should be at the top of your list.
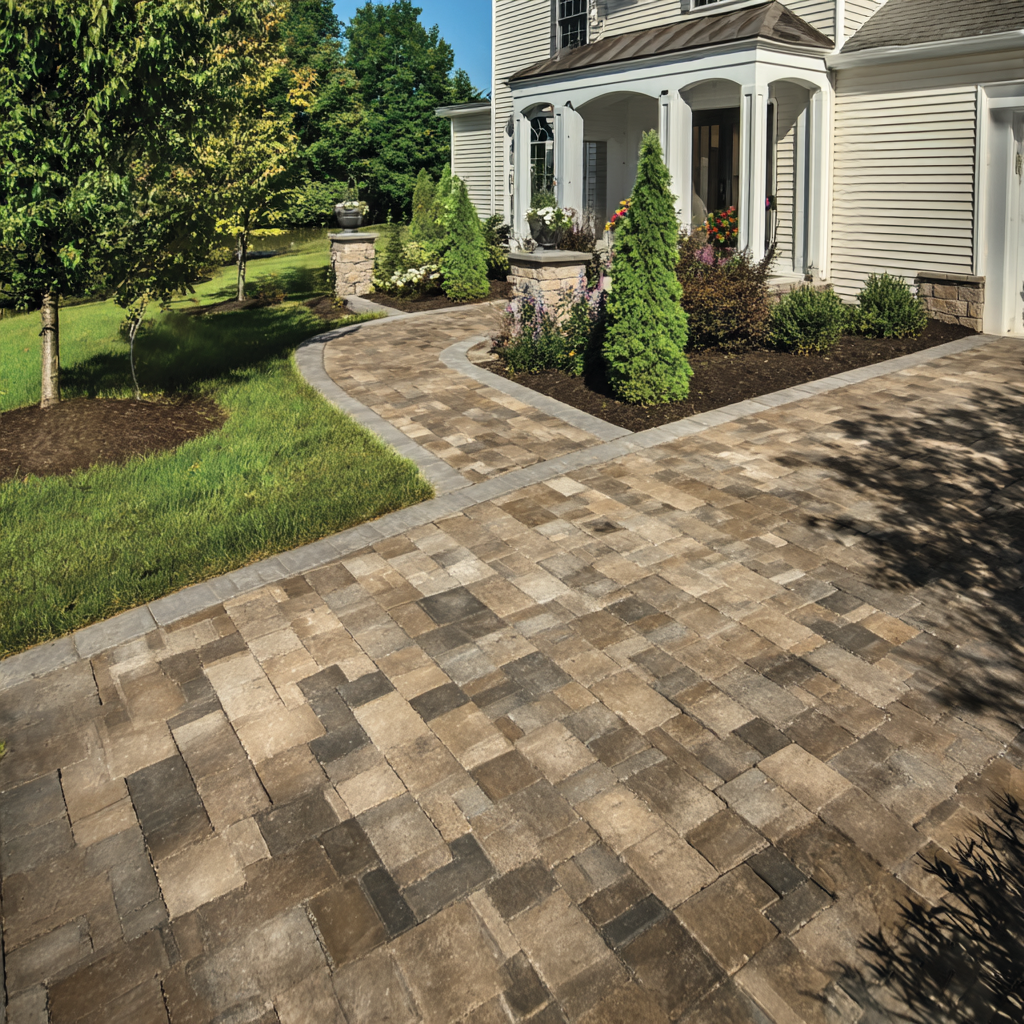
Understanding how to use a paver cost calculator helps homeowners budget more effectively for their hardscaping projects, ensuring they make informed decisions. In the realm of landscaping, particularly when it comes to installing pavers, the costs can quickly add up. A paver cost calculator serves as a vital tool that enables homeowners to estimate expenses accurately, allowing for better financial planning and project execution.
A paver cost calculator is an online tool designed to help individuals estimate the costs associated with installing pavers for patios, walkways, driveways, and more. By inputting various parameters such as the area size, type of pavers, and installation complexity, users can receive a detailed breakdown of potential costs.
The calculator typically requires inputs like dimensions of the area, paver type (e.g., concrete, brick, stone), and any additional features like borders or patterns. After entering these details, it computes the estimated cost based on current market prices and average installation fees.
Utilizing a paver cost calculator comes with numerous advantages for homeowners planning hardscaping projects. Here are some of the key benefits:
Absolutely! A paver cost calculator is beneficial for both DIY enthusiasts and those hiring professionals. It provides essential cost insights regardless of whether the work is done by the homeowner or a contractor.
Using a paver cost calculator is straightforward. Here’s a step-by-step guide:
While most online paver cost calculators are based on industry standards and average pricing, it’s essential to remember that actual costs can vary based on location, labor rates, and material availability. Always consult local contractors for the most accurate quotes.
To illustrate the benefits of using a paver cost calculator, here are a couple of case studies showcasing real-world applications:
A homeowner in suburban Chicago wanted to install a 400 square foot patio using concrete pavers. By using a paver cost calculator, they estimated the total cost to be around $3,200, including materials and labor. After reviewing the breakdown, they decided to opt for a DIY installation, which saved them $800.
Another homeowner in Florida needed to replace their driveway with brick pavers. The calculator provided an estimate of $7,500 for professional installation. Upon learning this, they opted for a less expensive paver type, reducing the total to $5,500. This decision was made easier with the cost comparison feature of the calculator.
Several factors influence paver installation costs, including the type of pavers, the complexity of the design, labor costs in your area, and any additional features such as borders or patterns.
To save money, consider DIY installation, choose less expensive paver materials, and compare quotes from multiple contractors to find the best deal.
A paver cost calculator is a tool that helps estimate the costs associated with installing pavers for various hardscaping projects.
While they provide good estimates based on average costs, actual prices may vary due to local factors.
Yes, it’s beneficial for both DIYers and those hiring professionals to get a clear financial picture.
Utilizing a paver cost calculator can significantly enhance your budgeting and planning for hardscaping projects. Key benefits include:
By leveraging these tools, homeowners can confidently embark on their hardscaping projects, ensuring they stay within budget while achieving their desired aesthetic.
By [Author Name], Landscaping Expert
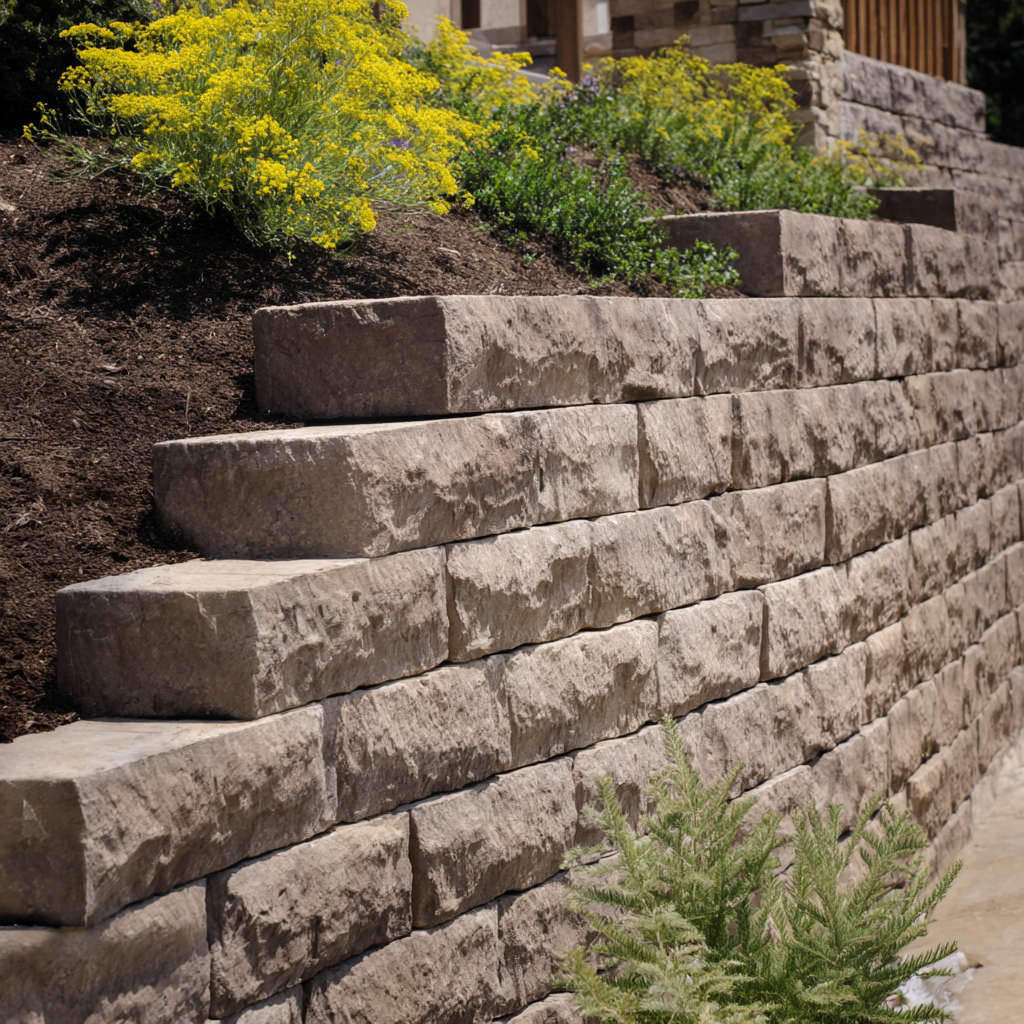
As environmental concerns continue to rise, homeowners are increasingly focused on sustainability in their landscaping projects. One critical aspect of landscape design is the use of retaining walls, which serve both functional and aesthetic purposes. However, the choice of materials can significantly impact the environment. In this article, we will explore eco-friendly retaining wall materials that not only enhance the beauty of your property but also contribute to a more sustainable future. We will delve into various options, their benefits, and practical applications, ensuring you make informed choices for your landscaping needs.
Retaining walls are structures designed to hold back soil and prevent erosion, especially on sloped landscapes. They can also create level areas for planting, patios, and walkways. The materials used for constructing retaining walls vary widely, from concrete and brick to natural stones and recycled materials. Each option has its own set of environmental impacts, which is why eco-friendly alternatives are becoming increasingly popular.
The primary purpose of a retaining wall is to support soil laterally so that it can be retained at different levels on the two sides. This is particularly important for preventing soil erosion, managing water runoff, and creating usable outdoor spaces.
Choosing eco-friendly retaining wall materials is crucial for several reasons:
Opting for eco-friendly materials not only supports environmental sustainability but also enhances the aesthetic value of your landscape. Additionally, it can lead to long-term cost savings and improved property value.
There are several eco-friendly materials that you can choose from for your retaining wall projects:
Recycled concrete is made from crushed concrete debris, reducing the need for new concrete production. This material is durable, cost-effective, and can be used in various applications.
Natural stone is a timeless choice for retaining walls. It is durable and blends seamlessly with the natural landscape. Sourcing local stone can further reduce environmental impact.
Rammed earth walls are made by compacting a mixture of soil, sand, and gravel. This method is highly sustainable as it uses natural materials and has a low carbon footprint.
Using timber from sustainably managed forests ensures that your retaining wall is eco-friendly. Look for certifications like FSC (Forest Stewardship Council) to ensure responsible sourcing.
Gabion walls are made from wire mesh cages filled with rocks or recycled materials. They are highly effective for erosion control and can be visually appealing when filled with colorful stones.
Straw bales can be used as an innovative and sustainable option for retaining walls. They are biodegradable and provide excellent insulation.
The benefits of utilizing eco-friendly materials for retaining walls are manifold:
Eco-friendly materials contribute to sustainability by reducing resource depletion, minimizing pollution, and promoting biodiversity. They often use renewable resources and can be recycled at the end of their life cycle.
When considering eco-friendly retaining wall materials, it's essential to weigh the costs against the benefits. The following table summarizes the average costs and benefits of various eco-friendly materials:
| Material | Average Cost per Square Foot | Longevity (Years) | Environmental Impact |
|---|---|---|---|
| Recycled Concrete | $10 | 30 | Low |
| Natural Stone | $15 | 50+ | Moderate |
| Rammed Earth | $12 | 100 | Very Low |
| Sustainable Timber | $8 | 20 | Moderate |
| Gabion Walls | $9 | 30 | Low |
| Straw Bales | $6 | 5-10 | Very Low |
When evaluating costs, consider the initial purchase price, installation costs, longevity, maintenance requirements, and potential environmental benefits. This comprehensive approach will help you make the most informed decision.
To illustrate the effectiveness of eco-friendly retaining wall materials, here are a few case studies:
A community park in California utilized recycled concrete for its retaining walls. The project not only saved costs but also contributed to a significant reduction in waste, diverting over 500 tons of concrete from landfills.
A homeowner in Oregon chose natural stone for their retaining wall, enhancing the property's aesthetic appeal while ensuring durability. The local sourcing of materials minimized transportation emissions.
The best eco-friendly materials include recycled concrete, natural stone, rammed earth, sustainable timber, gabion walls, and straw bales. Each material has its unique benefits and applications.
To ensure your retaining wall is environmentally friendly, choose materials that are locally sourced, renewable, or recycled. Additionally, consider the installation methods to minimize environmental impact.
As homeowners become more environmentally conscious, the demand for eco-friendly retaining wall materials continues to grow. By selecting sustainable options, you not only enhance your landscape's beauty but also contribute to a healthier planet. Whether you opt for recycled concrete, natural stone, or innovative materials like rammed earth, each choice plays a role in promoting sustainability. Make informed decisions, and your landscaping projects can reflect your commitment to the environment.
• Eco-friendly retaining wall materials contribute to sustainability and enhance landscape aesthetics.
• Options include recycled concrete, natural stone, rammed earth, sustainable timber, gabion walls, and straw bales.
• Consider the long-term benefits and costs when selecting materials for your retaining wall projects.
By: Eco Landscaping Expert
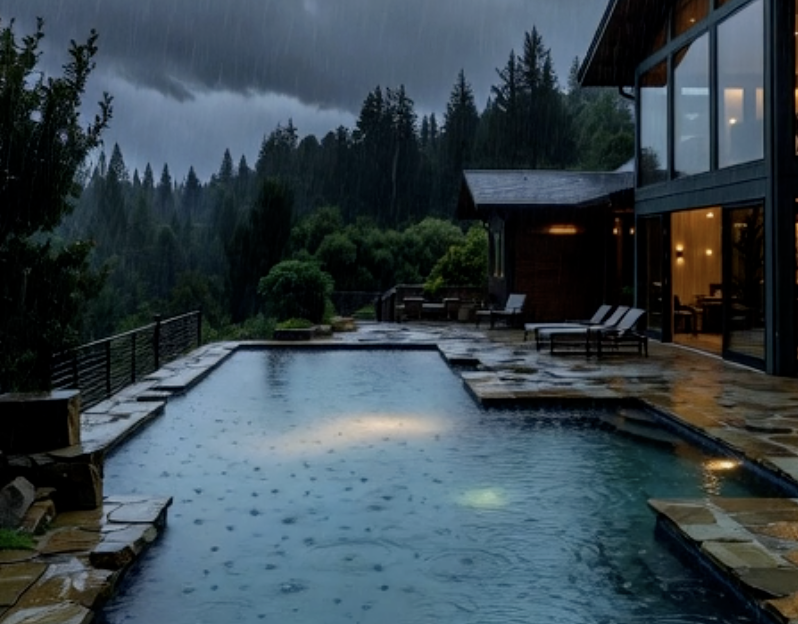
La Niña + king tides + potential triple atmospheric rivers Dec 2025–Jan 2026. Free 20-min drainage assessment prevents $20K–$40K in paver damage. Book before slots gone.
Understanding the 2025-2026 La Niña-Driven Atmospheric River Threat
Why Paver and Hardscape Drainage Fails First in Bay Area Winter Storms
Current December 2025 Warnings: King Tides Are Just the Opening Act
The Silent Saturation: What’s Already Happening Under Your Driveway and Pool Deck
Real Bay Area Case Studies from Recent Atmospheric Rivers
Early Warning Signs Your Drainage System Is About to Collapse
How Much Rain Your Specific Hardscape Can Actually Survive
Our Exclusive 20-Minute Drainage Risk Assessment Process
The Bayside No-Storm-Damage Guarantee – Only Available This December
Complete Action Plan to Protect Your Property Before the Next Storm Hits
Right now, on December 3, 2025, the National Weather Service and NOAA confirm La Niña conditions are locked in place through at least February 2026. This pattern dramatically increases the likelihood of repeated, high-intensity atmospheric river events hitting Northern California. While the first half of December is starting drier than normal, meteorologists are already watching three potential storm systems that could deliver the wettest 4–6 week stretch since 2017.
At Bayside Pavers, we specialize in one thing: making sure your pavers, driveways, patios, and pool decks survive these exact events. After rescuing hundreds of failed installations and performing over 500 drainage assessments in the past 24 months, one statistic has never changed: not a single client who completed our pre-storm drainage assessment has ever suffered major storm-related damage.
La Niña winters historically produce sharper contrasts: longer dry periods broken by extremely intense wet episodes. The current NOAA outlook shows elevated chances for above-normal precipitation across Northern California from January through March 2026, with the strongest signal in coastal and Bay Area counties.
Current modeling suggests three major atmospheric river events are possible between mid-December 2025 and late January 2026:
When these systems align with king tides — which we are experiencing right now, December 1–5, 2025 — flood risk becomes extreme even with moderate rainfall.
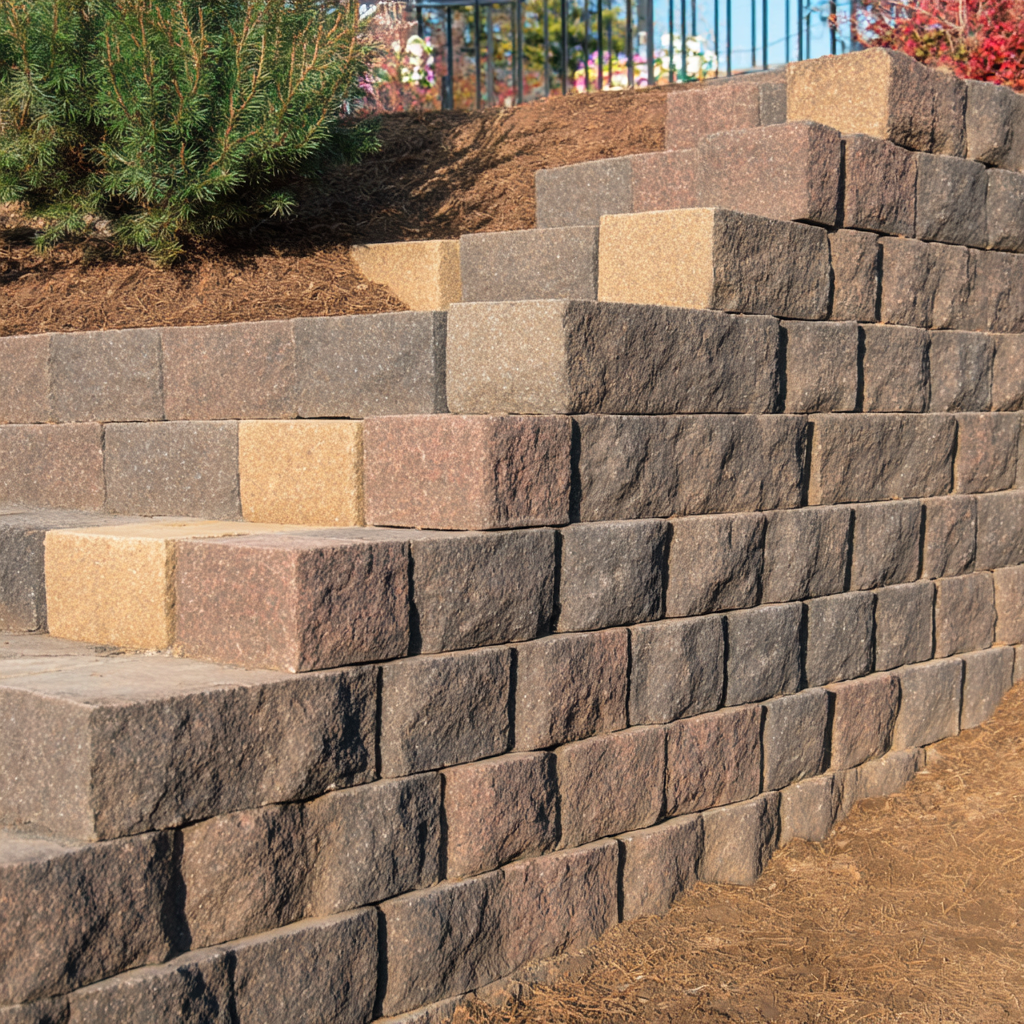
Discover the latest Basalite retaining wall design trends to enhance your California landscape's aesthetics and functionality.
Retaining walls are more than just functional structures; they are essential elements of landscape design that can enhance the beauty and usability of outdoor spaces. Among the various materials available, Basalite blocks have emerged as a popular choice in California, owing to their durability and aesthetic appeal. In this article, we will delve into the latest Basalite Retaining Wall Design Trends that are shaping landscapes across the state, exploring how these trends not only elevate aesthetics but also improve functionality.
Basalite is a leading manufacturer of concrete masonry products, renowned for its quality and innovation. Their retaining wall blocks are designed to withstand the test of time while offering a range of styles and finishes. Here are some key features of Basalite products:
Common question: What are the benefits of using Basalite blocks for retaining walls? Basalite blocks offer durability, aesthetic appeal, and ease of installation, making them an excellent choice for both residential and commercial projects.
As landscape design evolves, so do the trends associated with retaining walls. Here are some of the most prominent trends in Basalite retaining wall design:
One of the leading trends is the use of Basalite blocks that mimic the appearance of natural stone. This design integrates seamlessly into outdoor environments, providing a rustic yet refined look.
Color variation in retaining walls is gaining popularity. Homeowners are opting for blocks that come in multiple hues to create visually appealing patterns and designs.
Incorporating greenery into retaining walls has become a popular trend. Basalite blocks can be designed to support vertical gardens, enhancing both beauty and air quality.
Geometric patterns and shapes are also in vogue. Unique designs can create dynamic landscapes that stand out.
Common question: How do color variations enhance the design of retaining walls? Color variations can add depth and visual interest, making retaining walls more attractive and harmonious with the surrounding landscape.
While aesthetics are crucial, the functionality of retaining walls cannot be overlooked. Basalite retaining walls serve multiple purposes:
Common question: What are the primary functions of retaining walls? Retaining walls primarily retain soil, manage drainage, and can also serve as functional outdoor seating.
To illustrate the impact of Basalite retaining walls, let's look at a few case studies:
A homeowner in San Diego used Basalite blocks to create a terraced garden. By integrating color variations and natural stone aesthetics, the garden became a focal point, attracting compliments from neighbors.
A commercial property in Los Angeles utilized Basalite retaining walls to manage a steep slope. The walls not only provided necessary soil retention but also created an attractive landscape that enhanced the property's curb appeal.
A community park in San Francisco incorporated Basalite blocks to create seating areas around a playground. The walls provided safety while also serving as a gathering space for families.
Common question: How can Basalite retaining walls be used in commercial landscaping? Basalite retaining walls can enhance aesthetics, manage slopes, and create usable spaces in commercial landscapes.
Basalite retaining walls require minimal maintenance. Regular inspections for cracks or damage are advisable, along with occasional cleaning to remove debris.
While DIY installation is possible, hiring a professional is recommended to ensure proper drainage and structural integrity.
With proper installation and maintenance, Basalite retaining walls can last for decades, making them a durable choice for landscaping.
The latest Basalite Retaining Wall Design Trends not only enhance the visual appeal of landscapes but also provide essential functionality. From natural stone aesthetics to innovative designs that incorporate greenery, these trends reflect a growing appreciation for both beauty and utility in outdoor spaces. As you consider your next landscaping project, keep these trends in mind to create a stunning and practical environment.
Tackle home drainage problems during California storms—gutters, backups & more. Bay Area tips + free Bayside assessment. Stay dry in 2025!
Table of Contents

Stop soggy lawns and backyard flooding in the Bay Area for good. Proven fixes + free drainage assessment from Bayside Pavers.
Table of Contents

As a licensed geotechnical and structural engineer specializing in Bay Area hillsides for the last 18 years, I can tell you the November 13–15 atmospheric river was the exact type of long-duration, moderate-intensity event that triggers the majority of our region’s shallow debris flows and slow earth movement. The combination of antecedent moisture from earlier rains, followed by 2–4 inches in 48 hours on steep, clay-rich soils and burn-scar areas, created perfect conditions for slope instability across San Mateo County’s coastal mountains.
If you own a home in Woodside, Portola Valley, Hillsborough, Emerald Hills, or the San Mateo Highlands, your lot is almost certainly governed by the same Franciscan bedrock and colluvial soils that lose strength dramatically when saturated. The good news: properly designed retaining walls and sub-drainage can reduce risk by 95% or more.
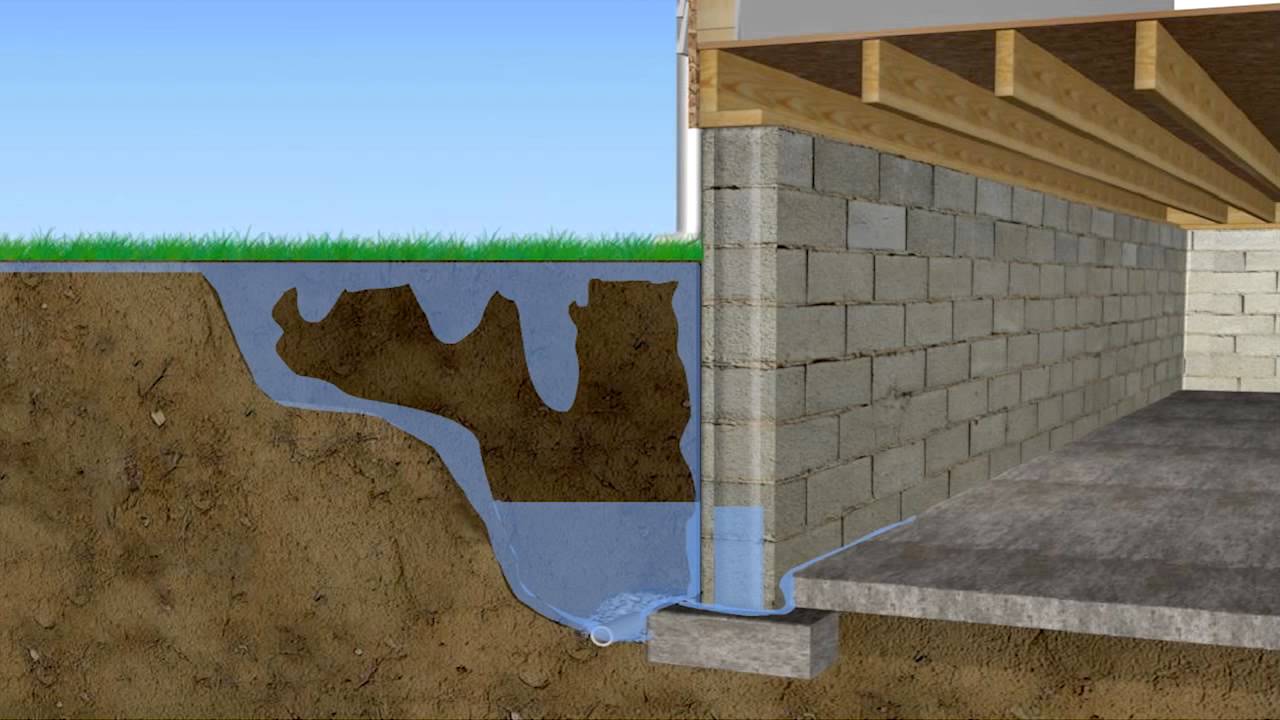
Shallow rapid landslides on the Peninsula rarely happen in one cinematic moment. Instead, pore-water pressure builds inside the soil mantle until effective stress drops to zero. The top 3–12 feet of soil then begins to move downslope as a translational slide or earthflow, typically at rates of inches to feet per day. Once that sliding plane reaches the toe of an undersized or poorly drained retaining wall, the wall rotates or overturns — and everything upslope, including your foundation, deck, and pool, starts moving with it.
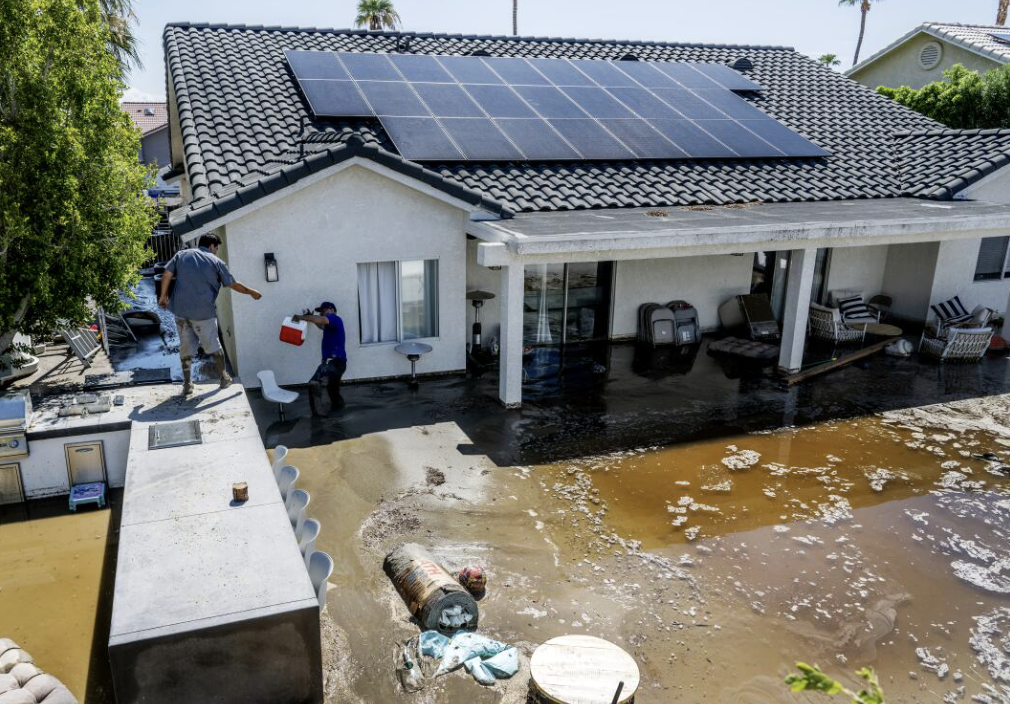
While the news has moved on from the November 13–15 atmospheric river, structural engineers and foundation contractors are completely slammed. Thousands of single-family homes across San Francisco, Oakland, Marin, and the Peninsula now have new cracks, settling, or hydrostatic damage that won’t show up until walls start separating or floors slope noticeably — often months from now.
The average repair bill we’re quoting this week is $28,000–$115,000 depending on the foundation type and how long water sat against it. Most standard homeowner policies exclude this entirely. The good news: 85–90% of the damage we’re seeing could have been prevented with upgrades that cost 10–20% of the repair.
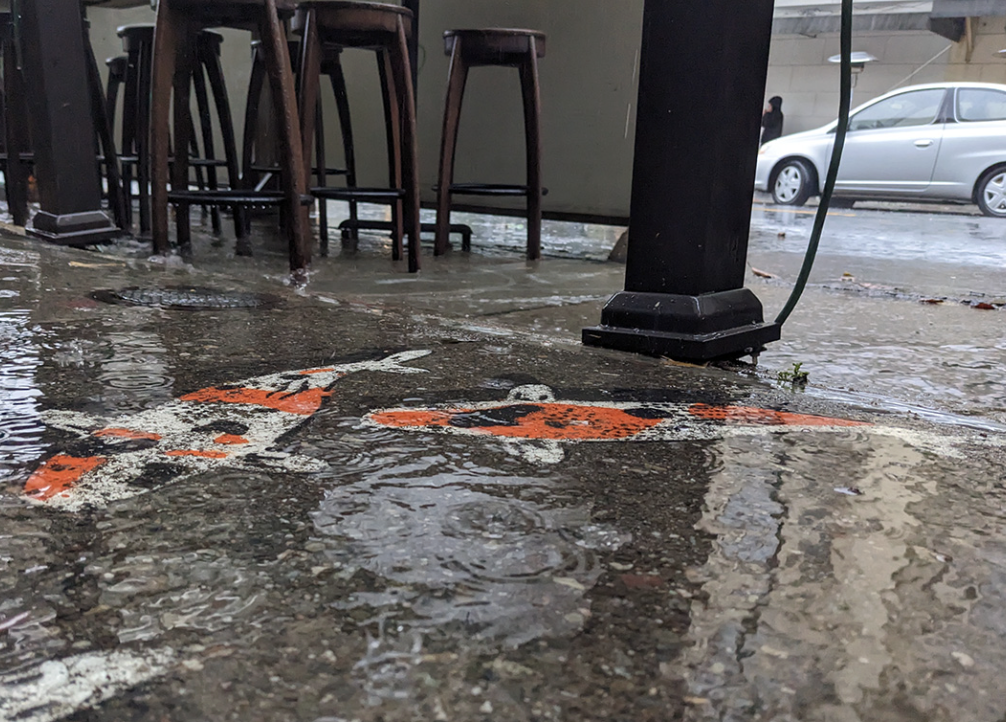
Between November 13–15, 2025, San Francisco’s 100+ year-old combined sewer system was completely overwhelmed. The atmospheric river dropped 0.75–1.5 inches in hours, but the real culprit was decades of neglected catch basins and street gutters packed with leaves, trash, and construction silt. Entire blocks in the Haight, Mission, and Sunset turned into lakes because water had nowhere to go.
For single-family homeowners, this meant water shooting out of street drains and straight into garages, basements, and side yards. One Noe Valley client had 14 inches in their finished basement — all because the catch basin 20 feet away was 100% clogged.
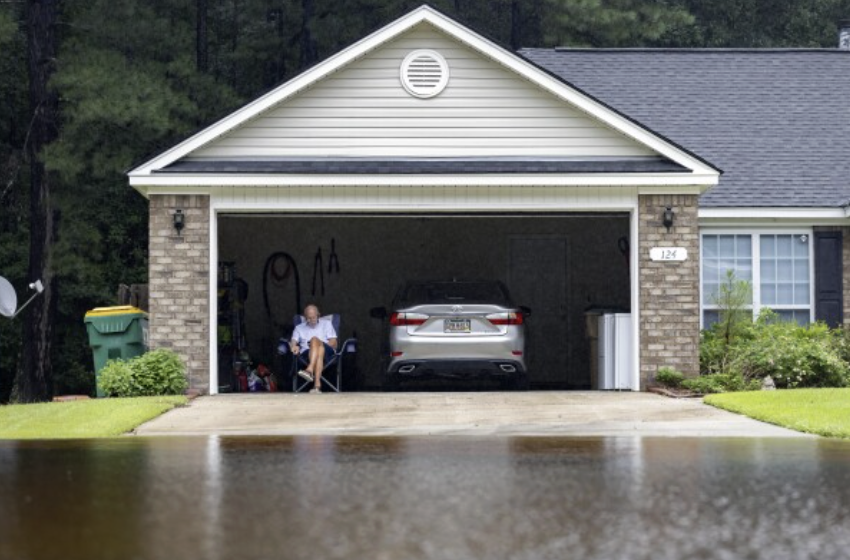
Between November 13–15, 2025, a strong Category 3 atmospheric river dropped 1–5 inches of rain across the Bay Area in under 48 hours. While the news focused on street flooding and mudslides, thousands of single-family homeowners woke up to wet carpets, cracked foundations, ruined furnaces, and sewer backups — damage that standard homeowner insurance almost never covers.If you own a house in San Francisco, Oakland, Daly City, San Rafael, or the East Bay hills, this storm just became the most expensive rain event many of us have ever seen. The good news? Almost all of the damage was preventable with upgrades that cost far less than the repairs now hitting mailboxes.

Why Paver Patios in the Bay Area? Durability – Patio pavers provide nearly 4 times the load-bearing weight of a concrete slab. This durability means that an interlocking concrete paver patio can support heavier loads and provide you with a longer usable life than concrete or asphalt. It’s why pavers are a popular choice for driveways & other high-impact areas; see why we are a trusted Bay Area paver driveway installation contractor.

Flexibility – Interlocking pavers are flexible, and that means that they adjust to environmental changes like cold and heat, expansion and contraction, as well as the frequent seismic distortion we experience here in Northern California that can wreak have on concrete slab or asphalt over time.
Easy Repair Repair and maintenance of patio pavers is easy. If a paver is damaged or stained, just remove it and replace it with a new paver. When stained or cracked, concrete or asphalt may require expensive, time-consuming repairs. With concrete or asphalt, you’ll need to make repeated repairs over the life of your patio, and once it’s cracked, it will never look the same again!
Low Maintenance – Sealing your concrete pavers every year or two will keep them looking like new. You may also need to replace joint sand periodically as well. When compared to patching asphalt or repairing cracks in concrete, concrete pavers are the clear choice!


One of the best benefits of concrete patio pavers is that there’s no curing time! Asphalt or poured concrete often have long curing times during which you’ll have to avoid putting weight on the surface until it has set. Curing can take days or even weeks.
With pavers, there’s no wait. Once the stone is installed, you can be entertaining guests the day our trucks pull out of your driveway!
DETERMINE THE RIGHT TONE AND COLOR PALETTE
When we’re talking about color “tone” we’re referring to how light or dark it is. Just like warm or cool paint colors, the tone you choose is ultimately a personal choice, but there are some things to understand when choosing a color tone.
Lighter colors can make your space feel larger and more open, while darker tones create a more cozy, intimate space. You might choose to go with a more natural tone, as these tend to blend well with your surroundings, but remember even natural tones have shades of color like yellow, gray, or pink that can change under different lighting, or when wet. And these colors might not be right for your home. Pavers that are in the same family, but on the lighter style of the scale will let your home stand our, without confusing the eye.
HOW WILL YOU USE THE SPACE?
Think about how you’ll use the space where you’ll be installing patio pavers. For example, will you be barbecuing? You may want to choose a dark color paver to hide stains. If you’re planning on paving your pool deck, think about using a light color textured paver to prevent slipping and to help stay cool during bright sunny days. Pavers used to create a walkway should be smoother, however, you can line the walkway with darker more textured stones to create visual interest.
MONOTONE OR MULTI-COLOR?
Do you want your patio or driveway to be a single color or more of a mix? A monotone layout offers a sleek, modern, clean-lined look. However, stains are more noticeable. Multicolored pavers have more variation in color which can hide stains better and blend into your existing landscape a little more easily.
CONSIDER YOUR ROOF COLOR AND HOUSE MATERIALS
Many experts suggest matching your paver color to the color of your roof is the best way to tie all of the colors of your property together. It doesn’t need to match exactly, just choose shades that don’t clash. Also, choose pavers that match or coordinate with the materials your home is made from.
A good example is if your home is made from brick, installing brick hardscaping next to your home can lead to a look that is much too red. Grey or neutral pavers combined with red brick offers a much more pleasant condition.
If you live in the greater San Francisco Bay area and you’re planning a hardscape project, why not give the experts at Bayside Pavers a call at (925) 318-5754 and schedule a free consultation to discuss your project. We carry pavers from some of the top manufacturers in the industry including McNear, Belgard Hardscape, Basalite, Calstone, and Pavestone. We’re always happy to answer your questions and can help you to create the outdoor living space you’ve always wanted!

Before laying pavers over an existing concrete slab, it’s crucial to assess drainage and consider the height increase. Ensure proper drainage by checking for water pooling and drilling holes if necessary. Polymeric sand should be used to fill joints for permeability. Edging is essential for stability, but semi-mortaring can be an alternative. However, be mindful of potential water pooling.
The condition of the existing concrete slab is vital. If it’s damaged or creates hazards, overlaying might not be suitable. Additionally, overlaying pavers on driveways is generally not recommended due to the lack of flexibility in the underlying slab.
Concrete pavers offer a diverse range of shapes, colors, and textures, enabling homeowners to craft unique patio designs. Research into the geometric and physical properties of pavers reveals that specific shapes exhibit superior stability and durability. Traditional patterns, ideal for smaller spaces, emphasize symmetry and order. Modular shapes and patterns, on the other hand, provide flexibility for larger areas. Asymmetrical and random patterns can introduce a more natural aesthetic, adding visual interest to outdoor spaces.

Before making any home renovations, it’s important to take proper measurements. Knowing how much backyard space you’re working with is crucial to your patio design. When in doubt, discuss with a professional. An Alameda County paver contractor will help you visualize how the patio will fit into the current layout of your backyard.
Once you’ve measured the layout of your patio, you’ll need to pick out a flooring material that suits your style. In the past, many patios were set with poured concrete. When looking for design inspiration, you’ll notice that many contemporary patios have paver flooring. Paver tiles come in a variety of styles, colors, shapes, and sizes. For a unified look, choose one or more tile styles that match the overall aesthetic of your home’s features.

Concrete pavers are incredibly durable, capable of withstanding heavy loads and weathering the elements without deteriorating. This means less maintenance and fewer repairs compared to wood decks. Additionally, their versatility allows me to install them on various surfaces, making them a suitable choice for any outdoor area. While wood decks may have a certain charm, concrete pavers offer a more sustainable and cost-effective option that will enhance the value of my home. Learn more about patio paver cost in the Bay Area
Installing concrete paver patios in the Bay Area during winter offers several benefits. Since it’s the slow season for patio installation, companies like Bayside have better availability and may be able to start your project sooner! Winter installation also avoids the mess and mud that can come with spring rain, allowing you to enjoy your new patio as soon as warm weather arrives. Winter installation can also minimize the impact on your landscaping, as most plants are dormant during this season.

You may be wondering how much patio pavers cost to install in the Bay Area on average you can expect to pay between $22 and $40 per square foot for patio pavers in the Bay Area. There are many factors that go into creating a comprehensive pricing model, including the materials you choose, the size of the patio installation, and the scope of the site preparation. Based on our experience, the average cost for a patio paver project is around $35,000.
The first item to consider is the actual paver material you’d like to use. Materials available range from concrete, natural stone pavers, gravel, asphalt, and interlocking concrete pavers. Each material has its own set of pros and cons, and the cost-per-square-foot can vary widely.
Along with materials, another important consideration is the size and intended use of your patio. This will help you to narrow your choice of materials.

Grading means to level the land surface of your patio. It involves correcting or leveling any slope in the land to make draining of water easier. This leveling should be approximately 1 to 2 percent from the foundation of your house. It will also involve excavating and filling soil again to level the land surface properly to cater for proper drainage.
Grading is important for the safety and stability of your patio. So, depending on the amount of grading that your patio needs, the overall cost of paver installation in Concord and surrounding areas will vary. Also, to remove soil for grading, you might need to obtain special permits from your local authorities. This will add to the paver patio cost.
Filling the surface after excavating the soil should be catered to as well. These costs are generally not included in the hardscape material costs, but should be considered in the overall project cost.

1. ALWAYS HAVE EXTRA PAVERS
While pavers are durable, and when properly installed can literally last a lifetime, occasionally you will experience damage. Whether it’s during the cutting process, or through simple wear and tear, pavers can get broken. That’s why it’s important to always have extra material on hand so you can quickly replace any damaged ones.
2. DON’T FORGET TO ALLOW FOR DRAINAGE
This is where a professional can help. Drainage is the most important aspect of installing a patio. If it’s installed improperly and the patio is close to the house, during heavy rain you can experience flooding inside your home. You need to plan ahead. When you create a level foundation to install your patio paver stones, make sure it slopes away from the house. Experts recommend a drop of about 1/4” every two feet.
3. BLOCK THE WEEDS
Nothing is worse than laying the perfect patio, only to go out in the spring and see weeds coming up through the gaps in the stone. You can pick them out, but they will come back. Thanks to advances in agricultural technology, weeds can be eliminated through the use of chemicals, which while effective, are not environmentally friendly.

Transforming your outdoor space with a beautifully paved patio starts long before you lay the first stone. From choosing the right base to keeping your design durable and weed-free, every step matters. Whether you’re a DIY enthusiast or working with professionals, these nine practical tips will help you build a patio that’s not only stunning but also built to last.
Whether it is during the cutting process, or through simple wear and tear, pavers can get broken. You should always purchase extra bricks or stones so that you can quickly replace any damaged ones.
If you have already laid your pavers and you need to remove a cracked one, you can get them out with good leverage using a pry bar.
Or if you don’t have one of those laying around you can use two flathead screwdrivers. Wedge them in the crack on one side of the broken paver. Push down on the handle and this should cause it to lift up.
To set patio pavers in place a layer of sand is applied. The granules build up in the crevices between stones. They should be compacted repeatedly until water does not wash away the sand so they will stay in place and allow your patio to drain properly.
Dense sand is also a great way to prevent weeds from growing in between your beautiful design.
No matter which of the garden paving ideas you select, you will want your design to be flawless.
To create some of the more complex patterns multiple cuts may be required on the same stone.
It is possible to use a cold chisel for this, but renting a wet saw isn’t prohibitively expensive. In the end, this rental can save you a lot of time and reduce the amount of strain laying pavers causes on your body.
Like any product made from natural materials, stones and bricks used in these garden paving ideas will have color variations. These slight changes in hue can help to create a more fluid looking design. If they all were perfectly uniform, your patio could end up resembling a checkerboard. It’s best to avoid this patchwork appearance.
No matter how well you pack in the sand, pavers are known to shift as they settle.
It is important to set up a very firm perimeter to outline your design. This can save you a lot of stress later when you don’t have to redo everything. These borders are especially important in climates with an intense rainy season. Even the most solid pavers are porous and subject to the same erosive forces that shaped rivers.
Everyone thought he was crazy when he built the Ark. But when the storms blew in, Noah was happy he had built a sturdy ship.
Your patio may not be saving the animals of the world from extinction, but it will be weathering some pretty severe storms.
Plan ahead by creating a level foundation that slopes away from your home. Experts recommend that you allow a quarter inch elevation drop every two feet.
Nothing is more rewarding than the satisfaction of properly packing your foundation.
By renting a Wacker plate compactor, you will be able to create a level base for your paver design. A tamper could also be used.
For years people had to go outside periodically and pluck individual weeds from the ground.
Today, due to innovations in agriculture technology, we can eliminate weeds with much less effort.
Beyond the traditional elimination sprays, landscaping cloth can create a great barrier for your unwanted vegetation.
You should add about ten percent to your square footage estimation to allow for variations in the topography of the area you are covering.
If you want a long lasting end result, digging deep to lay your foundation can be a great choice. The goal is to get below the root level of the vegetation. If you can get about six inches below this level then you can be assured you will have minimal weeds erupt between your pavers.
It is a good idea to give your local utilities and cable companies a call before you use any garden paving ideas.
They can come out with flags and cans of spray paint to mark where each of their lines is running underground. Having this information before you start digging can save you a lot of hassle in the end.
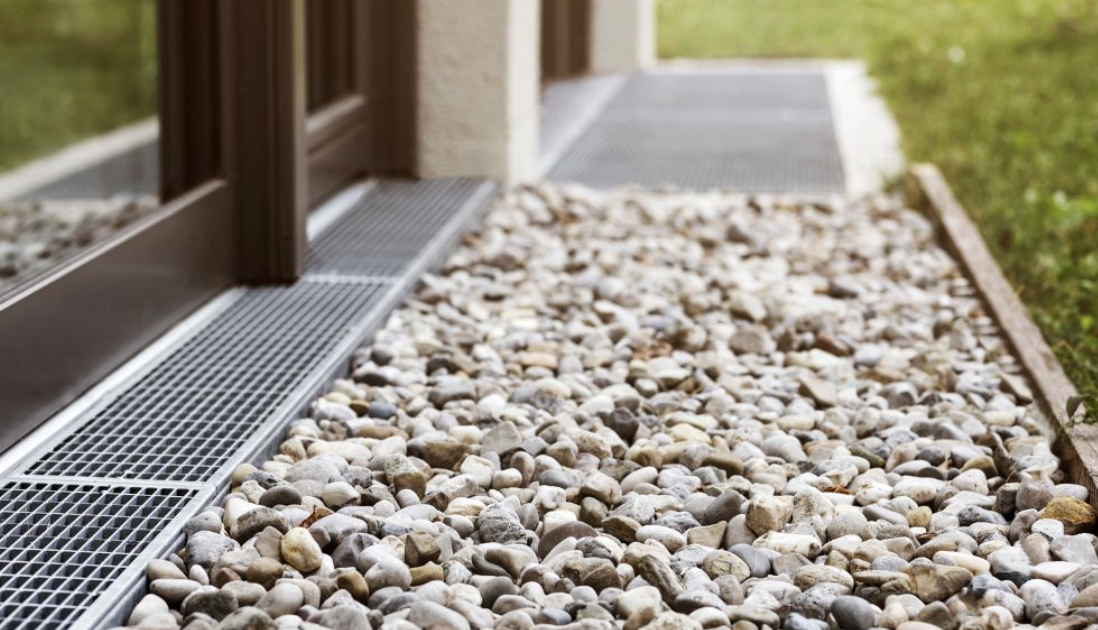
Seeing damp walls or musty smells in your Bay Area basement after winter storms? At Bayside Pavers, we’ve pumped out countless flooded crawl spaces in Oakland, Walnut Creek, and San Jose where surface runoff from patios pushed water under foundations—triggering mold, wood rot, and structural shifts in earthquake zones.
This DIY guide shows you how to install a paver patio with an integrated NDS EZ-Flow French drain system that intercepts patio runoff before it reaches your basement, routing it safely to daylight or a sump. Act now to stop water intrusion and protect your home’s value.
Even minor patio runoff can migrate 10+ feet underground in clay-heavy Bay Area soil. Over time:
An NDS EZ-Flow French drain, per ICPI and Caltrans guidelines, captures 100% of patio surface water at the perimeter—preventing basement entry before damage begins.
Patios without perimeter drainage act like reservoirs. Rain sheets off the surface, saturates the soil along the foundation, and finds micro-cracks in concrete. In Marin’s foggy hills or San Francisco’s seismic zones, this leads to efflorescence, bowing walls, and $15,000+ repair bills. A French drain under the patio edge stops this cycle.
Focus on intercepting water before it hits the foundation:
Check permits—most patio + drain combos under 500 sq ft in Concord or San Jose are exempt, but basement tie-ins may need review.
Gather Materials and Tools for Basement Defense
Use pre-engineered NDS EZ-Flow bundles for foolproof drainage.
Purpose for Basement Protection
Techo-Bloc Pavers (e.g., Antika)
Durable surface with clean edges
NDS EZ-Flow French Drain (7" bundle)
Pre-wrapped pipe + aggregate for instant flow
3/4" Gravel Base
Load support + secondary infiltration
Geotextile Fabric
Filters fines, prevents clogging
4" Solid PVC Discharge Pipe
Routes water to safe outlet
Polymeric Sand
Seals joints, resists erosion
Pro Tip: Rent a trencher ($120/day)—cuts French drain time in half and ensures straight, deep lines.
Follow these 11 steps, based on NDS and ICPI specs. Total time: 48–60 hours over 2–3 weekends.
Safety Tip: Call 811—basement utilities (gas, sewer) often run near foundations.
Bay Area Essential: This intercepts all patio runoff before it migrates under your slab.
Add 2 inches of gravel over wrapped EZ-Flow, compact lightly. This locks the system in place.
Spread 6 inches of ¾" gravel across entire patio in 2-inch lifts. Compact to 95%—prevents settling that could crack basement walls.
Add 1 inch concrete sand; screed level with 1" pipes. Maintain 2% slope toward the French drain.
Start at house edge:
Spike rigid edging along outer patio edge—prevents lateral shift during Marin winds.
Fill joints, mist lightly—hardens to resist washout and basement-bound erosion.
Critical Warning: On hillsides (>5% slope) in San Francisco or Walnut Creek, shifting soil can crush pipes. Hire ICPI-certified installers to avoid basement flood risk.
Early red flags:
Q: Will a French drain clog in Bay Area redwood mulch?
A: NDS EZ-Flow has built-in geotextile—rake debris monthly. Flush annually to maintain flow. See our paver patio ideas (/paver-patio/).
Q: Can I connect the French drain to my sump pump?
A: Yes—route solid PVC to sump basin. We install battery backups for San Jose power outages.
Q: Do I need permeable pavers with a French drain?
A: Optional—French drain handles 100% surface load. Permeable adds infiltration for drought credits in Marin.
Q: Are permits required for basement drainage in Walnut Creek?
A: Subsurface drains near foundations often need plan review. We submit for you.
Q: How do I winterize the system in foggy Concord?
A: Inspect discharge in fall; ensure pop-up emitter is clear of leaves.
Tired of puddles turning your patio into a slip hazard or seeping toward your foundation after every storm? At Bayside Pavers, we’ve repaired countless East Bay and South Bay patios where poor drainage caused cracked slabs, moldy walls, and soil erosion—issues that start small but threaten your home’s stability in San Jose’s clay soil or Marin’s foggy microclimates.
This DIY guide shows you how to install a paver patio with integrated NDS channel drainage that captures surface runoff at the source, directing it safely away before it can pool or migrate under your foundation. Act now to protect your investment and enjoy a dry, safe outdoor space year-round.
Even a 1/4-inch depression on a patio can hold gallons of water per storm. In the Bay Area, this leads to:
NDS channel drains, per ICPI best practices, intercept 100% of surface flow along low edges—preventing these issues before they start.How Does Water Pooling on Patios Threaten Bay Area Homes?Patios built flush or sloping toward the house act like funnels during winter rains. Water saturates the soil beneath, expands clay (common in Oakland and Walnut Creek), and pushes against foundation walls. Over 2–3 seasons, hairline cracks become structural nightmares. A properly graded patio with channel drains reverses this risk.
Prioritize slope and drain placement:
Gather Materials and Tools for Proactive DrainageUse ICPI-compliant, durable components to ensure 20+ years of dry performance.
Purpose for Water Prevention
Pavers of choice (Belgard, calstone, techo bloc, etc)
Interlocking strength + aesthetic
NDS Pro Series 5" Channel Drain Kit
Captures surface runoff along house
3/4" Gravel Base
Supports load + allows infiltration
4" PVC Perforated Pipe
Connects channel to discharge
Geotextile Fabric
Prevents clogging in foggy climates
Polymeric Sand
Locks pavers, resists washout
Pro Tip: Rent a laser level ($40/day) for perfect slope—critical to avoid future pooling.What Are the Step-by-Step Instructions for a Dry, Safe Paver Patio?Follow these 12 steps, adapted from ICPI and NDS installation specs. Total time: 48–60 hours over 2–3 weekends.
Wrap fabric under and around channel drain—prevents silt buildup in East Bay clay.
Spread 4–6 inches of ¾" gravel in 2-inch lifts. Compact to 95%—loose base = future sinking and water traps.
Add 1 inch of concrete sand; screed level using 1" pipes as rails. Maintain 2% slope.
Start at the channel drain:
Run perforated PVC from channel outlet:
Spike plastic or aluminum edging along perimeter—locks layout and prevents lateral shift.
Fill joints, sweep excess, lightly mist to activate—seals against washout during Marin fog drip.
Run plate compactor in circles. Clean pavers with leaf blower.
Hose-test entire patio:
Critical Warning: On sloped yards (>5%) in San Francisco or Marin, improper compaction causes drain misalignment. Hire ICPI pros to avoid liability.
Watch for:
Q: Will channel drains clog in the Bay Area’s redwood debris?
A: NDS grates have ¼-inch slots—rake leaves weekly. Annual vacuuming prevents 99% of blockages. See paver patio gallery (/paver-patio/).
Q: Can I tie patio drainage into my downspout system?
A: Yes—connect channel outlet to underground PVC. We design full systems for San Jose homes.
Q: Do permeable pavers work better than than channel drains?
A: Combine both: Permeable for infiltration, channel for high-volume edge capture—ideal for Walnut Creek clay.
Q: Are permits needed for patio drainage in Concord?
A: Rarely for surface drains—but subsurface tie-ins may trigger review. We navigate codes.
Q: How do I winterize channel drains in Marin?
A: Flush with hose in fall; cover grates during heavy leaf drop to avoid clogs.
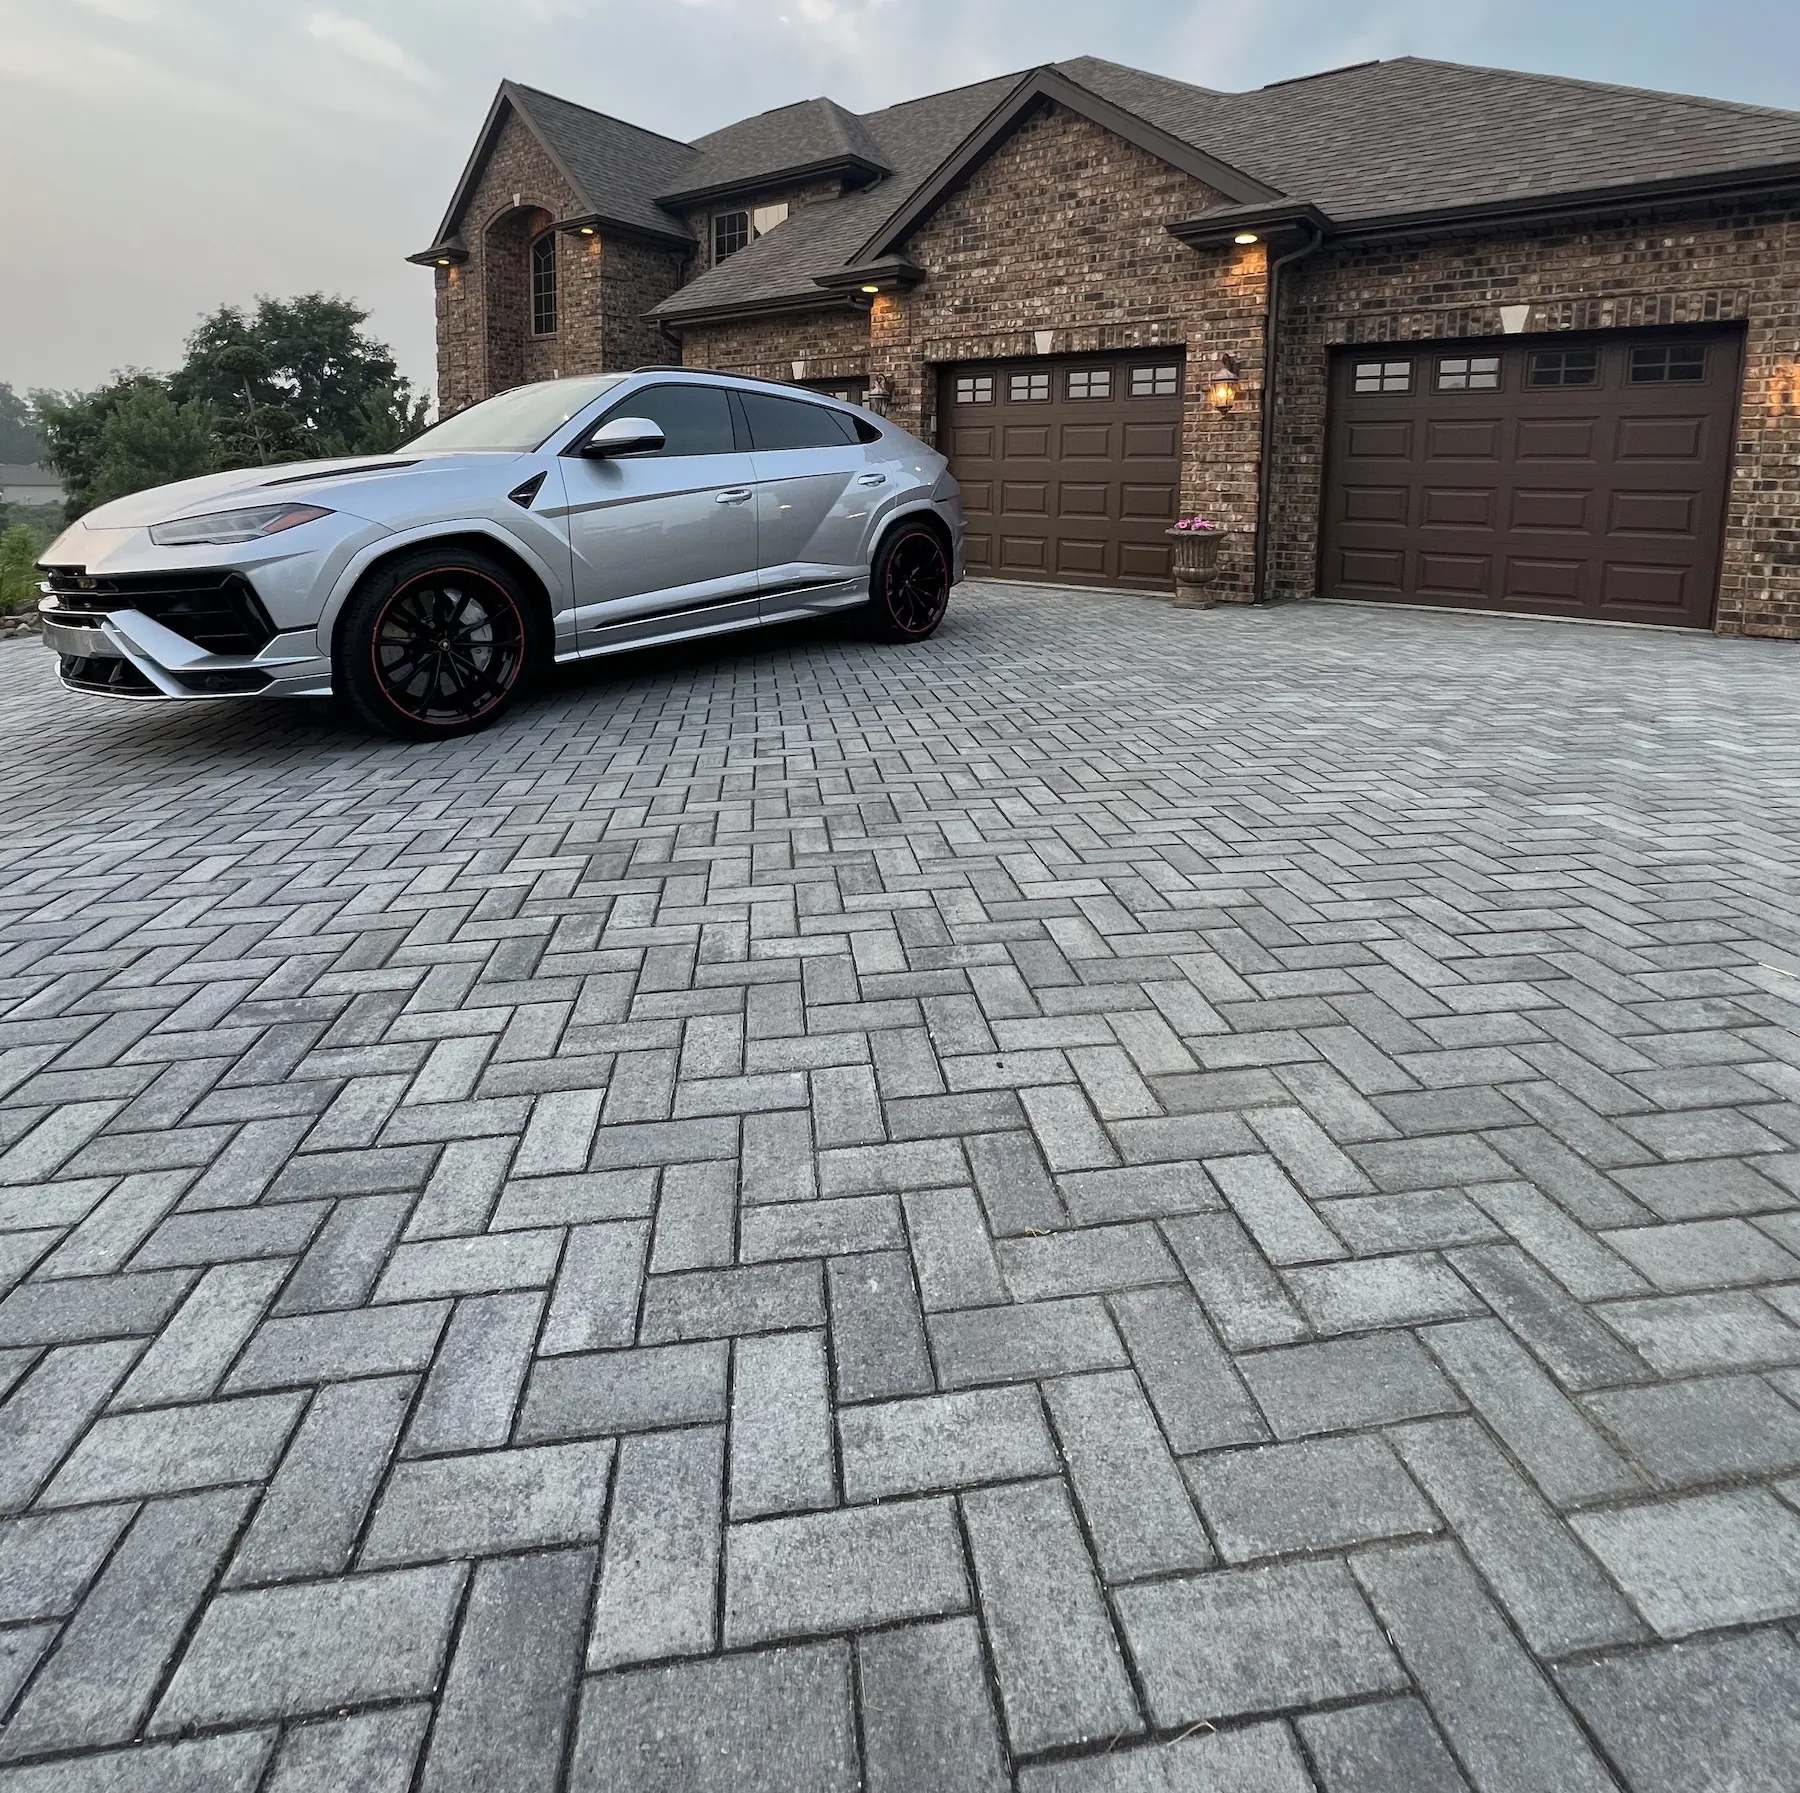
Want to build a permeable paver driveway in San Jose that stops downspout runoff from eroding your home’s foundation before major damage begins?
At Bayside Pavers, we’ve seen too many East Bay and South Bay homes suffer cracked slabs and shifting walls from unchecked gutter overflow—especially in foggy neighborhoods like Willow Glen, Almaden Valley, or Concord.
This DIY guide shows you how to install a permeable paver driveway that infiltrates rainwater and redirects downspouts underground, protecting your foundation in San Jose’s clay-heavy soil and seismic zones. Start now to avoid expensive repairs later.
Standing water from downspouts saturates soil near your foundation, causing expansion, cracking, and settlement—issues that can cost $10,000+ to fix in earthquake-prone Bay Area homes. Permeable pavers, per ICPI guidelines, reduce surface runoff by up to 90%, giving water a safe path into the ground instead of against your slab.
Gutters dump thousands of gallons per storm directly beside your home. In San Jose’s clay soil, this creates hydrostatic pressure that pushes against foundation walls. Over time, cracks form, doors stick, and floors slope. A permeable driveway with NDS catch basins channels that water away or through the pavers—preventing saturation before it starts.
Begin with a drainage-first mindset: Assess downspout locations and grade away from the house. Check San Jose permits—most driveway replacements under 500 sq ft don’t require them, but drainage alterations may. Test soil percolation; slow-draining clay needs a deeper gravel reservoir.
Gather Materials and Tools for Long-Term Protection
Focus on durable, ICPI-compliant materials like Belgard, Calstone or Techo Bloc permeable pavers and NDS drainage components. Prioritize quality to ensure 20+ years of foundation safety.
Purpose for Foundation Protection
Permeable Pavers
Allow infiltration, reduce surface pooling
3/4" Gravel Base
Creates storage reservoir for excess runoff
NDS 9x9 Catch Basin Kit
Captures downspout flow at source
4" PVC Drain Pipe
Routes water safely underground
Geotextile Fabric
Prevents soil migration and clogging
Permeable Jointing Aggregate
Maintains infiltration rate over time
Pro Tip: Use a plate compactor to achieve 95% compaction—loose base leads to settling and foundation stress.
Follow these 10 steps, based on ICPI and Caltrans standards, to complete in 2 weekends. Always wear PPE and call 811 before digging.
Prevent water from ever reaching the foundation:
Lay non-woven geotextile over native soil—keeps fines out of the gravel reservoir, ensuring long-term drainage.
Add 6–8 inches of ¾" gravel in 2-inch lifts, compacting each to 95%. This stores water during heavy rains, giving it time to infiltrate away from your foundation.
Screed 2 inches of ¼" minus chip; lightly compact. This supports pavers while maintaining permeability.
Start at the house: Lay in herringbone pattern with ⅛-inch joints. Cut edges with a wet saw rented locally.
Run PVC from catch basins through the gravel layer to a pop-up emitter or swale—ensuring no water backs up toward the house.
Sweep in clean, angular chip; vibrate to settle. This locks pavers and maintains 30+ inches/hour infiltration.
Install rigid edging; backfill with soil. Grade topsoil away from foundation to complete the drainage plane.
Hose-test downspouts—water should disappear in under 2 minutes. Vacuum joints yearly to preserve infiltration and prevent future foundation risk.
Critical Warning: On slopes >5% (common in Evergreen or Marin), shifting pavers can undermine drainage. Hire pros to avoid liability.
Q: How soon can poor drainage damage my San Jose foundation?
A: Within 1–3 winters in clay soil; hydrostatic pressure builds fast. Start your permeable driveway now—see our driveway gallery (/gallery/).
Q: Will permeable pavers work in earthquake-prone East Bay areas?
A: Yes—flexible joints absorb movement better than rigid concrete. Techo-Bloc meets ICPI seismic standards.
Q: How do I maintain drainage to protect my foundation long-term?
A: Clean NDS basins quarterly; vacuum paver joints annually. Prevents clogs in foggy Concord or Marin.
Q: Do I need permits to add drainage in Walnut Creek?
A: Minor DIY drainage often doesn’t—but confirm with Contra Costa County. We handle permits for pro jobs.
Q: Can I combine permeable pavers with rain gardens?
A: Absolutely—route overflow to bioswales for extra foundation buffering and drought-resistant landscaping.
Pro Tip: For slopes >5%, complex soils, or homes with existing cracks, hire Bayside Pavers to prevent shifting and ensure full drainage integrity
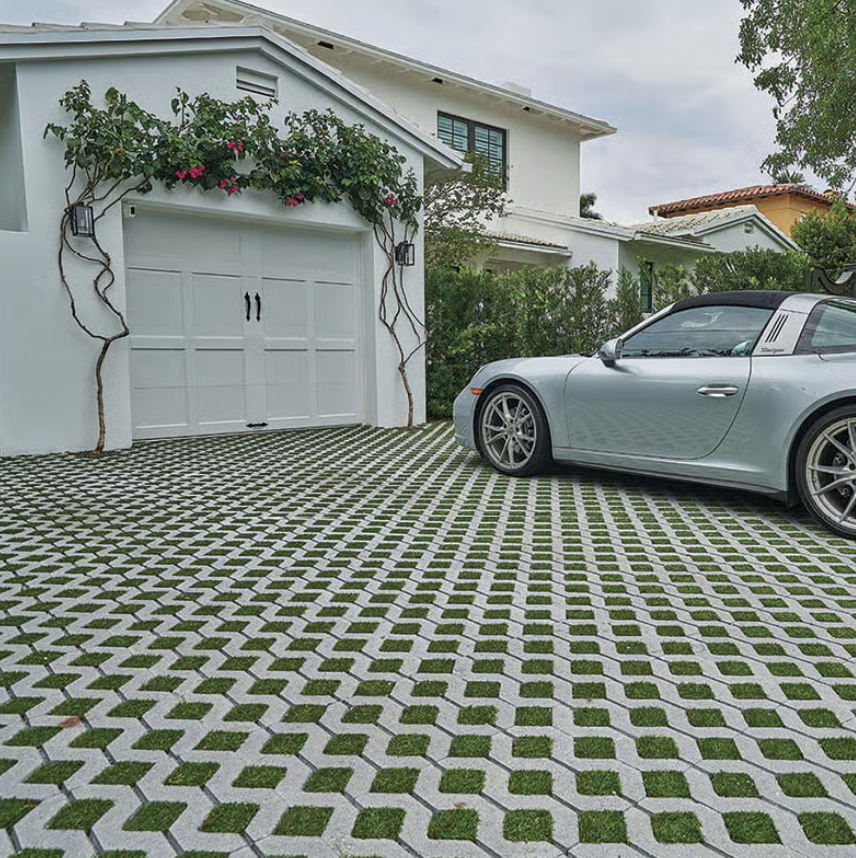
Permeable turfstone pavers are increasingly becoming a popular choice among homeowners, especially in regions like California, where water conservation is a significant concern. These innovative pavers not only enhance the aesthetic appeal of a landscape but also play a crucial role in managing stormwater runoff. In this article, we will delve deep into the permeable turfstone pavers benefits, exploring how they contribute to sustainable landscaping practices and why they are a wise investment for eco-conscious homeowners.
Permeable turfstone pavers are specially designed paving stones that allow water to pass through their surfaces, promoting natural drainage and reducing runoff. These pavers are typically made from concrete or other durable materials and are structured to create voids filled with soil or grass. This design mimics natural landscapes, making them an ideal choice for residential and commercial properties seeking to manage water sustainably.
Common Question: How do permeable turfstone pavers work?
Permeable turfstone pavers work by allowing rainwater to infiltrate through their surface into the underlying soil, where it can be absorbed and filtered naturally. This process reduces the volume of stormwater runoff, helping to prevent flooding and erosion while replenishing groundwater supplies.
There are numerous benefits associated with installing permeable turfstone pavers. Below are some major advantages:
Common Question: How do permeable pavers help in flood-prone areas?
Permeable pavers help in flood-prone areas by allowing rainwater to infiltrate rather than flow over impervious surfaces. This infiltration reduces the volume of water that can accumulate and overflow, effectively managing stormwater and minimizing flood risks.
Common Question: Are permeable turfstone pavers environmentally friendly?
Yes, permeable turfstone pavers are environmentally friendly as they facilitate natural water drainage, reduce runoff pollution, and support local ecosystems, making them a sustainable choice for landscaping.
Common Question: Can permeable pavers be used in decorative ways?
Absolutely! Permeable pavers can be arranged in various patterns and colors, allowing homeowners to create stunning designs that complement their landscape while providing functional drainage.
Common Question: Are permeable turfstone pavers worth the investment?
Yes, permeable turfstone pavers are worth the investment due to their long-term cost savings, durability, and ability to enhance property value while providing significant environmental benefits.
The installation of permeable turfstone pavers involves several steps to ensure proper drainage and stability:
Common Question: How long does it take to install permeable pavers?
The installation time for permeable pavers varies depending on the project size and complexity, but typically ranges from a few days to a week.
Common Question: What types of projects benefit from permeable turfstone pavers?
Permeable turfstone pavers are beneficial for various projects, including residential gardens, commercial parking lots, and public parks, where effective stormwater management is desired.
Common Question: How do I maintain permeable turfstone pavers?
Maintenance involves occasional cleaning to remove debris and ensuring that the grass or soil in the voids is healthy and well-watered.
Common Question: Can permeable pavers freeze in winter?
Permeable pavers can withstand freezing temperatures; however, proper installation and drainage are crucial to prevent ice formation.
Common Question: Are permeable pavers suitable for heavy traffic areas?
Yes, permeable pavers are designed to support heavy traffic when properly installed and maintained, making them suitable for driveways and commercial areas.
In conclusion, the permeable turfstone pavers benefits extend far beyond aesthetics. They provide effective stormwater management, promote eco-friendly practices, and enhance property value while being cost-effective in the long run. For California homeowners concerned about water conservation and sustainable landscaping, permeable turfstone pavers are an excellent choice to create beautiful, functional outdoor spaces.

Sustainable retaining wall materials are essential for creating environmentally friendly landscapes. This guide will explore various options, their benefits, and how to choose the right materials for your project.
Sustainable retaining wall materials are those that minimize environmental impact while providing durability and functionality. These materials are often sourced responsibly and are designed to last.
Recycled concrete is an excellent choice for sustainable retaining walls. It reduces waste and provides a robust structure.
Natural stone offers beauty and durability. It is a timeless choice that blends well with nature.
This technique uses soil and can create stunning walls that are both sustainable and strong.
When selecting materials, consider the following:
Some of the most eco-friendly materials include recycled concrete, natural stone, and rammed earth.
With proper maintenance, sustainable retaining walls can last for decades.
Recycled materials often provide cost-effective solutions while being environmentally friendly.
Sustainable retaining wall materials not only benefit the environment but also enhance the beauty and functionality of your landscape. Choose wisely for a lasting impact.

Permeable pavers are a sustainable solution that can significantly benefit landscapes, especially in drought-prone areas. This article explores how permeable pavers work, their benefits, and why they are essential in today's environmental landscape.
Permeable pavers are specially designed pavement systems that allow water to flow through them, reducing runoff and promoting groundwater recharge. These systems can be made from various materials such as concrete, brick, or stone, and are ideal for driveways, patios, and walkways.
Permeable pavers play a crucial role in drought management by:
By utilizing permeable pavers, communities can significantly reduce the impact of droughts. They help maintain the water cycle and provide a sustainable landscaping solution.
Installing permeable pavers requires careful planning and execution. Key steps include:
To ensure longevity, regular maintenance is essential, including:
The cost can vary widely based on materials and installation, typically ranging from $10 to $30 per square foot.
Yes, when installed correctly, permeable pavers can withstand heavy vehicle traffic.
Absolutely! They help manage stormwater, reduce flooding, and promote ecological health.
Permeable pavers offer a sustainable solution to drought challenges, improving water management and enhancing landscapes.
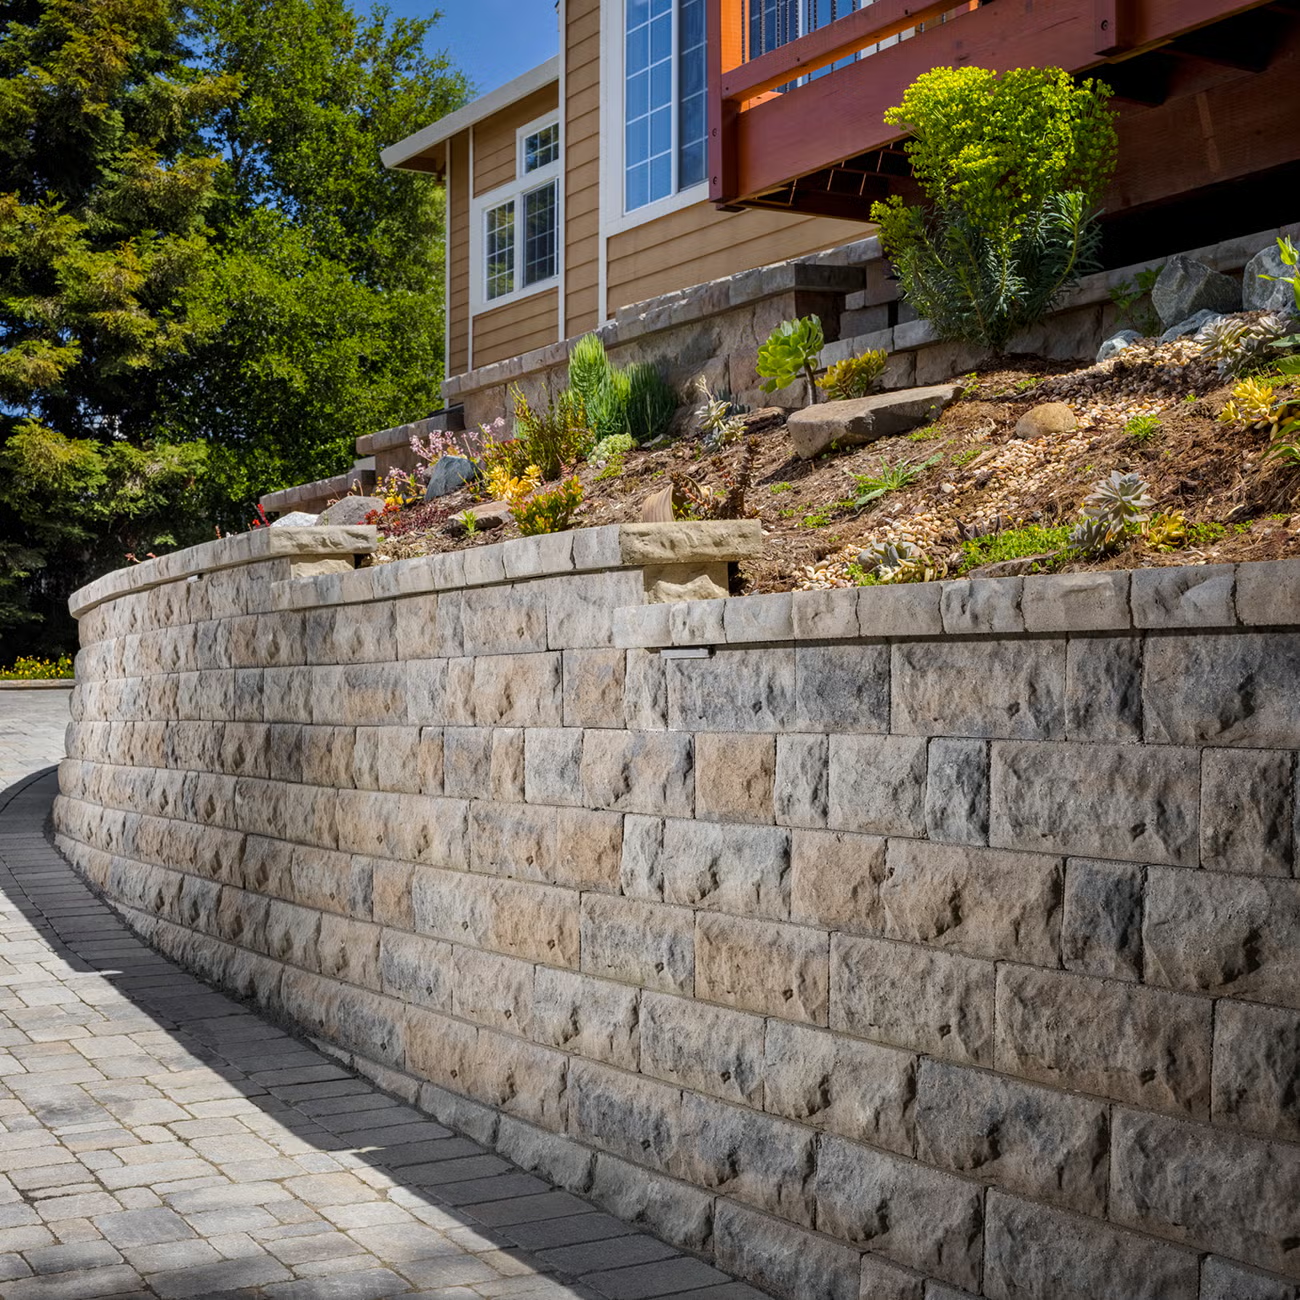
Transforming your driveway into a durable, attractive, and functional feature can significantly enhance your home’s curb appeal while addressing practical concerns like water management. In Fremont, California, where sloped terrain and water runoff are common challenges, this project incorporates Belgard Avalon Slate Bella pavers, a Belgard Graphite border, a 15-linear-foot Belair 2.0 retaining wall, and a French drain to ensure proper drainage away from the property. This detailed how-to guide will walk you through the demolition and installation process, address project constraints, and emphasize the primary goal of directing water away from the house, including the use of a car-grade drain at the garage interface.
The primary objective of this driveway installation is to create a stable, aesthetically pleasing surface that ensures water flows away from the house, preventing pooling or structural damage.
The project addresses a sloped terrain where the land sinks toward the house, requiring a 15-linear-foot Belair 2.0 retaining wall and a French drain to manage runoff. The driveway will feature Belgard Avalon Slate Bella pavers for a sophisticated, textured look and a Graphite border for a clean, defined edge. A car-grade drain will be installed at the garage door to handle water flow at the transition point, ensuring durability under vehicle traffic.
Before starting, confirm local regulations in Fremont, California. Driveway installations may require permits, especially for retaining walls or drainage systems affecting runoff to public streets. Check with the City of Fremont’s Building Division for guidelines on setbacks, drainage, and structural requirements. Mark utility lines by calling 811 to avoid underground conflicts.Key Considerations:
If replacing an existing driveway (e.g., concrete or asphalt), follow these steps:
Constraint Note: The sinking gradient toward the house requires careful excavation to avoid undermining the soil near the foundation. Excavate gradually and monitor soil stability.
A solid subbase is critical for a stable, long-lasting driveway.
The 15-linear-foot Belair 2.0 retaining wall stabilizes the sloped edge and supports the French drain.
Constraint Note: The wall must be structurally sound to handle soil pressure from the sloped terrain. Ensure proper backfill and compaction to prevent shifting.
The French drain runs parallel to the retaining wall to capture and redirect water to the street.
Goal Note: The French drain ensures water is efficiently channeled away from the house, preventing pooling near the foundation.
A car-grade channel drain at the garage door prevents water from entering the garage.
The primary goal of directing water away from the house is achieved through:
At Bayside Pavers (https://baysidepavers.com), we specialize in creating custom driveways that blend functionality with stunning design. Our expertise in Fremont’s unique terrain and climate ensures your project meets local regulations and performs reliably for years. Using premium Belgard products like Avalon Slate Bella pavers, Graphite borders, and Belair 2.0 retaining walls, we deliver durable, visually appealing results tailored to your needs.ConclusionInstalling a driveway with Belgard Avalon Slate Bella pavers, a Graphite border, a Belair 2.0 retaining wall, and a French drain in Fremont, California, requires careful planning and execution to address the sloped terrain and ensure proper water management. By following this step-by-step guide, you can achieve a professional-grade driveway that enhances your home’s value while protecting it from water damage. For expert installation, contact Bayside Pavers to bring your vision to life with precision and quality craftsmanship.
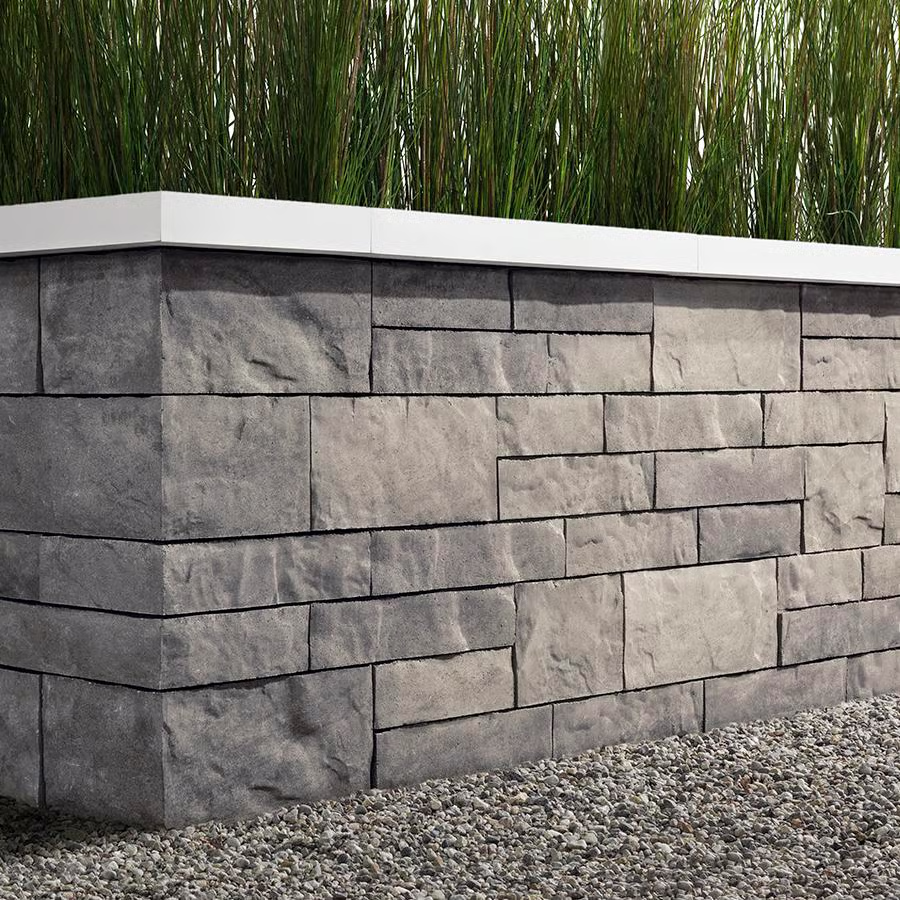
If you own a sloped property in San Jose, a properly installed retaining wall can transform your yard into a functional, beautiful space. In the Bay Area’s climate—dry summers, foggy mornings, and occasional winter rains—retaining walls manage soil erosion, enhance drainage, and add aesthetic appeal. On San Jose’s hilly terrains, like those in Almaden Valley or Evergreen, retaining walls are crucial for stabilizing slopes, especially in our seismically active region where ground movement is a concern.
At Bayside Pavers, we’ve been enhancing Bay Area properties since 2009, serving neighborhoods like Willow Glen, Los Gatos, and Downtown San Jose. As ICPI-certified professionals, we adhere to Interlocking Concrete Pavement Institute standards, ensuring durable retaining walls backed by our 25-year warranties. With over 15 years of experience, we understand San Jose’s clay-heavy soils, local zoning regulations, and drainage requirements. Hiring a general contractor for your retaining wall ensures compliance with ICPI standards and avoids costly mistakes.
This guide walks you through the process of correctly installing a retaining wall on a sloped property in San Jose, tailored to local conditions. Ready to stabilize your yard?
Call Bayside Pavers for a free design consultation.
The ICPI provides strict guidelines for segmental retaining walls (SRWs) to ensure structural integrity and longevity. According to the National Association of Landscape Professionals, well-built retaining walls can last 40-60 years, ideal for San Jose’s variable soils and seismic activity. ICPI standards, such as Tech Spec 18, require certified materials (e.g., concrete blocks meeting ASTM C1372) and precise engineering to handle lateral earth pressure. For San Jose, this means designing walls to manage heavy clay soils, occasional heavy rains, and earthquake resilience.
Common materials include concrete blocks ($10-20 per square foot), natural stone ($15-30 per square foot), and modular systems ($12-25 per square foot). Permeable options support San Jose’s eco-friendly drainage goals.
Installing a retaining wall on a sloped property is complex, requiring expertise in engineering, local permits, and ICPI standards. A general contractor coordinates permits, ensures compliance with San Jose’s Building Division, and manages the project efficiently. At Bayside Pavers, our contractors handle everything from soil analysis to final inspections, saving you time and avoiding errors like improper drainage or wall failure.
Following ICPI guidelines, installing a retaining wall in San Jose involves precise steps. Here’s how a general contractor ensures a compliant, durable wall.
The contractor assesses the slope, soil type (e.g., San Jose’s expansive clay), and drainage needs. They mark the wall’s footprint, considering a 1-2% slope for water runoff. In San Jose, permits are often required for walls over 4 feet, so the contractor coordinates with the Building Division ($100-500 fees). They also check utilities via DigAlert.
Benefits: Ensures compliance with zoning and safety codes.
Cost Estimate: $1,000-2,000 for design and permits.
Tips: Request a 3D design to visualize the wall’s look.
Excavate a trench at least 6 inches deep and 24 inches wide for walls up to 4 feet. For San Jose’s clay soils, remove organic material and compact to 95% Proctor density. A gravel foundation (4-6 inches) supports stability.
Benefits: Prevents settling in seismic areas.Cost Estimate: $3-6 per square foot.
Tips: Test soil compaction; add drainage pipes for wet areas.
Lay the first row of concrete blocks or stones, ensuring they’re level. Use a string line for alignment. Backfill with gravel (3/4-inch aggregate) behind the base course.
Benefits: Creates a stable foundation for the wall.Cost Estimate: $5-10 per square foot for materials.
Tips: Use laser levels for precision; check local codes for reinforcement.
Stack additional courses, staggering joints for strength. Install geogrid reinforcement every 2-3 courses for walls over 3 feet, per ICPI recommendations. Backfill with gravel and compact in 6-inch lifts.Benefits: Resists lateral pressure from San Jose’s heavy soils.
Cost Estimate: $8-15 per square foot for labor and materials.
Tips: Ensure geogrid extends 3-6 feet into the slope.
Install perforated drain pipes behind the wall, wrapped in geotextile fabric, to manage water flow. Add gravel around pipes and ensure outlets comply with San Jose’s drainage rules.
Benefits: Prevents water buildup, reducing wall stress.Cost Estimate: $2-5 per linear foot.
Tips: Slope pipes downward to direct water away.
Secure capstones with adhesive for a polished look. Compact backfill to 95% density and grade the topsoil for landscaping.Benefits: Enhances aesthetics and protects the wall.Cost Estimate: $3-7 per linear foot for capstones.Tips: Seal capstones for UV protection in San Jose’s sun.
Sloped properties require extra attention to soil stability and drainage. San Jose’s clay soils expand when wet, increasing pressure on walls. ICPI standards recommend geogrid for slopes steeper than 3:1 (horizontal:vertical). Permits are critical for walls over 4 feet or near property lines, especially in neighborhoods like Evergreen. A general contractor ensures seismic reinforcements, like deeper footings, to handle earthquakes.
Expect $70-$100 per square foot.
Average retaining wall projects cost $15,000-20,000, depending on height and length.
Correctly installing a retaining wall in San Jose to ICPI standards transforms sloped properties into safe, usable spaces tailored to our Bay Area climate. Each step, from design to drainage, ensures durability. At Bayside Pavers, our ICPI expertise and local experience—serving San Jose since 2009—deliver results with 25-year warranties. We’ve stabilized countless yards, like a terraced wall in Los Gatos that tackled erosion perfectly.
DIY is risky with retaining walls; a general contractor avoids structural failures. Call Bayside Pavers at +1 (866) 225-3512 or visit https://www.baysidepavers.com for a free quote. Share your project ideas below or ask about our services today!
ICPI standards outline materials, reinforcement, and drainage for durable segmental retaining walls, tailored for slope and load.
Yes, for walls over 4 feet or near property lines. Check with San Jose’s Building Division.
$70-100 per square foot.
Concrete blocks are durable and cost-effective for clay soils and rain.
Yes, with proper geogrid and footings per ICPI standards.
Most projects take 5-10 days, depending on size.
Contractors ensure ICPI compliance, permits, and warranties like our 25-year guarantee.
Tim McMullen, Designer at Bayside Pavers, has a background in luxury residential development and sales. His passion lies in creating outdoor spaces that draw people outside to simply enjoy. With expertise in yard design and hardscaping, Tim has helped transform numerous Bay Area properties, including in San Jose. Learn more at https://www.baysidepavers.com/tim.
Check ICPI standards at https://www.icpi.org or get inspiration from https://www.houzz.com. Explore our retaining wall services (/services/retaining-walls), patio services (/services/patio-installation), or blog (/blog).
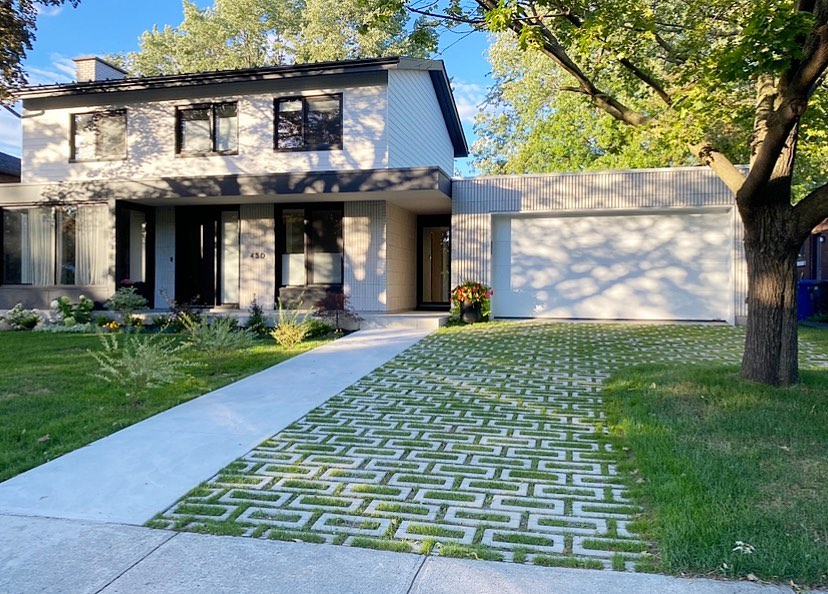
If you’re a San Jose homeowner dreaming of a stunning driveway, patio, or garden path, paver installation is a game-changer. In the Bay Area’s unique climate—dry summers, foggy mornings, and occasional winter rains—pavers are a durable, attractive choice compared to plain concrete. Plus, in a seismically active spot like San Jose, interlocking pavers flex with ground movement, reducing cracks.
At Bayside Pavers, we’ve been transforming Bay Area homes since 2009, serving neighborhoods like Willow Glen, Almaden Valley, and Downtown San Jose. As ICPI-certified pros, we follow strict Interlocking Concrete Pavement Institute standards, ensuring top-notch results backed by our 25-year warranties. With over 15 years of experience, we know San Jose’s clay-heavy soils, alluvial deposits, and local zoning rules inside out.
Paver installation isn’t just about looks—it boosts your home’s value, improves drainage to meet San Jose’s water regulations, and creates inviting outdoor spaces.
Whether you’re curious about installing driveway pavers for heavy cars or patio pavers for cozy evenings, this guide covers the ICPI-standard process, highlights differences for driveways versus paths and patios, and shares Bay Area-specific tips. Ready to get started? Call Bayside Pavers for a free design consultation.
The ICPI sets tough rules for installing interlocking concrete pavers to ensure they hold up for both foot traffic and vehicles. Industry data from the National Association of Landscape Professionals shows well-installed pavers can last 30-50 years, perfect for the Bay Area’s variable weather.
ICPI guidelines demand certified materials, like pavers with 8,000 psi strength (per ASTM C936), and precise compaction to avoid settling. For San Jose, this means designing for minimal freeze-thaw cycles but prioritizing seismic flexibility and drainage for rainy days.
Popular options include concrete pavers ($5-15 per square foot), natural stone ($10-25 per square foot), and permeable pavers ($8-20 per square foot) that align with San Jose’s eco-friendly focus.
Following ICPI Tech Spec 2, installing pavers in San Jose requires careful steps. We recommend hiring pros for compliance, but here’s how it works.
Start by assessing the site: mark excavation areas with stakes, keeping San Jose’s zoning rules (like setbacks in Almaden) in mind. Call DigAlert to check for utilities. Design a 1.5-2% slope to handle drainage during winter rains.Benefits: Avoids costly mistakes and ensures legal compliance.
Cost Estimate: $500-1,000 for surveys, included in project costs.
Tips: Use string lines for precision; pros like Bayside Pavers offer 3D design mockups.
Dig to the right depth—deeper for driveways. Clear out grass or roots, then compact the soil to 98% Proctor density. In San Jose’s clay soils, add drainage pipes if needed.
Benefits: A stable base prevents shifting in earthquake-prone areas.
Cost Estimate: $2-5 per square foot.
Tips: Lightly moisten soil for better compaction; test density for accuracy.
Lay optional geotextile fabric to stop soil mixing. Spread aggregate base in 4-6 inch layers, compacting each to 98% density using dense-graded aggregates (per ICPI Table 4).
Benefits: Supports heavy loads on San Jose’s varied soils.
Cost Estimate: $3-7 per square foot for materials.
Tips: Avoid frozen aggregates; use up to 50% recycled concrete for driveways.
Install aluminum, plastic, or concrete edges to hold pavers in place.
Benefits: Keeps pavers locked under traffic.
Cost Estimate: $1-3 per linear foot.
Tips: Secure edges into the base; critical for San Jose driveways.
Spread a 1-inch layer of concrete sand (ASTM C33) and smooth it evenly.
Benefits: Allows small adjustments for uneven ground.Cost Estimate: $1-2 per square foot.Tips: Don’t walk on screeded sand; use powered screeds for big areas.
LAYING THE PAVERS
Place pavers in patterns (herringbone for driveways), keeping joints 1/16-3/16 inches wide. Cut edges with a saw for a clean fit.
Benefits: Looks great and allows easy repairs.Cost Estimate: $5-10 per square foot for labor.
Tips: Mix pavers from different bundles for uniformity; compact within 6 feet of the laying edge.
Spread joint sand (ASTM C144), then compact with a plate vibrator until joints are full.
Benefits: Locks pavers tightly; prevents weeds.
Cost Estimate: $0.50-1 per square foot.
Tips: Seal pavers for UV protection in sunny San Jose.
ICPI standards vary depending on whether pavers are used for vehicular or pedestrian traffic. For driveways, which handle cars, the paver thickness is 3 1/8 inches (80 mm), while paths and patios, meant for foot traffic, use 2 3/8 inches (60 mm). The base thickness for driveways requires 6-12 inches of compacted aggregate, compared to 4-6 inches for paths and patios.
Compaction for driveways follows a 98% modified Proctor standard, while paths and patios use a 98% standard Proctor. Driveways typically use a herringbone pattern for better load support, whereas paths and patios allow more flexible patterns. In San Jose, driveways often require permits for drainage changes, while patios rarely need permits unless the grade is altered.
In San Jose, driveways in places like Rose Garden may require Building Division permits ($100-300 fees). Patios often use permeable pavers to meet eco-regulations.
Expect $15-30 per square foot. Average projects: $15,000-20,000.
Installing pavers in San Jose to ICPI standards delivers durable, eye-catching hardscapes perfect for our Bay Area climate and soils. From planning to final compaction, each step ensures longevity. At Bayside Pavers, our ICPI expertise and local know-how—serving San Jose since 2009—guarantee results with 25-year warranties. We’ve revamped countless yards, like a permeable patio in Willow Glen that aced winter drainage.DIY can be risky, so trust pros to avoid headaches. Call Bayside Pavers at +1 (866) 225-3512 or visit https://www.baysidepavers.com for a free quote. Share your project ideas below or ask about our services today!
ICPI standards cover materials, compaction, and processes for durable interlocking pavements, varying for pedestrian vs. vehicular use.
Driveways may need permits if changing drainage or grade; patios usually don’t. Check with San Jose’s Building Division.
$15-30 per square foot. Average projects cost $15,000-20,000.
Permeable concrete pavers excel for drainage in mild, rainy weather.
Yes, their flexibility makes them ideal for seismic zones.
Most residential projects take 3-7 days.
Yes—pros ensure compliance and warranties like our 25-year guarantee.
Tim McMullen, Designer at Bayside Pavers, has a background in luxury residential development and sales. His passion lies in creating outdoor spaces that draw people outside to simply enjoy. With expertise in yard design and hardscaping, Tim has helped transform numerous Bay Area properties, including in San Jose. Learn more at https://www.baysidepavers.com/tim.
LEARN MORECheck ICPI standards at ICPI.org or get inspiration from Houzz.
Explore our patio services (/services/patio-installation), driveway pavers (/services/driveway-pavers), or blog (/blog).
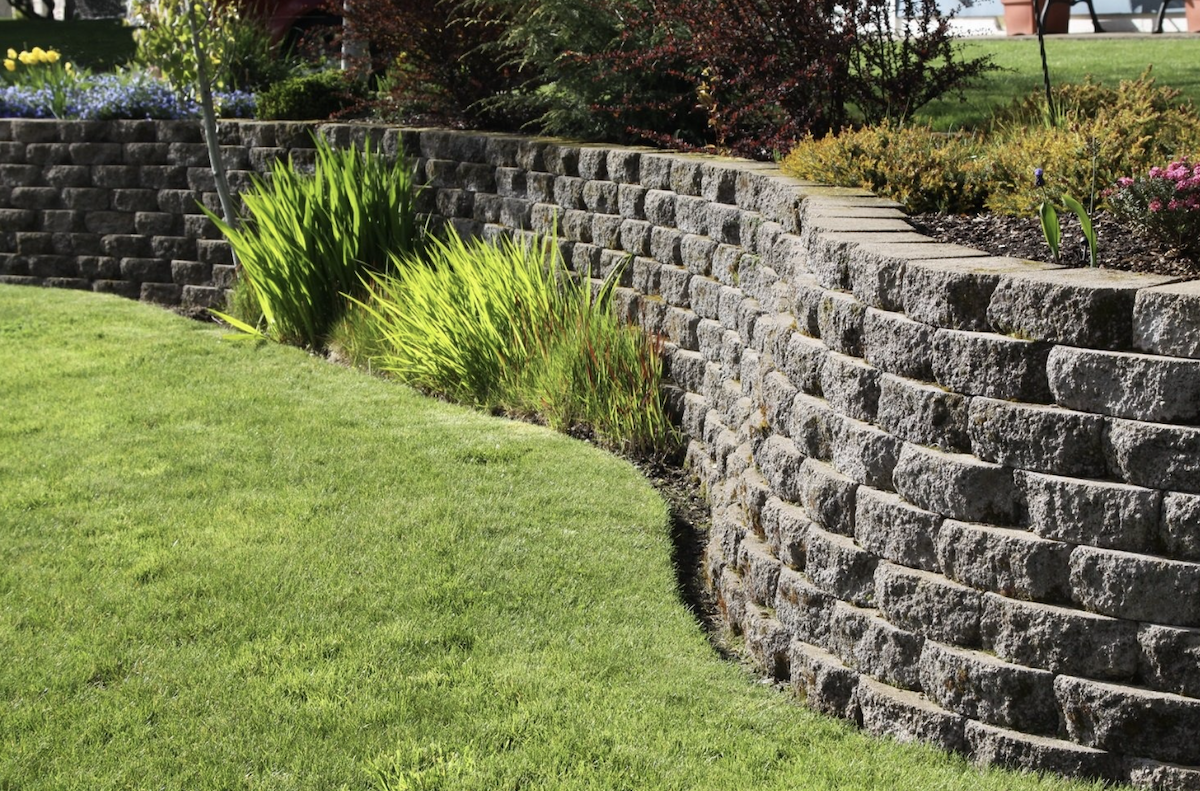
As Bayside Pavers (https://baysidepavers.com), we’re excited to guide you through the process of building your own retaining wall system. A DIY retaining wall project can transform your outdoor space, adding both functionality and beauty to your property. This comprehensive guide will educate you on what retaining walls are, their benefits, and the detailed steps to construct one yourself, ensuring a professional outcome that enhances your landscape.
Retaining walls are sturdy structures designed to hold soil in place and prevent erosion, particularly on properties with slopes, hills, or uneven terrain. These systems are essential for stabilizing landscapes, managing water runoff, and creating usable outdoor spaces. By installing a retaining wall, you can protect your yard from soil displacement, reduce the risk of structural damage, and enhance the overall aesthetic of your property. Retaining walls can vary in height, from a few feet for small garden beds to taller structures at the base of steep inclines, providing both safety and visual appeal.
Building a retaining wall offers numerous advantages beyond erosion control:
Before starting your project, careful planning is crucial to ensure a safe and durable retaining wall. Follow these steps to prepare:
Evaluate your yard to determine where a retaining wall is needed. Look for areas with slopes, hills, or erosion issues. Consider the wall’s purpose—whether it’s to level a space for a garden, create a pathway, or secure a steep incline. Measure the area to estimate the wall’s height and length, keeping in mind that walls over 4 feet tall typically require professional engineering for safety.
Contact your local building authority to verify zoning laws, permits, or restrictions for retaining walls. Some areas require permits for walls above a certain height (often 3–4 feet) or near property lines. You may also need to check for underground utilities by calling 811 before digging.
Select materials that match your aesthetic preferences and functional needs. Common options include:
You’ll need the following for your DIY project:
Follow these detailed steps to construct a sturdy and attractive retaining wall:Step 1: Mark and Excavate the Area
To keep your retaining wall looking great and functioning properly:
When to Consult a Professional
While DIY retaining walls are achievable for walls under 3–4 feet, taller or more complex structures may require professional expertise. If your project involves steep slopes, heavy soil loads, or intricate designs, contact Bayside Pavers for a consultation. Our team can provide guidance, high-quality materials, or full installation services to ensure safety and durability.Get Started with Bayside PaversBuilding a retaining wall is a rewarding DIY project that enhances your property’s beauty and functionality. With careful planning, the right materials, and these step-by-step instructions, you can create a stunning and stable addition to your landscape.
For premium retaining wall blocks and expert advice, schedule a consultation with Bayside Pavers today to bring your vision to life.
Picture a warm summer evening in your backyard, practicing your golf swing on a personal putting green while the kids laugh and join in. With Evergrass® Putting Green Turf 78 from MSI Surfaces, this vision can become reality. This premium artificial turf delivers a professional-grade golfing experience with minimal upkeep, making it a perfect addition to any home. At Bayside Pavers, we’re excited to highlight this innovative product and help you create a backyard oasis that’s both fun and functional. Let’s explore artificial turf, dive into the specifications of Evergrass® Putting Green Turf 78, and discover why a backyard putting green is the ultimate summer upgrade.
Artificial turf has transformed outdoor spaces, offering a low-maintenance, eco-friendly alternative to natural grass. Unlike traditional lawns that demand constant mowing, watering, and fertilizing, artificial turf provides year-round greenery with minimal effort. MSI’s Evergrass® collection includes various turf options tailored to different needs, from lush residential lawns to pet-friendly spaces and specialized applications like putting greens. Here’s a quick overview of the types of artificial turf and their uses:
Each turf type is designed with specific pile heights, face weights, and total weights to suit its purpose. Sports turfs like putting greens prioritize shorter piles (10–20 mm) for performance, while residential lawns have taller piles (40–45 mm) for a lusher look. All Evergrass® products come with a lifetime limited residential warranty and a 10-year commercial warranty, ensuring long-lasting quality.
The Evergrass® Putting Green Turf 78 is a game-changer for golf enthusiasts and families looking to elevate their outdoor experience. Here are its key specifications and features:
This turf is engineered to replicate the speed and texture of a professional putting green, making it perfect for practicing your short game at home. Its durability ensures it stands up to heavy foot traffic from family and friends.
A backyard putting green isn’t just for golfers—it’s a versatile addition that transforms your outdoor space into a hub of entertainment and relaxation. Here’s why Evergrass® Putting Green Turf 78 is the perfect summer upgrade:
Imagine the kids practicing putts, friends gathering for a fun game, and the sunset casting a warm glow over your maintenance-free green. It’s the perfect setting for summer memories.
Installing a backyard putting green with Evergrass® Putting Green Turf 78 starts with excavating the area, compacting the soil, and laying a weed barrier for a stable base. The turf is then cut and secured with landscape staples, with seams joined for a smooth finish. For a professional installation, the experts at Bayside Pavers can ensure a flawless result.
Ready to turn your backyard into a golfer’s paradise or a family-friendly retreat?
Evergrass® Putting Green Turf 78 from MSI Surfaces is the ideal choice for a low-maintenance, high-quality putting green that brings fun and functionality to your outdoor space. At Bayside Pavers, we specialize in creating stunning, durable landscapes that elevate your home’s appeal and usability. Our team is here to guide you from turf selection to professional installation.
Reach out to Bayside Pavers today for a free turf installation quote!
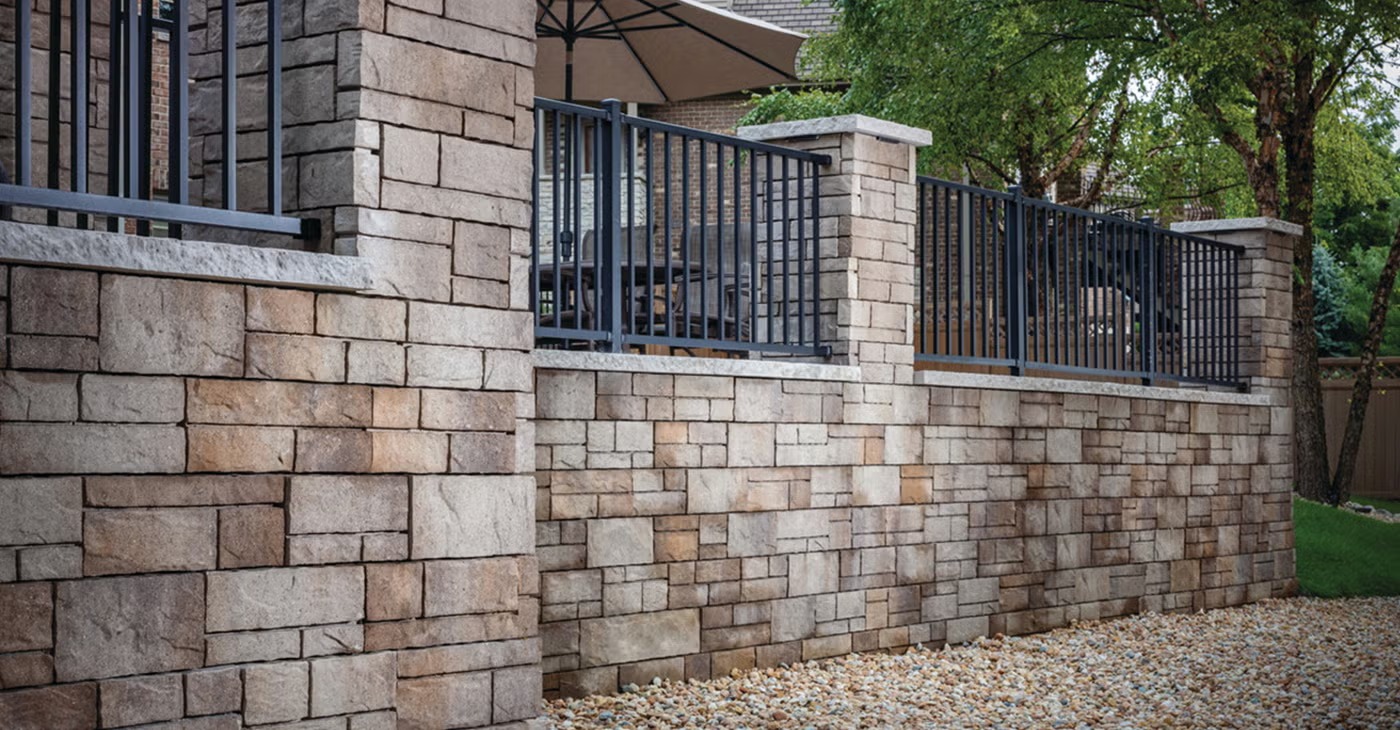
Retaining walls are a transformative addition for Orinda homeowners, taming sloped yards, preventing erosion, and creating functional outdoor spaces. In a city known for its hilly terrain and upscale suburban charm, a well-constructed retaining wall can enhance your property’s usability and aesthetic. Whether you’re in Sleepy Hollow or Oak Springs, this expert-level DIY guide provides a step-by-step blueprint for building a retaining wall tailored to Orinda’s climate and soil conditions. We’ll cover planning, structural integrity, installation, and design ideas to ensure your wall is both durable and stylish.
Orinda’s picturesque hills and lush landscapes make it a stunning place to call home, but sloped yards in neighborhoods like Glorietta or Miner Road can pose challenges. Retaining walls are the perfect solution, offering erosion control during Contra Costa County’s wet winters and creating flat, usable spaces for gardens, patios, or seating areas. This guide equips you with the knowledge to build a sturdy, stylish retaining wall that complements Orinda’s rustic yet refined aesthetic while meeting local regulations.
Retaining walls serve multiple purposes in Orinda’s hilly landscapes:
Selecting the right material ensures durability and aligns with Orinda’s aesthetic:
In Orinda, retaining walls over 4 feet tall (measured from the bottom of the footing) typically require a permit from the City of Orinda’s Planning Department. Check setback requirements and consult a structural engineer for walls exceeding 4 feet to ensure compliance with local codes. Visit orinda.ca.us for permit details and guidelines.
Proper drainage is critical to prevent water pressure buildup behind the wall, especially in Orinda’s clay-heavy soils:
A retaining wall’s longevity depends on a solid foundation and proper reinforcement, tailored to Orinda’s soil and climate conditions.FoundationA stable base prevents settling and cracking:
For walls over 3 feet, reinforcement enhances stability:
Follow these steps to build a retaining wall that withstands Orinda’s conditions and enhances your property:
Your retaining wall should enhance Orinda’s rustic yet upscale aesthetic:
Consider integrating low-voltage LED lighting along the wall’s edges to highlight its texture and improve safety for evening use, enhancing Orinda’s vibrant outdoor lifestyle.
Building a retaining wall in Orinda is a rewarding DIY project that transforms your sloped yard into a functional and beautiful space. By prioritizing a strong foundation, effective drainage, and thoughtful design, you can create a wall that withstands Orinda’s clay-rich soils and winter rains while complementing its upscale charm. Whether you’re crafting a rustic stone wall or a sleek modern design, this guide provides the tools and confidence to succeed. Start planning your project today and elevate your Orinda property!
Planning a retaining wall in Orinda? DM us with your questions for personalized advice from our team at Bayside Pavers!
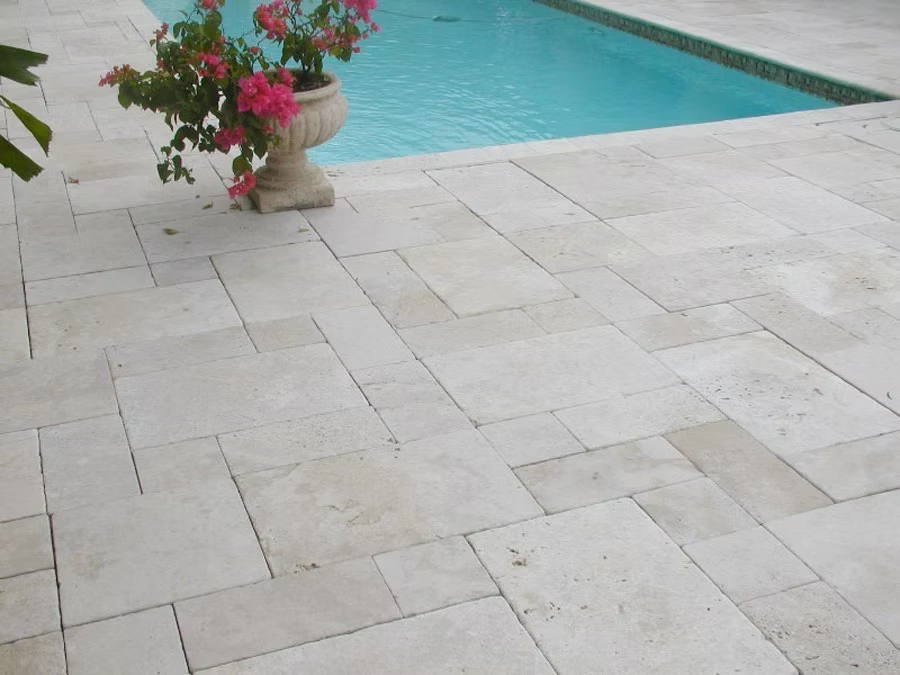
A travertine pool deck transforms your Walnut Creek backyard into a luxurious, safe, and stylish oasis, perfectly suited for the city’s warm climate and upscale suburban charm. Known for its cool-to-the-touch surface, slip-resistant texture, and elegant appearance, travertine is an ideal choice for poolside areas. Whether you’re in Northgate or Saranap, this expert-level DIY guide walks you through designing and installing a travertine pool deck that blends functionality with sophistication. We’ll cover structural integrity, installation steps, purpose, and design ideas tailored to Walnut Creek’s refined aesthetic.
Walnut Creek’s sunny weather and affluent neighborhoods make travertine pool decks a top choice. These natural stone tiles offer:
SafetyTravertine’s naturally textured surface provides excellent slip resistance, making it a safe choice for pool decks where water and foot traffic are constant. This is crucial for family-friendly Walnut Creek neighborhoods like Livorna Estates, where kids and guests frequently use the pool area.
Travertine’s earthy tones and unique veining create a timeless, sophisticated look that complements Walnut Creek’s mix of modern and Mediterranean-style homes. Whether your property leans toward sleek contemporary designs or classic estates, travertine integrates seamlessly with patios and landscaping for a cohesive outdoor space.
Travertine withstands Walnut Creek’s sun exposure and occasional winter rains, maintaining its beauty with proper care. When sealed, it resists staining from pool chemicals and wear from foot traffic, ensuring a long-lasting pool deck.
To ensure your travertine pool deck stands up to Walnut Creek’s conditions, focus on a solid foundation and proper installation techniques.
A stable base prevents cracking and settling:
Proper drainage prevents water pooling, which can damage travertine or create slippery surfaces:
Travertine’s porous nature requires sealing to protect against Walnut Creek’s sun, moisture, and pool chemicals:
Use sanded grout or polymeric sand between tiles to ensure stability and prevent shifting. Tight joints (1/8–1/4 inch) enhance both aesthetics and structural integrity.
Follow these steps to install a travertine pool deck that’s safe and stylish in Walnut Creek:
Your travertine pool deck should reflect Walnut Creek’s refined yet approachable aesthetic:
A travertine pool deck is a stunning addition to any Walnut Creek backyard, combining safety, durability, and timeless elegance. By focusing on a solid base, proper drainage, and thoughtful design, you can create a poolside retreat that enhances your outdoor lifestyle. This DIY guide equips you with the knowledge to tackle the project with confidence, from planning to sealing. Start your travertine pool deck today and transform your Walnut Creek home into a luxurious oasis!
Questions about your Walnut Creek pool deck? DM us for expert tips from our team at Bayside Pavers!
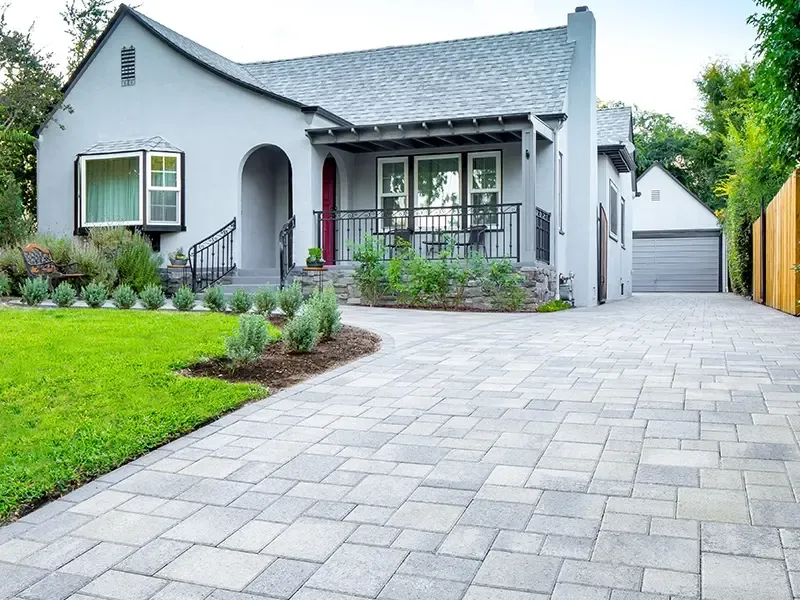
A paver driveway adds style, durability, and eco-friendly functionality to Dublin homes, perfectly complementing the city’s modern suburban vibe and family-friendly atmosphere. Whether you’re in Dublin Ranch or Schaefer Ranch, a well-installed paver driveway enhances curb appeal and withstands daily use. This expert-level DIY guide walks you through the process of installing a paver driveway tailored to Dublin’s mild climate and aesthetic. From structural integrity to design ideas, we’ll cover everything you need to create a driveway that’s both practical and visually stunning.
Dublin’s blend of contemporary homes, open spaces, and commitment to sustainability makes paver driveways an ideal choice. They offer:
A paver driveway provides reliable vehicle access, from compact cars to SUVs, while boosting property value. In Dublin, where homes often have spacious lots in areas like Tassajara Hills, pavers offer flexibility and strength, allowing for easy repairs if individual units are damaged.
Dublin’s occasional heavy rains and Alameda County’s focus on sustainable water management make permeable pavers a smart choice. These pavers allow rainwater to infiltrate the ground, reducing runoff and easing pressure on local drainage systems. They’re especially useful in flat areas like West Dublin, where heavy rains can cause pooling.
A stylish paver driveway enhances curb appeal, appealing to Dublin’s homebuyers who value both aesthetics and eco-friendly features.
To ensure your driveway withstands Dublin’s conditions and heavy use, focus on a robust foundation and proper construction techniques.
A solid base is critical for stability:
Pavers can shift under traffic without proper edging:
Choose pavers rated for vehicular use (at least 8,000 psi compressive strength). Thicker pavers (2.5–3 inches) are ideal for handling heavy loads, ensuring durability in busy neighborhoods like Dublin Boulevard.
Incorporate a 1–2% slope to direct water away from your home or garage, preventing pooling during Dublin’s wet winters. For permeable pavers, use open-graded gravel and sand to maximize water infiltration, complying with Alameda County’s stormwater regulations.
Follow these steps to install a paver driveway that meets Dublin’s standards and enhances your property:
Your driveway should reflect Dublin’s modern and family-friendly aesthetic:
Installing a paver driveway in Dublin is a rewarding DIY project that enhances your home’s functionality, value, and aesthetic. By prioritizing a strong base, proper edging, and thoughtful design, you can create a driveway that withstands Dublin’s mild climate and occasional rains while reflecting its modern suburban charm. Whether you choose permeable pavers for sustainability or a classic pattern for timeless appeal, this guide equips you to tackle the project with confidence. Start planning today and transform your Dublin home’s entrance!
Got driveway questions in Dublin? DM us for advice from our team at Bayside Pavers!
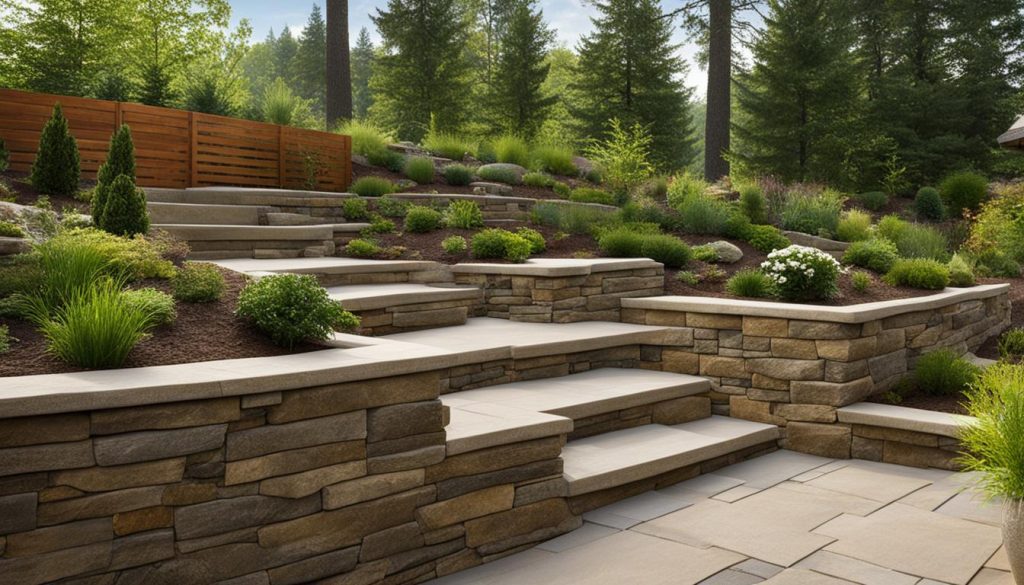
Retaining walls are a transformative addition for Atherton homeowners, taming sloped yards, preventing erosion, and creating functional outdoor spaces. In a town known for its luxurious estates and hilly terrain, a well-constructed retaining wall can enhance your property’s usability and aesthetic. Whether you’re in Lindenwood or West Atherton, this expert-level DIY guide provides a step-by-step blueprint for building a retaining wall tailored to Atherton’s climate and soil conditions. We’ll cover planning, structural integrity, installation, and design ideas to ensure your wall is both durable and stylish.
Atherton’s prestigious neighborhoods and varied terrain make retaining walls essential for many properties. These structures offer:
PurposeRetaining walls prevent soil erosion and create flat, usable spaces for landscaping or outdoor living. In Atherton, where slopes are common in areas like Lloyden Park or Fair Oaks, retaining walls are critical for protecting your yard from runoff during heavy rains. They also allow you to carve out space for gardens, entertainment areas, or play zones, maximizing your property’s potential.
Choose materials that balance durability, cost, and Atherton’s aesthetic:
Atherton’s loamy soils drain well but can still build pressure behind a wall if not managed:
In Atherton, retaining walls over 4 feet tall (measured from the bottom of the footing) require a permit from the Town of Atherton’s Building Department. Check setback requirements and consult a structural engineer for walls exceeding 4 feet to ensure compliance. Visit atherton.ca.gov for permit details.
A retaining wall’s strength depends on a solid foundation and proper reinforcement, especially in Atherton’s loamy soils.
A stable base prevents settling and cracking:
For walls over 3 feet, reinforcement enhances stability:
Follow these steps to build a retaining wall that lasts in Atherton:
Your retaining wall should enhance Atherton’s prestigious and natural aesthetic:
Consider adding low-voltage LED lighting to highlight the wall’s texture and improve safety for evening use, perfect for Atherton’s upscale outdoor lifestyle.
Constructing a retaining wall in Atherton is a rewarding DIY project that enhances your property’s functionality and beauty. By prioritizing a strong foundation, effective drainage, and thoughtful design, you can create a wall that withstands Atherton’s loamy soils and winter rains while complementing its luxurious charm.
Whether you’re aiming for a modern masterpiece or a rustic retreat, this guide equips you to succeed. Start your project today and transform your Atherton yard into a stable, stunning landscape!
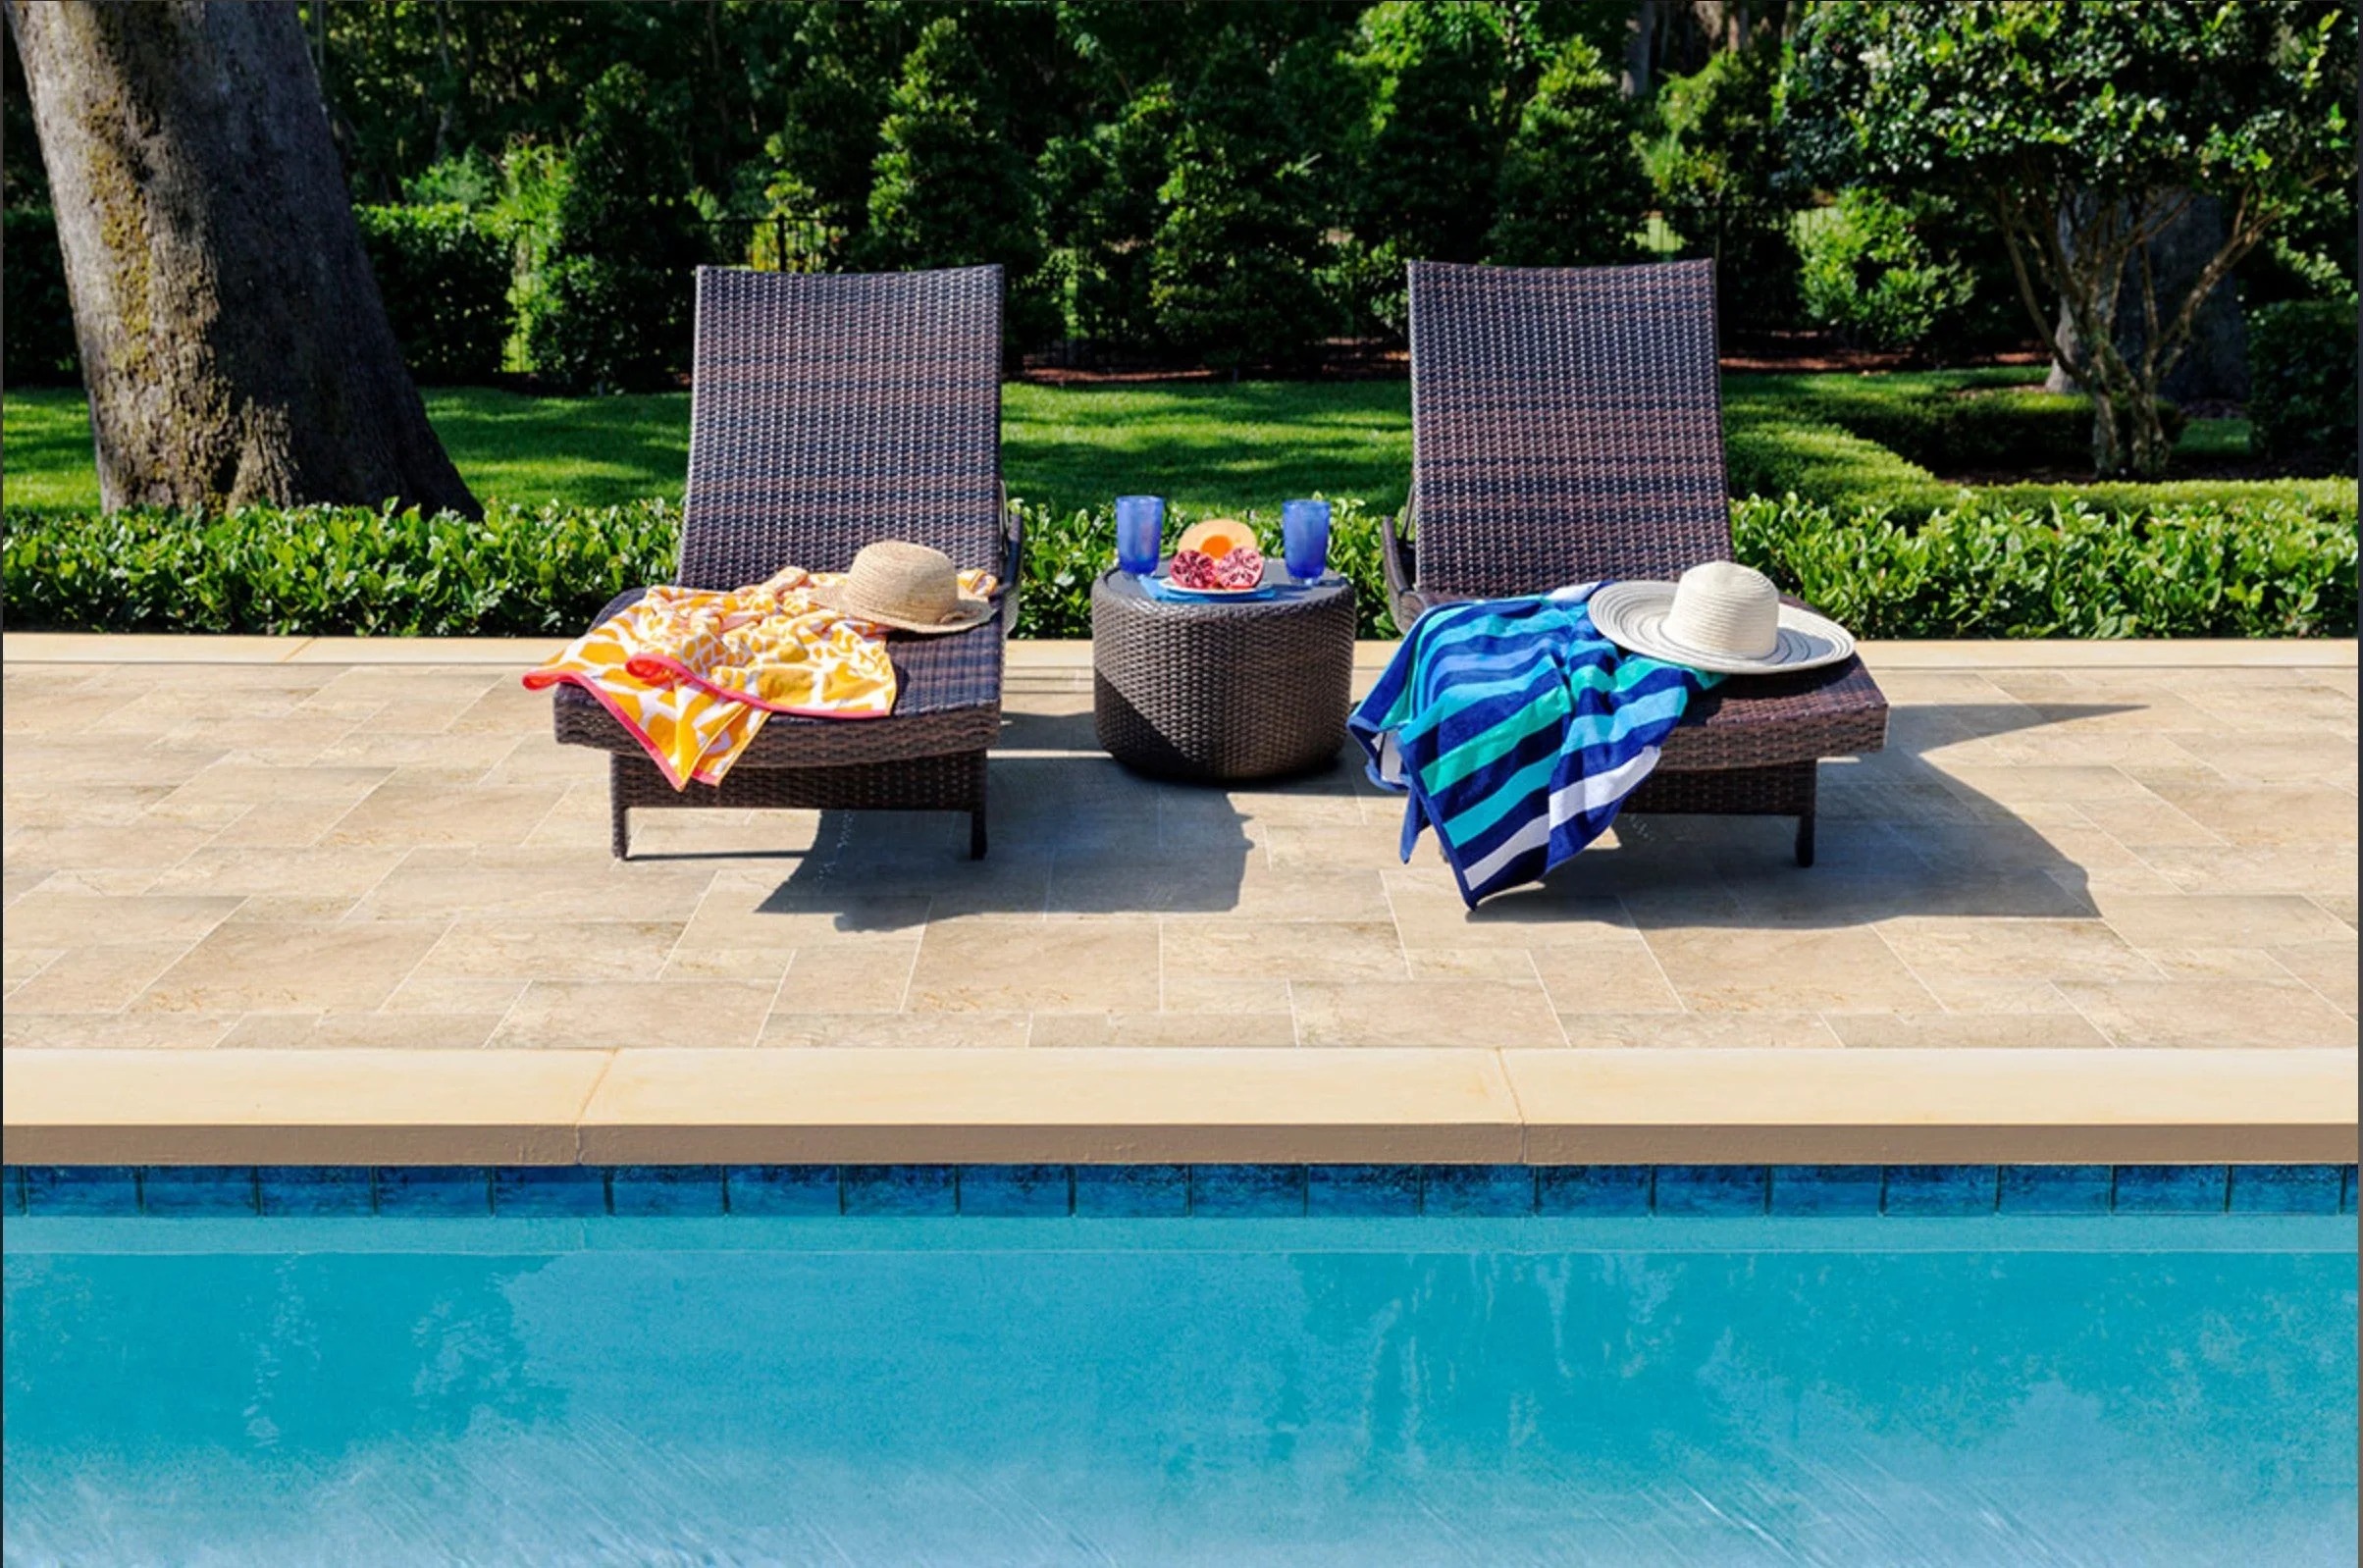
A porcelain pool deck brings sleek sophistication and durability to your Saratoga backyard, creating a safe and stylish poolside retreat. Known for its slip-resistant surface, low maintenance, and modern aesthetic, porcelain is perfect for Saratoga’s upscale homes and sunny climate. Whether you’re in Quito Village or Pride’s Crossing, this expert-level DIY guide walks you through designing and installing a porcelain pool deck that blends functionality with elegance. We’ll cover structural integrity, installation steps, purpose, and design ideas tailored to Saratoga’s luxurious suburban vibe.
Saratoga’s warm weather and affluent neighborhoods make porcelain pool decks an ideal choice. These tiles offer:
Porcelain’s textured surface provides excellent slip resistance, making it a safe choice for pool decks where water and foot traffic are constant. This is crucial for family-friendly Saratoga neighborhoods like Fruitvale, where kids and guests frequently use the pool area.
Porcelain tiles come in a variety of finishes, from wood-look to stone-effect, offering versatility to match Saratoga’s high-end, modern, and traditional homes. Whether your property leans toward sleek tech-inspired designs or classic estates, porcelain creates a polished, cohesive look that elevates your outdoor space.
Porcelain is highly resistant to pool chemicals, UV rays, and Saratoga’s occasional winter rains. Its low porosity means minimal maintenance, making it ideal for busy homeowners who want a stunning yet practical pool deck.
To ensure your porcelain pool deck withstands Saratoga’s conditions, focus on a solid foundation and proper installation techniques.
A stable base prevents cracking and shifting:
Proper drainage prevents water pooling, which can damage tiles or create slippery surfaces:
Porcelain is less porous than natural stone, requiring minimal sealing:
Use epoxy or sanded grout between tiles to ensure stability and prevent shifting. Tight joints (1/8–1/4 inch) enhance both aesthetics and structural integrity.
Follow these steps to install a porcelain pool deck that’s safe and stylish in Saratoga:
Your porcelain pool deck should reflect Saratoga’s luxurious yet approachable aesthetic:
A porcelain pool deck is a stunning addition to any Saratoga backyard, combining safety, durability, and modern elegance. By focusing on a solid base, proper drainage, and thoughtful design, you can create a poolside retreat that enhances your outdoor lifestyle. This DIY guide equips you with the knowledge to tackle the project with confidence, from planning to sealing.
Start your porcelain pool deck today and transform your Saratoga home into a luxurious oasis!Questions about your Saratoga pool deck? DM us for expert tips from our team at Bayside Pavers!
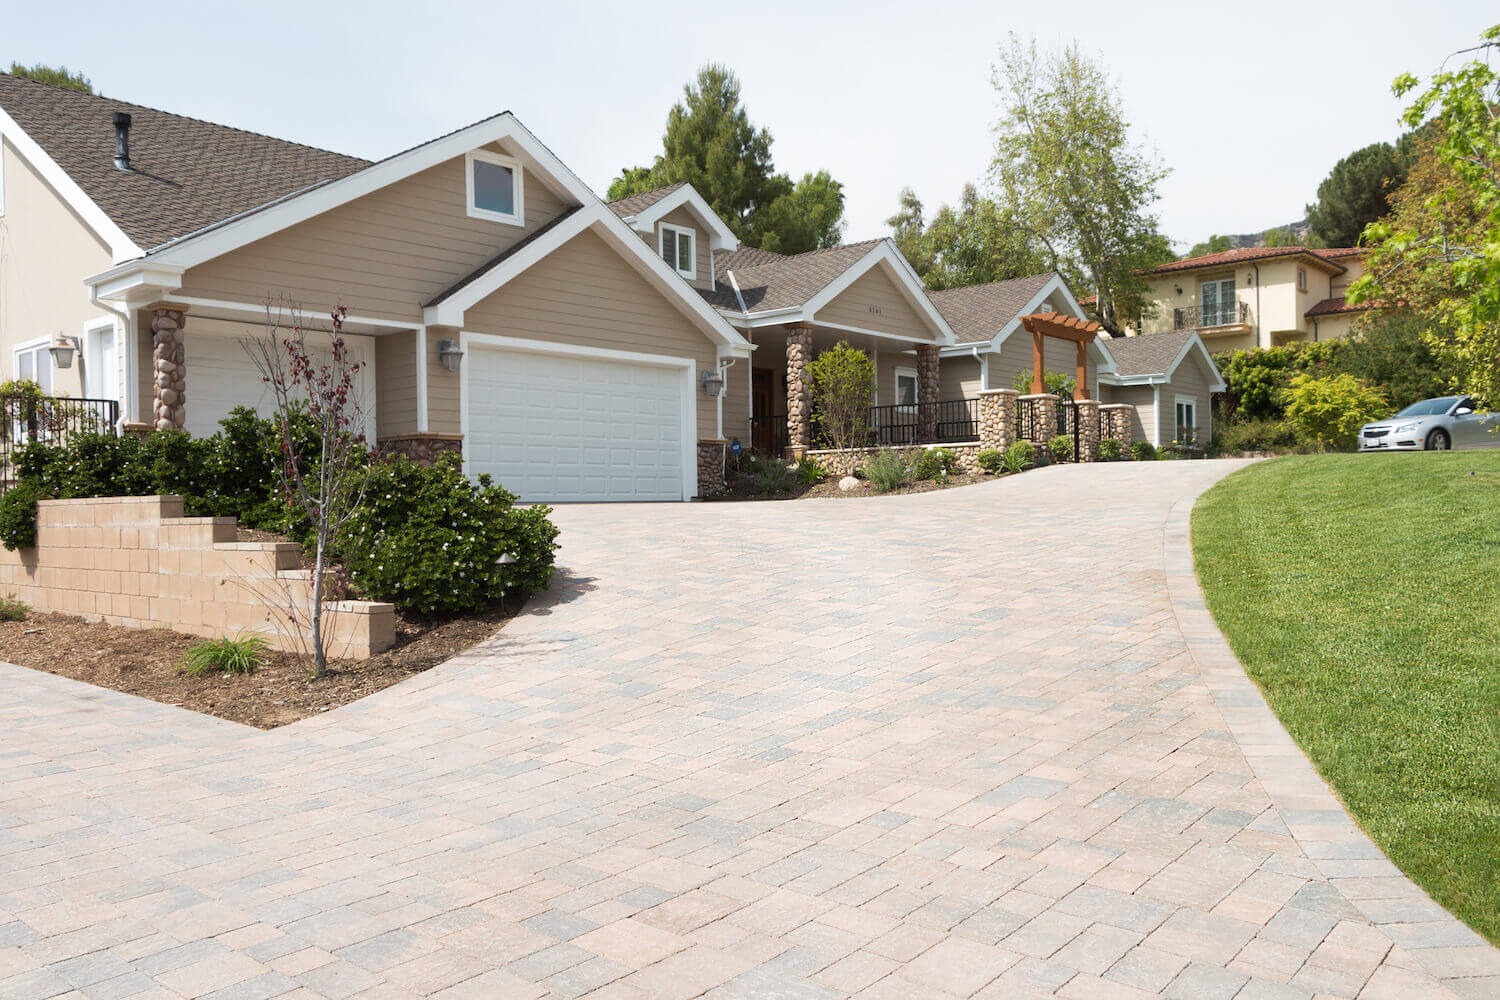
A paver driveway adds style, durability, and eco-friendly functionality to Milpitas homes, perfectly complementing the city’s vibrant suburban vibe and Silicon Valley energy. Whether you’re in Friendly Village or Sunnyhills, a well-installed paver driveway enhances curb appeal and withstands daily use. This expert-level DIY guide walks you through the process of installing a paver driveway tailored to Milpitas’ mild climate and aesthetic. From structural integrity to design ideas, we’ll cover everything you need to create a driveway that’s both practical and visually stunning.
Milpitas’ blend of modern homes, tech-driven culture, and commitment to sustainability makes paver driveways an ideal choice. They offer:
A paver driveway provides reliable vehicle access, from compact cars to SUVs, while boosting property value. In Milpitas, where homes often have compact lots in areas like Parkside, pavers offer flexibility and strength, allowing for easy repairs if individual units are damaged.
Milpitas’ occasional heavy rains and Santa Clara County’s focus on sustainable water management make permeable pavers a smart choice. These pavers allow rainwater to infiltrate the ground, reducing runoff and easing pressure on local drainage systems. They’re especially useful in flat areas like Berryessa, where heavy rains can cause pooling.
A stylish paver driveway enhances curb appeal, appealing to Milpitas’ homebuyers who value both aesthetics and eco-friendly features.
To ensure your driveway withstands Milpitas’ conditions and heavy use, focus on a robust foundation and proper construction techniques.
A solid base is critical for stability:
Pavers can shift under traffic without proper edging:
Choose pavers rated for vehicular use (at least 8,000 psi compressive strength). Thicker pavers (2.5–3 inches) are ideal for handling heavy loads, ensuring durability in busy neighborhoods like Calaveras Boulevard.
Incorporate a 1–2% slope to direct water away from your home or garage, preventing pooling during Milpitas’ wet winters. For permeable pavers, use open-graded gravel and sand to maximize water infiltration, complying with Santa Clara County’s stormwater regulations.
Follow these steps to install a paver driveway that meets Milpitas’ standards and enhances your property:
Your driveway should reflect Milpitas’ vibrant, tech-savvy aesthetic:
Installing a paver driveway in Milpitas is a rewarding DIY project that enhances your home’s functionality, value, and aesthetic. By prioritizing a strong base, proper edging, and thoughtful design, you can create a driveway that withstands Milpitas’ mild climate and occasional rains while reflecting its vibrant charm. Whether you choose permeable pavers for sustainability or a classic pattern for timeless appeal, this guide equips you to tackle the project with confidence. Start planning today and transform your Milpitas home’s entrance!
Got driveway questions in Milpitas? DM us for advice from our team at Bayside Pavers!
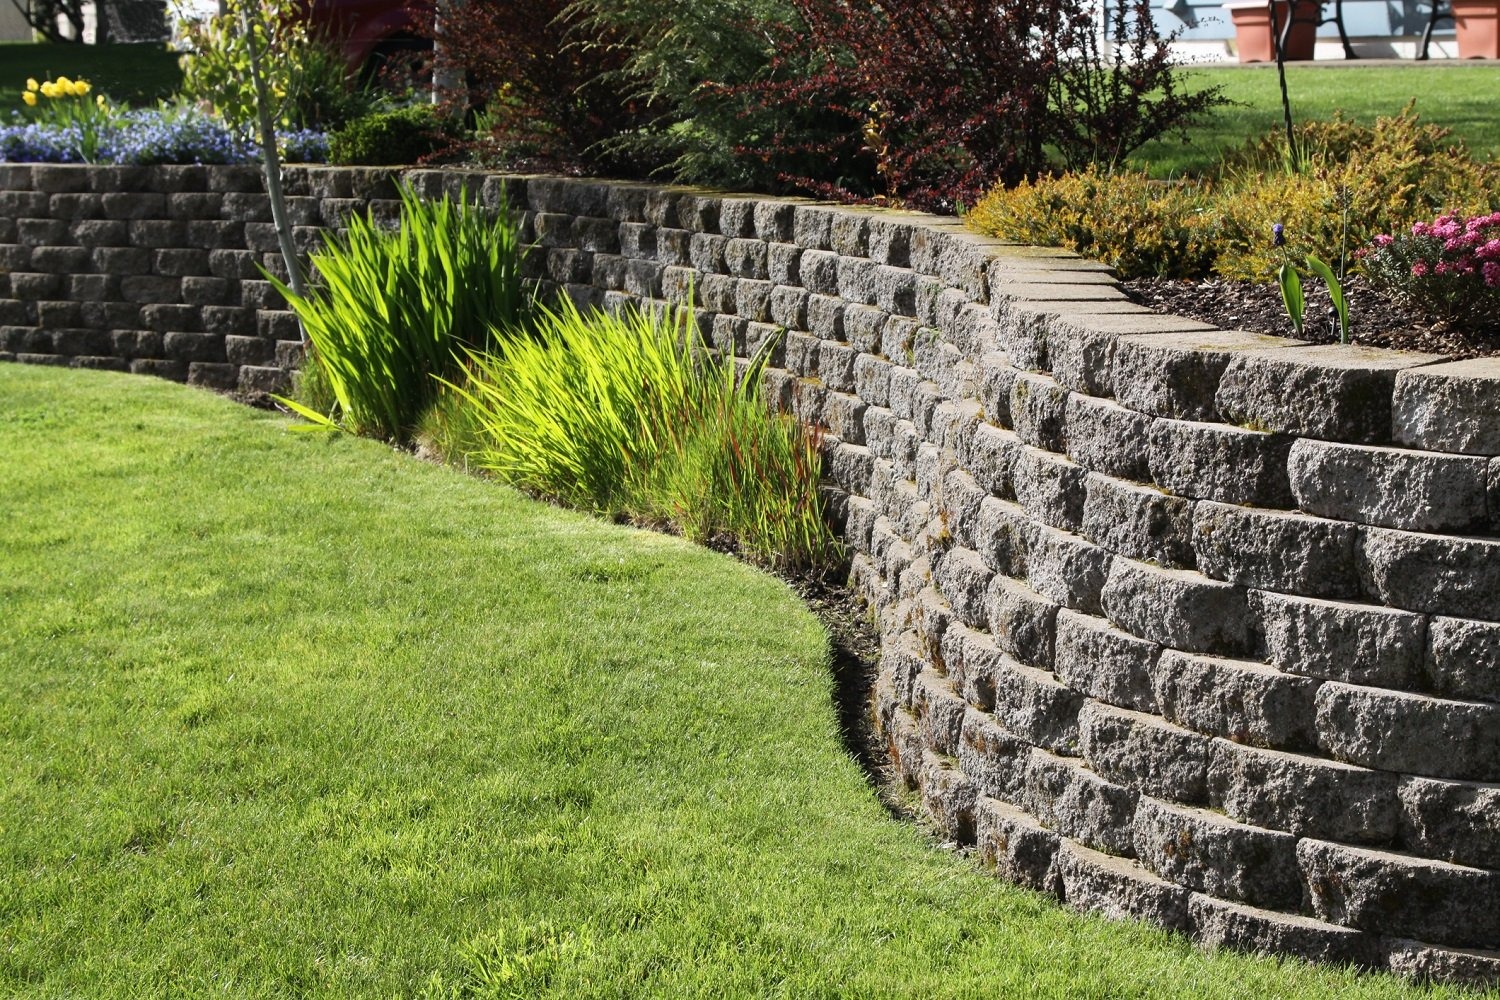
Retaining walls are a transformative addition for Los Altos homeowners, taming sloped yards, preventing erosion, and creating functional outdoor spaces. In a city known for its upscale suburban charm and hilly terrain, a well-constructed retaining wall can enhance your property’s usability and aesthetic. Whether you’re in Loyola Corners or South Los Altos, this expert-level DIY guide provides a step-by-step blueprint for building a retaining wall tailored to Los Altos’ climate and soil conditions. We’ll cover planning, structural integrity, installation, and design ideas to ensure your wall is both durable and stylish.
Los Altos’ hilly neighborhoods and Mediterranean climate make retaining walls essential for many properties. These structures offer:
Retaining walls prevent soil erosion and create flat, usable spaces for landscaping or outdoor living. In Los Altos, where slopes are common in areas like Country Club or Woodland Acres, retaining walls are critical for protecting your yard from runoff during heavy rains. They also allow you to carve out space for gardens, entertainment areas, or play zones, maximizing your property’s potential.
Choose materials that balance durability, cost, and Los Altos’ aesthetic:
Los Altos’ loamy soils drain well but can still build pressure behind a wall if not managed:
In Los Altos, retaining walls over 4 feet tall (measured from the bottom of the footing) require a permit from the City of Los Altos’ Community Development Department. Check setback requirements and consult a structural engineer for walls exceeding 4 feet to ensure compliance. Visit losaltosca.gov for permit details.
A retaining wall’s strength depends on a solid foundation and proper reinforcement, especially in Los Altos’ loamy soils.
A stable base prevents settling and cracking:
For walls over 3 feet, reinforcement enhances stability:
Follow these steps to build a retaining wall that lasts in Los Altos:
Your retaining wall should enhance Los Altos’ upscale and natural aesthetic:
Consider adding low-voltage LED lighting to highlight the wall’s texture and improve safety for evening use, perfect for Los Altos’ sophisticated outdoor lifestyle.
Constructing a retaining wall in Los Altos is a rewarding DIY project that enhances your property’s functionality and beauty. By prioritizing a strong foundation, effective drainage, and thoughtful design, you can create a wall that withstands Los Altos’ loamy soils and winter rains while complementing its upscale charm. Whether you’re aiming for a modern masterpiece or a rustic retreat, this guide equips you to succeed. Start your project today and transform your Los Altos yard into a stable, stunning landscape!
Planning a retaining wall in Los Altos? DM us with your questions for personalized advice from our team at Bayside Pavers!
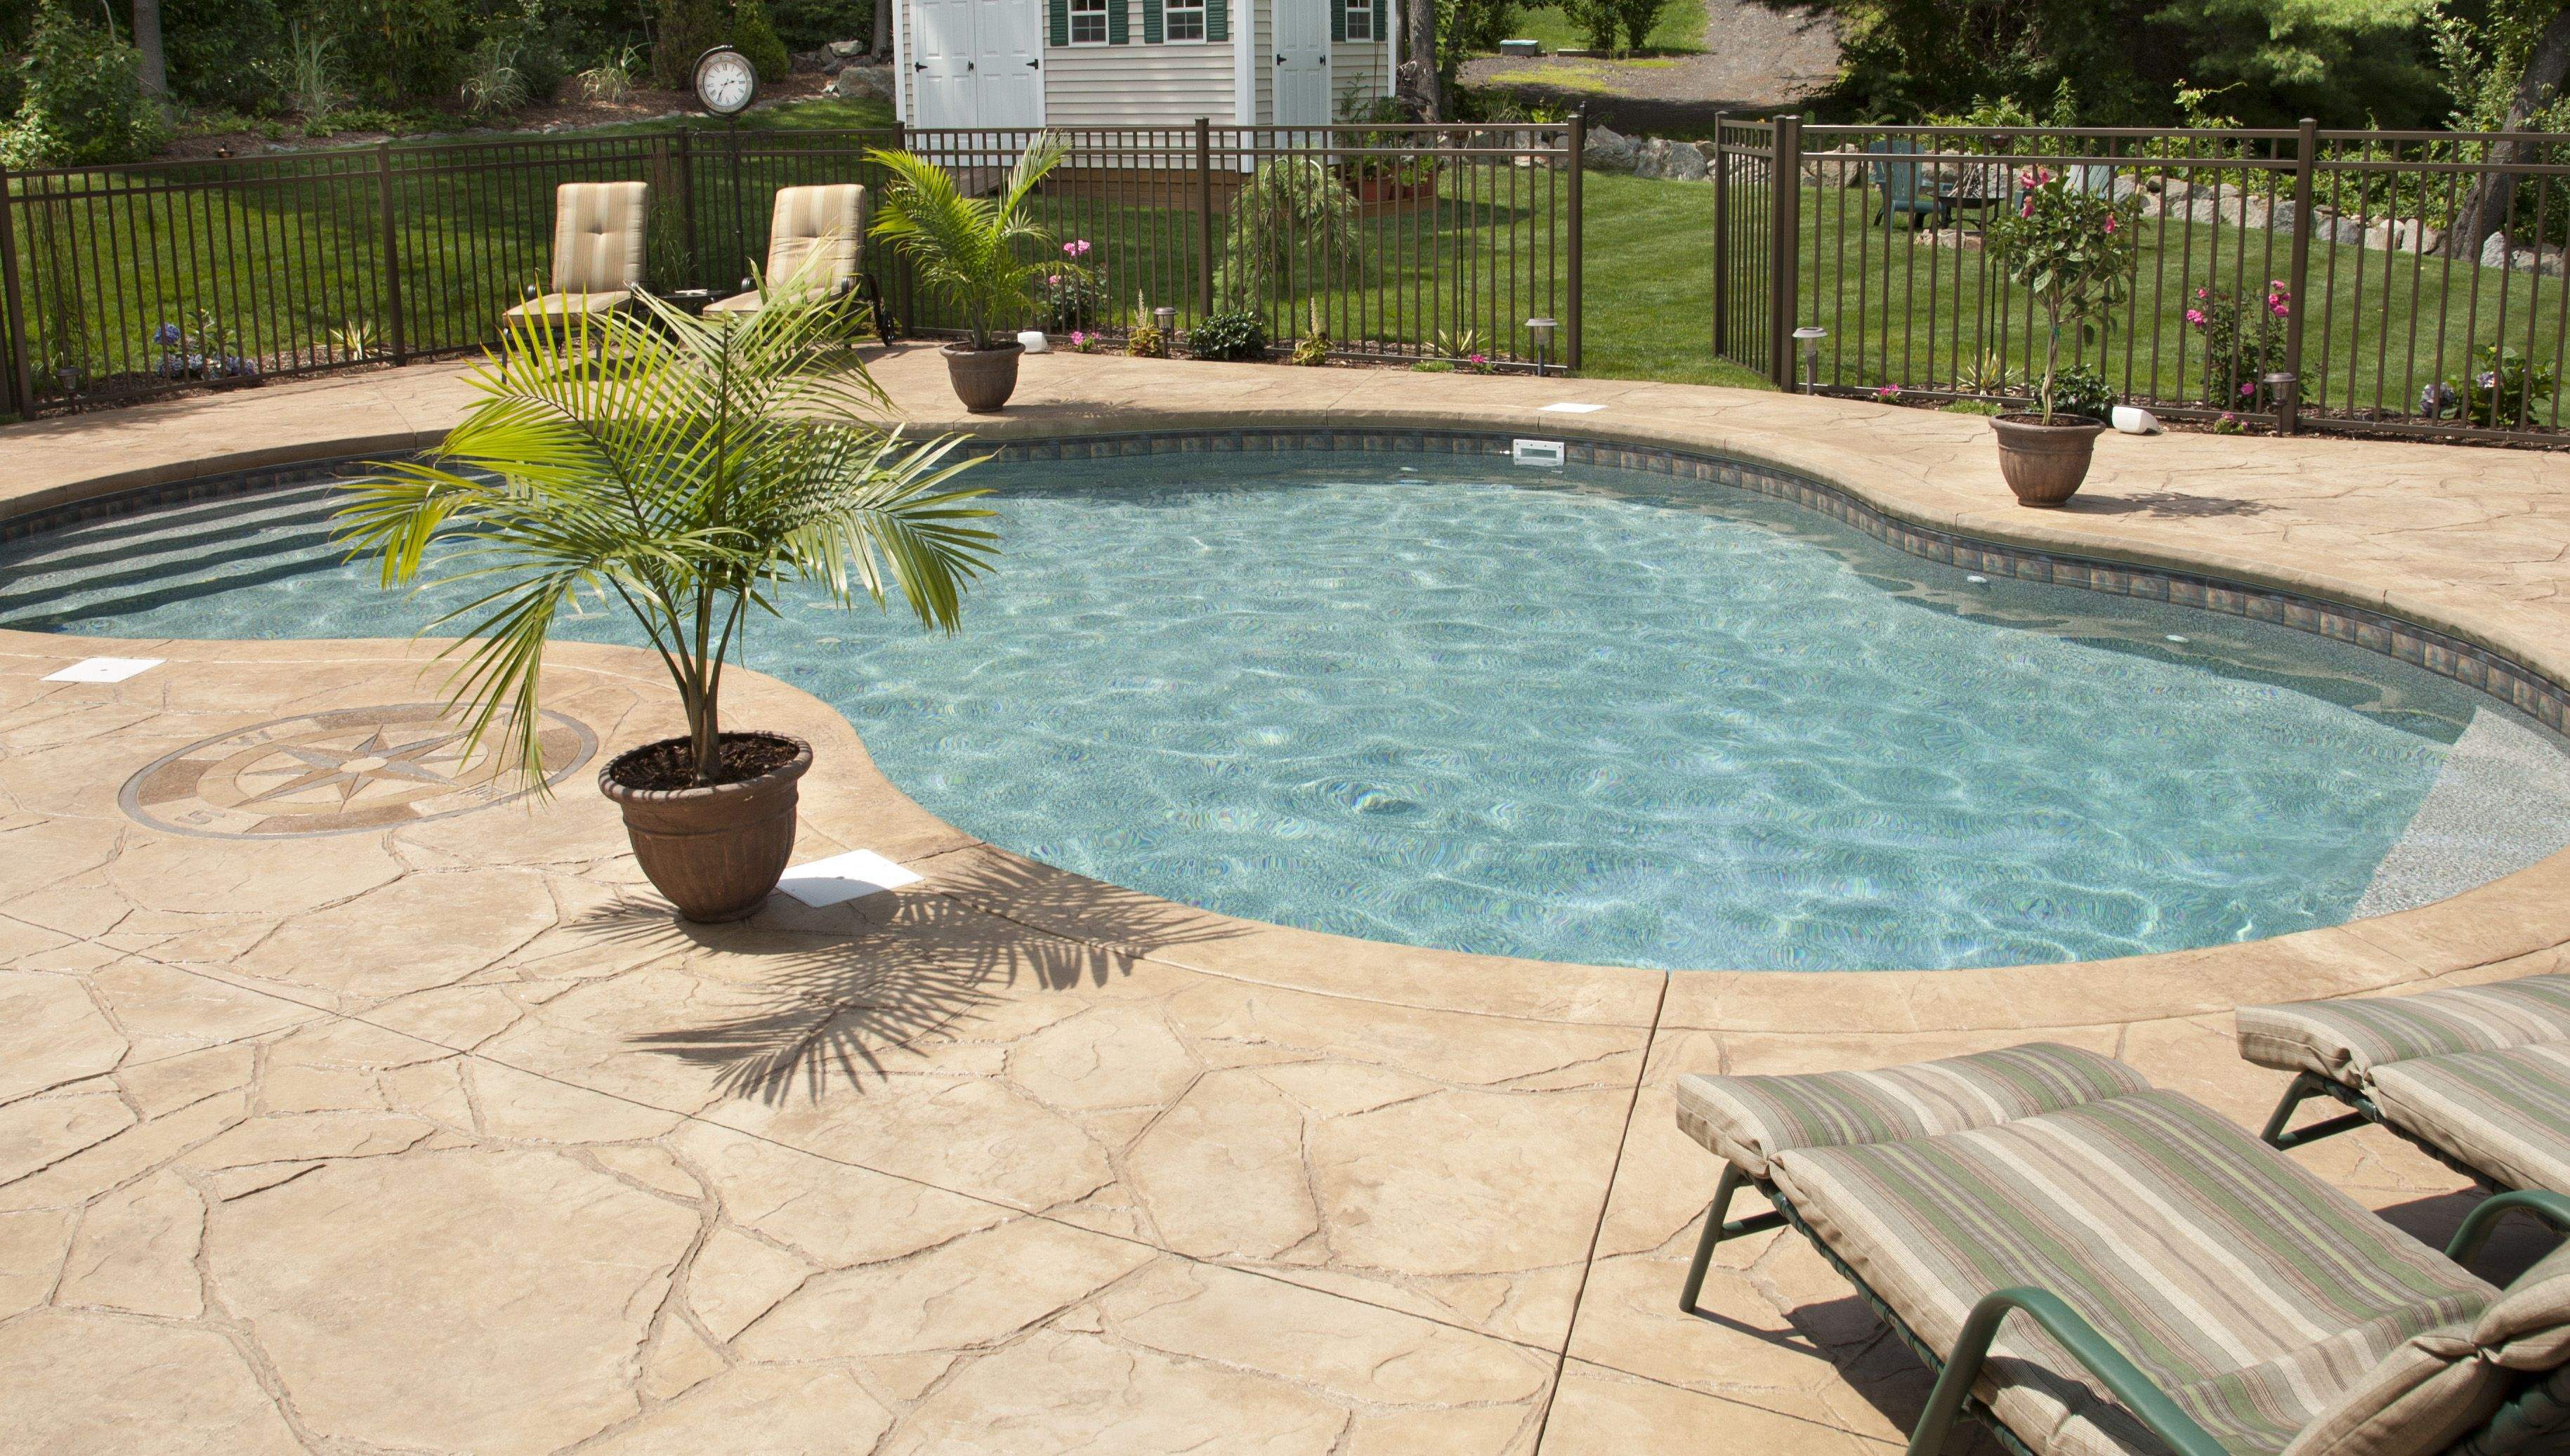
A flagstone pool deck adds natural beauty and safety to your Morgan Hill backyard, creating a stunning and functional space for relaxation and entertaining. With its unique textures and earthy tones, flagstone is an ideal choice for poolside areas in Morgan Hill’s warm, sunny climate. Whether you’re in Paradise Valley or Downtown Morgan Hill, this expert-level DIY guide walks you through designing and installing a flagstone pool deck that blends durability with style. We’ll cover structural integrity, installation steps, purpose, and design ideas tailored to Morgan Hill’s charming, rural-suburban aesthetic.
Morgan Hill’s warm weather and blend of rural charm with modern homes make flagstone pool decks a perfect fit. These natural stone pavers offer:
Flagstone’s naturally irregular surface provides excellent traction, reducing the risk of slips around the pool. This is especially important for family-friendly Morgan Hill neighborhoods like Coyote Estates, where kids and guests frequently use the pool area.AestheticsFlagstone’s organic patterns and earthy hues—ranging from warm reds to cool grays—create a timeless look that complements Morgan Hill’s diverse architectural styles, from ranch-style homes to modern estates. It seamlessly integrates with patios and landscaping for a cohesive outdoor space.
Flagstone is tough enough to handle Morgan Hill’s sunny days and occasional winter rains. When properly sealed, it resists staining from pool chemicals and wear from foot traffic, ensuring a long-lasting pool deck.
To ensure your flagstone pool deck stands up to Morgan Hill’s conditions, focus on a solid foundation and proper installation techniques.Base StabilityA stable base prevents cracking and shifting:
Proper drainage prevents water pooling, which can damage flagstone or create slippery surfaces:
Flagstone’s porous nature requires sealing to protect against Morgan Hill’s sun, moisture, and pool chemicals:
Use polymeric sand or mortar between flagstone pieces to ensure stability and prevent shifting. Irregular joints (1/4–1/2 inch) enhance the natural look while maintaining structural integrity.
Follow these steps to install a flagstone pool deck that’s safe and stylish in Morgan Hill:
Your flagstone pool deck should reflect Morgan Hill’s rustic yet refined aesthetic:
A flagstone pool deck is a stunning addition to any Morgan Hill backyard, combining safety, durability, and natural beauty. By focusing on a solid base, proper drainage, and thoughtful design, you can create a poolside retreat that enhances your outdoor lifestyle. This DIY guide equips you with the knowledge to tackle the project with confidence, from planning to sealing.
Start your flagstone pool deck today and transform your Morgan Hill home into a stylish oasis!
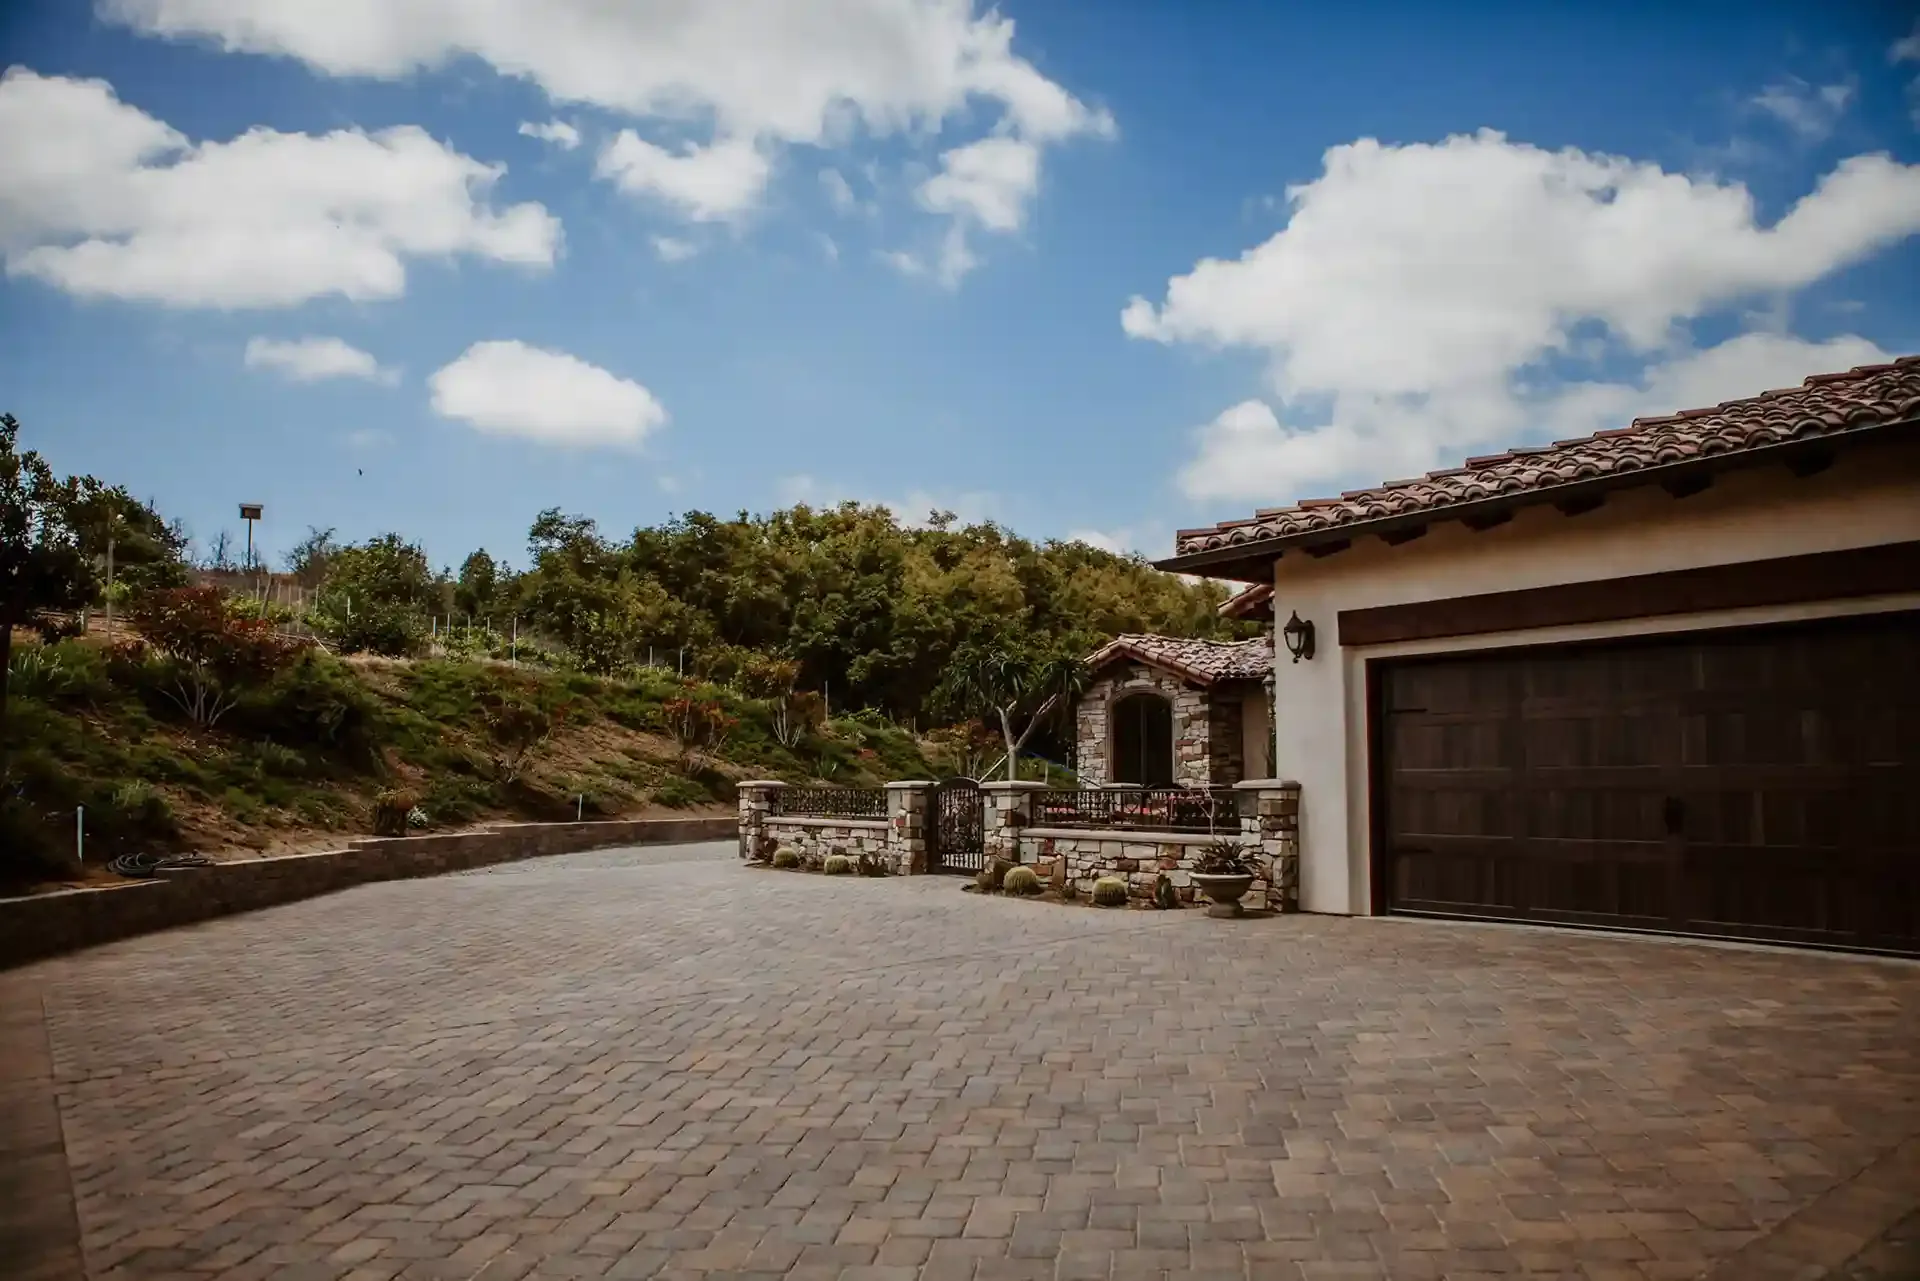
A paver driveway adds style, durability, and eco-friendly functionality to Campbell homes, perfectly complementing the city’s charming suburban vibe and Silicon Valley energy. Whether you’re in Downtown Campbell or Westmont, a well-installed paver driveway enhances curb appeal and withstands daily use. This expert-level DIY guide walks you through the process of installing a paver driveway tailored to Campbell’s mild climate and aesthetic. From structural integrity to design ideas, we’ll cover everything you need to create a driveway that’s both practical and visually stunning.
Campbell’s blend of historic charm, modern homes, and commitment to sustainability makes paver driveways an ideal choice. They offer:
A paver driveway provides reliable vehicle access, from compact cars to SUVs, while boosting property value. In Campbell, where homes often have compact lots in areas like San Tomas, pavers offer flexibility and strength, allowing for easy repairs if individual units are damaged.
Campbell’s occasional heavy rains and Santa Clara County’s focus on sustainable water management make permeable pavers a smart choice. These pavers allow rainwater to infiltrate the ground, reducing runoff and easing pressure on local drainage systems. They’re especially useful in flat areas like Union, where heavy rains can cause pooling.
A stylish paver driveway enhances curb appeal, appealing to Campbell’s homebuyers who value both aesthetics and eco-friendly features.
To ensure your driveway withstands Campbell’s conditions and heavy use, focus on a robust foundation and proper construction techniques.Base StrengthA solid base is critical for stability:
Pavers can shift under traffic without proper edging:
Choose pavers rated for vehicular use (at least 8,000 psi compressive strength). Thicker pavers (2.5–3 inches) are ideal for handling heavy loads, ensuring durability in busy neighborhoods like Bascom Avenue.DrainageIncorporate a 1–2% slope to direct water away from your home or garage, preventing pooling during Campbell’s wet winters. For permeable pavers, use open-graded gravel and sand to maximize water infiltration, complying with Santa Clara County’s stormwater regulations.
Follow these steps to install a paver driveway that meets Campbell’s standards and enhances your property:
Your driveway should reflect Campbell’s charming suburban aesthetic:
Installing a paver driveway in Campbell is a rewarding DIY project that enhances your home’s functionality, value, and aesthetic. By prioritizing a strong base, proper edging, and thoughtful design, you can create a driveway that withstands Campbell’s mild climate and occasional rains while reflecting its suburban charm. Whether you choose permeable pavers for sustainability or a classic pattern for timeless appeal, this guide equips you to tackle the project with confidence. Start planning today and transform your Campbell home’s entrance!
Got driveway questions in Campbell? DM us for advice from our team at Bayside Pavers!
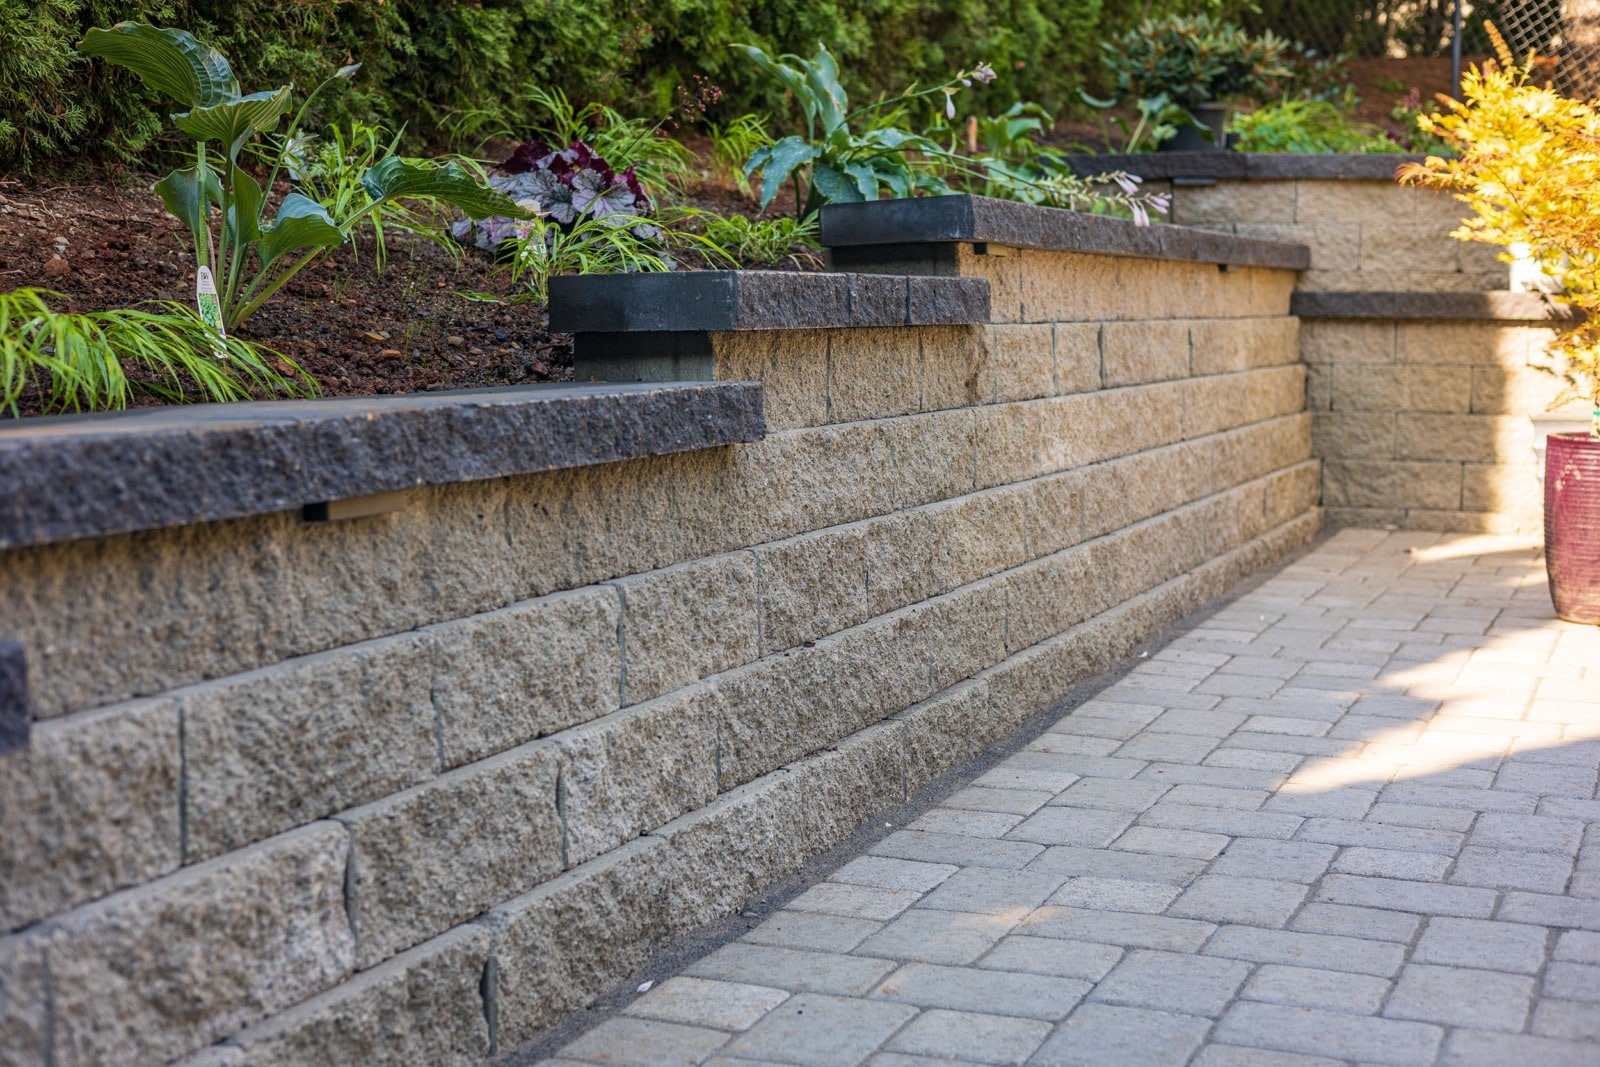
Retaining walls are a transformative addition for Alamo homeowners, taming sloped yards, preventing erosion, and creating functional outdoor spaces. In a community known for its luxurious estates and hilly terrain, a well-constructed retaining wall can enhance your property’s usability and aesthetic. Whether you’re in Round Hill or Stone Valley, this expert-level DIY guide provides a step-by-step blueprint for building a retaining wall tailored to Alamo’s climate and soil conditions. We’ll cover planning, structural integrity, installation, and design ideas to ensure your wall is both durable and stylish.
Alamo’s rolling hills and Mediterranean climate make retaining walls essential for many properties. These structures offer:
Retaining walls prevent soil erosion and create flat, usable spaces for landscaping or outdoor living. In Alamo, where steep slopes are common in areas like Livorna Estates or Westside, retaining walls are critical for protecting your yard from runoff during heavy rains. They also allow you to carve out space for gardens, entertainment areas, or play zones, maximizing your property’s potential.
Choose materials that balance durability, cost, and Alamo’s aesthetic:
Alamo’s clay-rich soils retain water, which can build pressure behind a wall and cause failure:
In Alamo, retaining walls over 4 feet tall (measured from the bottom of the footing) typically require a permit through Contra Costa County’s Department of Conservation and Development. Check setback requirements and consult a structural engineer for walls exceeding 4 feet to ensure compliance. Visit contracosta.ca.gov for permit details.
A retaining wall’s strength depends on a solid foundation and proper reinforcement, especially in Alamo’s clay-rich soils.FoundationA stable base prevents settling and cracking:
For walls over 3 feet, reinforcement enhances stability:
Follow these steps to build a retaining wall that lasts in Alamo:
Your retaining wall should enhance Alamo’s luxurious and natural aesthetic:
Consider adding low-voltage LED lighting to highlight the wall’s texture and improve safety for evening use, perfect for Alamo’s upscale outdoor lifestyle.
Constructing a retaining wall in Alamo is a rewarding DIY project that enhances your property’s functionality and beauty. By prioritizing a strong foundation, effective drainage, and thoughtful design, you can create a wall that withstands Alamo’s clay-rich soils and winter rains while complementing its luxurious charm. Whether you’re aiming for a rustic retreat or a modern masterpiece, this guide equips you to succeed. Start your project today and transform your Alamo yard into a stable, stunning landscape!
Planning a retaining wall in Alamo? DM us with your questions for personalized advice from our team at Bayside Pavers!
.png)
A travertine pool deck transforms your Los Gatos backyard into a luxurious, safe, and stylish oasis, perfectly suited for the town’s sunny climate and upscale aesthetic. Known for its cool-to-the-touch surface, slip-resistant texture, and elegant appearance, travertine is an ideal choice for poolside areas. Whether you’re in Blossom Hill or Downtown Los Gatos, this expert-level DIY guide walks you through designing and installing a travertine pool deck that blends functionality with sophistication. We’ll cover structural integrity, installation steps, purpose, and design ideas tailored to Los Gatos’ refined charm.
Los Gatos’ warm weather and affluent neighborhoods make travertine pool decks a top choice. These natural stone tiles offer:
Travertine’s naturally textured surface provides excellent slip resistance, making it a safe choice for pool decks where water and foot traffic are constant. This is crucial for family-friendly Los Gatos neighborhoods like Rinconada, where kids and guests frequently use the pool area.
Travertine’s earthy tones and unique veining create a timeless, sophisticated look that complements Los Gatos’ mix of modern and Mediterranean-style homes. Whether your property leans toward sleek contemporary designs or classic estates, travertine integrates seamlessly with patios and landscaping for a cohesive outdoor space.
Travertine withstands Los Gatos’ sun exposure and occasional winter rains, maintaining its beauty with proper care. When sealed, it resists staining from pool chemicals and wear from foot traffic, ensuring a long-lasting pool deck.
To ensure your travertine pool deck stands up to Los Gatos’ conditions, focus on a solid foundation and proper installation techniques.Base StabilityA stable base prevents cracking and settling:
Proper drainage prevents water pooling, which can damage travertine or create slippery surfaces:
Travertine’s porous nature requires sealing to protect against Los Gatos’ sun, moisture, and pool chemicals:
Use sanded grout or polymeric sand between tiles to ensure stability and prevent shifting. Tight joints (1/8–1/4 inch) enhance both aesthetics and structural integrity.
Follow these steps to install a travertine pool deck that’s safe and stylish in Los Gatos:
Your travertine pool deck should reflect Los Gatos’ refined yet relaxed aesthetic:
A travertine pool deck is a stunning addition to any Los Gatos backyard, combining safety, durability, and timeless elegance. By focusing on a solid base, proper drainage, and thoughtful design, you can create a poolside retreat that enhances your outdoor lifestyle.
This DIY guide equips you with the knowledge to tackle the project with confidence, from planning to sealing. Start your travertine pool deck today and transform your Los Gatos home into a luxurious oasis!
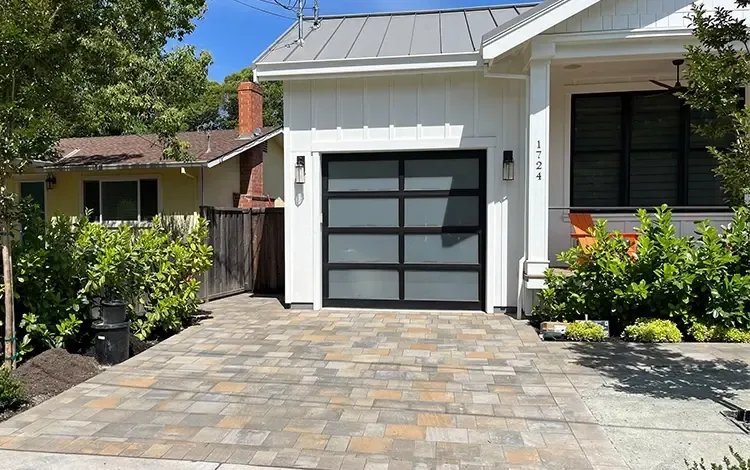
A paver driveway adds style, durability, and eco-friendly functionality to Daly City homes, perfectly complementing the city’s foggy coastal climate and urban-suburban mix. Whether you’re in Westlake or Bayshore, a well-installed paver driveway enhances curb appeal and withstands daily use. This expert-level DIY guide walks you through the process of installing a paver driveway tailored to Daly City’s moist conditions and aesthetic. From structural integrity to design ideas, we’ll cover everything you need to create a driveway that’s both practical and visually stunning.
Daly City’s coastal location, with its frequent fog and diverse neighborhoods, makes paver driveways an ideal choice. They offer:
A paver driveway provides reliable vehicle access, from compact cars to SUVs, while boosting property value. In Daly City, where homes often have compact lots in areas like Serramonte, pavers offer flexibility and strength, allowing for easy repairs if individual units are damaged.
Daly City’s foggy, wet winters and San Mateo County’s focus on sustainable water management make permeable pavers a smart choice. These pavers allow rainwater to infiltrate the ground, reducing runoff and easing pressure on local drainage systems. They’re especially useful in low-lying areas like St. Francis Heights, where heavy rains can cause pooling.
A stylish paver driveway enhances curb appeal, appealing to Daly City’s homebuyers who value both aesthetics and eco-friendly features.Section 2: Structural IntegrityTo ensure your driveway withstands Daly City’s moist climate and heavy use, focus on a robust foundation and proper construction techniques.
A solid base is critical for stability:
Pavers can shift under traffic without proper edging:
Choose pavers rated for vehicular use (at least 8,000 psi compressive strength). Thicker pavers (2.5–3 inches) are ideal for handling heavy loads, ensuring durability in busy neighborhoods like Southgate.
Incorporate a 1–2% slope to direct water away from your home or garage, preventing pooling during Daly City’s wet winters. For permeable pavers, use open-graded gravel and sand to maximize water infiltration, complying with San Mateo County’s stormwater regulations.
Follow these steps to install a paver driveway that meets Daly City’s standards and enhances your property:
Your driveway should reflect Daly City’s urban-coastal aesthetic:
Installing a paver driveway in Daly City is a rewarding DIY project that enhances your home’s functionality, value, and aesthetic. By prioritizing a strong base, proper edging, and thoughtful design, you can create a driveway that withstands the area’s foggy, wet climate while reflecting Daly City’s urban-coastal charm. Whether you choose permeable pavers for sustainability or a classic pattern for timeless appeal, this guide equips you to tackle the project with confidence.
Start planning today and transform your Daly City home’s entrance!Got driveway questions in Daly City? Comment below for expert advice from our team at Bayside Pavers!
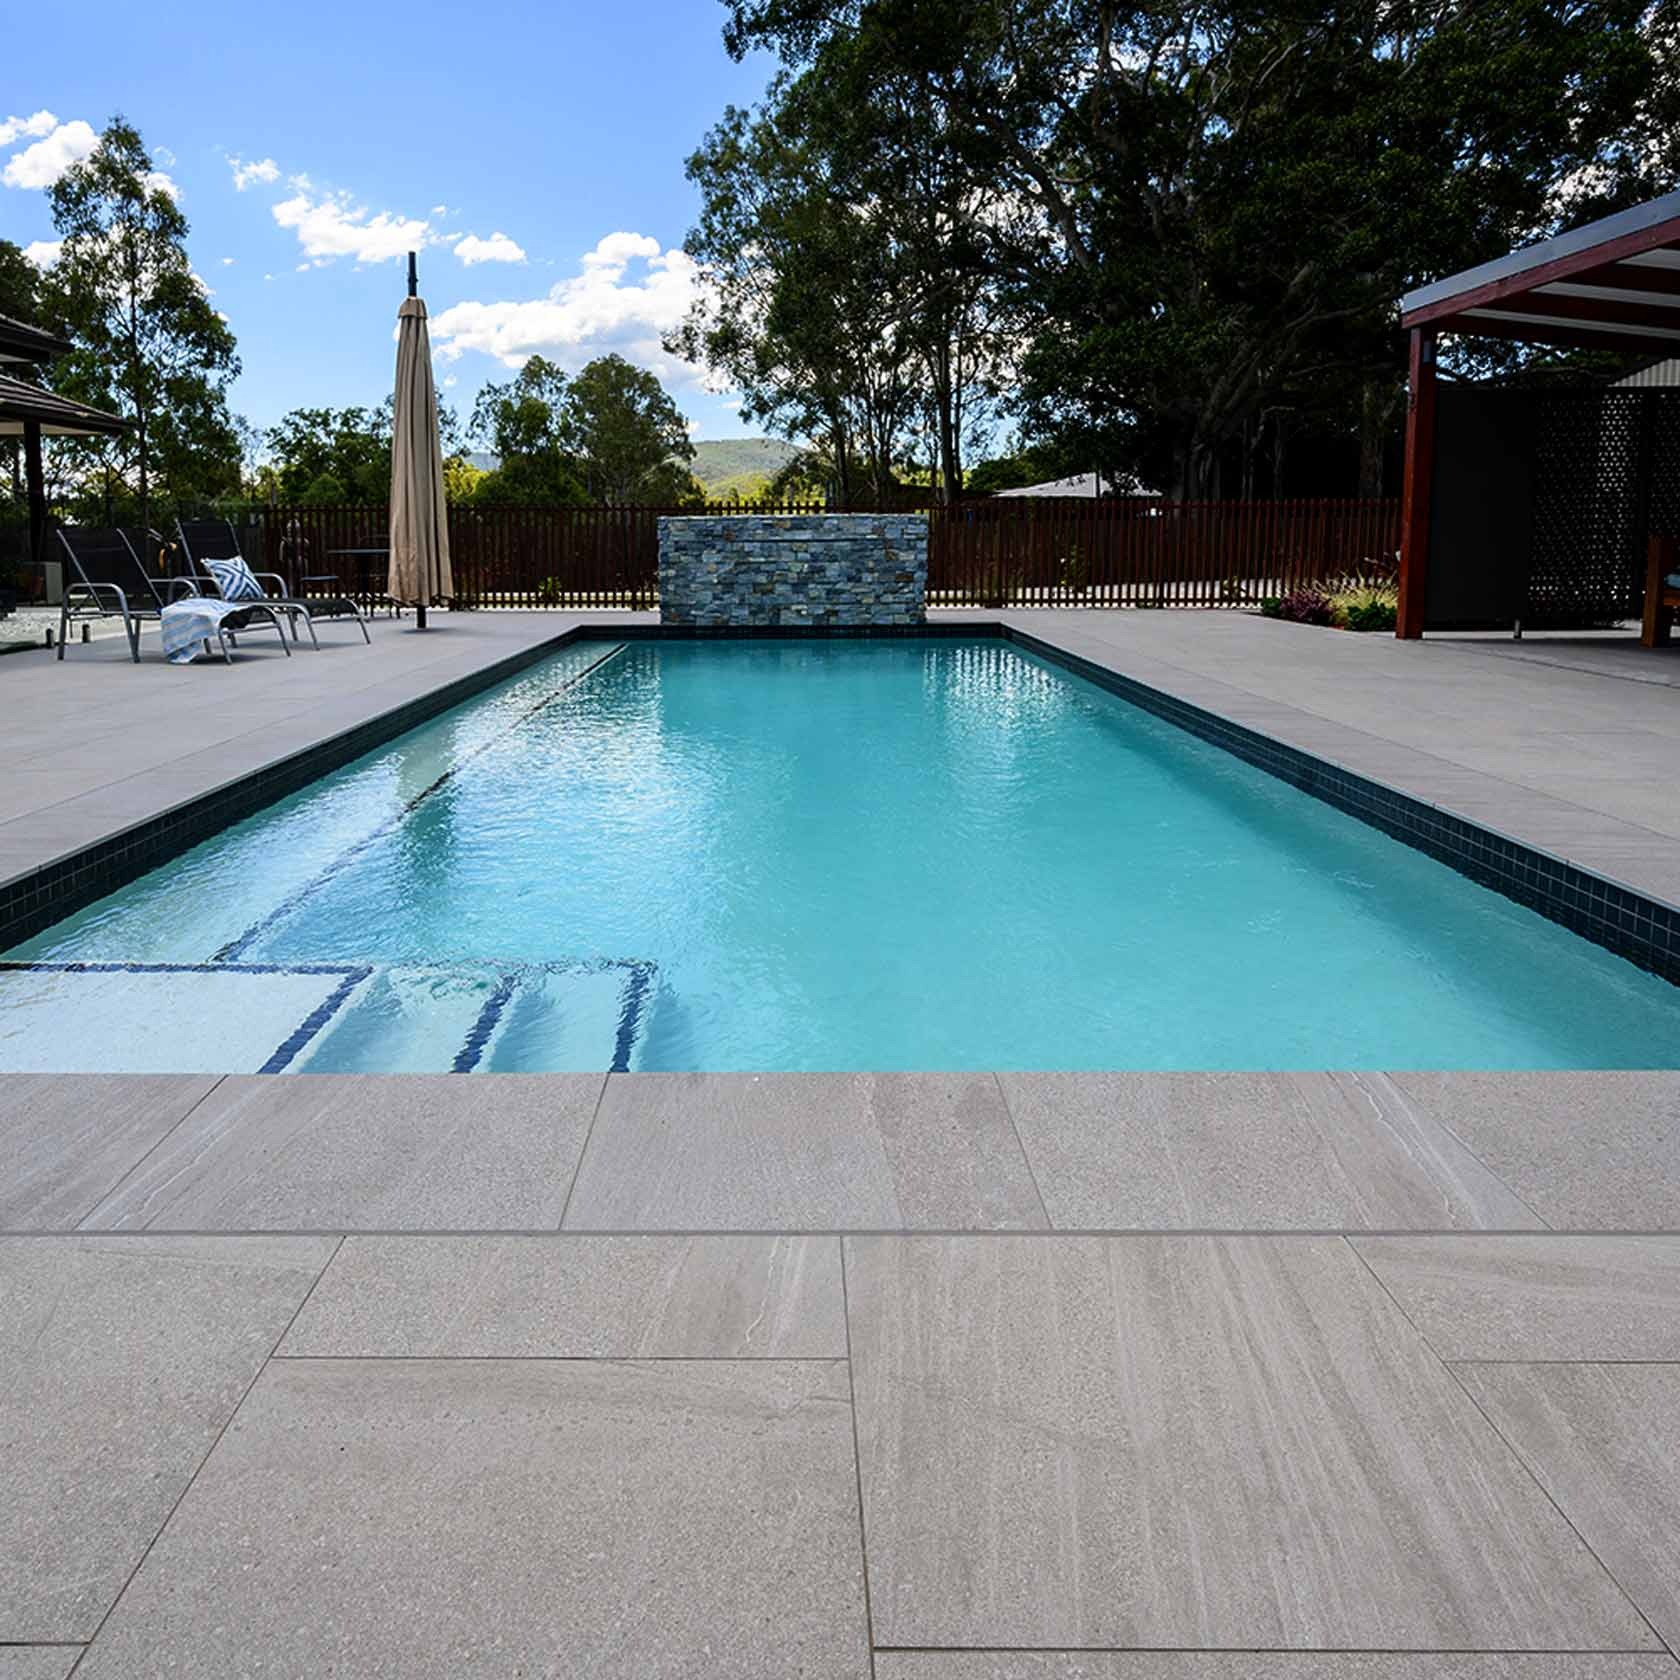
A porcelain pool deck brings a sleek, modern, and low-maintenance aesthetic to your Cupertino backyard, creating a safe and stylish poolside retreat. Known for its slip-resistant surface, durability, and versatile design options, porcelain is perfect for Cupertino’s tech-savvy homes and sunny climate. Whether you’re in Monta Vista or Rancho Rinconada, this expert-level DIY guide walks you through designing and installing a porcelain pool deck that blends functionality with sophistication. We’ll cover structural integrity, installation steps, purpose, and design ideas tailored to Cupertino’s innovative suburban vibe.
Cupertino’s warm weather and modern architectural landscape make porcelain pool decks an ideal choice. These tiles offer:
Porcelain’s textured surface provides excellent slip resistance, making it a safe choice for pool decks where water and foot traffic are constant. This is crucial for family-friendly Cupertino neighborhoods like Westside, where kids and guests frequently use the pool area.AestheticsPorcelain tiles come in a variety of finishes, from wood-look to stone-effect, offering versatility to match Cupertino’s high-tech, contemporary homes. Whether your property leans modern or has a touch of traditional charm, porcelain creates a polished, cohesive look that elevates your outdoor space.
Porcelain is highly resistant to pool chemicals, UV rays, and Cupertino’s occasional winter rains. Its low porosity means minimal maintenance, making it ideal for busy homeowners who want a stunning yet practical pool deck.
To ensure your porcelain pool deck withstands Cupertino’s conditions, focus on a solid foundation and proper installation techniques.
A stable base prevents cracking and shifting:
Proper drainage prevents water pooling, which can damage tiles or create slippery surfaces:
Porcelain is less porous than natural stone, requiring minimal sealing:
Use epoxy or sanded grout between tiles to ensure stability and prevent shifting. Tight joints (1/8–1/4 inch) enhance both aesthetics and structural integrity.
Follow these steps to install a porcelain pool deck that’s safe and stylish in Cupertino:
Your porcelain pool deck should reflect Cupertino’s tech-forward yet approachable aesthetic:
A porcelain pool deck is a stunning addition to any Cupertino backyard, combining safety, durability, and modern elegance. By focusing on a solid base, proper drainage, and thoughtful design, you can create a poolside retreat that enhances your outdoor lifestyle. This DIY guide equips you with the knowledge to tackle the project with confidence, from planning to sealing. Start your porcelain pool deck today and transform your Cupertino home into a luxurious oasis!
Questions about your Cupertino pool deck? Comment below for expert tips from our team at Bayside Pavers!
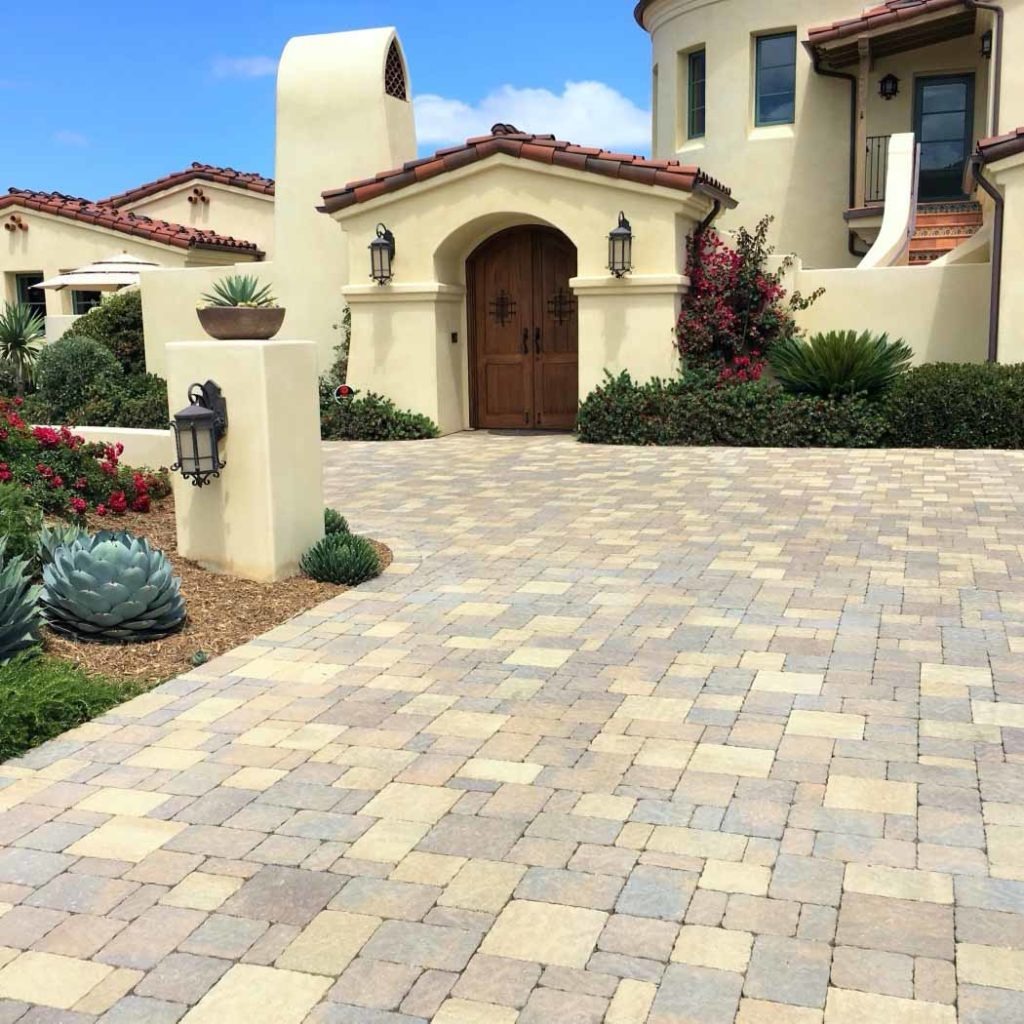
A paver driveway adds charm, durability, and eco-friendly functionality to Novato homes, perfectly complementing the city’s suburban landscapes and Marin County’s commitment to sustainability. Whether you’re in Ignacio or Indian Valley, a well-installed paver driveway enhances curb appeal and withstands daily use. This expert-level DIY guide walks you through the process of installing a paver driveway tailored to Novato’s mild climate and varied terrain. From structural integrity to design ideas, we’ll cover everything you need to create a driveway that’s both practical and visually stunning.
Novato’s blend of rolling hills, forested neighborhoods, and environmental consciousness makes paver driveways an ideal choice. They offer:
A paver driveway provides reliable vehicle access, from compact cars to SUVs, while boosting property value. In Novato, where driveways often navigate gentle slopes in areas like Pacheco Valle, pavers offer flexibility and strength, allowing for easy repairs if individual units are damaged.
Novato’s wet winters and Marin County’s focus on sustainable water management make permeable pavers a smart choice. These pavers allow rainwater to infiltrate the ground, reducing runoff and easing pressure on local drainage systems. They’re especially useful in low-lying areas like Hamilton, where heavy rains can cause pooling.
A stylish paver driveway enhances curb appeal, appealing to Novato’s homebuyers who value both aesthetics and eco-friendly features.
To ensure your driveway withstands Novato’s hilly terrain and moist climate, focus on a robust foundation and proper construction techniques.
A solid base is critical for stability, especially on Novato’s varied terrain:
Pavers can shift under traffic without proper edging:
Choose pavers rated for vehicular use (at least 8,000 psi compressive strength). Thicker pavers (2.5–3 inches) are ideal for handling heavy loads, ensuring durability in high-traffic areas like Ignacio Boulevard.
Incorporate a 1–2% slope to direct water away from your home or garage, preventing pooling during Novato’s wet winters. For permeable pavers, use open-graded gravel and sand to maximize water infiltration, complying with Marin County’s stormwater regulations.
Follow these steps to install a paver driveway that meets Novato’s standards and enhances your property:
Your driveway should reflect Novato’s natural beauty and suburban aesthetic:
Installing a paver driveway in Novato is a rewarding DIY project that enhances your home’s functionality, value, and aesthetic. By prioritizing a strong base, proper edging, and thoughtful design, you can create a driveway that withstands Novato’s hilly terrain and wet winters while reflecting its natural charm. Whether you choose permeable pavers for sustainability or a classic pattern for timeless appeal, this guide equips you to tackle the project with confidence. Start planning today and transform your Novato home’s entrance!
Got driveway questions in Novato? DM us for advice from our team at Bayside Pavers!
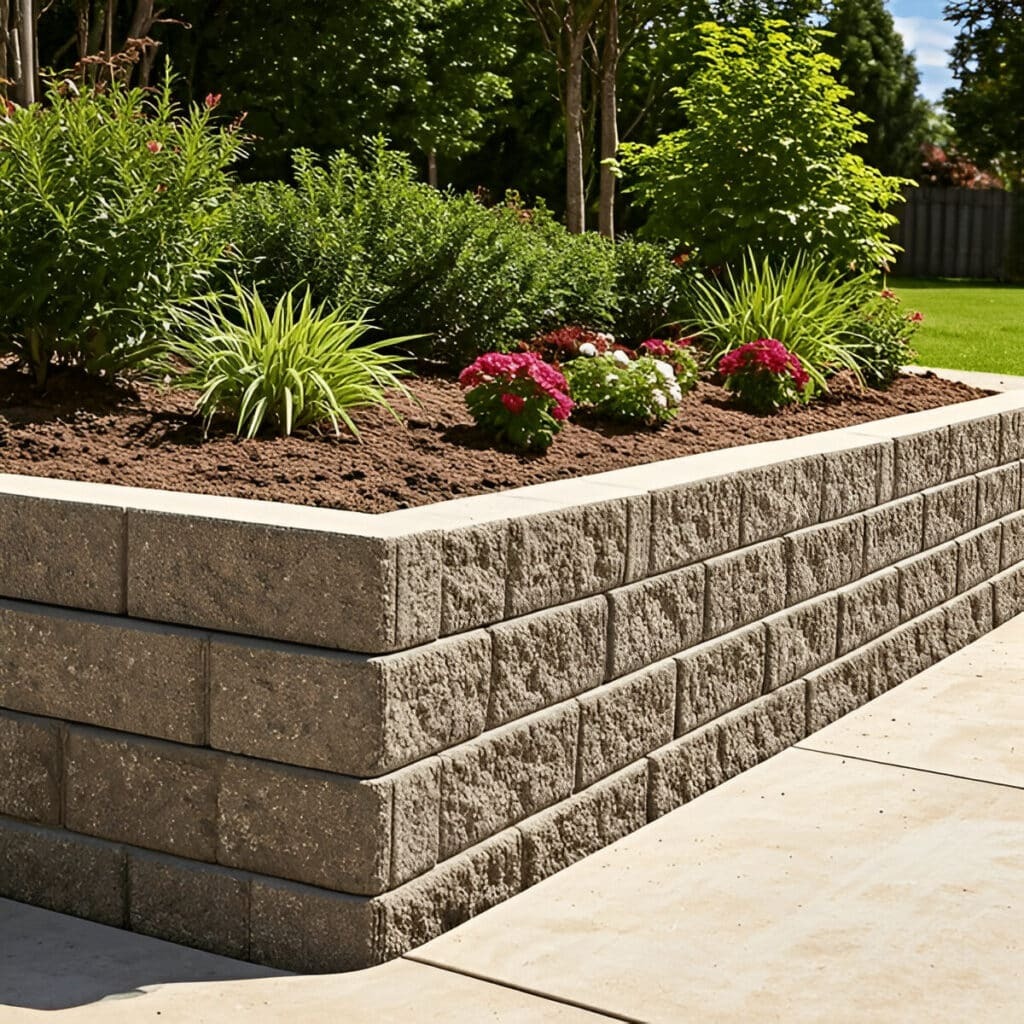
Retaining walls are a vital addition for Burlingame homeowners looking to manage sloped yards, prevent erosion, and create functional outdoor spaces. In a city known for its hilly terrain and upscale suburban charm, a well-constructed retaining wall can enhance your property’s usability and aesthetic. Whether you’re in Burlingame Hills or Easton Addition, this expert-level DIY guide provides a step-by-step blueprint for building a retaining wall tailored to Burlingame’s coastal climate and soil conditions. We’ll cover planning, structural integrity, installation, and design ideas to ensure your wall is both durable and stylish.
Burlingame’s hilly neighborhoods and proximity to the San Francisco Bay make retaining walls essential for many properties. These structures offer:
Retaining walls prevent soil erosion and create flat, usable spaces for landscaping or outdoor living. In Burlingame, where slopes are common in areas like Burlingame Terrace or Mills Estates, retaining walls are critical for protecting your yard from runoff during heavy rains. They also allow you to carve out space for gardens, entertainment areas, or play zones, maximizing your property’s potential.
Choose materials that balance durability, cost, and Burlingame’s aesthetic:
Burlingame’s loamy soils drain well but can still build pressure behind a wall if not managed:
In Burlingame, retaining walls over 4 feet tall (measured from the bottom of the footing) require a permit from the City of Burlingame’s Building Division. Check setback requirements and consult a structural engineer for walls exceeding 4 feet to ensure compliance. Visit burlingame.org for permit details.
A retaining wall’s strength depends on a solid foundation and proper reinforcement, especially in Burlingame’s loamy soils and moist climate.FoundationA stable base prevents settling and cracking:
For walls over 3 feet, reinforcement enhances stability:
Follow these steps to build a retaining wall that lasts in Burlingame:
Your retaining wall should enhance Burlingame’s upscale coastal aesthetic:
Consider adding low-voltage LED lighting to highlight the wall’s texture and improve safety for evening use, perfect for Burlingame’s vibrant outdoor lifestyle.
Constructing a retaining wall in Burlingame is a rewarding DIY project that enhances your property’s functionality and beauty. By prioritizing a strong foundation, effective drainage, and thoughtful design, you can create a wall that withstands Burlingame’s loamy soils and coastal climate while complementing its upscale charm. Whether you’re aiming for a modern masterpiece or a rustic retreat, this guide equips you to succeed.
Start your project today and transform your Burlingame yard into a stable, stunning landscape!Planning a retaining wall in Burlingame? Comment with your questions, and our team at Bayside Pavers will help you get started!

A flagstone pool deck adds natural beauty and safety to your Lafayette backyard, creating a stunning and functional space for relaxation and entertaining. With its unique textures and earthy tones, flagstone is an ideal choice for poolside areas in Lafayette’s warm, sunny climate. Whether you’re in Happy Valley or Reliez Valley, this expert-level DIY guide walks you through designing and installing a flagstone pool deck that blends durability with style. We’ll cover structural integrity, installation steps, purpose, and design ideas tailored to Lafayette’s upscale suburban aesthetic.
Lafayette’s Mediterranean climate and affluent neighborhoods make flagstone pool decks a perfect fit. These natural stone pavers offer:
Flagstone’s naturally irregular surface provides excellent traction, reducing the risk of slips around the pool. This is especially important for family-friendly Lafayette neighborhoods like Acalanes Ridge, where kids and guests frequently use the pool area.
Flagstone’s organic patterns and earthy hues—ranging from warm reds to cool grays—create a timeless look that complements Lafayette’s diverse architectural styles, from contemporary estates to craftsman homes. It seamlessly integrates with patios and landscaping for a cohesive outdoor space.
Flagstone is tough enough to handle Lafayette’s sunny days and occasional winter rains. When properly sealed, it resists staining from pool chemicals and wear from foot traffic, ensuring a long-lasting pool deck.
To ensure your flagstone pool deck stands up to Lafayette’s conditions, focus on a solid foundation and proper installation techniques.Base StabilityA stable base prevents cracking and shifting:
Proper drainage prevents water pooling, which can damage flagstone or create slippery surfaces:
Flagstone’s porous nature requires sealing to protect against Lafayette’s sun, moisture, and pool chemicals:
Use polymeric sand or mortar between flagstone pieces to ensure stability and prevent shifting. Irregular joints (1/4–1/2 inch) enhance the natural look while maintaining structural integrity.
Follow these steps to install a flagstone pool deck that’s safe and stylish in Lafayette:
Your flagstone pool deck should reflect Lafayette’s upscale yet relaxed aesthetic:
A flagstone pool deck is a stunning addition to any Lafayette backyard, combining safety, durability, and natural beauty. By focusing on a solid base, proper drainage, and thoughtful design, you can create a poolside retreat that enhances your outdoor lifestyle. This DIY guide equips you with the knowledge to tackle the project with confidence, from planning to sealing. Start your flagstone pool deck today and transform your Lafayette home into a stylish oasis!
Questions about your Lafayette pool deck? DM us for guidance from our team at Bayside Pavers!
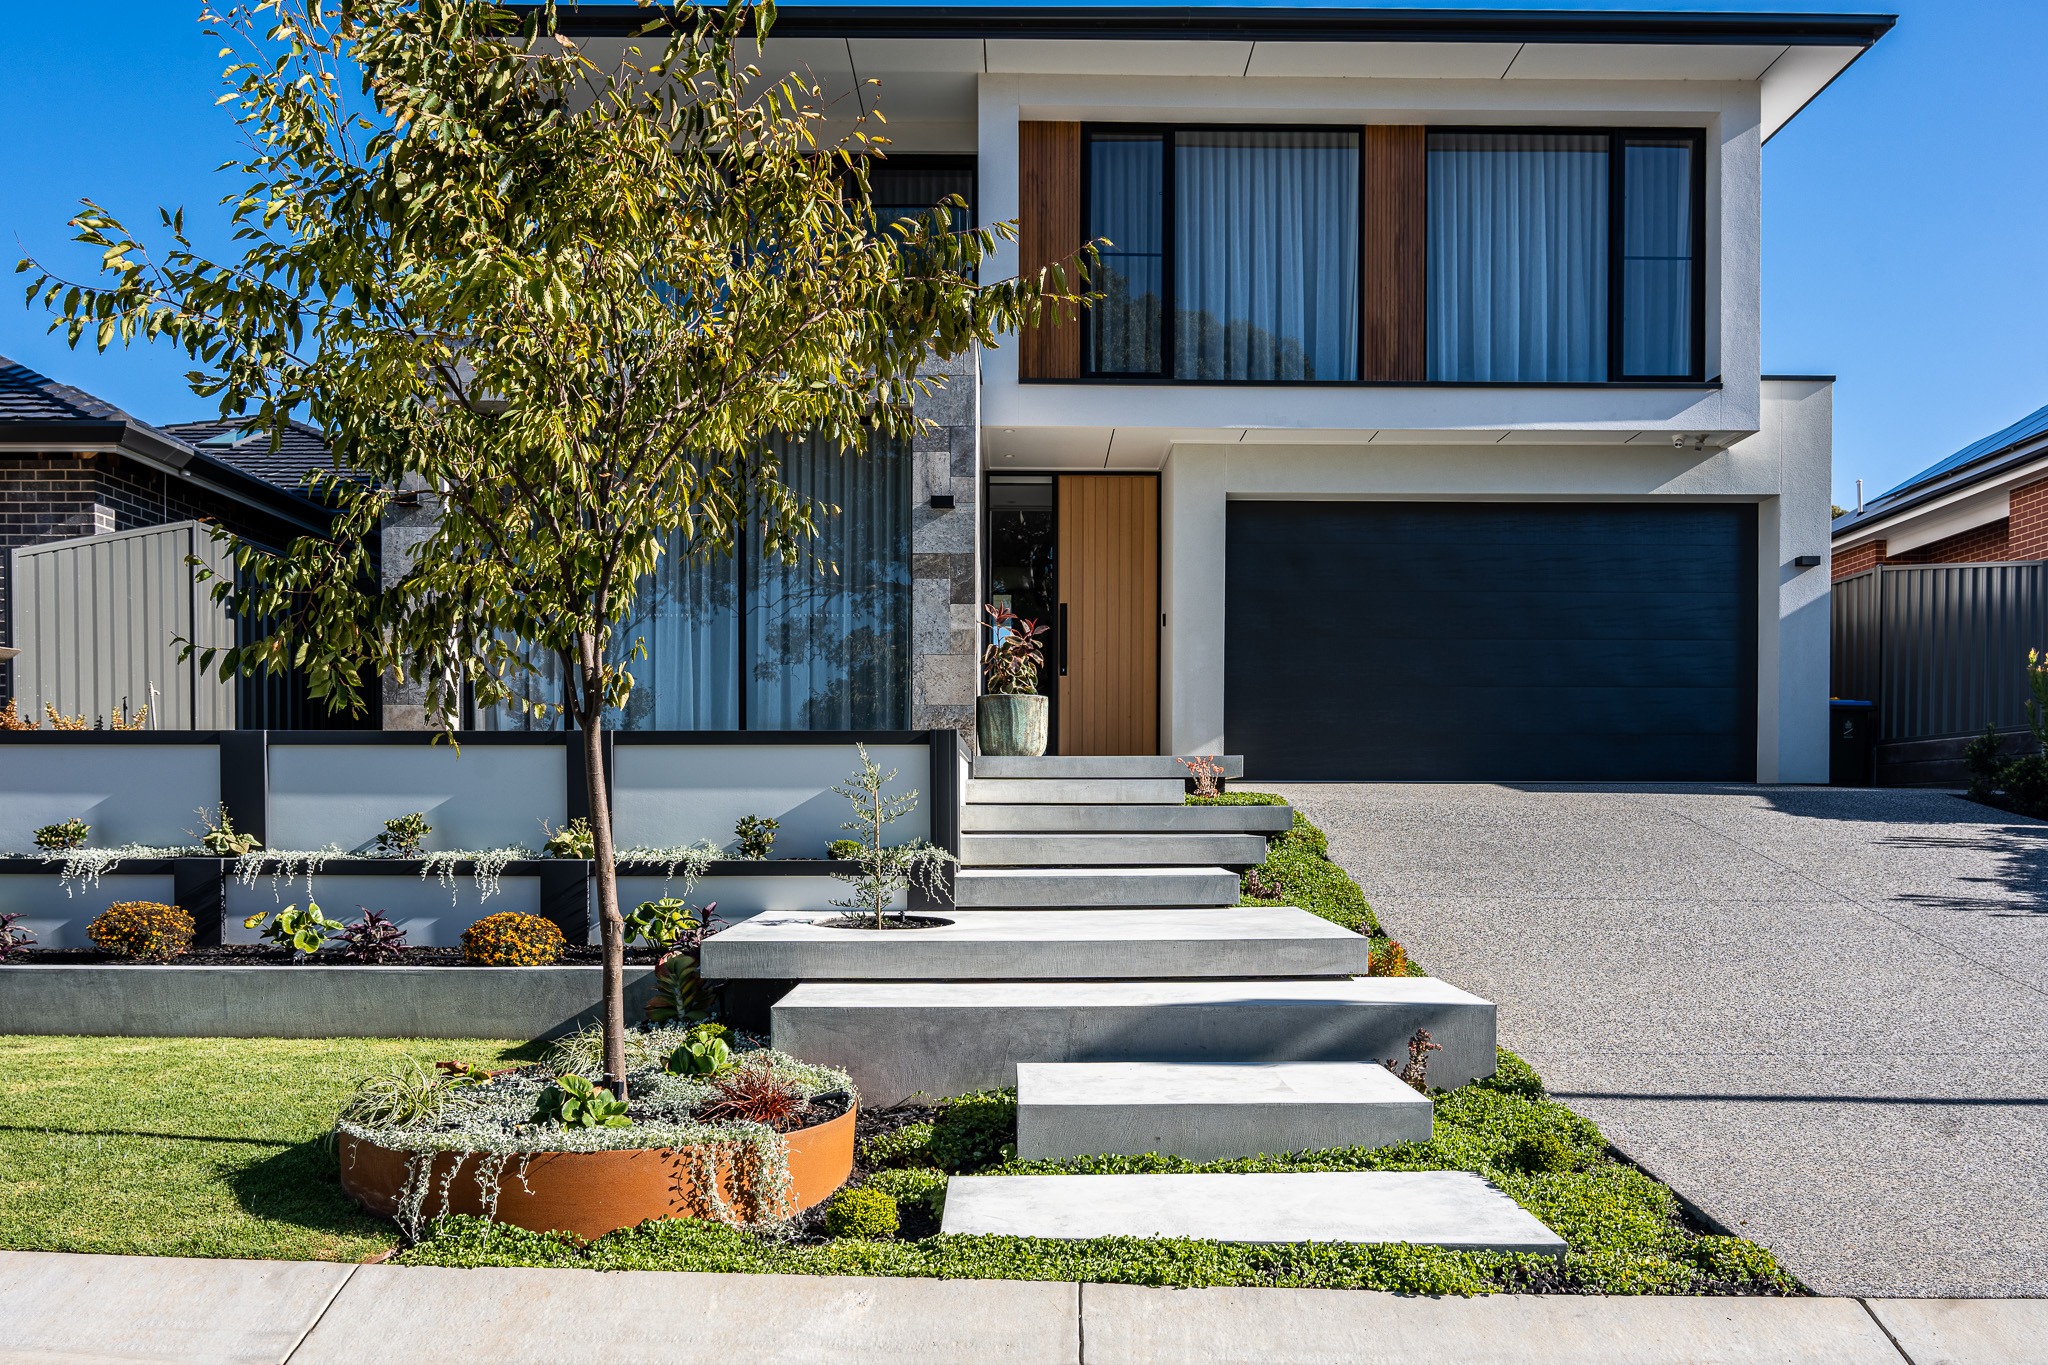
A paver driveway adds style, durability, and eco-friendly functionality to Mountain View homes, perfectly complementing the city’s tech-forward vibe and suburban charm. Whether you’re in Old Mountain View or Shoreline West, a well-installed paver driveway enhances curb appeal and withstands daily use. This expert-level DIY guide walks you through the process of installing a paver driveway tailored to Mountain View’s mild climate and innovative aesthetic. From structural integrity to design ideas, we’ll cover everything you need to create a driveway that’s both practical and visually stunning.
Mountain View’s blend of modern architecture, tech-driven culture, and commitment to sustainability makes paver driveways an ideal choice. They offer:
A paver driveway provides reliable vehicle access, from compact cars to SUVs, while boosting property value. In Mountain View, where homes range from modernist designs to craftsman classics, a paver driveway adds a polished look that ties the property together. Individual pavers can be replaced if damaged, making maintenance simple.
Mountain View’s occasional heavy rains and Santa Clara County’s focus on sustainable water management make permeable pavers a smart choice. These pavers allow rainwater to infiltrate the ground, reducing runoff and easing pressure on local drainage systems. They’re especially useful in areas like Monta Loma, where flat terrain can lead to pooling.
A stylish paver driveway enhances curb appeal, appealing to Mountain View’s discerning homebuyers who value both aesthetics and eco-friendly features.
Section 2: Structural Integrity
To ensure your driveway withstands Mountain View’s conditions and heavy use, focus on a robust foundation and proper construction techniques.Base StrengthA solid base is critical for stability:
Pavers can shift under traffic without proper edging:
Choose pavers rated for vehicular use (at least 8,000 psi compressive strength). Thicker pavers (2.5–3 inches) are ideal for handling heavy loads, ensuring durability in busy neighborhoods like Castro Street.
Incorporate a 1–2% slope to direct water away from your home or garage, preventing pooling during Mountain View’s wet winters. For permeable pavers, use open-graded gravel and sand to maximize water infiltration, complying with Santa Clara County’s stormwater regulations.
Follow these steps to install a paver driveway that meets Mountain View’s standards and enhances your property:
Your driveway should reflect Mountain View’s tech-savvy yet welcoming aesthetic:
Installing a paver driveway in Mountain View is a rewarding DIY project that enhances your home’s functionality, value, and aesthetic. By prioritizing a strong base, proper edging, and thoughtful design, you can create a driveway that withstands the area’s mild climate and occasional rains while reflecting Mountain View’s innovative charm. Whether you choose permeable pavers for sustainability or a classic pattern for timeless appeal, this guide equips you to tackle the project with confidence. Start planning today and transform your Mountain View home’s entrance!
Got driveway questions in Mountain View? Comment below for expert advice from our team at Bayside Pavers!
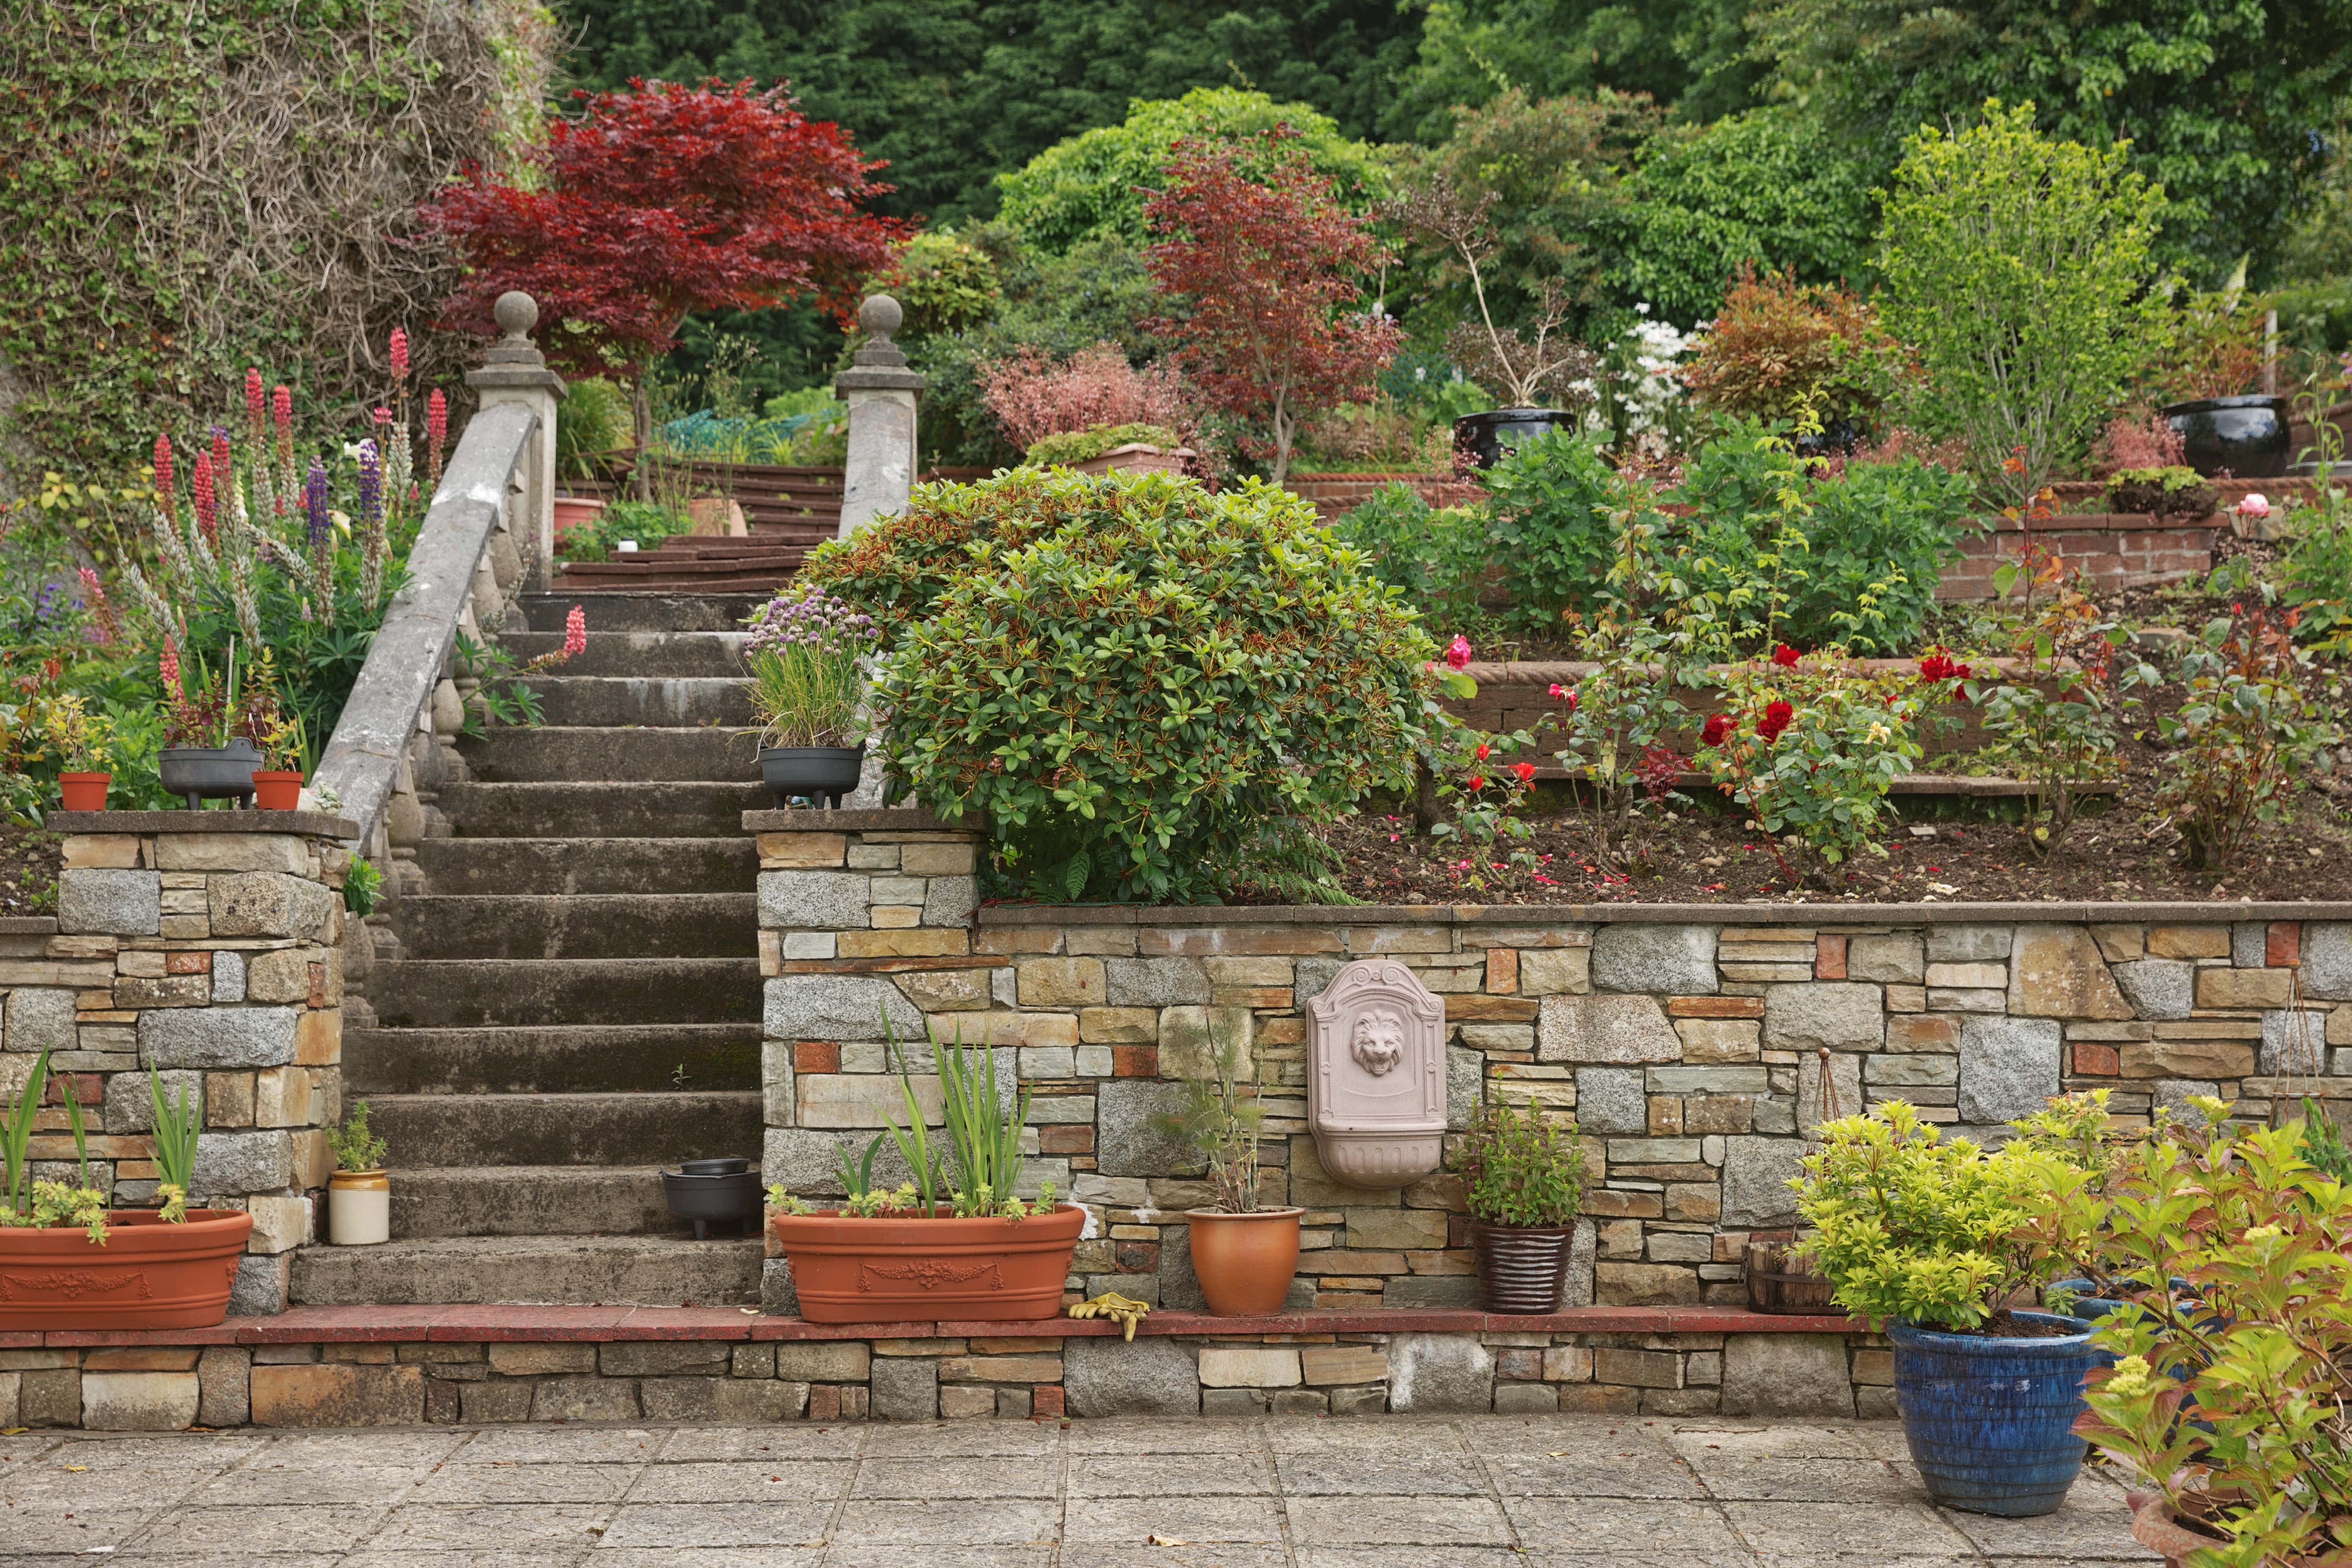
Retaining walls are a transformative addition for Pleasanton homeowners, taming sloped yards, preventing erosion, and creating functional outdoor spaces. In a city known for its suburban charm and rolling hills, a well-constructed retaining wall can enhance your property’s usability and aesthetic. Whether you’re in Hacienda or Birdland, this expert-level DIY guide provides a step-by-step blueprint for building a retaining wall tailored to Pleasanton’s climate and soil conditions. We’ll cover planning, structural integrity, installation, and design ideas to ensure your wall is both durable and stylish.
Pleasanton’s varied terrain, from the flatlands of downtown to the hills of Val Vista, often requires retaining walls to manage slopes and enhance outdoor living. These structures offer:
Retaining walls prevent soil erosion and create flat, usable spaces for landscaping or outdoor living. In Pleasanton, where slopes are common in areas like Foothill Knolls or Ruby Hill, retaining walls are critical for protecting your yard from runoff during heavy rains. They also allow you to carve out space for gardens, play areas, or entertainment zones, maximizing your property’s potential.
Choose materials that balance durability, cost, and Pleasanton’s aesthetic:
Pleasanton’s loamy soils drain well but can still build pressure behind a wall if not managed:
In Pleasanton, retaining walls over 4 feet tall (measured from the bottom of the footing) require a permit from the City of Pleasanton’s Building Division. Check setback requirements and consult a structural engineer for walls exceeding 4 feet to ensure compliance. Visit cityofpleasantonca.gov for permit details.
A retaining wall’s strength depends on a solid foundation and proper reinforcement, especially in Pleasanton’s loamy soils.
A stable base prevents settling and cracking:
For walls over 3 feet, reinforcement enhances stability:
Follow these steps to build a retaining wall that lasts in Pleasanton:
Your retaining wall should enhance Pleasanton’s suburban and traditional aesthetic:
Consider adding low-voltage LED lighting to highlight the wall’s texture and improve safety for evening use, perfect for Pleasanton’s vibrant outdoor lifestyle.ConclusionConstructing a retaining wall in Pleasanton is a rewarding DIY project that enhances your property’s functionality and beauty. By prioritizing a strong foundation, effective drainage, and thoughtful design, you can create a wall that withstands Pleasanton’s loamy soils and winter rains while complementing its suburban charm. Whether you’re aiming for a classic, rustic look or a modern masterpiece, this guide equips you to succeed.
Start your project today and transform your Pleasanton yard into a stable, stunning landscape!
Planning a retaining wall in Pleasanton? DM us with your questions for personalized advice from our team at Bayside Pavers!
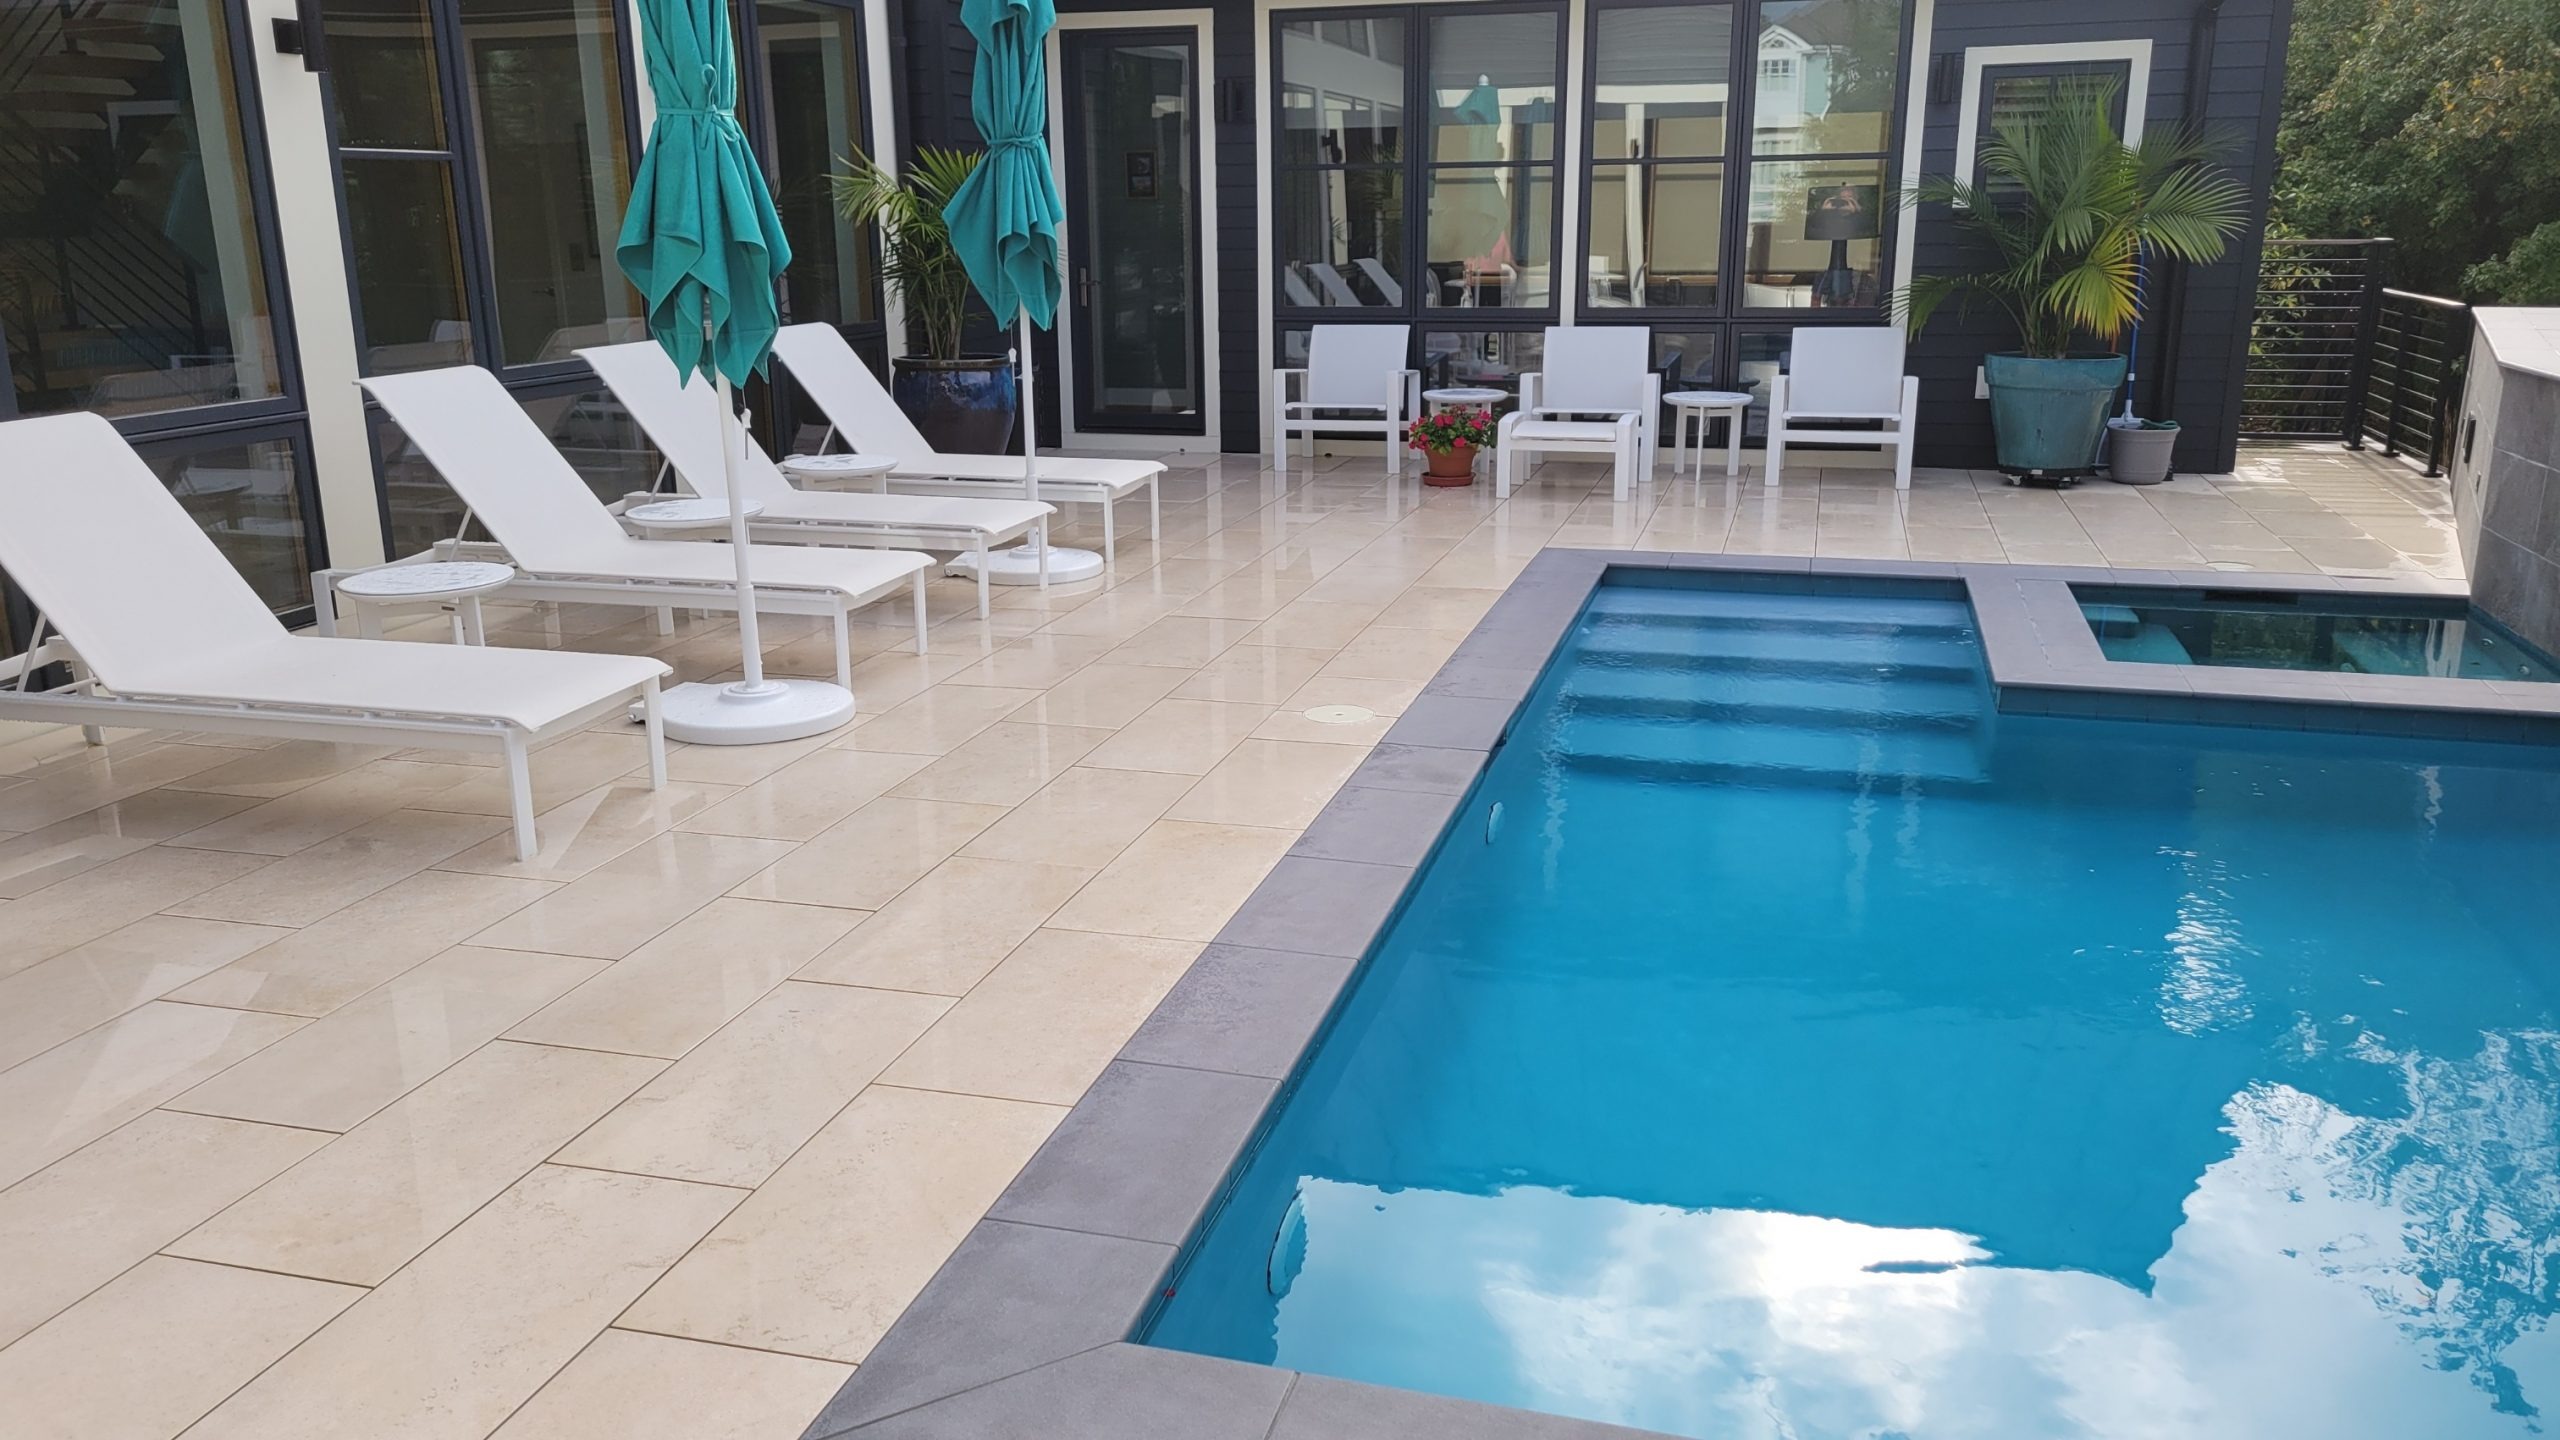
A travertine pool deck elevates your Menlo Park backyard into a luxurious, safe, and stylish retreat, perfect for the city’s sunny climate and upscale aesthetic. Known for its cool-to-the-touch surface, slip-resistant texture, and timeless elegance, travertine is an ideal choice for poolside areas. Whether you’re in Sharon Heights or Allied Arts, this expert-level DIY guide walks you through designing and installing a travertine pool deck that blends functionality with sophistication. We’ll cover structural integrity, installation steps, purpose, and design ideas tailored to Menlo Park’s refined suburban vibe.Why Choose a Travertine Pool Deck in Menlo Park?
Menlo Park’s warm, sunny weather and affluent neighborhoods make travertine pool decks a top choice. These natural stone tiles offer:
Travertine’s naturally textured surface provides excellent slip resistance, making it a safe choice for pool decks where water and foot traffic are constant. This is crucial for family-friendly Menlo Park neighborhoods like University Heights, where kids and guests frequently use the pool area.
Travertine’s earthy tones and unique veining create a timeless, sophisticated look that complements Menlo Park’s mix of modern and traditional homes. Whether your property leans toward sleek tech-inspired designs or classic craftsman styles, travertine integrates seamlessly with patios and landscaping for a cohesive outdoor space.
Travertine withstands Menlo Park’s sun exposure and occasional winter rains, maintaining its beauty with proper care. When sealed, it resists staining from pool chemicals and wear from foot traffic, ensuring a long-lasting pool deck.
To ensure your travertine pool deck stands up to Menlo Park’s conditions, focus on a solid foundation and proper installation techniques.
A stable base prevents cracking and settling:
Proper drainage prevents water pooling, which can damage travertine or create slippery surfaces:
Travertine’s porous nature requires sealing to protect against Menlo Park’s sun, moisture, and pool chemicals:
Use sanded grout or polymeric sand between tiles to ensure stability and prevent shifting. Tight joints (1/8–1/4 inch) enhance both aesthetics and structural integrity.
Follow these steps to install a travertine pool deck that’s safe and stylish in Menlo Park:
Your travertine pool deck should reflect Menlo Park’s refined yet approachable aesthetic:
A travertine pool deck is a stunning addition to any Menlo Park backyard, combining safety, durability, and timeless elegance. By focusing on a solid base, proper drainage, and thoughtful design, you can create a poolside retreat that enhances your outdoor lifestyle. This DIY guide equips you with the knowledge to tackle the project with confidence, from planning to sealing.
Start your travertine pool deck today and transform your Menlo Park home into a luxurious oasis!
Questions about your Menlo Park pool deck? Comment below for expert tips from our team at Bayside Pavers!
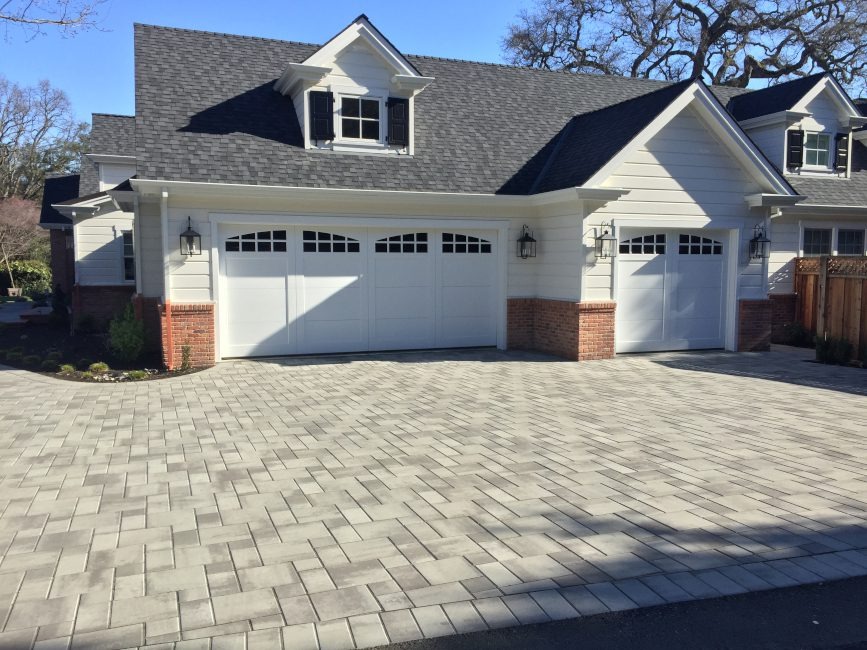
A paver driveway adds charm, durability, and eco-friendly functionality to San Rafael homes, perfectly complementing the city’s scenic beauty and Marin County’s commitment to sustainability. Whether you’re in Terra Linda or Peacock Gap, a well-installed paver driveway enhances curb appeal and withstands daily use. This expert-level DIY guide walks you through the process of installing a paver driveway tailored to San Rafael’s mild climate and hilly terrain. From structural integrity to design ideas, we’ll cover everything you need to create a driveway that’s both practical and visually stunning.Why Install a Paver Driveway in San Rafael?
San Rafael’s blend of coastal charm, forested neighborhoods, and environmental consciousness makes paver driveways an ideal choice. They offer:
A paver driveway provides reliable vehicle access, from compact cars to SUVs, while boosting property value. In San Rafael, where driveways often navigate slopes in areas like Dominican or Sun Valley, pavers offer flexibility and strength, allowing for easy repairs if individual units are damaged.
San Rafael’s wet winters and Marin County’s focus on sustainable water management make permeable pavers a smart choice. These pavers allow rainwater to infiltrate the ground, reducing runoff and easing pressure on local drainage systems. They’re especially useful in low-lying areas like Canal, where heavy rains can cause pooling.
A stylish paver driveway enhances curb appeal, appealing to San Rafael’s homebuyers who value both aesthetics and eco-friendly features.
To ensure your driveway withstands San Rafael’s hilly terrain and moist climate, focus on a robust foundation and proper construction techniques.Base StrengthA solid base is critical for stability, especially on San Rafael’s sloped lots:
Pavers can shift under traffic without proper edging:
Choose pavers rated for vehicular use (at least 8,000 psi compressive strength). Thicker pavers (2.5–3 inches) are ideal for handling heavy loads, ensuring durability in high-traffic areas like Lincoln Avenue.DrainageIncorporate a 1–2% slope to direct water away from your home or garage, preventing pooling in San Rafael’s wet winters. For permeable pavers, use open-graded gravel and sand to maximize water infiltration, complying with Marin County’s stormwater regulations.
Follow these steps to install a paver driveway that meets San Rafael’s standards and enhances your property:
Your driveway should reflect San Rafael’s natural beauty and eclectic architectural styles:
Installing a paver driveway in San Rafael is a rewarding DIY project that enhances your home’s functionality, value, and aesthetic. By focusing on a strong base, proper edging, and thoughtful design, you can create a driveway that withstands the area’s hilly terrain and wet winters while reflecting San Rafael’s natural charm. Whether you choose permeable pavers for sustainability or a classic pattern for timeless appeal, this guide equips you to tackle the project with confidence.
Start planning today and transform your San Rafael home’s entrance!Got driveway questions in San Rafael? DM us for expert advice from our team at Bayside Pavers!
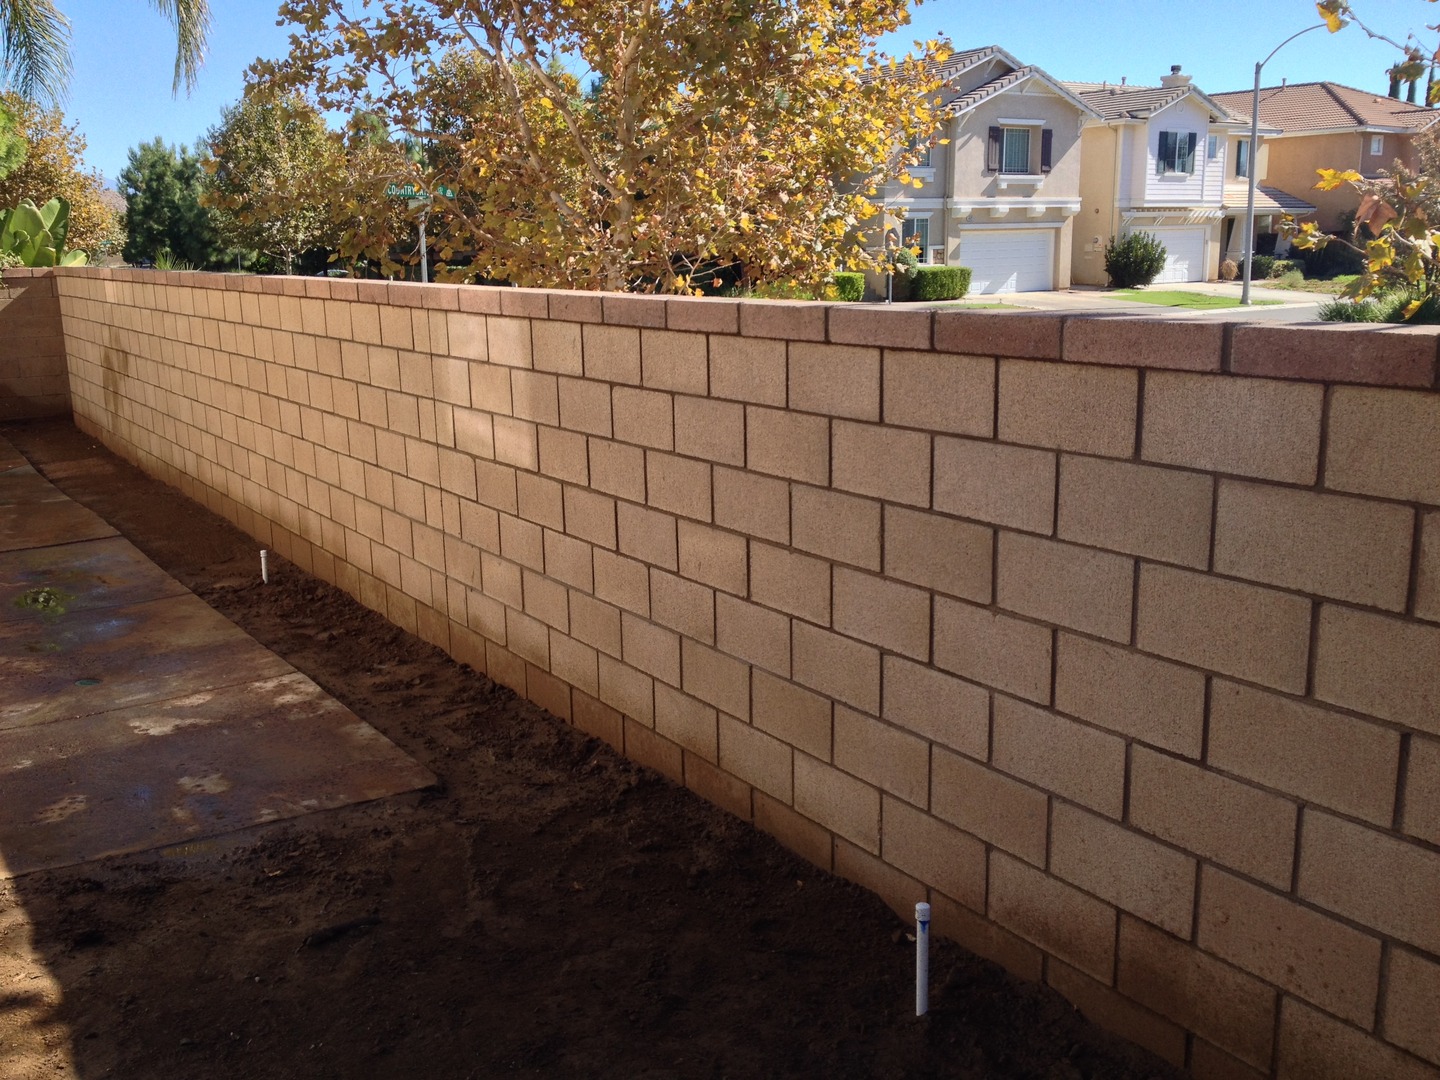
Retaining walls are a transformative addition for Livermore homeowners, taming sloped yards, preventing erosion, and creating functional outdoor spaces. In a city renowned for its vineyard-heavy landscapes and suburban charm, a well-built retaining wall can enhance your property’s usability and aesthetic. Whether you’re in Springtown or South Livermore, this expert-level DIY guide provides a step-by-step blueprint for constructing a retaining wall tailored to Livermore’s climate and loamy soils. We’ll cover planning, structural integrity, installation, and design ideas to ensure your wall is both durable and stylish.
Why Build a Retaining Wall in Livermore?
Livermore’s rolling hills and Mediterranean climate make retaining walls essential for many properties. These structures offer:
Retaining walls prevent soil erosion and create flat, usable spaces for landscaping or outdoor living. In Livermore, where slopes are common in areas like Del Valle or the Altamont Hills, retaining walls are critical for protecting your yard from runoff during heavy rains. They also allow you to carve out space for vineyards, gardens, or entertainment areas, enhancing your property’s functionality.Material ChoicesChoose materials that balance durability, cost, and Livermore’s wine country aesthetic:
Livermore’s loamy soils drain well but can still build pressure behind a wall if not managed:
Local RegulationsIn Livermore, retaining walls over 4 feet tall (measured from the bottom of the footing) require a permit from the City of Livermore’s Community Development Department. Check setback requirements and consult a structural engineer for walls exceeding 4 feet to ensure compliance. Visit livermoreca.gov for permit details.Section 2: Structural IntegrityA retaining wall’s strength depends on a solid foundation and proper reinforcement, especially in Livermore’s loamy soils.
A stable base prevents settling and cracking:
For walls over 3 feet, reinforcement enhances stability:
Follow these steps to build a retaining wall that lasts in Livermore:
Your retaining wall should enhance Livermore’s wine country aesthetic and suburban charm:
Consider adding low-voltage LED lighting to highlight the wall’s texture and improve safety for evening gatherings, a nod to Livermore’s vibrant outdoor lifestyle.ConclusionConstructing a retaining wall in Livermore is a rewarding DIY project that enhances your property’s functionality and beauty. By prioritizing a strong foundation, effective drainage, and thoughtful design, you can create a wall that withstands Livermore’s loamy soils and winter rains while complementing its wine country charm. Whether you’re aiming for a rustic vineyard-inspired look or a modern masterpiece, this guide equips you to succeed. Start your project today and transform your Livermore yard into a stable, stunning landscape!
Planning a retaining wall in Livermore? Comment with your questions, and our team at Bayside Pavers will help you get started!
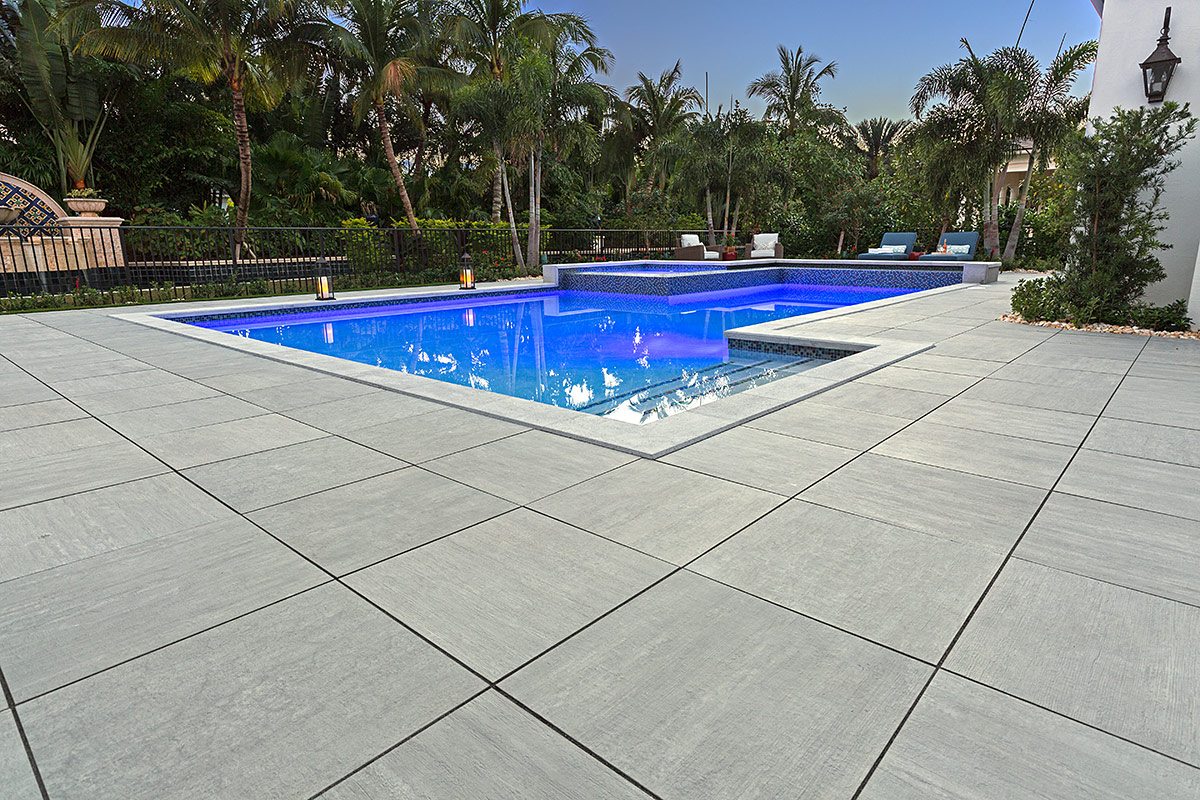
A porcelain pool deck brings sleek sophistication and durability to your Danville backyard, creating a luxurious and safe poolside retreat. Known for its low maintenance, slip-resistant surface, and modern aesthetic, porcelain is perfect for Danville’s upscale homes and warm climate. Whether you’re in Blackhawk or Alamo Oaks, this expert-level DIY guide walks you through designing and installing a porcelain pool deck that blends functionality with style. We’ll cover structural integrity, installation steps, purpose, and design ideas tailored to Danville’s elegant suburban vibe.Why Choose a Porcelain Pool Deck in Danville?
Danville’s sunny summers and affluent neighborhoods make porcelain pool decks an ideal choice. These tiles offer:
Porcelain’s textured surface provides excellent slip resistance, making it a safe choice for pool decks where water and foot traffic are constant. This is crucial for family-friendly Danville neighborhoods like Greenbrook, where kids and guests frequently use the pool area.
Porcelain tiles come in a variety of finishes, from wood-look to sleek stone, offering versatility to match Danville’s high-end architectural styles. Whether your home is modern or traditional, porcelain creates a polished, cohesive look that elevates your outdoor space.
Porcelain is highly resistant to pool chemicals, UV rays, and Danville’s occasional winter rains. Its low porosity means minimal maintenance, making it ideal for busy homeowners who want a stunning yet practical pool deck.
To ensure your porcelain pool deck withstands Danville’s conditions, focus on a solid foundation and proper installation techniques.
A stable base prevents cracking and shifting:
Proper drainage prevents water pooling, which can damage tiles or create slippery surfaces:
Porcelain is less porous than natural stone, requiring minimal sealing:
Use epoxy or sanded grout between tiles to ensure stability and prevent shifting. Tight joints (1/8–1/4 inch) enhance both aesthetics and structural integrity.
Follow these steps to install a porcelain pool deck that’s safe and stylish in Danville:
Your porcelain pool deck should reflect Danville’s luxurious yet approachable aesthetic:
A porcelain pool deck is a stunning addition to any Danville backyard, combining safety, durability, and modern elegance. By focusing on a solid base, proper drainage, and thoughtful design, you can create a poolside retreat that enhances your outdoor lifestyle. This DIY guide equips you with the knowledge to tackle the project with confidence, from planning to sealing.
Start your porcelain pool deck today and transform your Danville home into a luxurious oasis!
Questions about your Danville pool deck? DM us for expert guidance from our team at Bayside Pavers!
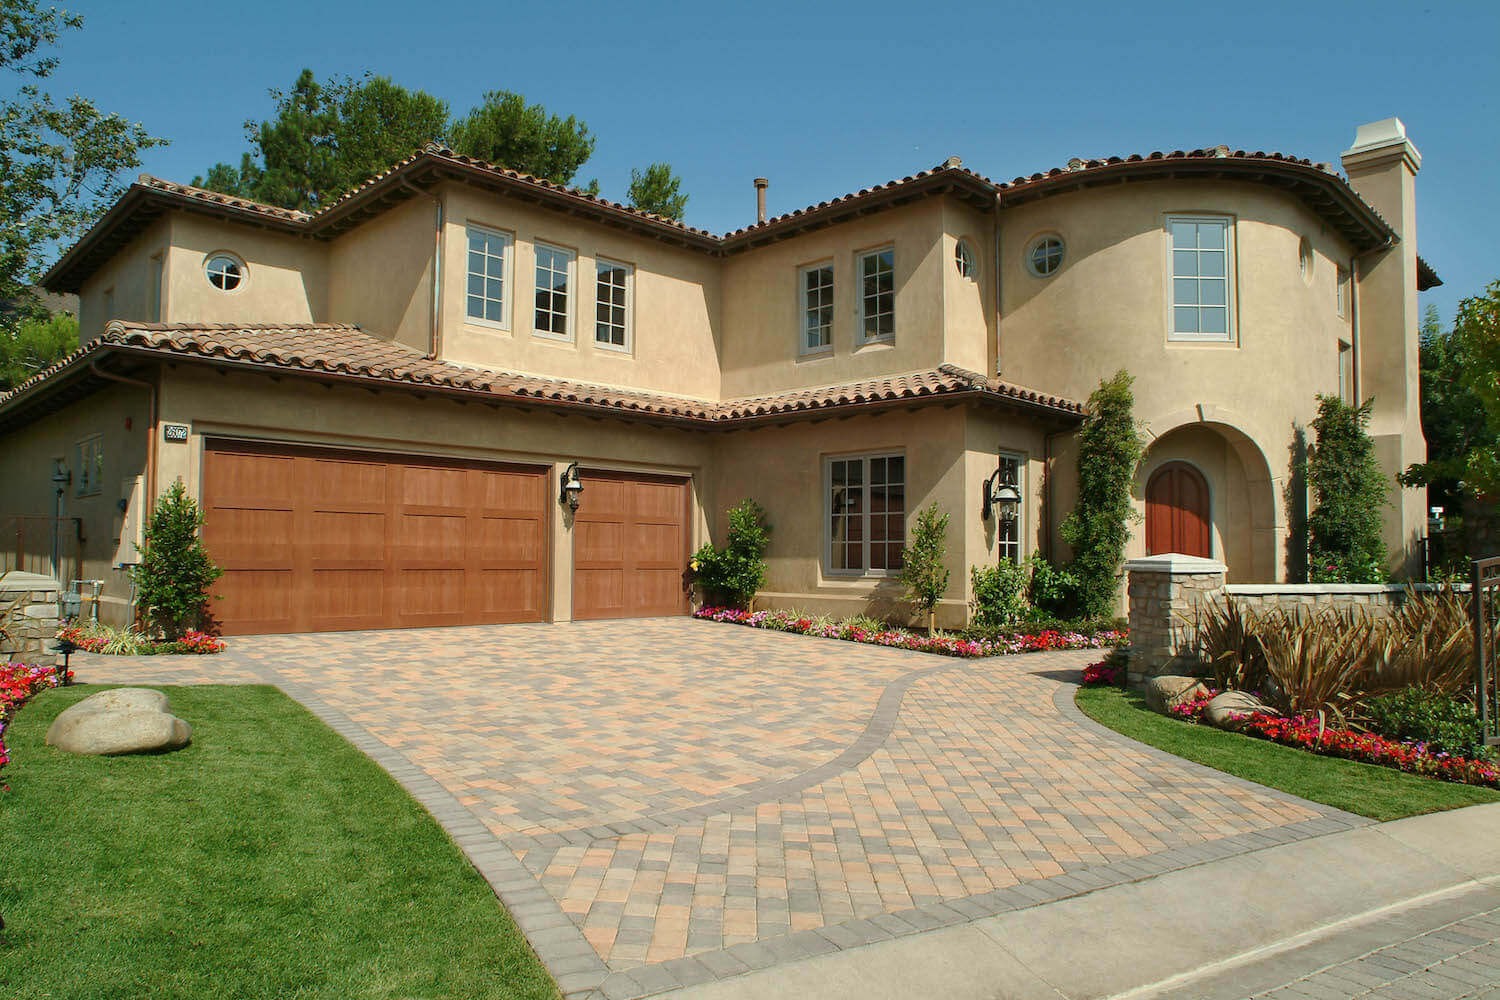
A paver driveway adds style, durability, and value to San Mateo homes, perfectly complementing the city’s coastal charm and urban sophistication. Whether you’re in Baywood or Sugarloaf, a well-installed paver driveway enhances curb appeal and withstands the demands of daily use. This expert-level DIY guide walks you through the process of installing a paver driveway tailored to San Mateo’s coastal climate and aesthetic. From structural integrity to design ideas, we’ll cover everything you need to create a driveway that’s both functional and visually stunning.Why Install a Paver Driveway in San Mateo?
San Mateo’s mild, coastal climate and diverse architectural styles make paver driveways an ideal choice. They offer:
A paver driveway provides safe, reliable access for vehicles, from sedans to SUVs, while increasing property value. In San Mateo, where homes range from craftsman bungalows to sleek contemporaries, a paver driveway adds a polished look that ties the property together. Individual pavers can be replaced if damaged, making maintenance simple.
San Mateo’s stormwater management regulations encourage eco-friendly solutions. Permeable pavers allow water to infiltrate the ground, reducing runoff and supporting local drainage systems. They’re particularly useful in neighborhoods like Shoreview, where heavy rains can cause pooling, and align with San Mateo’s sustainability goals.
A stylish paver driveway boosts curb appeal, appealing to San Mateo’s discerning homebuyers who value both aesthetics and environmental consciousness.
To ensure your driveway withstands San Mateo’s coastal conditions and heavy use, focus on a strong foundation and proper construction techniques.
A solid base is critical for stability:
Pavers can shift without proper edging, especially under San Mateo’s frequent vehicle traffic:
Choose pavers rated for vehicular use (at least 8,000 psi compressive strength). Thicker pavers (2.5–3 inches) are ideal for handling heavy loads, ensuring durability in busy neighborhoods like Hillsdale.DrainageIncorporate a 1–2% slope to direct water away from your home or garage, preventing pooling in San Mateo’s wet winters. For permeable pavers, use open-graded gravel and sand to maximize water infiltration, complying with local stormwater guidelines.
Follow these steps to install a paver driveway that meets San Mateo’s standards and enhances your property:
Your driveway should reflect San Mateo’s coastal elegance and urban sophistication:
Installing a paver driveway in San Mateo is a rewarding DIY project that enhances your home’s functionality, value, and aesthetic. By prioritizing a strong base, proper edging, and thoughtful design, you can create a driveway that withstands the coastal climate and complements San Mateo’s unique charm. Whether you choose permeable pavers for sustainability or a classic pattern for timeless appeal, this guide equips you to tackle the project with confidence. Start planning today and transform your San Mateo home’s entrance!
Got driveway questions in San Mateo? Leave a comment, and our team at Bayside Pavers will respond with expert advice!
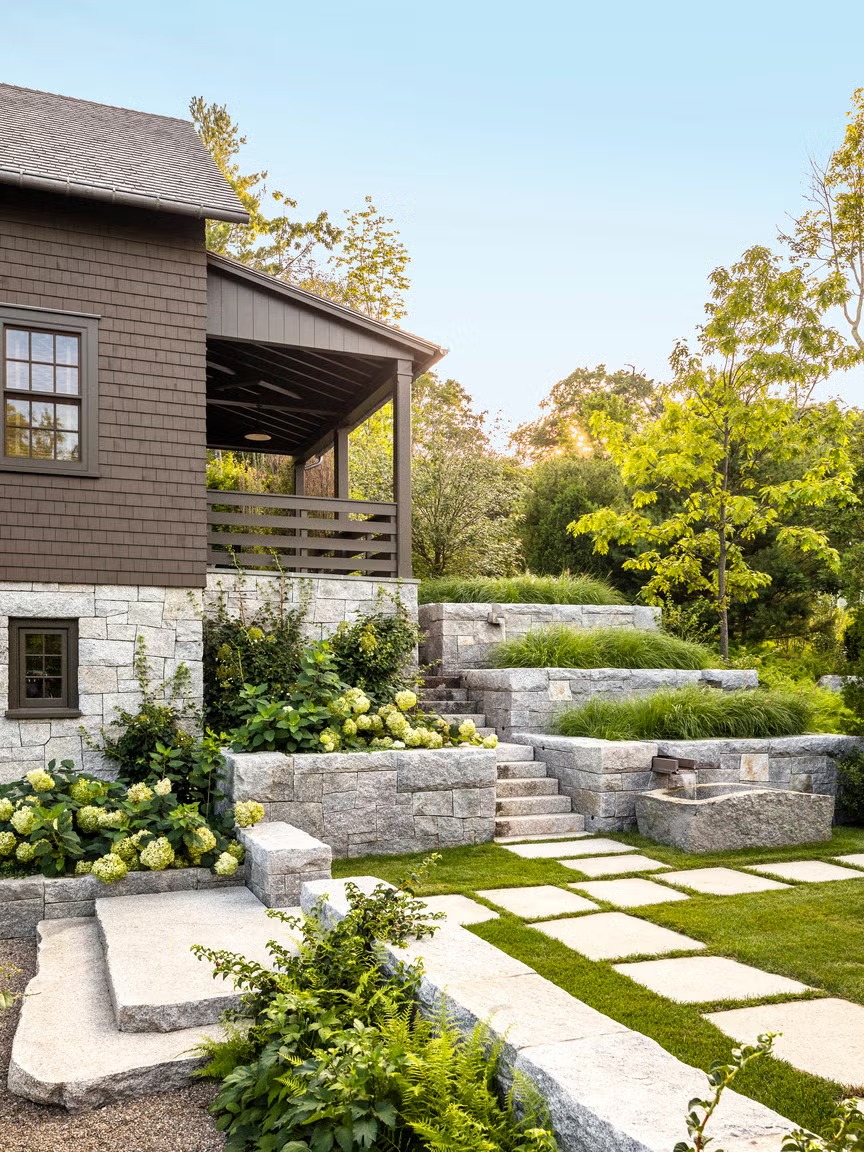
Retaining walls are a game-changer for Sunnyvale homeowners looking to manage sloped yards, prevent erosion, and create functional outdoor spaces. In a city known for its tech-driven vibe and suburban landscapes, a well-constructed retaining wall can enhance your property’s usability and aesthetic. Whether you’re in Cherry Orchard or Ortega, this expert-level DIY guide provides a step-by-step approach to building a retaining wall tailored to Sunnyvale’s clay-heavy soils and mild climate. We’ll cover planning, structural integrity, installation, and design ideas to ensure your wall is both durable and stylish.Why Build a Retaining Wall in Sunnyvale?
Sunnyvale’s suburban neighborhoods often feature gentle slopes or uneven terrain, making retaining walls essential for:
Retaining walls prevent soil erosion and create flat, usable spaces for landscaping or outdoor living. In Sunnyvale, where heavy rains can erode slopes in areas like Lakewood Village, these structures are vital for protecting your yard. They also allow you to carve out space for vegetable gardens, play areas, or patios, maximizing your property’s potential.Material ChoicesChoose materials that balance durability, cost, and Sunnyvale’s aesthetic:
Sunnyvale’s clay soils retain water, which can build pressure behind a wall and cause failure:
In Sunnyvale, retaining walls over 4 feet tall (measured from the bottom of the footing) require a permit from the City of Sunnyvale’s Community Development Department. Check setback requirements and consult a structural engineer for walls exceeding 4 feet to ensure compliance. Visit sunnyvale.ca.gov for permit details.Section 2: Structural IntegrityA retaining wall’s strength lies in its foundation and reinforcement, particularly in Sunnyvale’s expansive clay soils.FoundationA solid foundation prevents settling and cracking:
For walls over 3 feet, reinforcement is critical:
Follow these steps to build a retaining wall that lasts in Sunnyvale:
Your retaining wall should enhance Sunnyvale’s tech-savvy yet welcoming aesthetic:
Consider adding low-voltage LED lighting to highlight the wall’s texture and improve safety for evening use.ConclusionBuilding a retaining wall in Sunnyvale is a rewarding DIY project that enhances your property’s functionality and beauty. By prioritizing a strong foundation, effective drainage, and thoughtful design, you can create a wall that withstands Sunnyvale’s clay soils and winter rains. Whether you’re aiming for a modern masterpiece or a rustic retreat, this guide equips you to succeed. Start your project today and transform your Sunnyvale yard into a stable, stunning landscape!
Planning a retaining wall in Sunnyvale? DM us with your questions for personalized advice from our team at Bayside Pavers!
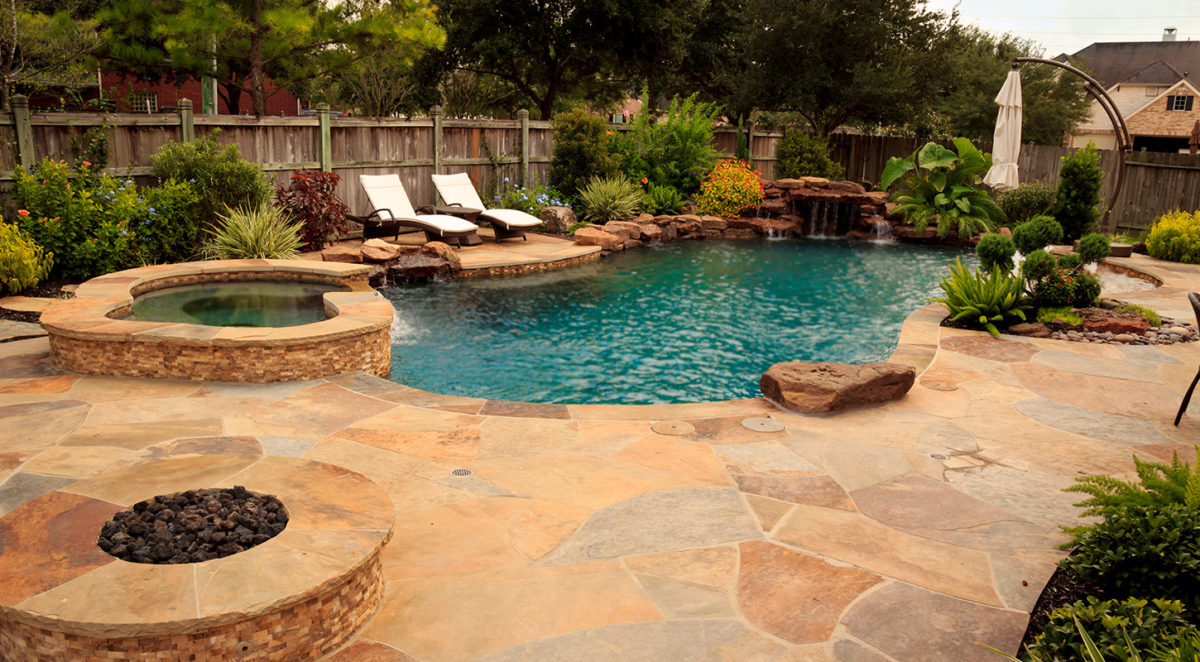
A flagstone pool deck brings natural beauty and safety to your Redwood City backyard, creating a stunning and functional space for relaxation and entertaining. With its unique textures and earthy tones, flagstone is an ideal choice for poolside areas in Redwood City’s temperate climate. Whether you’re in Woodside Plaza or Emerald Hills, this expert-level DIY guide will walk you through designing and installing a flagstone pool deck that blends durability with style. We’ll cover structural integrity, installation steps, purpose, and design ideas tailored to Redwood City’s vibrant suburban aesthetic.Why Choose a Flagstone Pool Deck in Redwood City?
Redwood City’s mild weather and lively outdoor lifestyle make flagstone pool decks a perfect fit. These natural stone pavers offer:
Flagstone’s naturally irregular surface provides excellent traction, reducing the risk of slips around the pool. This is especially important for family-friendly Redwood City neighborhoods like Farm Hills, where kids and guests frequently use the pool area.
Flagstone’s organic patterns and earthy hues—ranging from warm reds to cool grays—create a timeless look that complements Redwood City’s diverse architectural styles, from mid-century modern to craftsman homes. It seamlessly integrates with patios and landscaping for a cohesive outdoor space.
Flagstone is tough enough to handle Redwood City’s sunny days and occasional winter rains. When properly sealed, it resists staining from pool chemicals and wear from foot traffic, ensuring a long-lasting pool deck.
To ensure your flagstone pool deck stands up to Redwood City’s conditions, focus on a solid foundation and proper installation techniques.
A stable base prevents cracking and shifting:
Proper drainage prevents water pooling, which can damage flagstone or create slippery surfaces:
Flagstone’s porous nature requires sealing to protect against Redwood City’s sun, moisture, and pool chemicals:
Use polymeric sand or mortar between flagstone pieces to ensure stability and prevent shifting. Irregular joints (1/4–1/2 inch) enhance the natural look while maintaining structural integrity.
Follow these steps to install a flagstone pool deck that’s safe and stylish in Redwood City:
Your flagstone pool deck should reflect Redwood City’s vibrant yet relaxed aesthetic:
A flagstone pool deck is a stunning addition to any Redwood City backyard, combining safety, durability, and natural beauty. By focusing on a solid base, proper drainage, and thoughtful design, you can create a poolside retreat that enhances your outdoor lifestyle. This DIY guide equips you with the knowledge to tackle the project with confidence, from planning to sealing. Start your flagstone pool deck today and transform your Redwood City home into a stylish oasis!
Questions about your Redwood City pool deck? Comment below, and our team at Bayside Pavers will provide expert tips!
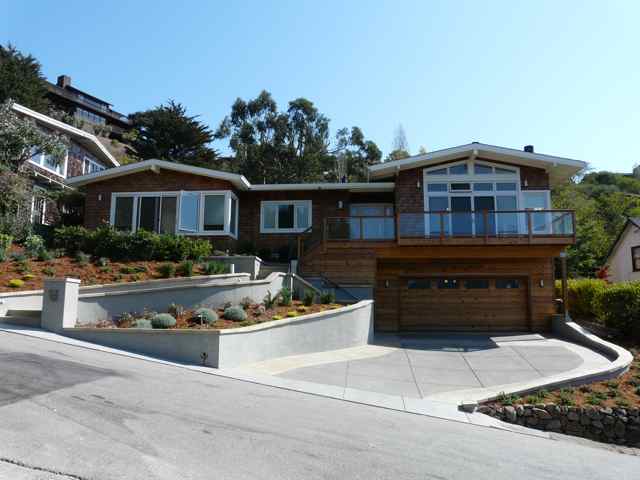
A paver driveway adds both charm and durability to Mill Valley homes, blending seamlessly with the city’s scenic, forested neighborhoods and hilly terrain. Whether you’re in Tamalpais Valley or downtown Mill Valley, a well-installed paver driveway enhances curb appeal, supports heavy vehicles, and aligns with Marin County’s eco-conscious ethos. This expert-level DIY guide walks you through the process of installing a paver driveway tailored to Mill Valley’s unique climate and aesthetic. From structural integrity to design ideas, we’ll cover everything you need to create a driveway that’s both functional and stunning.
Mill Valley’s lush, natural surroundings and commitment to sustainability make paver driveways an ideal choice. They offer:
A paver driveway provides reliable vehicle access, from compact cars to SUVs, while increasing your home’s value. In Mill Valley, where sloped driveways are common, pavers offer flexibility and strength, allowing for easy repairs if individual units are damaged.Permeable PaversMill Valley’s wet winters and Marin County’s focus on sustainable water management make permeable pavers a smart choice. These pavers allow rainwater to infiltrate the ground, reducing runoff and easing pressure on local drainage systems. They’re especially useful in areas like Alto or Cascade, where heavy rains can cause pooling.
A stylish paver driveway boosts curb appeal, appealing to Mill Valley’s discerning homebuyers who value both aesthetics and eco-friendly features.
To ensure your driveway withstands Mill Valley’s hilly terrain and wet climate, focus on a robust foundation and proper construction techniques.
A solid base is critical for stability, especially on Mill Valley’s sloped lots:
Pavers can shift under traffic without proper edging:
Choose pavers rated for vehicular use (at least 8,000 psi compressive strength). Thicker pavers (2.5–3 inches) are ideal for handling heavy loads, ensuring durability in high-traffic areas like Miller Avenue.DrainageIncorporate a 1–2% slope to direct water away from your home or garage. For permeable pavers, use open-graded gravel and sand to maximize water infiltration, aligning with Mill Valley’s stormwater regulations.
Follow these steps to install a paver driveway that meets Mill Valley’s standards and enhances your property:
Your driveway should reflect Mill Valley’s natural beauty and eclectic architectural styles:
Installing a paver driveway in Mill Valley is a rewarding DIY project that enhances your home’s functionality, value, and aesthetic. By focusing on a strong base, proper edging, and thoughtful design, you can create a driveway that withstands the area’s sloped terrain and wet winters while reflecting Mill Valley’s natural charm. Whether you choose permeable pavers for sustainability or a rustic pattern for timeless appeal, this guide equips you to tackle the project with confidence. Start planning today and transform your Mill Valley home’s entrance!
Have questions about your Mill Valley driveway? DM us, and our experts at Bayside Pavers will guide you!
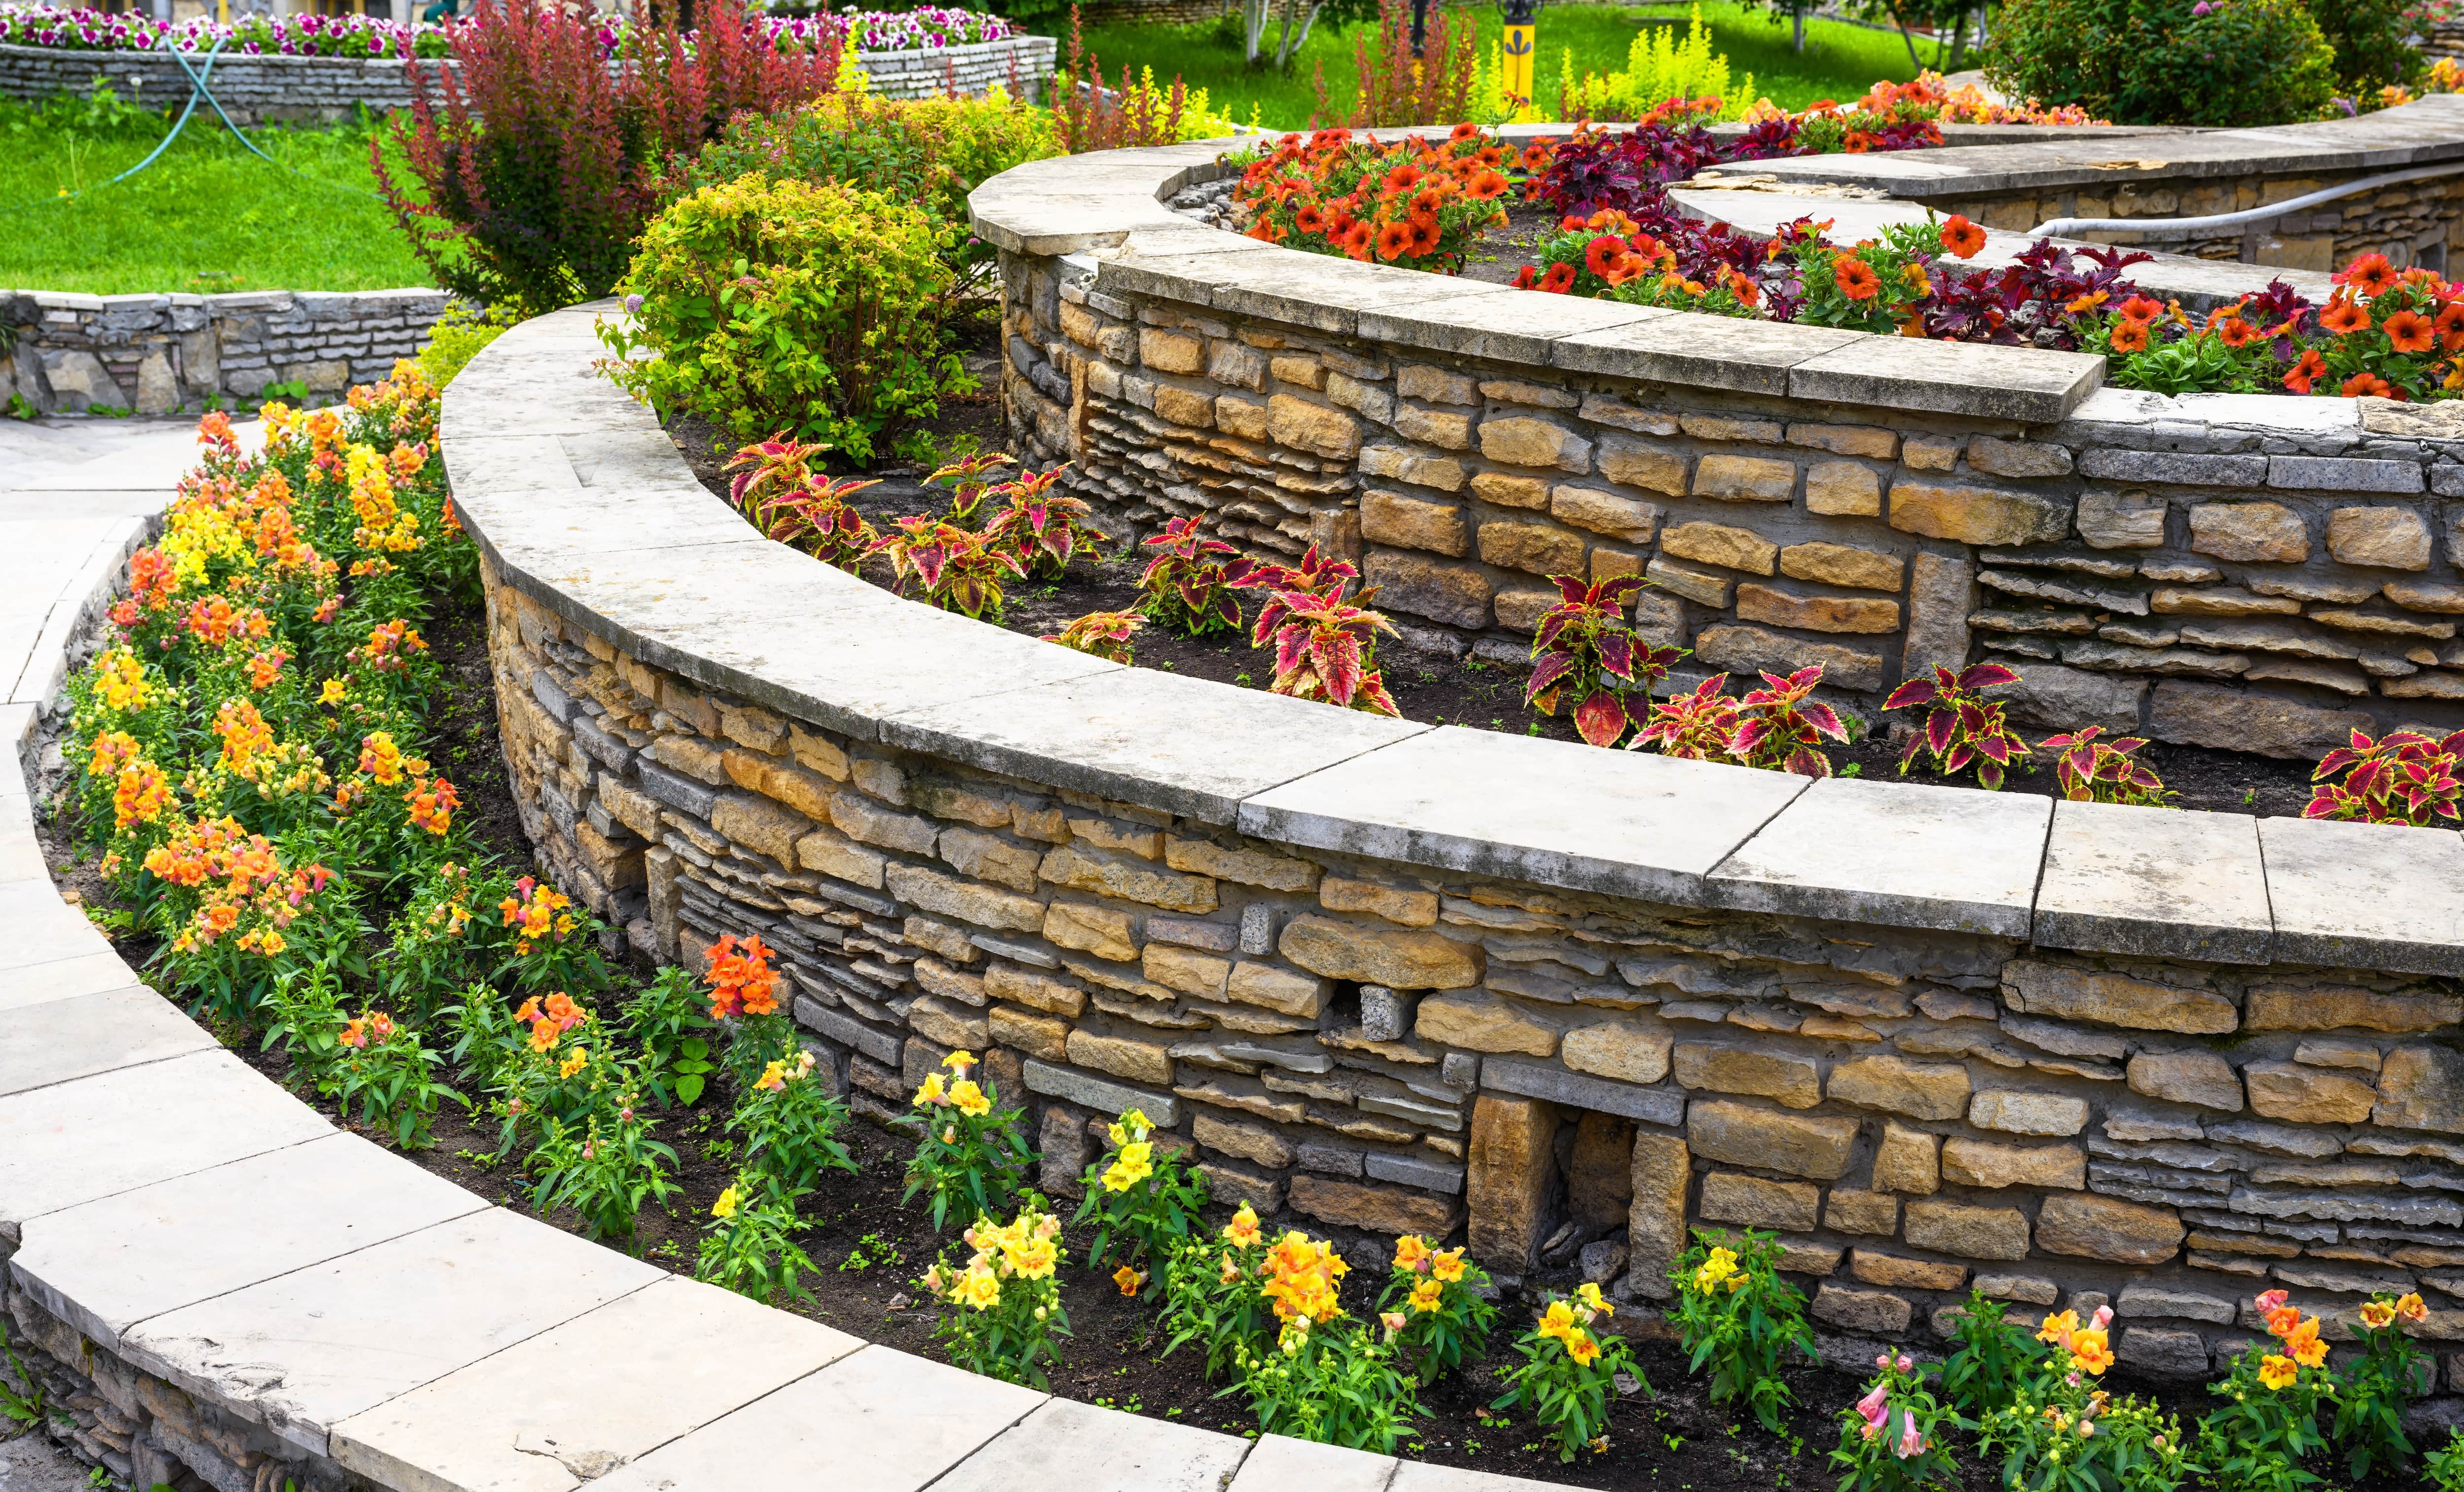
Retaining walls are essential for Fremont homeowners looking to tame sloped yards, prevent erosion, and create functional outdoor spaces. In a city with diverse neighborhoods like Mission San Jose and Warm Springs, a well-built retaining wall can transform your property while complementing Fremont’s suburban charm. This expert-level DIY guide provides a step-by-step blueprint for constructing a retaining wall tailored to Fremont’s climate and soil conditions. We’ll cover planning, structural integrity, installation, and design ideas to ensure your wall is both durable and stylish.
Fremont’s varied terrain, from the flatlands of Centerville to the hills of Niles, often requires retaining walls to manage slopes and enhance usability. These structures offer:
Retaining walls stabilize sloped landscapes, preventing soil erosion and creating flat, usable areas. In Fremont, where heavy rains can erode hillsides in areas like Mission Hills, retaining walls are critical for protecting your property. They also allow you to carve out space for gardens, patios, or play areas, maximizing your yard’s potential.
Choose materials that balance durability and Fremont’s aesthetic:
Select materials that resist Fremont’s sun exposure and occasional heavy rains for long-term performance.
Fremont’s sandy loam soils drain well but can still build pressure behind a wall if not managed:
In Fremont, retaining walls over 4 feet tall (measured from the bottom of the footing) require a permit from the City of Fremont’s Building Division. Check setback requirements and consult a structural engineer for walls exceeding 4 feet to ensure compliance. Visit fremont.gov for permit details.
A retaining wall’s strength depends on a solid foundation and proper reinforcement, especially in Fremont’s variable soil conditions.
A stable base prevents settling and cracking:
For walls over 3 feet, reinforcement enhances stability:
Follow these steps to build a retaining wall that lasts in Fremont:
Your retaining wall should enhance Fremont’s suburban and Mission-inspired aesthetic:
Consider adding low-voltage LED lighting to highlight the wall’s texture and improve safety for evening use.
Constructing a retaining wall in Fremont is a rewarding DIY project that enhances your property’s functionality and beauty. By prioritizing a strong foundation, effective drainage, and thoughtful design, you can build a wall that withstands Fremont’s sandy loam soils and winter rains. Whether you’re aiming for a modern masterpiece or a rustic retreat, this blueprint equips you to succeed.
Start your project today and transform your Fremont yard into a stable, stunning landscape!
Planning a retaining wall in Fremont? Leave a comment with your questions, and our team at Bayside Pavers will help you get started!
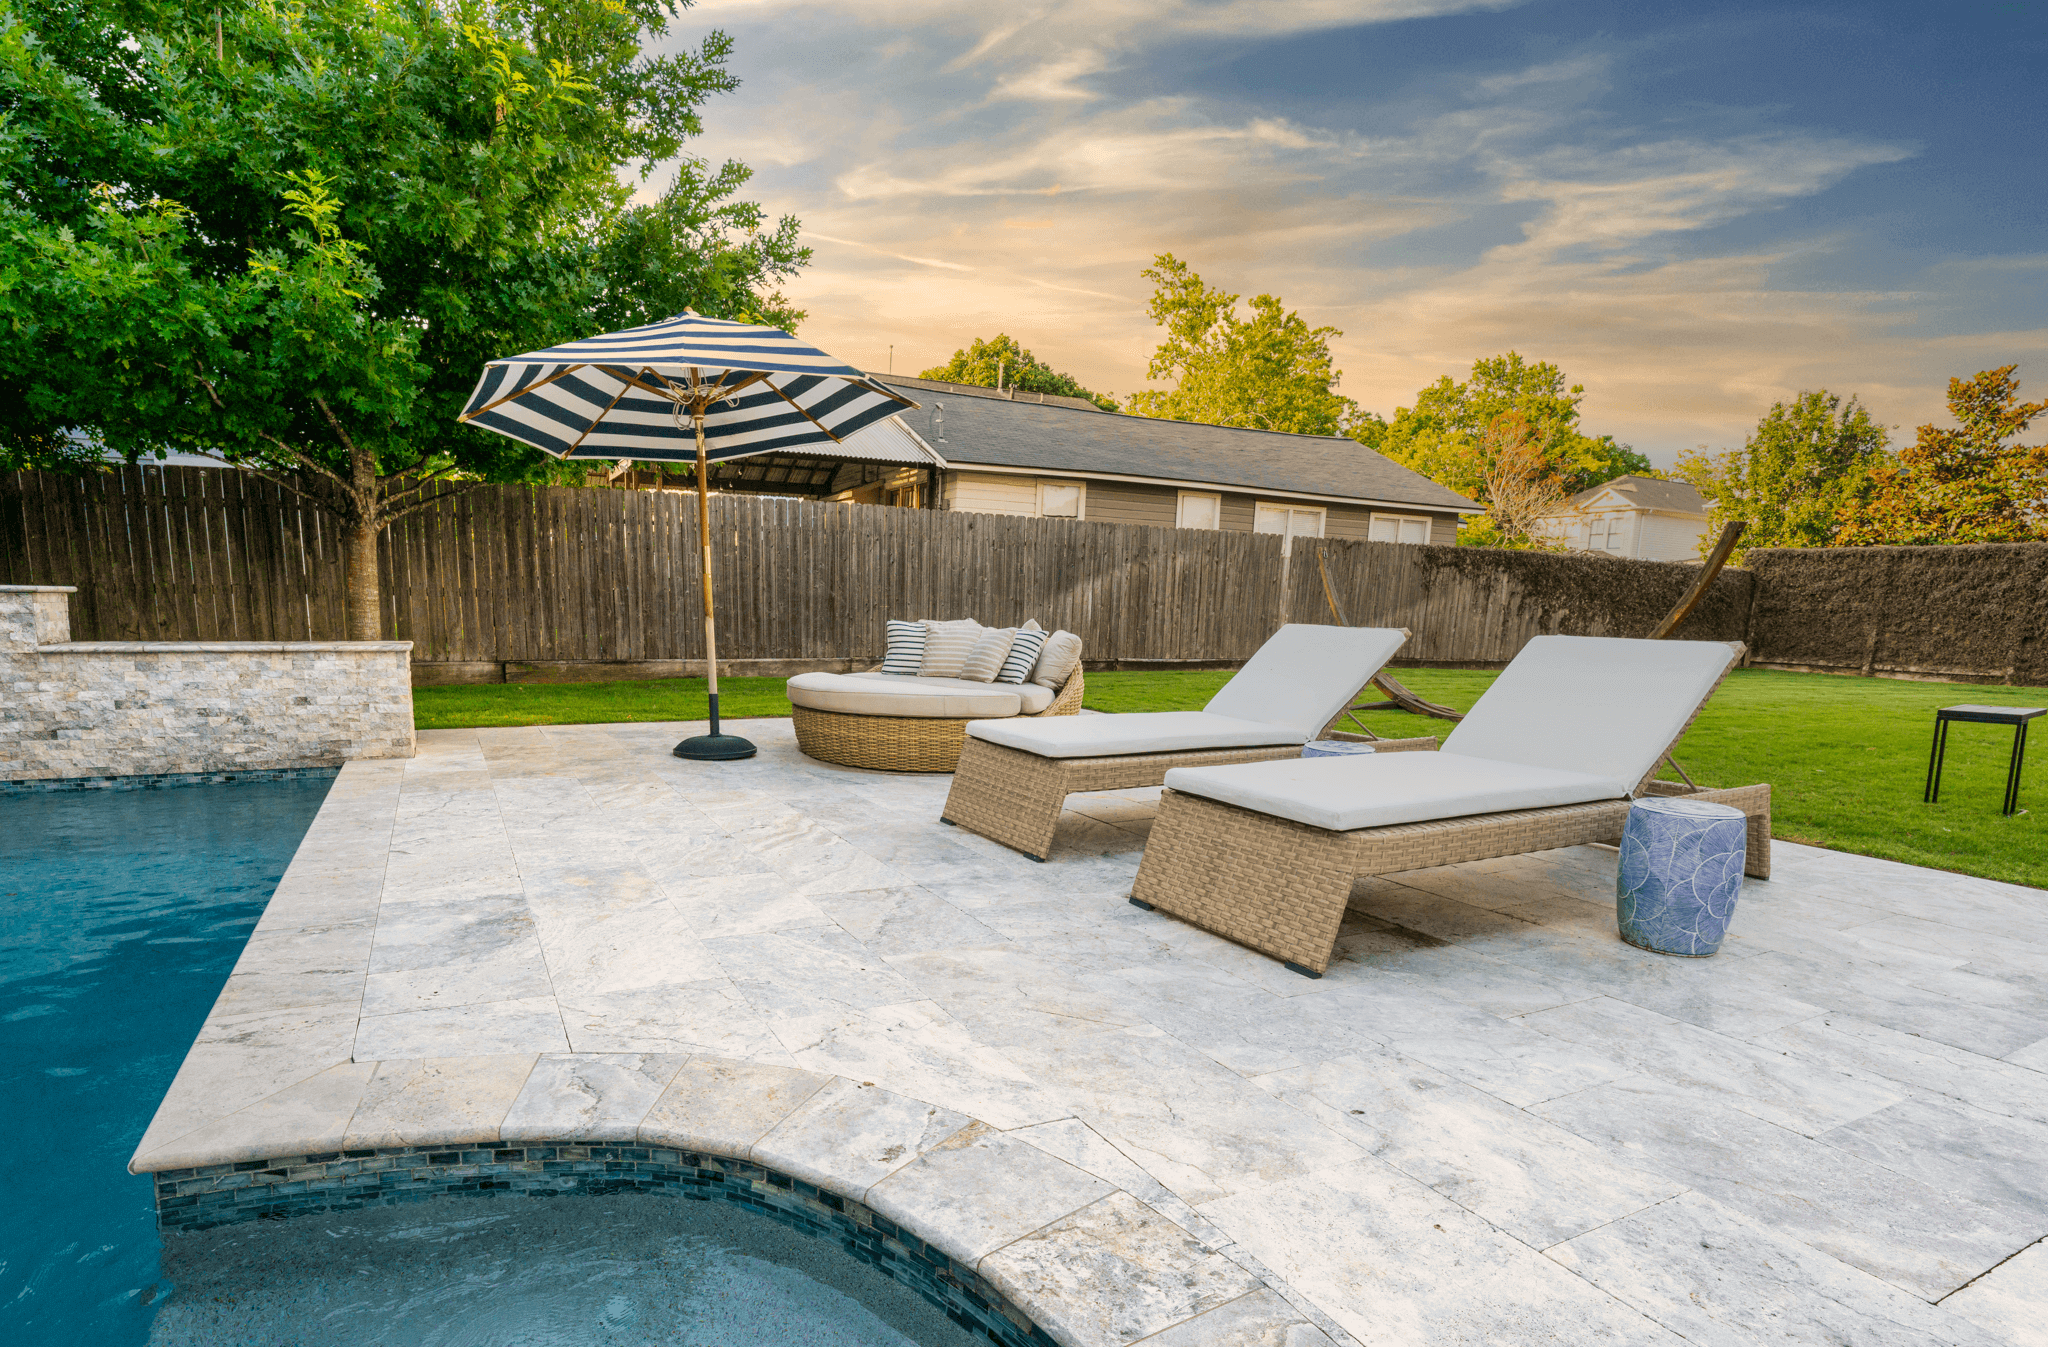
A travertine pool deck transforms your Walnut Creek backyard into a luxurious, safe, and stylish oasis. Known for its elegant appearance, slip-resistant texture, and cool-to-the-touch surface, travertine is the perfect choice for poolside areas in Walnut Creek’s warm, sunny climate. Whether you’re in Northgate or Saranap, this expert-level DIY guide will walk you through the process of designing and installing a travertine pool deck that blends functionality with stunning aesthetics. We’ll cover structural integrity, step-by-step installation, purpose, and design ideas tailored to Walnut Creek’s upscale suburban vibe.
Walnut Creek’s Mediterranean climate and affluent neighborhoods make travertine pool decks a popular choice. These natural stone tiles offer:
Travertine’s naturally textured surface provides excellent slip resistance, making it a top choice for pool decks where safety is paramount. Wet feet and splashing water are no match for travertine’s grip, reducing the risk of slips in family-friendly Walnut Creek backyards.
Travertine’s earthy tones and unique veining add timeless beauty to any pool area. Whether your Walnut Creek home leans modern or Mediterranean, travertine complements architectural styles with its versatile, natural look. It creates a seamless transition from pool to patio, elevating your outdoor living space.
Travertine withstands Walnut Creek’s sun exposure and occasional rain, maintaining its beauty with proper care. Its natural durability makes it ideal for high-traffic pool areas, ensuring long-lasting performance.
To ensure your travertine pool deck stands up to Walnut Creek’s conditions, focus on a solid foundation and proper installation techniques.
A stable base prevents cracking and settling:
Proper drainage is critical to prevent water pooling, which can damage travertine or create slippery surfaces:
Travertine is porous and requires sealing to protect against pool chemicals, UV rays, and Walnut Creek’s occasional heavy rains:
Use sanded grout or polymeric sand between tiles to ensure stability and prevent shifting. Tight joints (1/8–1/4 inch) enhance both aesthetics and structural integrity.
Follow these steps to install a travertine pool deck that’s safe and stunning in Walnut Creek:
Your travertine pool deck should reflect Walnut Creek’s sophisticated yet relaxed aesthetic:
A travertine pool deck is a stunning addition to any Walnut Creek backyard, combining safety, durability, and timeless beauty. By focusing on a solid base, proper drainage, and thoughtful design, you can create a poolside retreat that enhances your outdoor lifestyle. This DIY guide equips you with the knowledge to tackle the project with confidence, from planning to sealing.
Start your travertine pool deck today and elevate your Walnut Creek home into a luxurious haven!
Got questions about your Walnut Creek pool deck? Send us a direct message, and our team at Bayside Pavers will provide expert advice!

A well-crafted paver driveway not only boosts the curb appeal of your Palo Alto home but also provides a durable, low-maintenance solution for daily use. In a city known for its tech-forward vibe and eco-conscious community, paver driveways—especially permeable ones—offer both style and sustainability. This comprehensive DIY guide walks you through the process of installing a paver driveway tailored to Palo Alto’s aesthetic, climate, and regulations. From planning to finishing touches, we’ll cover structural integrity, installation steps, and design ideas to create a driveway that stands the test of time.Why Install a Paver Driveway in Palo Alto?
Palo Alto’s blend of modern architecture and environmental awareness makes paver driveways an ideal choice. They offer:
A driveway provides safe, reliable access for vehicles while enhancing property value. In Palo Alto, where homes often feature innovative designs, a paver driveway adds a polished look that ties the property together. It’s also a practical solution for managing wear from daily use, offering flexibility to repair individual pavers if needed.
Palo Alto’s stormwater management regulations encourage eco-friendly solutions. Permeable pavers allow water to infiltrate the ground, reducing runoff and easing the burden on local drainage systems. They’re especially useful in areas like Midtown, where heavy rains can cause pooling. Permeable options also help maintain groundwater levels, a priority in water-conscious Palo Alto.
A well-installed paver driveway can increase your home’s resale value, appealing to Palo Alto’s discerning buyers who value both aesthetics and sustainability.Section
To ensure your driveway lasts for decades, focus on a strong foundation and proper construction techniques tailored to Palo Alto’s conditions.
A solid base is critical for supporting heavy vehicles:
Pavers can shift under traffic without proper edging:
Choose pavers rated for vehicular use (at least 8,000 psi compressive strength). Thicker pavers (2.5–3 inches) are ideal for driveways, ensuring they can handle cars, SUVs, or even delivery trucks without cracking.
Incorporate a slight slope (1–2%) to direct water away from your home or garage. For permeable pavers, use open-graded gravel and sand to allow water infiltration, complying with Palo Alto’s stormwater guidelines.
Follow these steps to install a paver driveway that meets Palo Alto’s standards and enhances your property:
Your driveway should reflect Palo Alto’s unique blend of innovation and charm:
Installing a paver driveway in Palo Alto is a rewarding DIY project that enhances your home’s functionality, value, and aesthetic. By focusing on a strong base, proper edging, and thoughtful design, you can create a driveway that withstands daily use and complements the city’s eco-conscious ethos. Whether you choose permeable pavers for sustainability or a classic pattern for timeless appeal, this guide equips you to tackle the project with confidence. Start planning today and transform your Palo Alto home’s entrance!
Ready to start your Palo Alto driveway project? Drop a comment below with your questions, and our team at Bayside Pavers will guide you through the process!

Retaining walls are more than just functional structures; they’re game-changers for San Jose homeowners looking to manage sloped landscapes, prevent erosion, and elevate their property’s aesthetic. Whether you’re in Almaden Valley or Evergreen, a well-built retaining wall can transform your yard into a usable, beautiful space. In this expert-level DIY guide, we’ll walk you through the step-by-step process of designing and constructing a durable retaining wall tailored to San Jose’s unique soil conditions and climate. From planning to installation, we’ve got you covered with practical tips to ensure structural integrity and stunning design.
San Jose’s diverse terrain, with its hilly neighborhoods and clay-heavy soils, makes retaining walls essential for many properties. These structures serve multiple purposes:
With the right approach, you can build a retaining wall that’s both functional and stylish, perfectly suited for San Jose’s climate and local regulations.Section 1: Planning and DesignBefore you grab a shovel, thorough planning is key to a successful retaining wall. Here’s what to consider:PurposeRetaining walls primarily stabilize sloped landscapes and manage water runoff, which is critical in San Jose’s hilly areas like Almaden Valley or the East Foothills. They prevent soil erosion during heavy rains and create flat, usable spaces for gardening, entertaining, or relaxing. Identify your goal—erosion control, added space, or both—to guide your design.
Choose materials that balance durability, cost, and aesthetic:
Consider San Jose’s warm, dry climate when selecting materials—opt for UV-resistant and water-permeable options to ensure longevity.
San Jose’s clay soils retain water, which can build pressure behind a retaining wall and cause failure. Incorporate:
Local RegulationsIn San Jose, retaining walls over 4 feet tall (measured from the bottom of the footing) require a building permit from the City of San Jose’s Building Division. Check for setback requirements and consult with a structural engineer for walls over 4 feet to ensure compliance with local codes. Visit sanjoseca.gov for permit details.Section 2: Structural IntegrityA retaining wall’s strength lies in its foundation and construction. San Jose’s expansive clay soils, which swell and shrink with moisture, demand careful attention to structural details.
A solid foundation prevents settling and cracking. For San Jose’s clay soils:
For walls over 3 feet, reinforcement is critical to withstand soil pressure:
Follow these steps to build a retaining wall that stands the test of time in San Jose:
A retaining wall can be both functional and a design statement. Here are ideas tailored to San Jose’s architectural diversity:
Consider adding low-voltage LED lighting along the wall’s base or capstones to highlight its texture and enhance evening ambiance.ConclusionBuilding a retaining wall in San Jose is a rewarding DIY project that enhances your property’s functionality and beauty. By prioritizing proper planning, a strong foundation, effective drainage, and thoughtful design, you can create a structure that withstands the region’s clay soils and occasional heavy rains. Whether you’re aiming for a modern masterpiece or a rustic retreat, this guide equips you with the knowledge to succeed. Start your project today and transform your San Jose yard into a stunning, stable landscape!
Have questions about building your retaining wall in San Jose? Leave a comment below with your project details, and our experts at Bayside Pavers will respond with tailored advice!
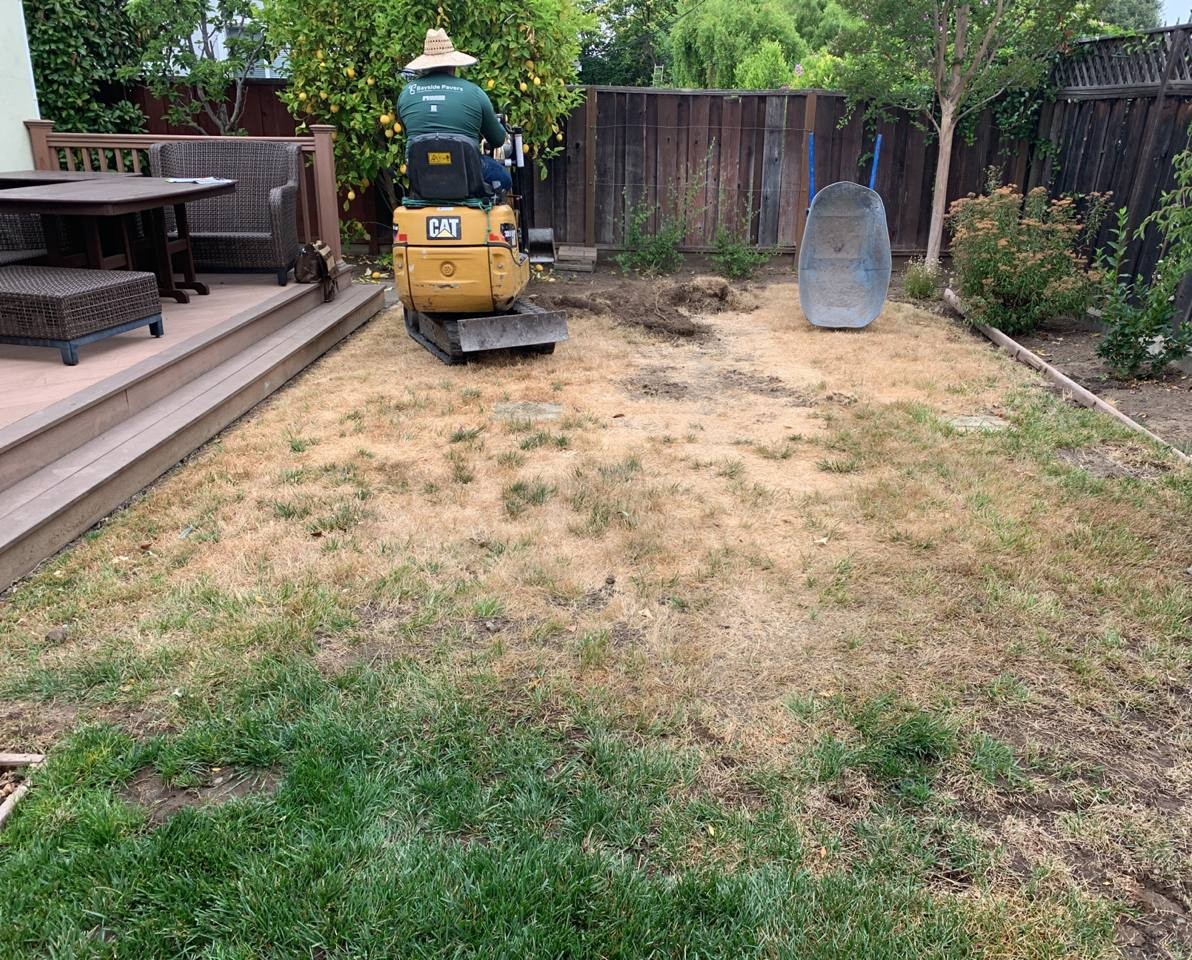
Imagine hosting a summer BBQ on your Mountain View patio, with friends laughing and kids playing, all on a surface that stays rock-solid year after year. No sinking, no cracks—just a patio that’s built to last. I had a friend in Mountain View whose patio started wobbling after a rainy winter, turning their backyard dreams into a headache. A quick call to Bayside Pavers, and we gave them a stable, stunning patio that’s now the star of their Silicon Valley gatherings.
The secret to a perfect paver patio lies beneath the surface: a strong, well-prepared base. In this guide, we’ll dive into why base prep is crucial, walk you through the step-by-step process, share a Mountain View success story, and highlight common mistakes to avoid—all backed by UCPRC’s durability standards. Plus, we’ll answer your top questions about patio stability. Ready to build a patio that stands the test of time? Let’s get started!
Why Base Prep Is Essential
Think of base preparation as the foundation of a house—if it’s not solid, everything else wobbles. A properly prepared base ensures your patio stays level, durable, and beautiful, even in Mountain View’s challenging climate. The University of California Pavement Research Center (UCPRC) recommends a 6–8-inch gravel base for paver patios to achieve stability and longevity. Here’s why it’s a game-changer:
At Bayside Pavers, we obsess over base prep to give your patio a rock-solid foundation. Let’s break down how we do it!
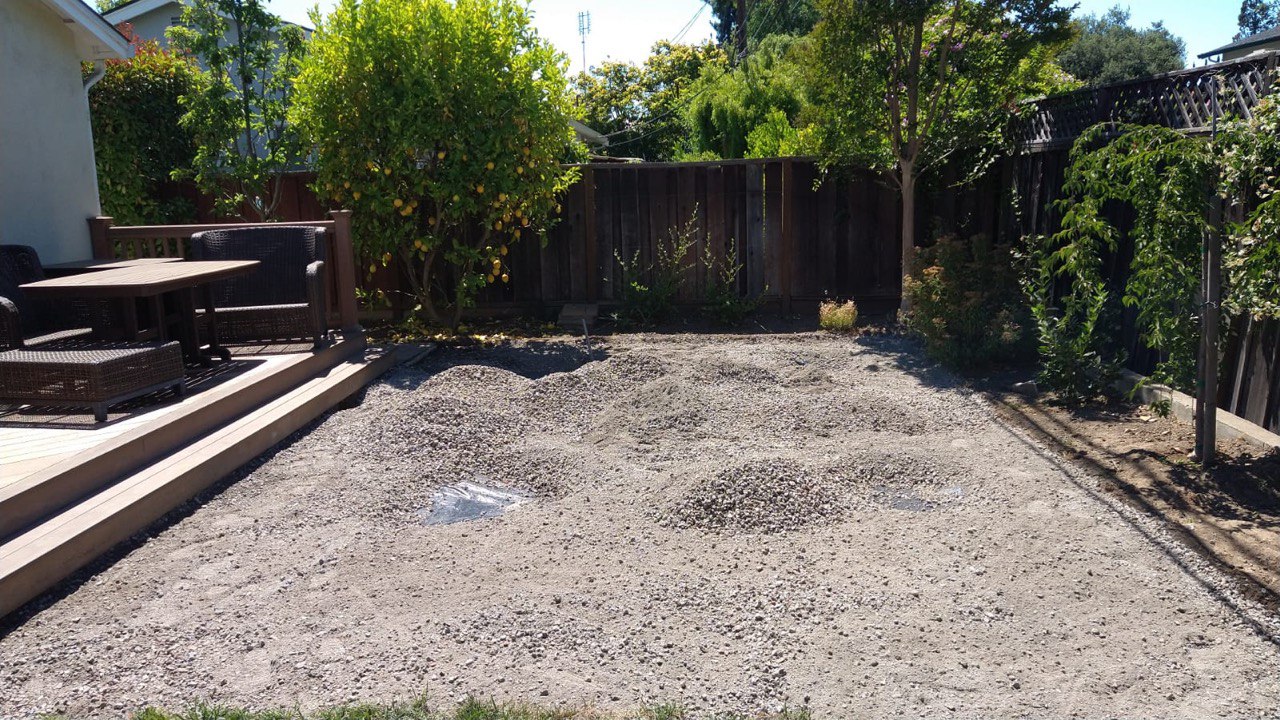
Step-by-Step Guide: Building a Stable Base
Creating a perfect patio base is like baking a cake—every layer matters, and precision is key. Here’s how Bayside Pavers builds a stable foundation for your Mountain View patio, following UCPRC guidelines:
Step 1: Site Assessment We visit your backyard to evaluate soil type, drainage, and patio size, ensuring the base suits Mountain View’s clay-heavy conditions.
Step 2: Excavation We dig 8–10 inches deep (10–12 inches for permeable pavers) to remove grass, roots, and loose soil, creating a clean slate.
Step 3: Geotextile Fabric We lay a permeable geotextile fabric over the soil to stabilize it and prevent weeds, ensuring water can still drain through.
Step 4: Gravel Base We add 6–8 inches of crushed gravel (3/4-inch aggregate), applied in 2-inch layers. Each layer is compacted with a plate compactor to achieve a rock-solid base that supports 8,000 psi, per UCPRC.
Step 5: Bedding Layer A 1-inch layer of coarse sand is screeded smooth over the gravel, creating a level bed for your Techo-Bloc pavers.
Step 6: Paver Installation We lay Techo-Bloc pavers (like Blu 60 or Mika) in your chosen pattern, ensuring a 1–2% slope for drainage.
Step 7: Finishing Touches We sweep polymeric sand into joints to lock pavers and prevent weeds, then compact the surface for a polished, stable finish.
This process ensures your patio stays level and strong for decades.
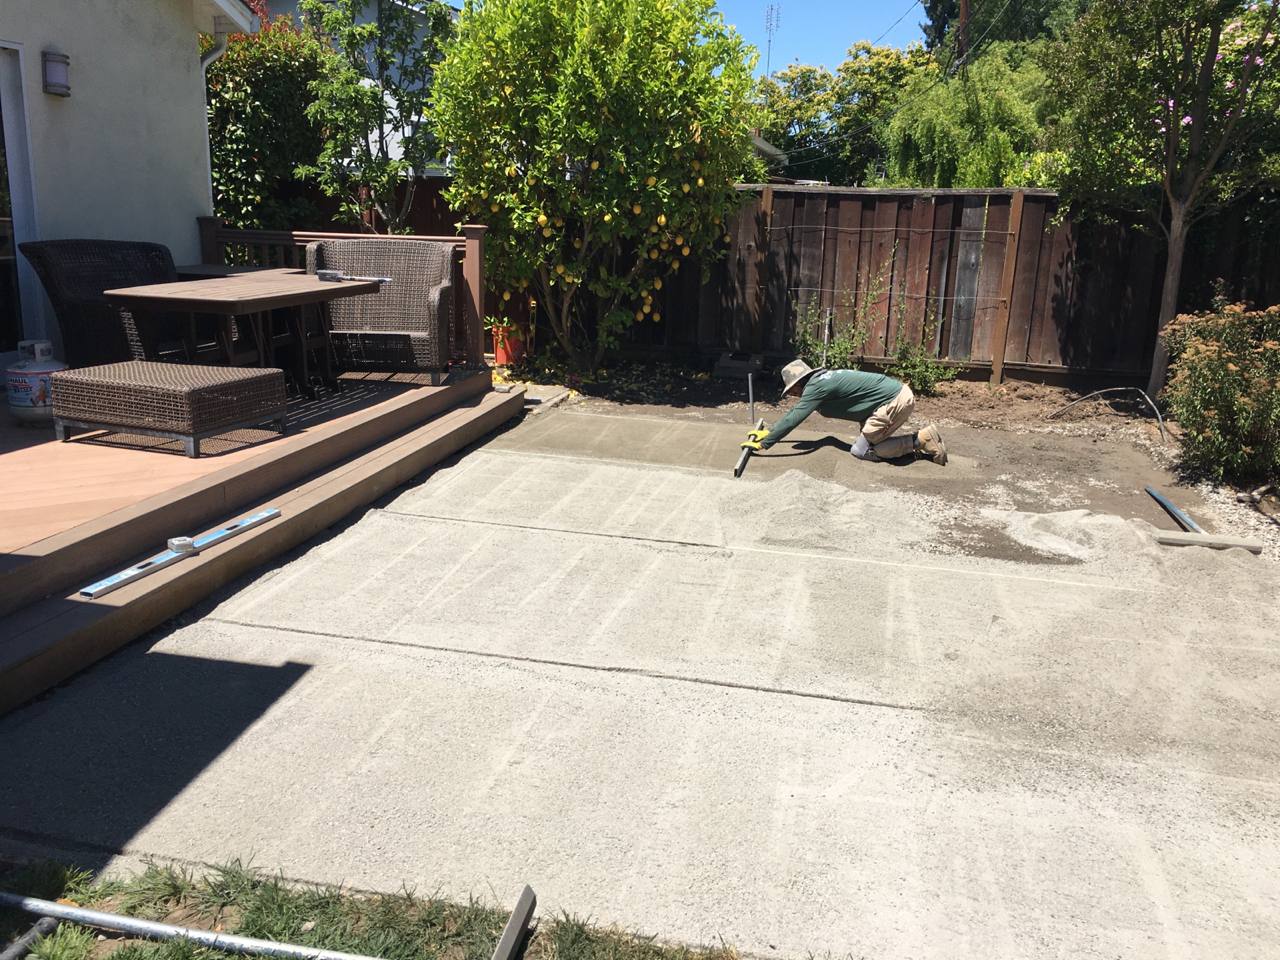
Mountain View Soil Considerations
Mountain View’s unique soil and climate demand careful base prep to keep your patio stable. Here’s how we tackle local challenges:
These strategies ensure your patio thrives in Mountain View’s conditions.
Common Mistakes to Avoid
A solid base is critical, but mistakes can compromise your patio’s stability. Here are pitfalls we avoid at Bayside Pavers:
Avoiding these mistakes ensures your patio stays stable and stunning.
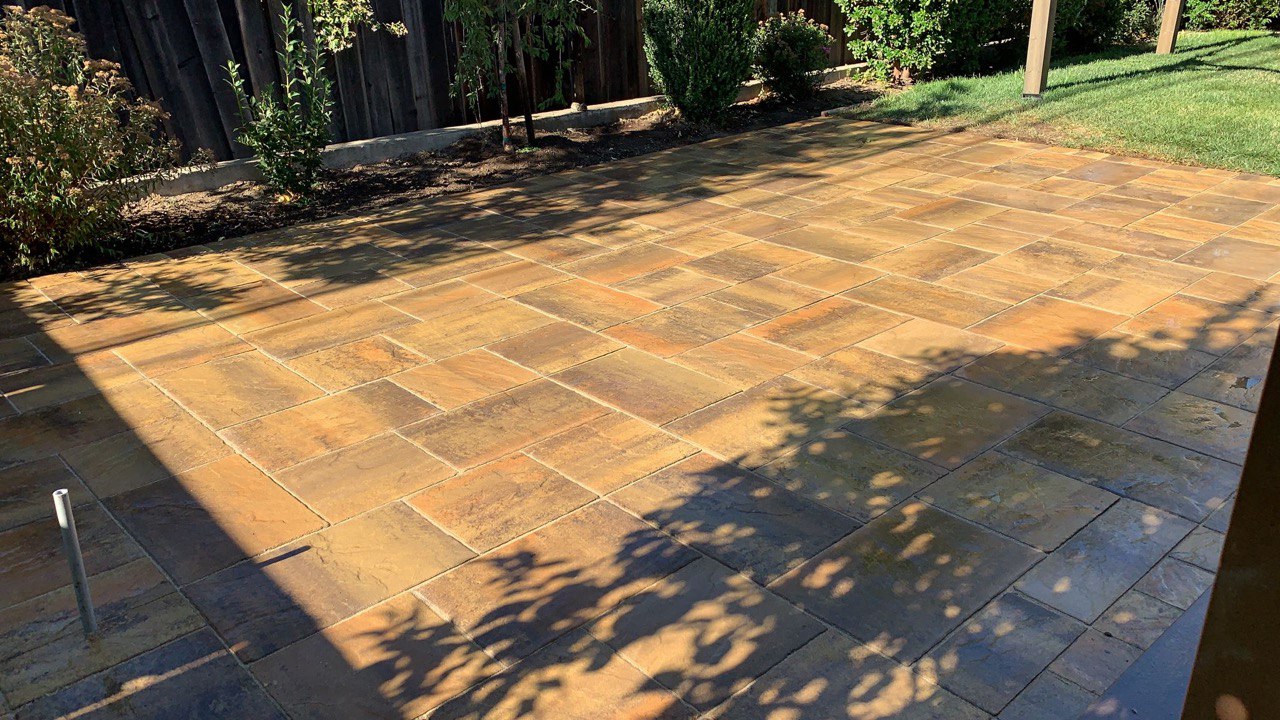
A Mountain View Success Story: The Chen Family’s Patio
Let’s talk about a real Mountain View project that nailed base prep. The Chen family had a sinking concrete patio that cracked and wobbled after heavy rains, ruining their Silicon Valley entertaining plans. They called Bayside Pavers for a stable, stylish solution.
Before: The patio was uneven, with cracks and puddles that made it unusable for BBQs or family gatherings. The weak base couldn’t handle Mountain View’s clay soil.
The Transformation: We designed a 300-square-foot patio using Techo-Bloc Blu 60 pavers in a running bond pattern. We excavated 10 inches deep, laid geotextile fabric, and added an 8-inch gravel base, compacted in 2-inch layers. A 1-inch sand layer and polymeric sand joints ensured stability, with a 1–2% slope for drainage.
After: The Chen patio is now a rock-solid, stylish oasis, perfect for tech meetups and family dinners. It’s stayed level through two rainy seasons, and the sleek design fits Mountain View’s vibe. “We finally have a patio we trust!” they said.
Maintenance for a Stable Patio
A well-prepared base minimizes maintenance, but a little care keeps your patio solid. Here’s how to maintain your Mountain View patio:
These steps keep your patio stable and beautiful for decades.
FAQs: Your Patio Stability Questions Answered
Got questions about patio stability? We’ve got answers!
Why does base prep matter for stability? A 6–8-inch gravel base, per UCPRC, distributes weight and prevents settling, keeping your patio level for 30–50 years.
What happens if the base isn’t compacted properly? Uneven compaction leads to sinking or shifting pavers. We compact each layer to ensure rock-solid stability.
Can clay soil affect my patio? Yes, Mountain View’s clay soil can shift, but geotextile fabric and a thick gravel base prevent issues.
How do I know if my patio is stable? A level surface with no wobbling or cracks indicates a solid base. Call +1 (866) 225-3512 for an inspection!
Are Techo-Bloc pavers durable on a strong base? Absolutely! They handle 8,000 psi and last decades with proper prep, backed by a lifetime warranty.
Build a Rock-Solid Patio with Bayside Pavers
Your Mountain View patio deserves a foundation that ensures stability, durability, and Silicon Valley style. With a 6–8-inch gravel base, Techo-Bloc pavers, and Bayside Pavers’ expertise, we’ll create a patio that stays level and stunning for decades, backed by UCPRC’s standards. Whether it’s a cozy retreat or a grand entertaining space, we’ve got you covered.
Questions about patio prep? Drop a comment or contact Bayside Pavers at +1 (866) 225-3512! Let’s make your Mountain View backyard a rock-solid masterpiece.
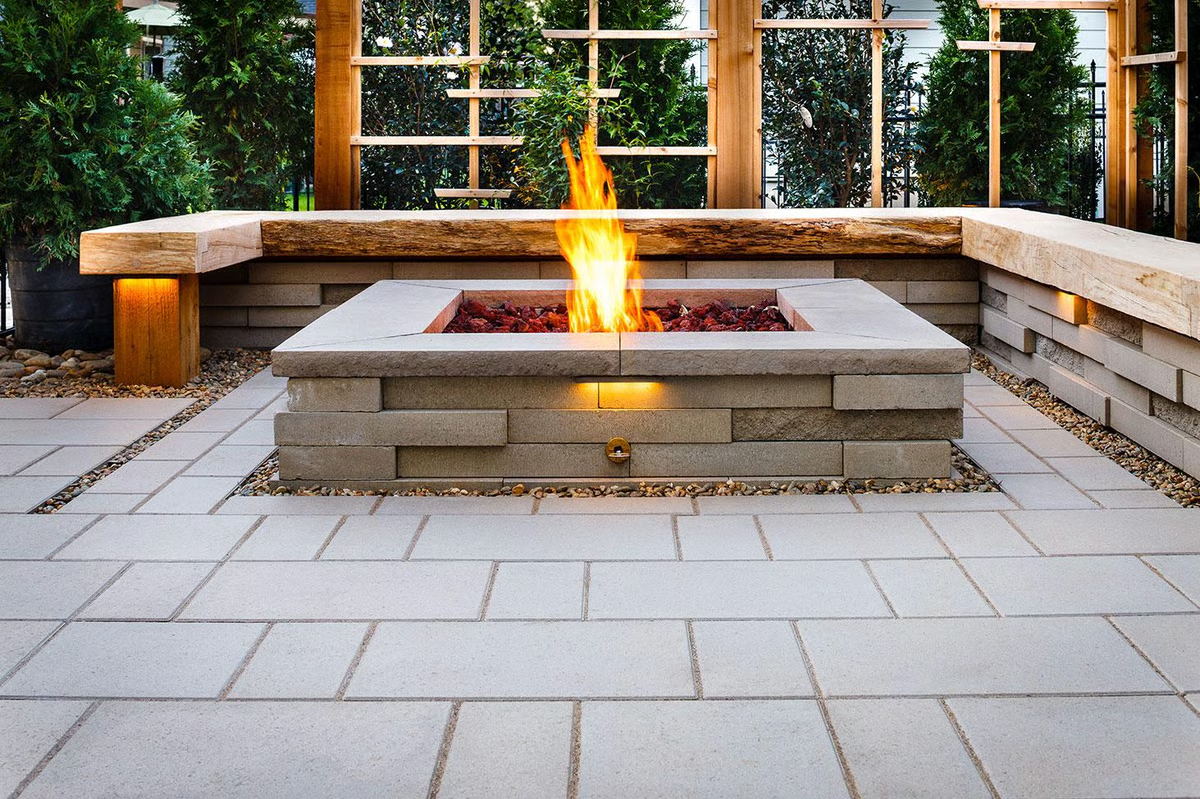
Imagine stepping into your Pleasanton backyard, where a stunning paver patio welcomes you with sleek Techo-Bloc slabs, perfect for hosting a Tri-Valley BBQ or sipping coffee under the East Bay sun. I had a friend in Pleasanton whose backyard was a muddy mess, useless for entertaining—until they called Bayside Pavers. Now, their patio is the go-to spot for family game nights and neighborly gatherings, and they can’t stop raving about it.
A paver patio isn’t just a surface; it’s a game-changer for outdoor living, turning your backyard into a space for memories, relaxation, and style. In this guide, we’ll explore the benefits of paver patios, share design inspiration for Pleasanton homes, dive into a local before-and-after transformation, and walk you through planning your own project—all backed by UCPRC’s durability standards. Plus, we’ll answer your top questions about costs and timelines. Ready to transform your backyard into a showstopper? Let’s dive in!
Benefits of a Paver Patio
A paver patio is like the Swiss Army knife of outdoor spaces—versatile, durable, and oh-so-stylish. Here’s why Pleasanton homeowners are choosing paver patios to elevate their backyards:
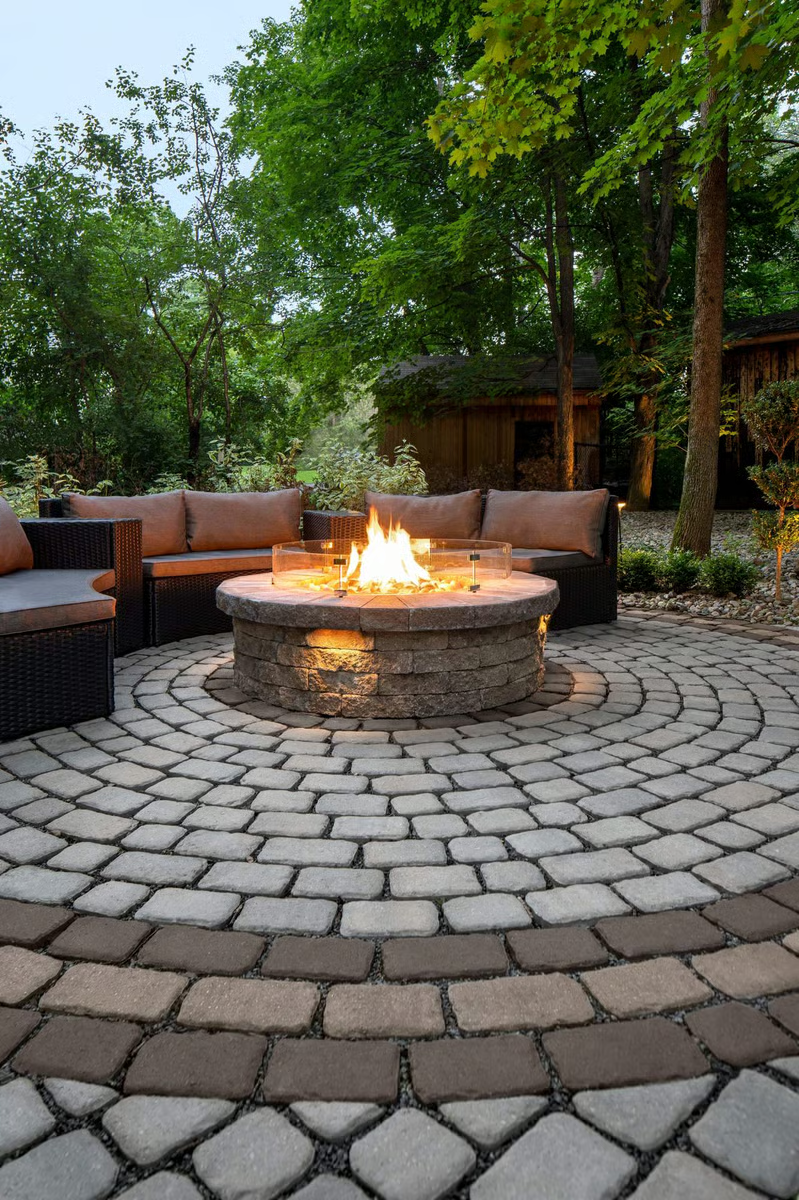
At Bayside Pavers, we’re passionate about crafting patios that make your Pleasanton backyard the heart of your home.
Design Inspiration: Ideas for Your Pleasanton Patio
Your patio should reflect your style and make your backyard feel like an extension of your home. Here are some design ideas to spark your creativity in Pleasanton:
These designs, built on a 6–8-inch gravel base (per UCPRC), ensure durability and style for Pleasanton’s outdoor lifestyle.
Pleasanton Case Study: The Garcia Family’s Transformation
Let’s talk about a real Pleasanton project that turned a lackluster backyard into a stunning outdoor haven. The Garcia family had a muddy, uneven lawn that was a nightmare for hosting their famous Tri-Valley BBQs. They wanted a patio that could handle family gatherings and look gorgeous year-round.
Before: The backyard was a patchy, muddy mess, unusable after rain and uninviting for guests. It clashed with their modern Pleasanton home and limited their outdoor fun.
The Transformation: We designed a 350-square-foot patio using Techo-Bloc Blu 60 slabs in a running bond pattern for a clean, modern look. We excavated 8 inches deep, laid geotextile fabric to prevent weeds, and added a 6-inch crushed gravel base (3/4-inch aggregate, per UCPRC), compacted in 2-inch layers for stability. A 1-inch sand layer provided a level bed, and polymeric sand locked the joints. A slight 1–2% slope ensured drainage during Pleasanton’s rainy winters.
After: The Garcia patio is now a vibrant, durable space, perfect for BBQs, kids’ playdates, and evening cocktails. It’s stayed flawless through two seasons, and the sleek Blu 60 design has neighbors asking for our number. “This patio transformed how we use our backyard!” they said.
Planning Your Transformation: Steps to Success
Transforming your Pleasanton backyard starts with a solid plan. Here’s how Bayside Pavers guides you through the process to create your dream patio:
With these steps, your patio will be a stunning, functional addition to your Pleasanton home.
Installation: Building Your Dream Patio
At Bayside Pavers, we craft patios with precision to ensure durability and beauty. Here’s our process, aligned with UCPRC guidelines:
Step 1: Design Consultation We visit your Pleasanton backyard to discuss your vision, measure the space, and recommend Techo-Bloc pavers like Blu 60 or Villagio.
Step 2: Excavation We dig 8–10 inches deep to remove grass, roots, and loose soil, creating a stable foundation.
Step 3: Base Preparation We lay geotextile fabric, then add 6–8 inches of crushed gravel, compacting each 2-inch layer to support 8,000 psi, per UCPRC.
Step 4: Bedding Layer A 1-inch layer of coarse sand is screeded smooth to create a level bed for your pavers.
Step 5: Paver Installation We lay Techo-Bloc slabs in your chosen pattern, cutting edges for a seamless fit and adding a 1–2% slope for drainage.
Step 6: Finishing Touches We sweep polymeric sand into joints to prevent weeds, compact the surface, and clean up for a polished look.
This process ensures your patio is built to last and elevate your outdoor living.
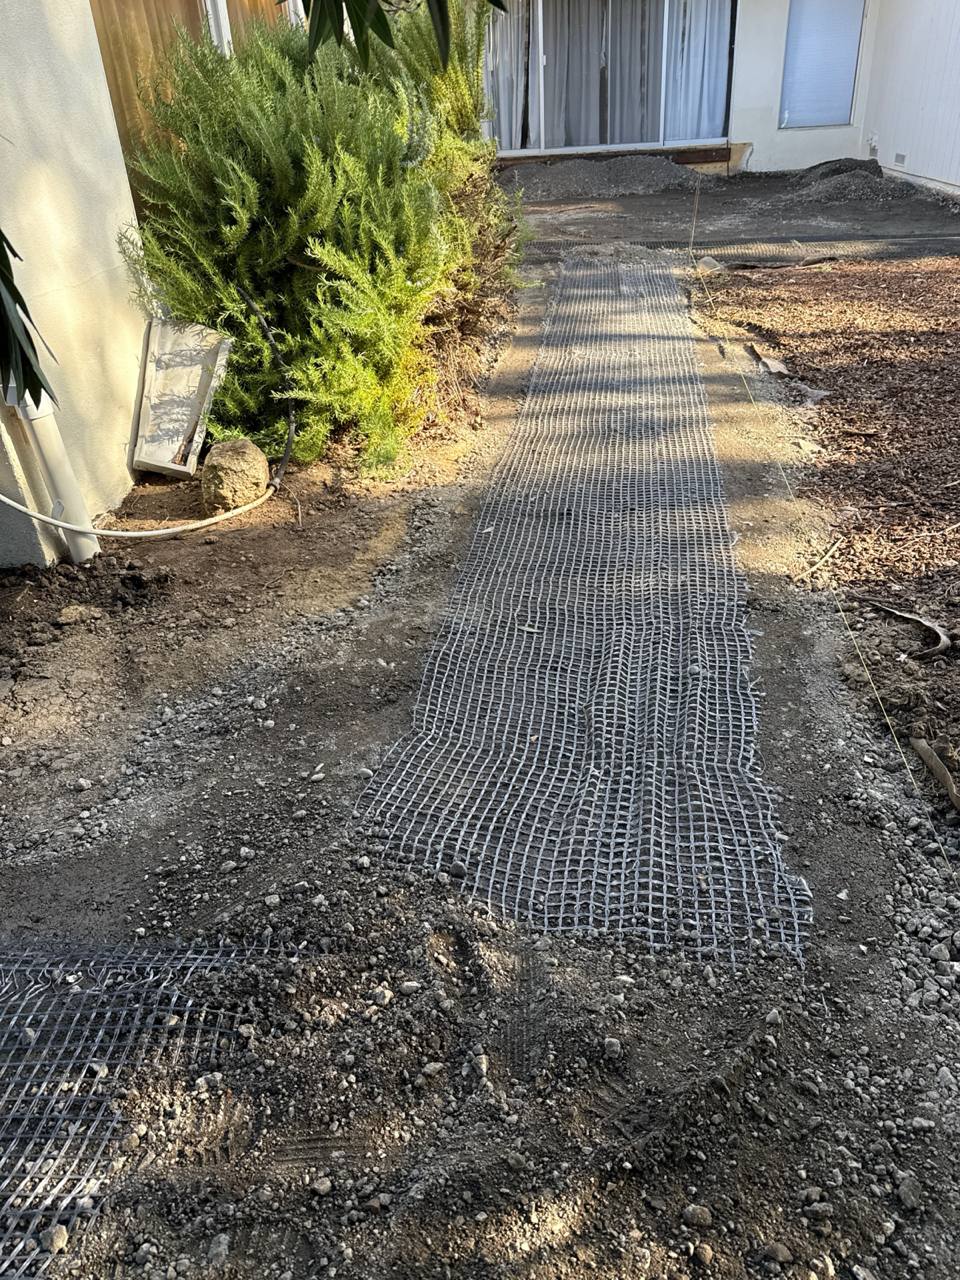
Pleasanton Weather and Soil Considerations
Pleasanton’s warm, dry summers and wet winters require careful planning to ensure your patio thrives. Here’s how we address local conditions:
These considerations make your patio a durable, beautiful addition to your Tri-Valley home.
FAQs: Your Patio Cost and Timeline Questions Answered
Got questions about transforming your backyard? We’ve got answers!
How much does a paver patio cost in Pleasanton? Depending on design and pavers. Call +1 (866) 225-3512 for a free quote!
How long does patio installation take? A 200–400 sq ft patio takes 3–5 days, depending on weather and complexity.
Can I install a patio myself? It’s possible, but professional base prep (6–8 inches, per UCPRC) ensures stability. We’ll save you time and stress.
How long do Techo-Bloc pavers last? With proper installation, 30–50 years, backed by a lifetime warranty on color and structure.
When’s the best time to install a patio? Spring or fall in Pleasanton avoids extreme heat or rain, but we work year-round for your convenience.
Transform Your Pleasanton Backyard with Bayside Pavers
Your Pleasanton backyard deserves to be a stunning, functional space for Tri-Valley living, not a wasted patch of grass. With Techo-Bloc’s durable, stylish pavers and Bayside Pavers’ expertise, we’ll transform your outdoor space into a haven for memories, backed by UCPRC’s standards. Whether it’s a modern masterpiece or a rustic retreat, we’ve got you covered.
Ready to transform your backyard? Share your vision in the comments or contact us at +1 (866) 225-3512! Let’s make your Pleasanton patio a showstopping oasis.
.avif)
Picture this: it’s a warm Sunnyvale evening, and your backyard is buzzing with friends around a glowing fire pit, laughter filling the air as you host the perfect Silicon Valley BBQ. Your new paver patio is the star of the show, with cozy seating and a sleek design that has everyone asking, “How do we get one of these?” I had a friend in Sunnyvale whose backyard was a boring lawn until they called Bayside Pavers. Now, their patio is the go-to spot for game nights and summer parties.
A paver patio isn’t just a surface—it’s a stage for unforgettable moments, from family dinners to epic outdoor gatherings. With the right design, like multi-level layouts and built-in features, you can transform your Sunnyvale backyard into an entertaining paradise. In this guide, we’ll explore key elements for hosting, popular layouts, Sunnyvale design trends, and how to choose Techo-Bloc pavers for style and durability. Plus, we’ll share a local success story and answer your top questions. Ready to make your backyard the heart of every party? Let’s dive in!
Key Elements for an Entertaining Patio
A great patio is like a well-planned party—it needs the right ingredients to shine. Here’s what makes a paver patio perfect for entertaining in Sunnyvale:
These elements turn your patio into a hosting hub that’s both practical and gorgeous.
Popular Patio Layouts for Entertaining
The layout of your patio sets the stage for how you entertain. Here are some crowd-pleasing designs for Sunnyvale backyards:
The University of California Pavement Research Center (UCPRC) recommends a 6–8-inch gravel base for all layouts to ensure stability, especially for multi-level designs.
Sunnyvale Design Trends: Silicon Valley Style
Sunnyvale’s tech-savvy, laid-back vibe calls for patios that blend modern style with functionality. Here are the top trends we’re seeing:
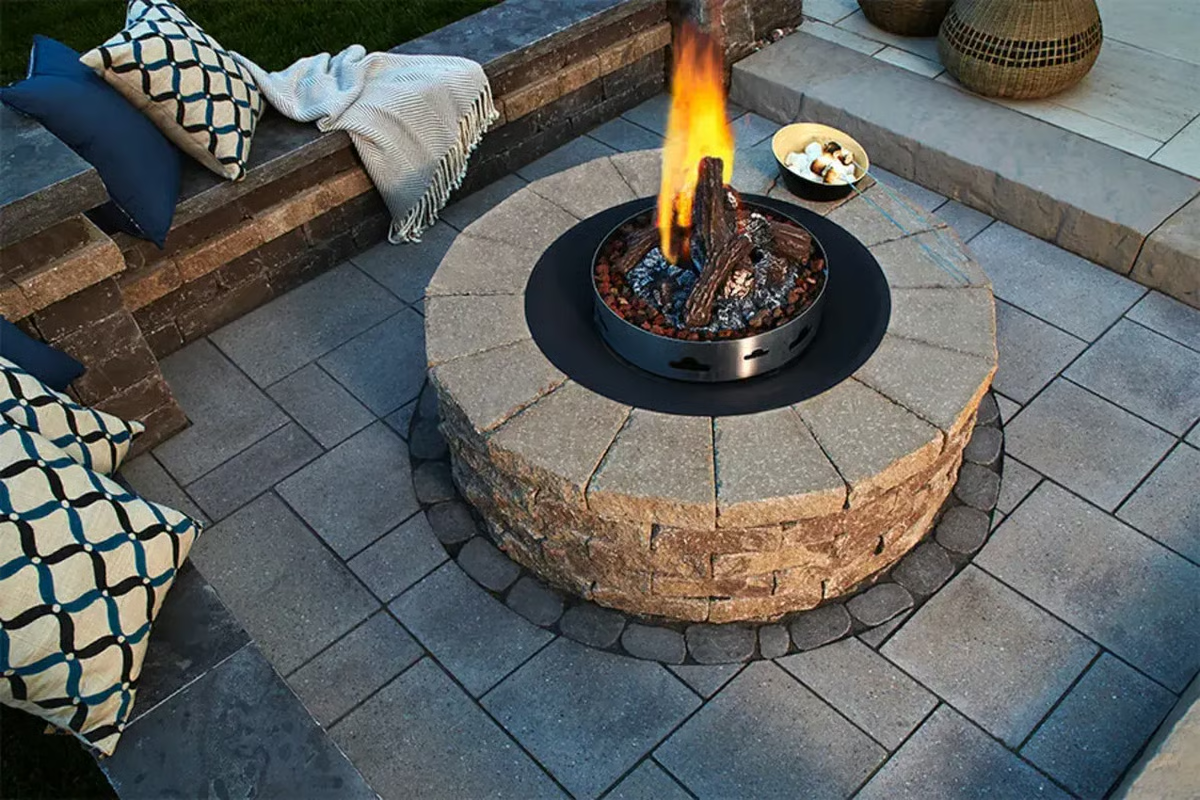
These trends make your patio a stylish extension of your Sunnyvale home, ready for any gathering.
Choosing the Right Pavers for Your Patio
Picking the perfect pavers is like choosing the vibe for your party—they set the tone. Techo-Bloc offers a range of options to match Sunnyvale’s entertaining needs:
Consider your entertaining style: Blu 60 for sleek, modern parties, Villagio for intimate gatherings, or Aquastorm for eco-conscious hosts. We’ll help you choose the perfect fit!
Installation: Building Your Entertaining Oasis
At Bayside Pavers, we craft patios with precision to ensure they’re party-ready and durable. Here’s our process, aligned with UCPRC guidelines:
Step 1: Design Consultation We visit your Sunnyvale backyard to discuss your entertaining needs, measure the space, and sketch a custom layout with features like fire pits or seating.
Step 2: Excavation We dig 8–10 inches deep to remove grass and loose soil, ensuring a stable foundation for your patio.
Step 3: Base Preparation We layer 6–8 inches of crushed gravel (3/4-inch aggregate), compacting each 2-inch layer to support 8,000 psi, per UCPRC.
Step 4: Bedding Layer A 1-inch layer of coarse sand is screeded smooth to create a level bed for your pavers.
Step 5: Paver Installation We lay Techo-Bloc pavers in your chosen pattern, cutting edges for a seamless fit. Multi-level designs may include retaining walls for raised areas.
Step 6: Finishing Touches We sweep polymeric sand into joints to prevent weeds, install lighting or fire pits, and clean the site for a polished look.
A Sunnyvale Success Story: The Lee Family’s Patio
Let’s talk about a real Sunnyvale project that turned a backyard into an entertaining haven. The Lee family had a small, uneven backyard that limited their hosting dreams. They wanted a patio for tech meetups and family dinners that matched their modern Silicon Valley home.
Before: The backyard was a patchy lawn with no space for entertaining. Muddy patches after rain made it unusable for gatherings.
The Transformation: We designed a 400-square-foot, multi-level patio using Techo-Bloc Blu 60 slabs in a linear pattern for the dining area and Raffinato walls for built-in seating on a lower lounge level. A central fire pit became the focal point. We excavated 8 inches deep, added a 6-inch gravel base, and used polymeric sand for stability.
After: The Lees’ patio is now a stunning entertaining space, perfect for Sunnyvale’s sunny evenings. They’ve hosted game nights and BBQs with ease, and the fire pit keeps guests cozy. “It’s like we doubled our living space!” they said.
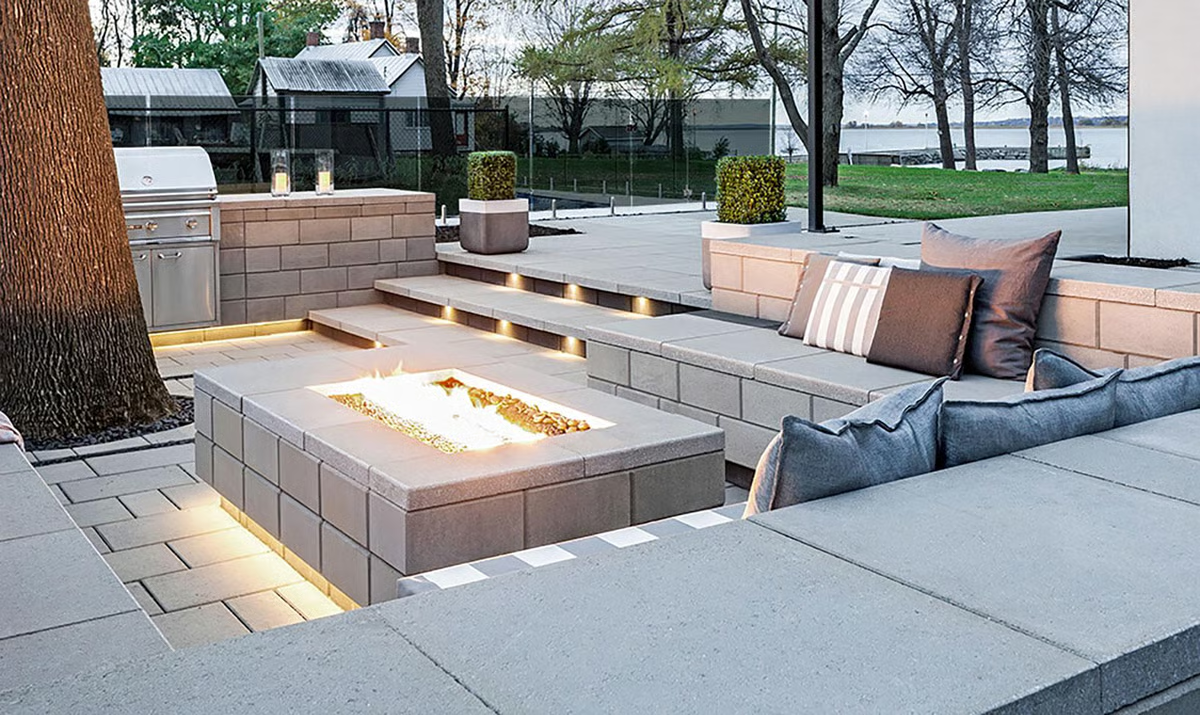
FAQs: Your Patio Hosting Questions Answered
Got questions about creating an entertaining patio? We’ve got answers!
How big should my patio be for entertaining? A 300–500 sq ft patio fits 10–20 guests comfortably, with zones for dining and lounging. We’ll tailor the size to your Sunnyvale backyard.
Can I add a fire pit later? Yes! Techo-Bloc’s fire pit kits can be integrated anytime, though planning upfront saves on labor.
How durable are patios for parties? Techo-Bloc pavers handle 8,000 psi (per UCPRC), so they’re perfect for heavy furniture, grills, or dancing guests.
Do I need a permit in Sunnyvale? Patios over 500 sq ft or with structures (like pergolas) may require a permit. We’ll handle the paperwork.
How much does a patio cost? Depending on design and pavers. Call +1 (866) 225-3512 for a free quote!
Create Your Sunnyvale Party Haven with Bayside Pavers
Your Sunnyvale backyard deserves to be the ultimate entertaining space, where friends gather, kids play, and memories are made. With Techo-Bloc’s stunning pavers and Bayside Pavers’ expertise, we’ll design a patio that’s perfect for Silicon Valley soirées, built to last with UCPRC-backed techniques. Whether it’s a multi-level masterpiece or a cozy fire pit retreat, we’ve got you covered.
Ready to design your dream patio? Comment below or reach out for a consultation at +1 (866) 225-3512! Let’s make your Sunnyvale backyard the heart of every party.
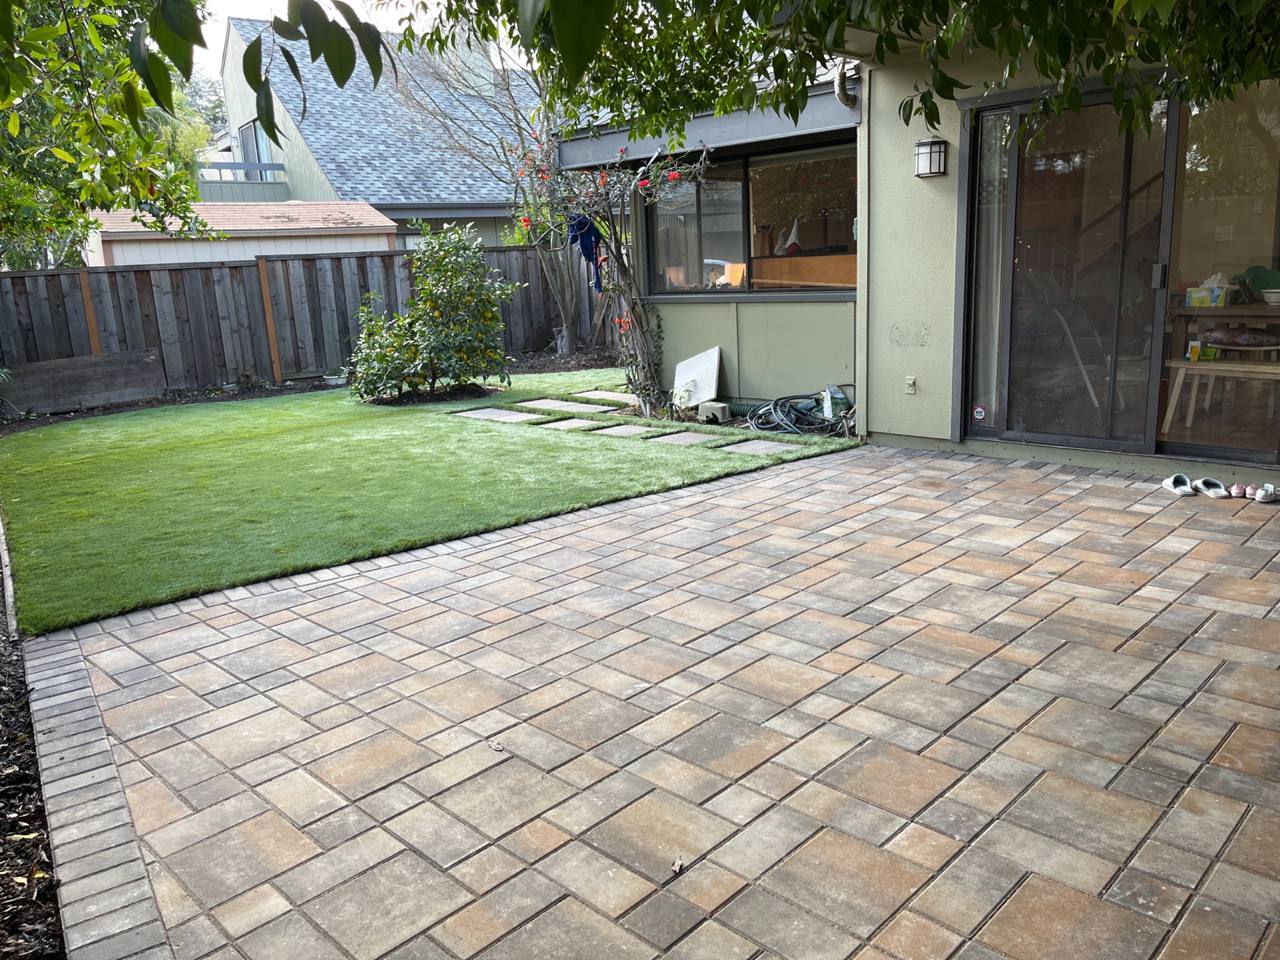
Imagine stepping into your Menlo Park backyard, coffee in hand, onto a stunning paver patio where you can host summer BBQs or just soak up the Silicon Valley sun. Sounds like a dream, right? I had a friend in Menlo Park whose backyard was a patchy lawn that screamed “missed opportunity”—until they called Bayside Pavers. Now, their patio is the go-to spot for family game nights and neighborly wine tastings, and they can’t stop raving about it.
A paver patio is more than just a pretty surface—it’s a space for memories, relaxation, and boosting your home’s value. But getting it right takes careful planning and execution. In this guide, we’ll walk you through the complete process of installing a paver patio, from dreaming up the design to laying Techo-Bloc slabs. We’ll share a Menlo Park success story, break down the tools and materials needed, and tackle your top questions about timelines and permits—all backed by UCPRC’s expert guidelines. Ready to turn your backyard into a masterpiece? Let’s get started!
Why a Paver Patio Is a Game-Changer
Your backyard should be an extension of your home, a place to unwind or entertain. A paver patio, especially with durable Techo-Bloc slabs, offers style, durability, and low maintenance. According to the University of California Pavement Research Center (UCPRC), a properly installed paver patio with a 6–8-inch gravel base can last 30–50 years, even under heavy use. Whether you’re hosting a Silicon Valley tech meetup or enjoying a quiet morning in Menlo Park, a paver patio sets the stage. Here’s why it’s worth it:
At Bayside Pavers, we’re passionate about creating patios that make your Menlo Park backyard the envy of the neighborhood. Let’s start with planning!
Planning Your Patio: Your Vision, Your Way
Before we grab the shovels, let’s dream big. Planning your patio is like sketching a blueprint for your perfect outdoor space. Here’s how to get started in Menlo Park:
Ask yourself: “What’s my dream patio vibe?” A sleek, modern space for tech meetups or a cozy retreat for family nights? We’ll bring your vision to life!
Step-by-Step Installation: Building Your Dream Patio
Installing a paver patio is like crafting a work of art—it takes precision and care. Here’s how Bayside Pavers builds a patio that lasts, following UCPRC’s guidelines:
Step 1: Site Assessment We visit your Menlo Park backyard to evaluate soil, drainage, and space. We’ll discuss your design preferences and ensure compliance with local codes.
Step 2: Excavation We dig 8–10 inches deep to remove grass, roots, and loose soil. For standard patios, 8 inches is typical, per UCPRC, to balance stability and cost.
Step 3: Base Preparation We layer 6–8 inches of crushed gravel (3/4-inch aggregate) in 2-inch increments, compacting each layer with a plate compactor. This creates a rock-solid base that supports up to 8,000 psi.
Step 4: Bedding Layer A 1-inch layer of coarse sand is screeded smooth to create a level bed for your pavers, like a canvas for your patio.
Step 5: Paver Installation We lay Techo-Bloc slabs (like Blu 60 or Villagio) in your chosen pattern—running bond for modern or herringbone for classic. We cut edges for a seamless fit.
Step 6: Finishing Touches We sweep polymeric sand into the joints to lock pavers in place and prevent weeds, then compact and clean the site for a polished look.
Tools and Materials for a Perfect Patio
Building a paver patio requires the right tools and materials to ensure durability and style. Here’s what Bayside Pavers uses for Menlo Park projects:
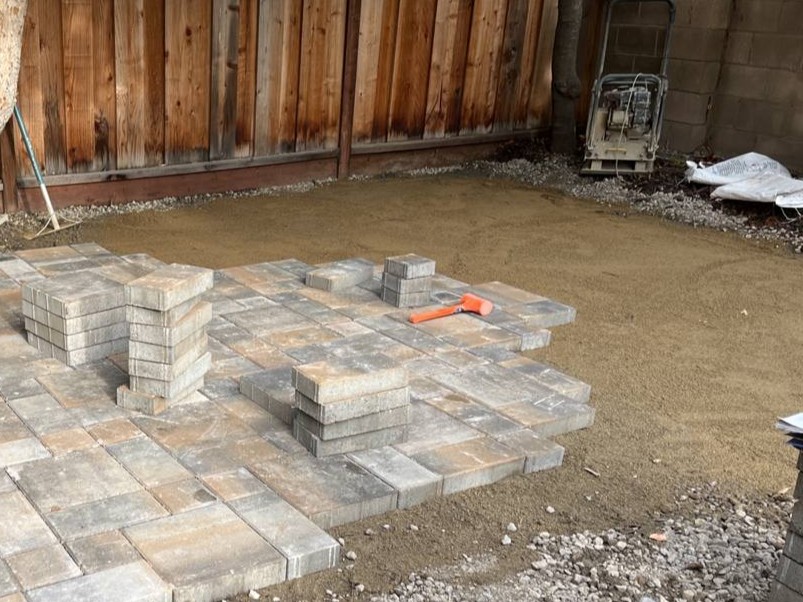
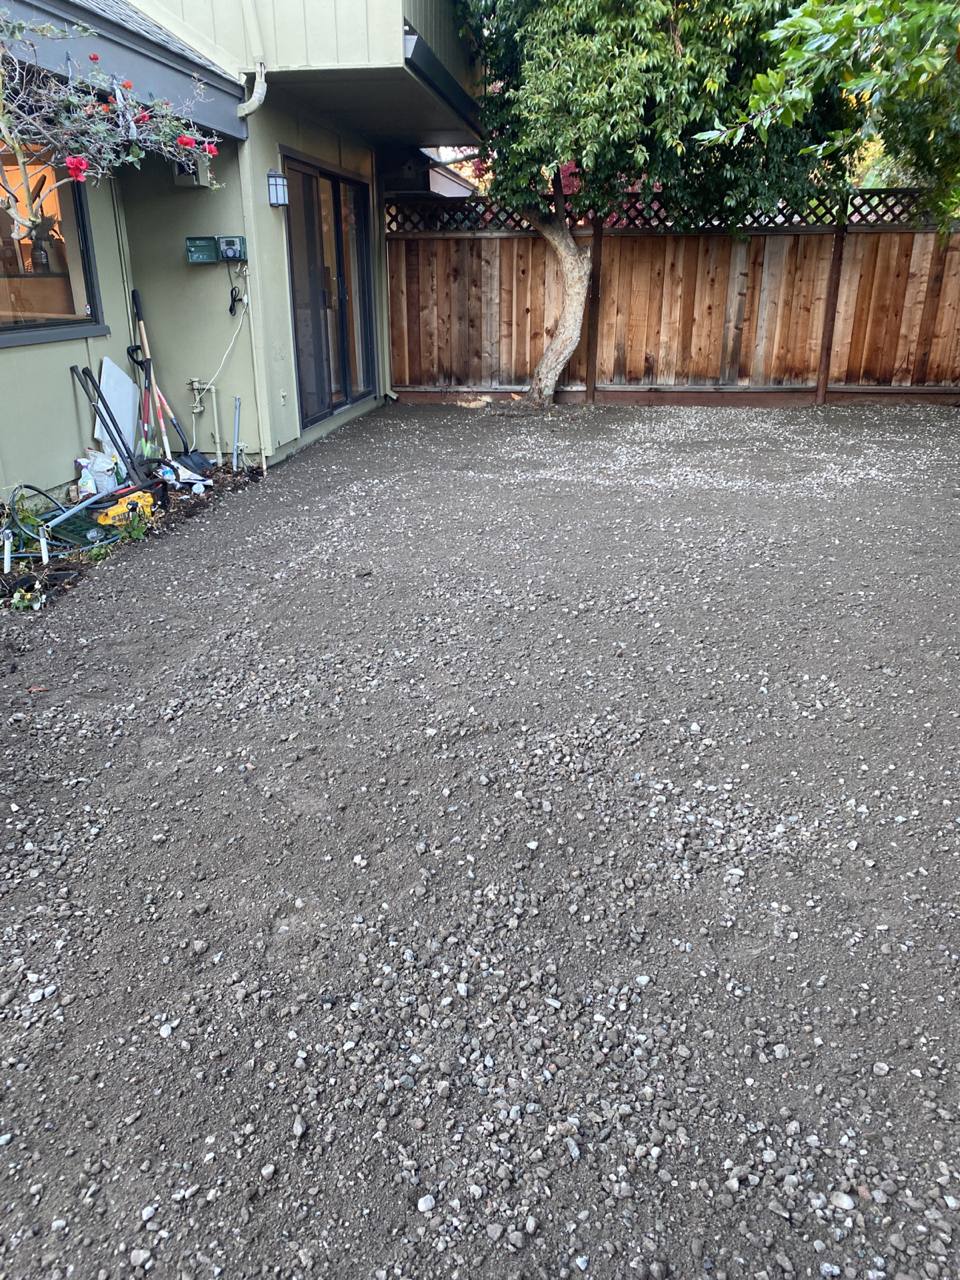
With these tools and materials, we create a patio that’s both beautiful and built to last.
Menlo Park Considerations: Local Challenges and Solutions
Menlo Park’s unique climate and soil present specific challenges for patio installation. Here’s how we address them:
Our experience in Menlo Park ensures your patio thrives in Silicon Valley’s unique conditions.
A Menlo Park Success Story: The Thompson Family’s Patio
Let’s talk about a real Menlo Park project that transformed a backyard into a dream space. The Thompson family had a muddy, uneven lawn that was unusable for their kids’ playdates or evening gatherings. They wanted a stylish, durable patio for their Silicon Valley lifestyle.
Before: The backyard was a patchy mess, with mud after every rain and no space for entertaining. It clashed with their modern Menlo Park home.
The Transformation: We designed a 300-square-foot patio using Techo-Bloc Blu 60 slabs in a running bond pattern for a sleek, modern look. We excavated 8 inches deep, added a 6-inch gravel base, and topped it with a sand layer. Polymeric sand locked the joints, and a slight slope ensured drainage.
After: The Thompsons’ patio is now a vibrant outdoor living space, perfect for family dinners and tech meetups. The kids play safely, and the patio’s held up flawlessly through two rainy seasons. “It’s like we added a new room to our home!” they said.
FAQs: Your Patio Installation Questions Answered
Got questions about installing a paver patio? We’ve got answers!
How long does patio installation take? A 200–400 sq ft patio in Menlo Park takes 3–5 days, depending on design and site conditions.
Do I need a permit in Menlo Park? Patios over 500 sq ft or impacting drainage may require a permit. We’ll handle the process to ensure compliance.
Can I install a patio myself? It’s possible, but professional installation ensures a stable base and proper drainage. Call us at +1 (866) 225-3512 for a flawless result!
How durable are Techo-Bloc slabs? They handle 8,000 psi (per UCPRC) and last 30–50 years with minimal maintenance, backed by a lifetime warranty.
What’s the cost of a paver patio? Depending on materials and design. We’ll provide a free quote tailored to your project!
Transform Your Menlo Park Backyard with Bayside Pavers
Your backyard deserves to be a place of joy, relaxation, and connection, and a paver patio is the perfect way to make it happen. With Techo-Bloc’s durable slabs and Bayside Pavers’ expert installation, backed by UCPRC’s guidelines, we’ll create a Menlo Park patio that’s beautiful, functional, and built to last. Whether it’s a cozy retreat or a grand entertaining space, we’ve got you covered.
Have questions about patio installation? Share them in the comments or contact us at +1 (866) 225-3512 today! Let’s turn your Menlo Park backyard into a Silicon Valley oasis.
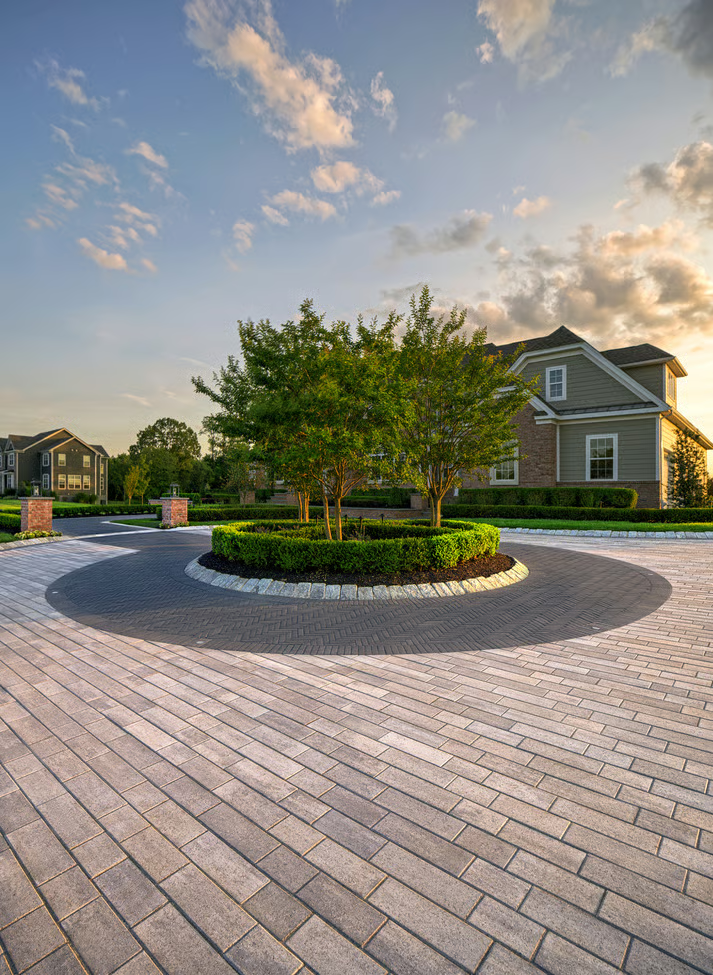
Imagine stepping onto your Sunnyvale patio, where sleek, linear Techo-Bloc Linea pavers create a modern masterpiece that screams Silicon Valley sophistication. Picture hosting a chic evening soiree or sipping coffee in a space that feels like it’s straight out of a design magazine. I had a friend in Sunnyvale whose backyard was a dull concrete slab—until they called Bayside Pavers. Now, their Linea paver patio is the envy of the neighborhood, blending cutting-edge style with rock-solid durability.
Techo-Bloc’s Linea pavers are the go-to choice for homeowners craving a modern, streamlined look that’s built to last. In this guide, we’ll explore the standout features of Linea pavers, dive into modern patio design trends, share a Sunnyvale transformation story, and provide a step-by-step installation guide—all backed by UCPRC’s durability standards. Plus, we’ll offer a pattern guide and answer your top questions about customization. Ready to transform your Sunnyvale backyard into a modern oasis? Let’s dive in!
Linea Paver Features: Sleek and Timeless
Techo-Bloc’s Linea pavers are like the sleek sports car of patio materials—stylish, high-performing, and built to impress. Their long, linear design and modern aesthetic make them perfect for Sunnyvale’s tech-savvy, upscale vibe. Here’s why Linea pavers shine, per UCPRC and Techo-Bloc specs:
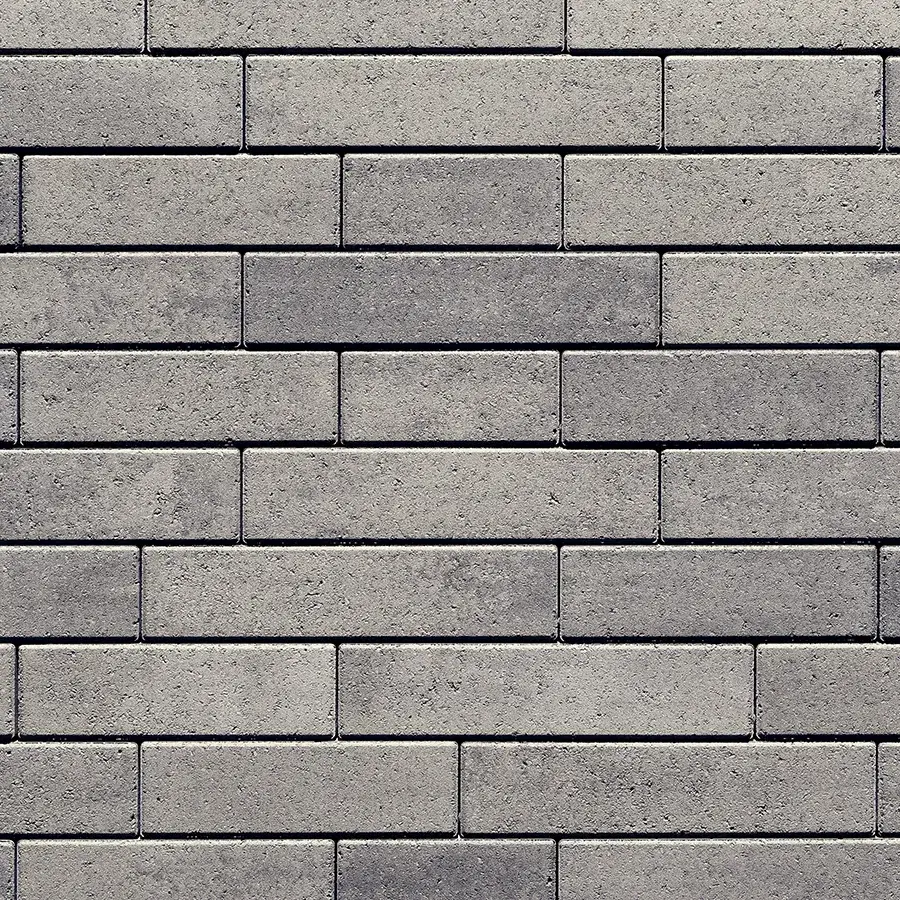
At Bayside Pavers, we love how Linea pavers bring modern elegance to Sunnyvale backyards, combining style with unbeatable durability.
Modern Design Trends: Elevating Your Patio
Modern patio design is all about clean lines, open spaces, and functional beauty—qualities Linea pavers deliver in spades. Here are the top trends to inspire your Sunnyvale patio, tailored to Silicon Valley’s aesthetic:
These trends, built on a 6–8-inch gravel base (per UCPRC), ensure your patio is both stylish and durable.
Sunnyvale Patio Ideas: Modern Meets Silicon Valley
Sunnyvale’s warm climate and innovative spirit make it the perfect place for a modern Linea paver patio. Here are design ideas to transform your backyard:
These designs make your Sunnyvale patio a modern masterpiece that’s both functional and gorgeous.
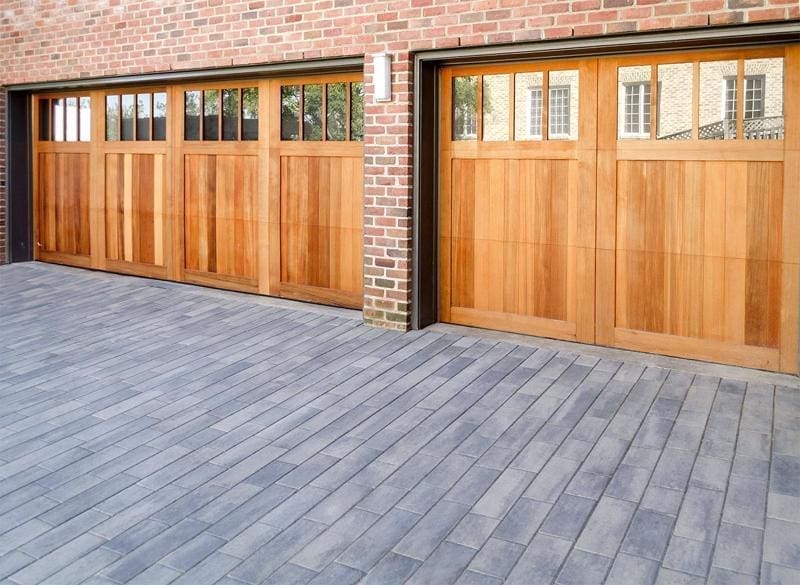
Installation Guide: Building a Modern Linea Patio
At Bayside Pavers, we craft Linea paver patios with precision to ensure modern elegance and lasting stability. Here’s our step-by-step process, aligned with UCPRC guidelines:
Step 1: Design Consultation We visit your Sunnyvale backyard to discuss your modern vision, measure the space, and recommend Linea pavers in colors like Shale Grey or Onyx Black.
Step 2: Excavation We dig 8–10 inches deep (10–12 inches for permeable pavers) to remove grass and clay-heavy soil, ensuring a stable foundation.
Step 3: Base Preparation We lay geotextile fabric to prevent weeds, then add 6–8 inches of crushed gravel (3/4-inch aggregate), compacting each 2-inch layer to support 8,000 psi, per UCPRC.
Step 4: Bedding Layer A 1-inch layer of coarse sand is screeded smooth to create a level bed for your Linea pavers.
Step 5: Paver Installation We lay Linea pavers in a running bond or stacked bond pattern, cutting edges for a seamless fit and adding a 1–2% slope for drainage.
Step 6: Finishing Touches We sweep polymeric sand into joints to lock pavers and prevent weeds, then apply a breathable sealant to enhance color and UV resistance.
Step 7: Modern Accents We add features like LED lighting or seating walls to complete the contemporary look.
This process ensures your patio is a durable, modern masterpiece.
Sunnyvale Case Study: The Patel Family’s Modern Patio
Let’s talk about a real Sunnyvale transformation that brought Linea pavers to life. The Patel family had a cracked concrete patio that felt dated and didn’t match their sleek, Silicon Valley home. They wanted a modern patio for entertaining friends and family game nights.
Before: The patio was an uneven, faded slab, prone to pooling water and unusable for gatherings. It dragged down their backyard’s potential.
The Transformation: We designed a 250-square-foot patio using Techo-Bloc Linea pavers in Onyx Black, laid in a stacked bond pattern for a clean, modern look. We excavated 8 inches deep, laid geotextile fabric, and added a 6-inch gravel base, compacted to UCPRC standards. A 1-inch sand layer ensured a level surface, and polymeric sand locked the joints. A 1–2% slope handled Sunnyvale’s occasional rains, and built-in LED lighting added a tech-savvy touch.
After: The Patel patio is now a stunning, modern oasis, perfect for Silicon Valley entertaining. It’s hosted game nights, BBQs, and quiet evenings, all while staying flawless through two seasons. “It’s like we got a whole new backyard!” they said.
Sunnyvale’s climate and soil require careful planning to ensure your Linea patio thrives:
These considerations ensure your patio is built to last in Sunnyvale’s conditions.
Maintenance for a Lasting Modern Look
Linea pavers are low-maintenance, but a little care keeps them looking sleek. Here’s how to maintain your Sunnyvale patio:
These steps keep your patio modern and flawless for decades.
FAQs: Your Linea Paver Customization Questions Answered
Got questions about customizing your Linea patio? We’ve got answers!
Can I mix Linea paver colors? Yes! Combine Onyx Black and Shale Grey for a dynamic, modern look, or stick to one for minimalist elegance.
Are there different Linea patterns? Absolutely! Running bond, stacked bond, or herringbone patterns create varied aesthetics, per Techo-Bloc’s design guide.
Can I add features like lighting or seating? Definitely! We can integrate LED lights or Techo-Bloc walls for a custom, tech-savvy patio.
How customizable are Linea pavers for small spaces? Linea’s slim design is perfect for compact Sunnyvale patios, with patterns and sizes to fit any layout.
How much does a Linea patio cost? depending on design. Call +1 (866) 225-3512 for a free quote tailored to your vision!
Create Your Modern Sunnyvale Patio with Bayside Pavers
Your Sunnyvale backyard deserves a modern, elegant patio that blends Silicon Valley style with lasting durability. With Techo-Bloc’s Linea pavers, Bayside Pavers will craft a sleek, functional masterpiece that elevates your outdoor living, backed by UCPRC’s standards and Techo-Bloc’s lifetime warranty. Whether it’s a chic lounge or a tech-savvy entertainment hub, we’ve got you covered.
Curious about Linea pavers? Drop a comment or reach out to Bayside Pavers at +1 (866) 225-3512! Let’s make your Sunnyvale patio a modern showstopper.
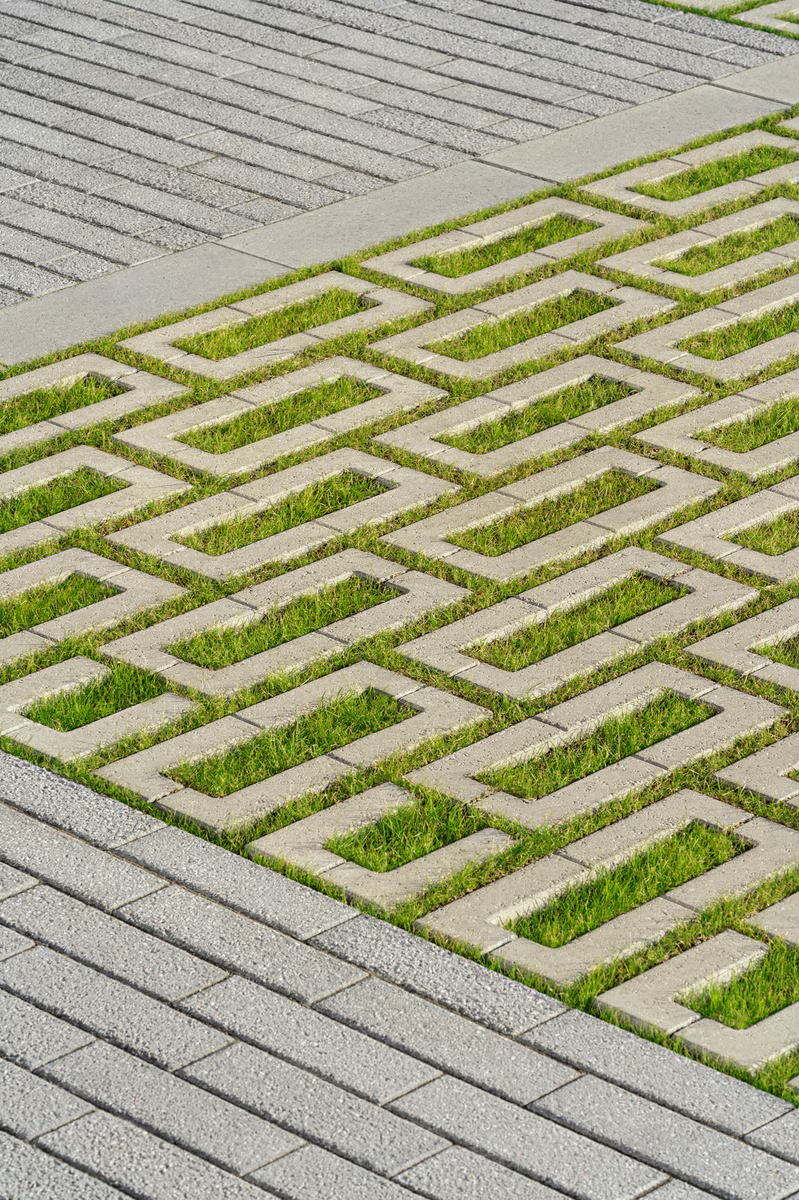
Imagine pulling into your Danville driveway after a rainy East Bay day, knowing it’s not just stylish but also helping the planet by managing stormwater naturally. No puddles, no runoff, just a sleek, eco-friendly surface that’s as good for your curb appeal as it is for the environment. I had a friend in Danville whose old asphalt driveway was a soggy mess, contributing to local flooding—until they called Bayside Pavers. Now, their Techo-Bloc Aquastorm paver driveway is a sustainable showstopper, blending modern design with green living.
Techo-Bloc’s Aquastorm pavers are the perfect choice for Danville homeowners who want a driveway that’s both beautiful and environmentally responsible. In this guide, we’ll explore the magic of permeable pavers, highlight Aquastorm’s eco-friendly benefits, share a Danville driveway transformation, and provide design and installation tips—all backed by UCPRC’s stormwater management guidelines. Plus, we’ll include a drainage diagram and answer your top questions about eco-friendly driveways. Ready to create a sustainable Danville driveway? Let’s dive in!
What Are Permeable Pavers?
Permeable pavers are like a sponge for your driveway—they let rainwater seep through their joints into a specially designed base, reducing runoff and helping the environment. Unlike traditional concrete or asphalt, which send water rushing into storm drains, permeable pavers allow water to infiltrate the ground naturally. The University of California Pavement Research Center (UCPRC) notes that permeable surfaces can reduce stormwater runoff by up to 80%, easing pressure on local drainage systems and preventing flooding.
Techo-Bloc’s Aquastorm pavers are a standout in this category, with wide joints filled with fine gravel that promote water flow while maintaining a sleek, modern look. They’re perfect for Danville’s eco-conscious community, where sustainable landscaping is a growing priority. Think of them as a driveway that works with nature, not against it.
Aquastorm Benefits: Green, Durable, and Stylish
Aquastorm pavers are the eco-warriors of the driveway world, combining sustainability with strength and style. Here’s why they’re a top choice for Danville homeowners, per UCPRC and Techo-Bloc specs:
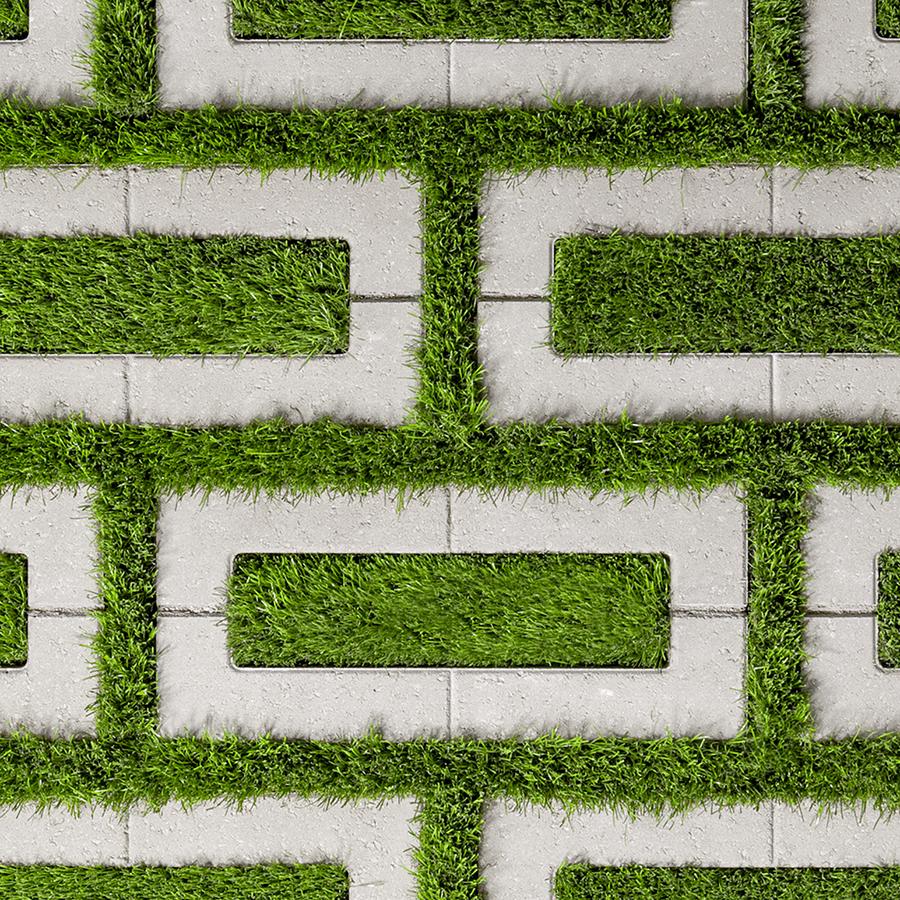
At Bayside Pavers, we love how Aquastorm pavers make Danville driveways both green and gorgeous.
Danville Environmental Regulations: Staying Compliant
Danville’s commitment to sustainability means driveway projects often need to align with local environmental regulations. Here’s how Aquastorm pavers fit into the picture:
By choosing Aquastorm pavers, you’re not just building a driveway—you’re contributing to Danville’s eco-friendly future.
Design and Installation: Crafting an Eco-Friendly Driveway
Creating a stunning, sustainable driveway requires careful design and expert installation. Here’s how Bayside Pavers uses Aquastorm pavers to transform Danville driveways, aligned with UCPRC guidelines:
Design Ideas
Installation Process
This process ensures your driveway is eco-friendly, durable, and stunning.
Danville Case Study: The Nguyen Family’s Eco-Friendly Driveway
Let’s dive into a real Danville transformation that showcases Aquastorm pavers. The Nguyen family had an outdated asphalt driveway that cracked and pooled water, contributing to runoff that overwhelmed local storm drains. They wanted a sustainable, stylish solution that fit Danville’s eco-conscious vibe.
Before: The driveway was a cracked, faded mess, with puddles forming after every rain. It looked out of place in their modern Danville home and wasn’t environmentally friendly.
The Transformation: We designed a 600-square-foot driveway using Techo-Bloc Aquastorm pavers in Shale Grey, laid in a running bond pattern for a sleek look. We excavated 12 inches deep, laid geotextile fabric, and added a 10-inch open-graded gravel base, compacted to UCPRC standards. Fine gravel filled the joints for permeability, and a 1–2% slope ensured any excess water drained properly. Native plant borders added a green touch.
After: The Nguyen driveway is now a sustainable, stunning masterpiece, handling daily traffic and heavy rains without puddles. It’s reduced runoff into local creeks, and the modern design has boosted their curb appeal. “We love knowing our driveway is helping the environment!” they said.
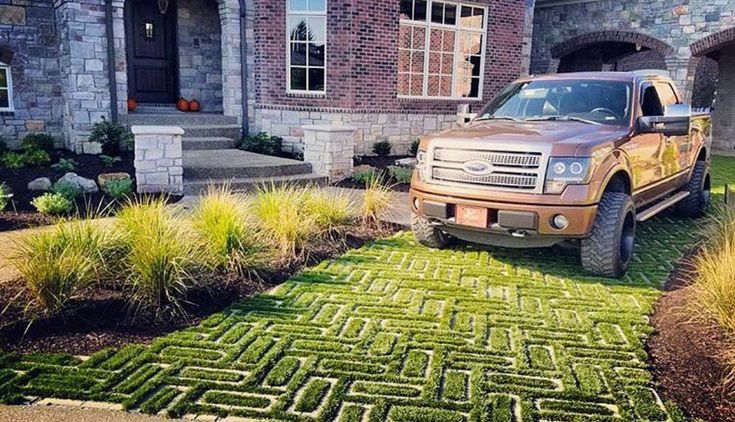
Maintenance for a Sustainable Driveway
Aquastorm pavers are low-maintenance, but a little care keeps them eco-friendly and gorgeous. Here’s how to maintain your Danville driveway:
These steps keep your driveway green and functional for decades.
FAQs: Your Eco-Friendly Driveway Questions Answered
Got questions about Aquastorm pavers? We’ve got answers!
How do Aquastorm pavers help the environment? Their permeable design reduces runoff by 80%, recharges groundwater, and eases strain on Danville’s storm drains, per UCPRC.
Are Aquastorm pavers strong enough for vehicles? Yes! With 8,000 psi strength, they handle heavy traffic and come with Techo-Bloc’s lifetime warranty.
Do permeable driveways need more maintenance? Not much! Annual rinsing and occasional vacuuming keep joints permeable, with minimal upkeep.
Can Aquastorm pavers match my home’s style? Absolutely! Colors like Shale Grey and patterns like running bond suit Danville’s modern and traditional homes.
How much does an Aquastorm driveway cost? Call +1 (866) 225-3512 for a free quote tailored to your Danville project!
Create Your Eco-Friendly Danville Driveway with Bayside Pavers
Your Danville driveway can be more than just a parking spot—it can be a sustainable, stylish feature that enhances your home and supports the environment. With Techo-Bloc’s Aquastorm pavers and Bayside Pavers’ expertise, we’ll craft a permeable driveway that manages stormwater, boosts curb appeal, and lasts decades, backed by UCPRC’s guidelines. Whether it’s a sleek modern design or a green oasis, we’ve got you covered.
Want an eco-friendly driveway? Share your questions in the comments or contact us at +1 (866) 225-3512! Let’s make your Danville driveway a sustainable masterpiece.
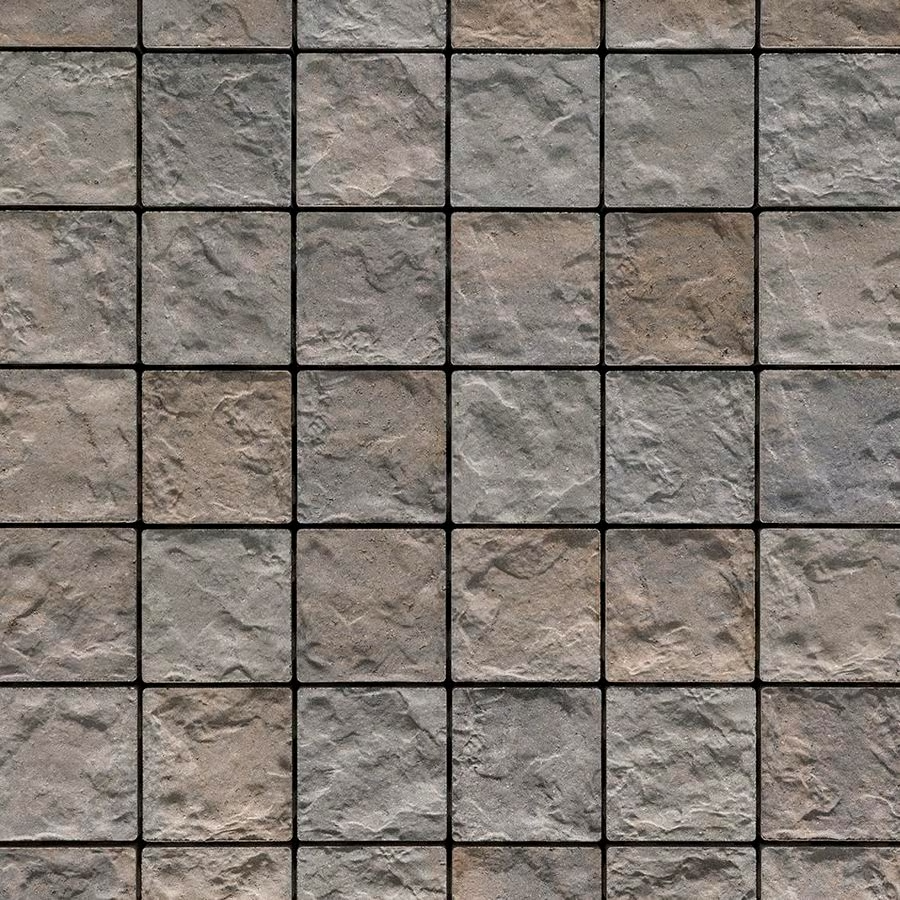
Picture this: you roll into your Walnut Creek driveway, greeted by a stunning mosaic of Techo-Bloc Valet pavers, their checkerboard patterns catching the eye of every passerby. It’s not just a driveway—it’s a statement, blending bold design with the strength to handle your SUV, kids’ bikes, and delivery trucks. I had a friend in Walnut Creek whose faded asphalt driveway was a total letdown—until they called Bayside Pavers. Now, their Valet paver driveway is a work of art, turning their home into the talk of the neighborhood.
Techo-Bloc’s Valet pavers are the perfect pick for homeowners craving a driveway that’s both visually striking and built to last, especially in Walnut Creek’s upscale, design-savvy community. In this guide, we’ll dive into Valet’s standout features, explore mosaic design ideas, share a Walnut Creek driveway transformation, and provide a step-by-step installation guide—all backed by UCPRC’s durability standards. Plus, we’ll include a pattern guide and answer your top questions about durability. Ready to make your driveway a masterpiece? Let’s get started!
.avif)
Valet Paver Features: Bold and Durable
Techo-Bloc’s Valet pavers are like the rock stars of driveway materials—small, stylish, and tough as nails. Their square shape and textured surface make them ideal for creating bold mosaic patterns while standing up to heavy traffic. Here’s why Valet pavers shine, per UCPRC and Techo-Bloc specs:
At Bayside Pavers, we’re thrilled about how Valet pavers combine bold style with unbeatable durability for driveways that pop.
Mosaic Design Ideas: Making Your Driveway Stand Out
Valet pavers are a designer’s dream, offering endless possibilities for creating eye-catching mosaic patterns that elevate Walnut Creek’s curb appeal. Their small, square shape is perfect for intricate layouts like checkerboards or geometric designs. Here are some ideas to inspire your driveway:
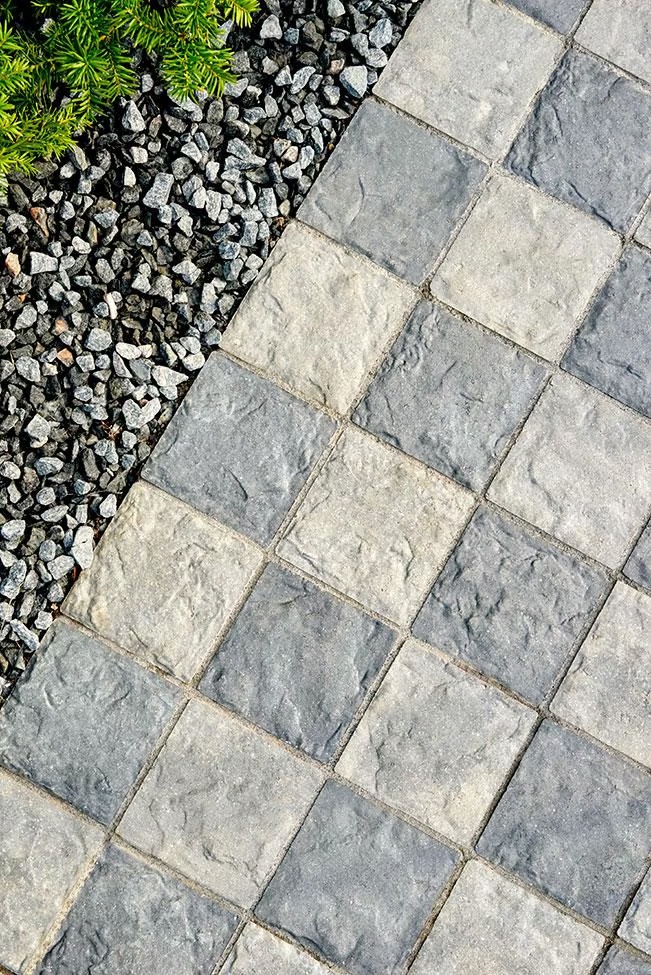
These designs, built on a robust 8-inch gravel base (per UCPRC), ensure your driveway is as durable as it is stunning.
Walnut Creek Project Example: The Carter Family’s Mosaic Driveway
Let’s talk about a real Walnut Creek transformation that brought Valet pavers to life. The Carter family had a cracked, uneven asphalt driveway that was a total mismatch for their modern yet welcoming home. It couldn’t handle their busy lifestyle—two cars, kids’ scooters, and frequent guests—and it dulled their curb appeal.
Before: The driveway was a faded, pockmarked mess, with puddles forming after every rain. It clashed with Walnut Creek’s polished aesthetic and frustrated the family’s hosting plans.
The Transformation: We designed a 700-square-foot driveway using Techo-Bloc Valet pavers in Onyx Black and Shale Grey, laid in a checkerboard pattern for bold visual impact. We excavated 10 inches deep, laid geotextile fabric to prevent weeds, and added an 8-inch crushed gravel base (3/4-inch aggregate), compacted in 2-inch layers to support 8,000 psi, per UCPRC. A 1-inch sand layer ensured a level bed, and polymeric sand locked the joints for stability. A 1–2% slope directed water away from the house, preventing pooling.
After: The Carter driveway is now a bold, mosaic masterpiece, handling heavy traffic with ease and turning heads in their Walnut Creek neighborhood. It’s stayed flawless through two rainy seasons, and the checkerboard design adds a touch of luxury. “Our driveway feels like a work of art!” they said.
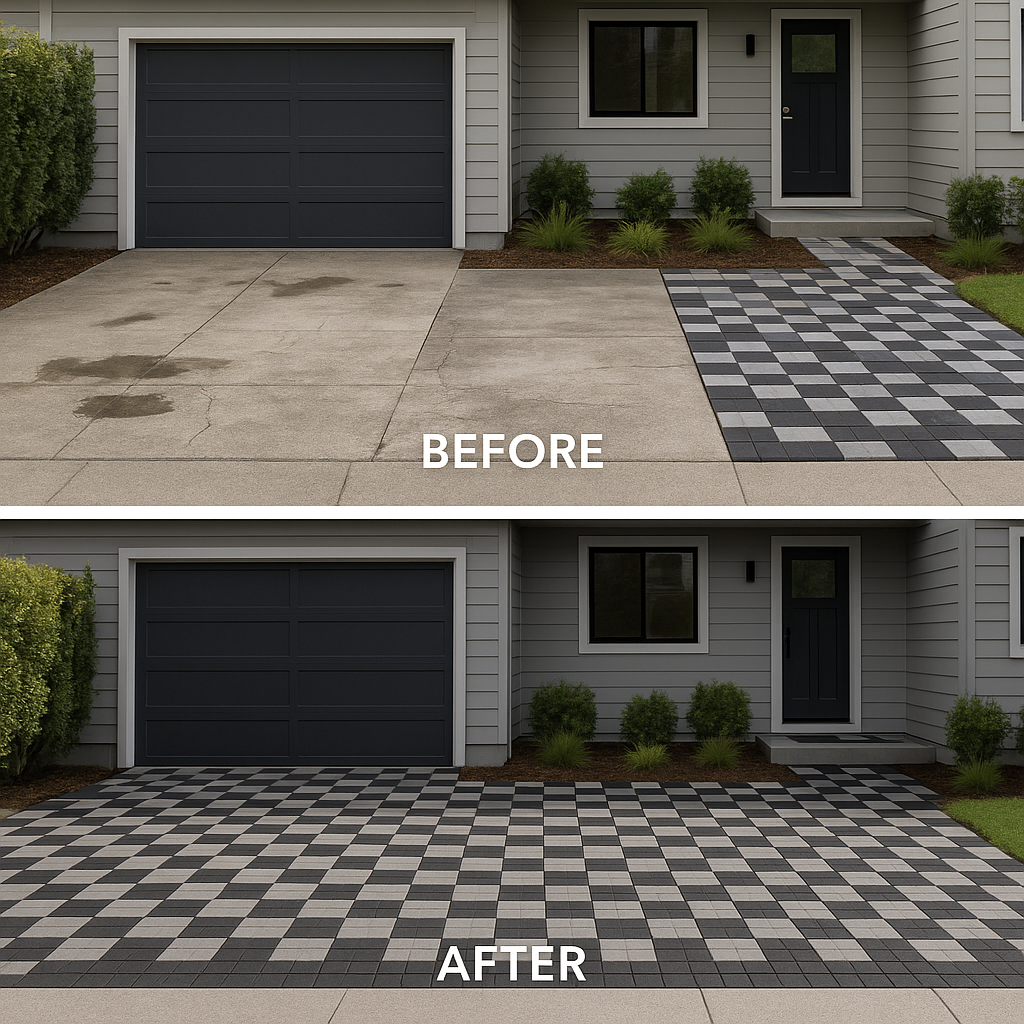
Walnut Creek Weather and Soil Considerations
Walnut Creek’s climate and soil present unique challenges, but Valet pavers are built to thrive:
These considerations make Valet pavers a perfect fit for Walnut Creek’s conditions.
Installation Guide: Crafting a Mosaic Valet Driveway
At Bayside Pavers, we build Valet paver driveways with precision to ensure bold design and lasting durability. Here’s our step-by-step process, aligned with UCPRC guidelines, plus maintenance tips:
Installation Process
Maintenance Tips
These steps ensure your driveway stays striking and durable for decades.
Comparing Valet Pavers to Other Options
Valet pavers are ideal for mosaic driveways, but how do they stack up? Here’s a comparison for Walnut Creek homeowners:
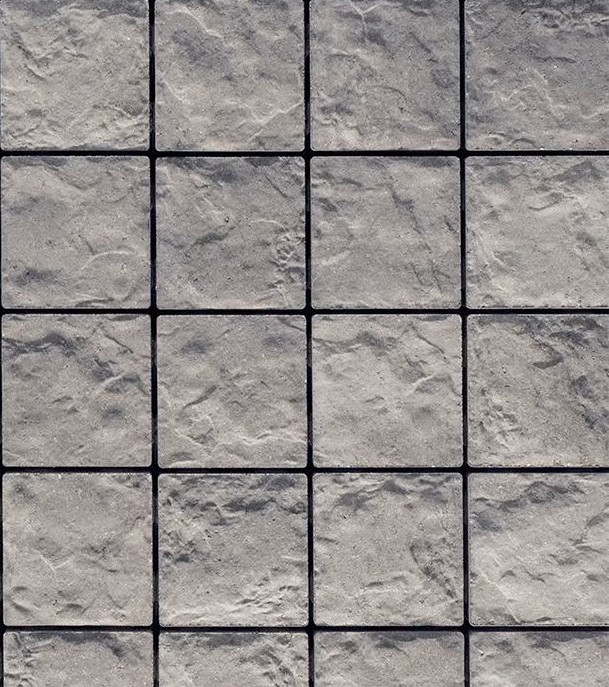
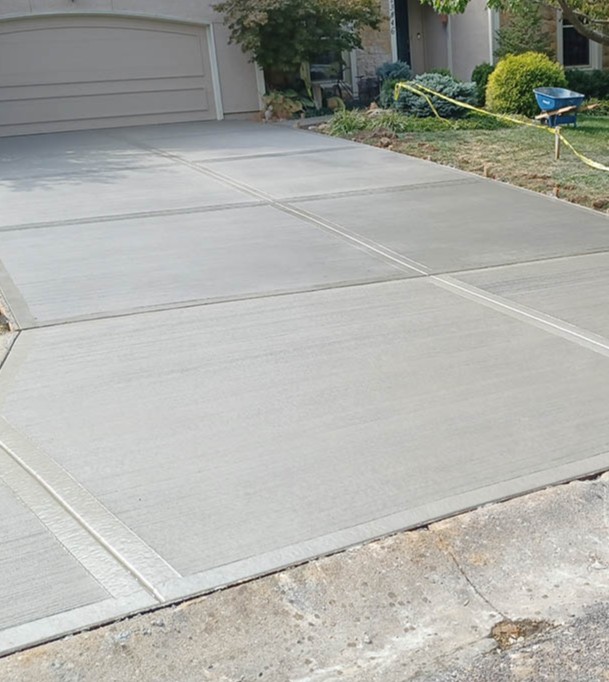
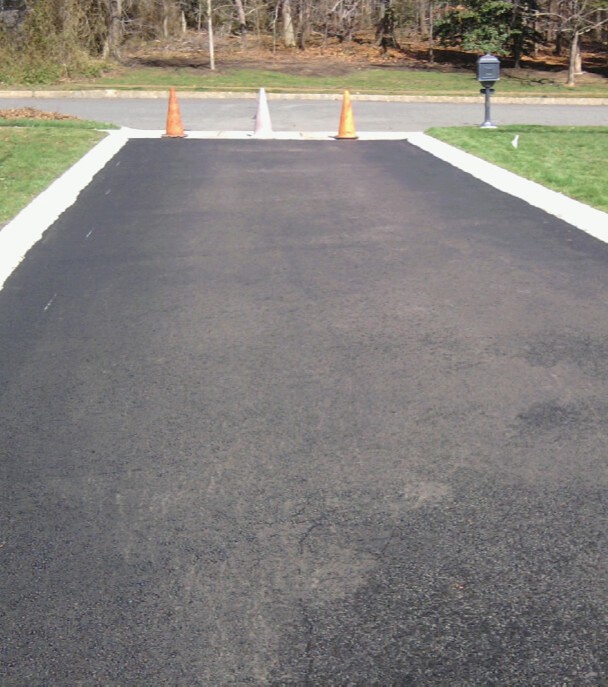
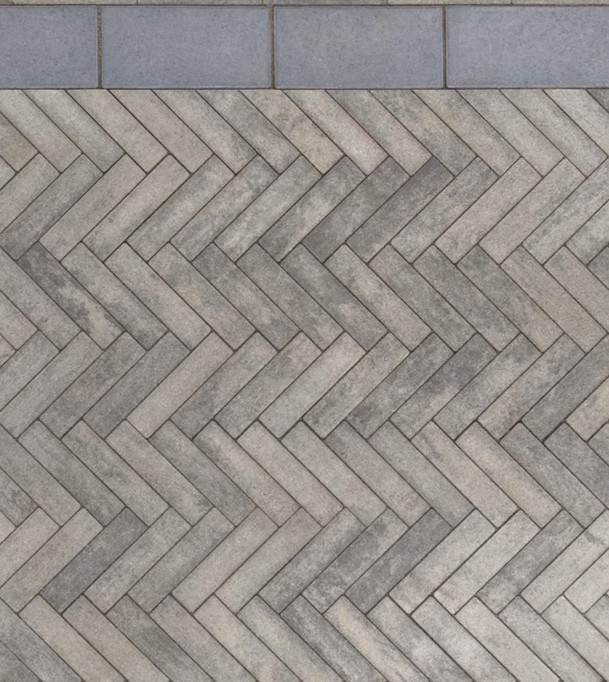
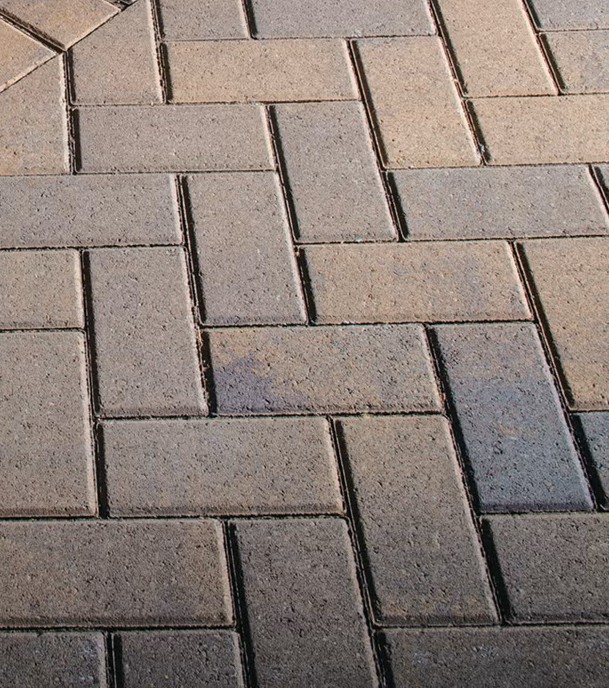
Valet pavers excel for Walnut Creek homeowners seeking bold, durable mosaic designs.
FAQs: Your Valet Paver Durability Questions Answered
Got questions about Valet paver durability? We’ve got answers!
How durable are Valet pavers for driveways? With 8,000 psi strength and salt resistance, Valet handles heavy vehicles and Walnut Creek’s weather for 30–50 years, per UCPRC.
Can Valet pavers withstand Walnut Creek’s coastal climate? Yes! They’re salt-resistant and UV-stable, staying vibrant through fog, rain, and sun.
How do I maintain a Valet mosaic driveway? Sweep weekly, rinse annually, and reseal every 2–3 years to keep the design bold and stable.
What if a paver gets damaged? Individual Valet pavers can be replaced easily. Call +1 (866) 225-3512 for repairs!
Are checkerboard patterns durable for traffic? Absolutely! The interlocking design and 8,000 psi strength ensure stability, per UCPRC.
Create Your Mosaic Walnut Creek Driveway with Bayside Pavers
Your Walnut Creek driveway deserves to be a bold, durable masterpiece that blends mosaic artistry with Silicon Valley strength. With Techo-Bloc’s Valet pavers and Bayside Pavers’ expertise, we’ll craft a driveway that turns heads, handles heavy traffic, and thrives in coastal weather, backed by UCPRC’s standards and Techo-Bloc’s lifetime warranty. Whether it’s a checkerboard classic or a geometric mosaic, we’ve got your curb appeal covered.
Love mosaic driveway designs? Comment below or reach out to Bayside Pavers at +1 (866) 225-3512 for inspiration! Let’s make your Walnut Creek driveway a stunning work of art.
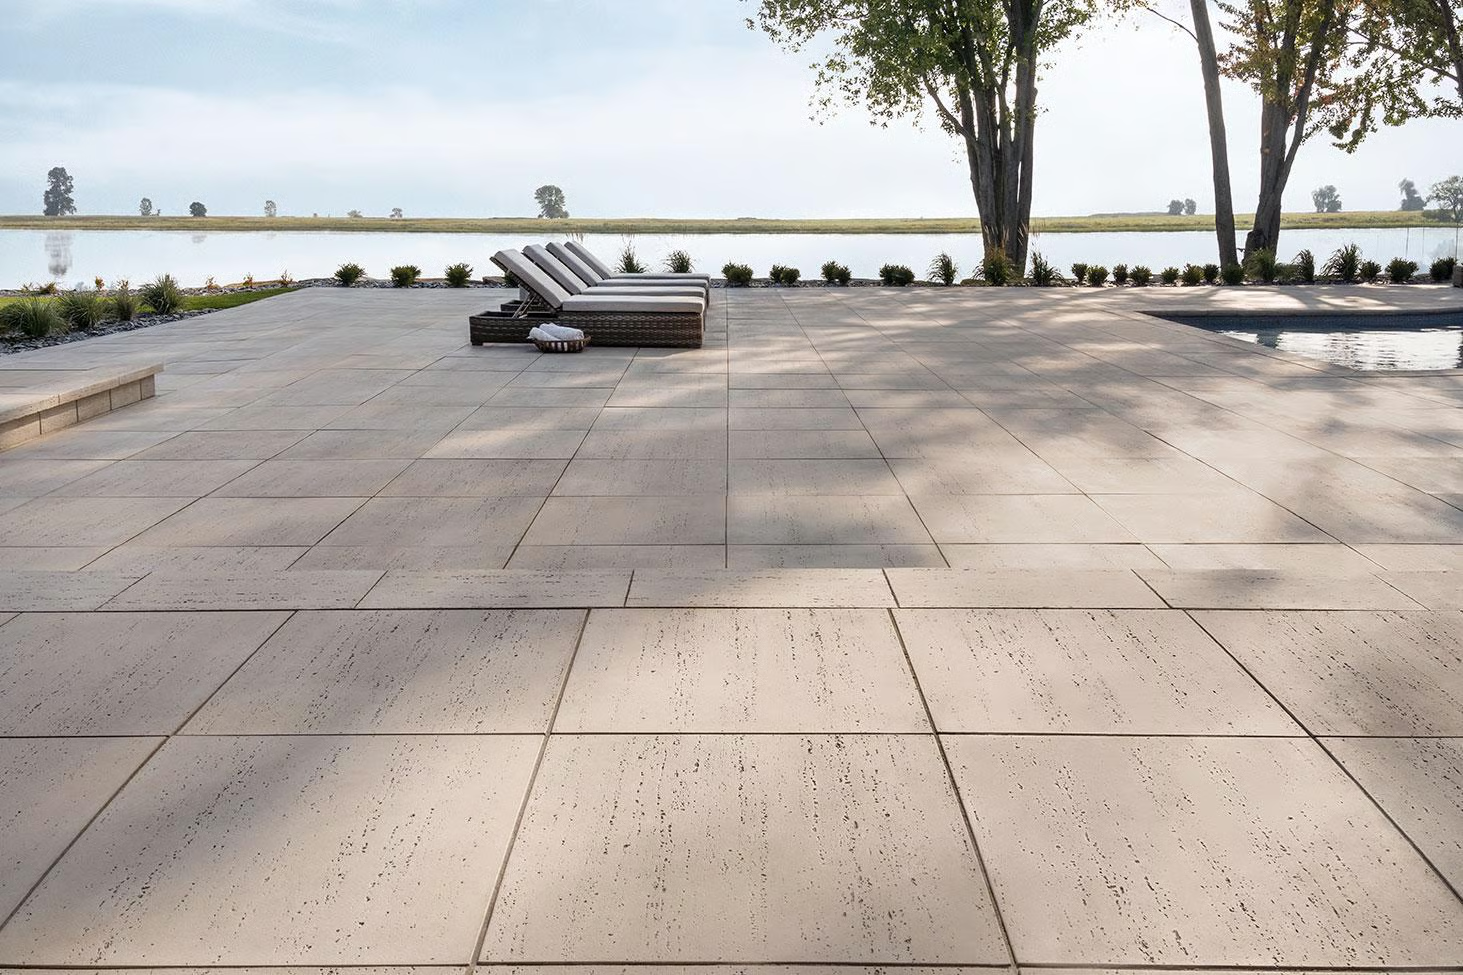
Imagine stepping onto your San Mateo patio, where Techo-Bloc’s Travertina Raw pavers create a stunning, natural stone-like surface that feels like a Mediterranean escape. The earthy textures and rich colors invite you to host a cozy dinner or relax with a book under the Peninsula sun. I had a friend in San Mateo whose backyard was a tired concrete slab—until they called Bayside Pavers. Now, their Travertina Raw patio is a natural masterpiece, blending timeless elegance with modern durability, perfect for their coastal lifestyle.
Techo-Bloc’s Travertina Raw pavers are the ideal choice for homeowners craving a patio that captures the beauty of natural stone with the strength to last decades. In this guide, we’ll explore what makes Travertina Raw pavers special, share design possibilities for San Mateo patios, spotlight a local transformation, and offer maintenance tips—all backed by UCPRC’s durability standards. Plus, we’ll include a color comparison and answer your top questions about care. Ready to bring natural elegance to your backyard? Let’s dive in!
Why Choose Travertina Raw Pavers?
Travertina Raw pavers are like nature’s finest stone, but with a modern twist that makes them perfect for San Mateo patios. Their textured, stone-like surface and vibrant color options create a luxurious yet earthy aesthetic that’s both inviting and durable. Here’s what sets them apart, per UCPRC and Techo-Bloc specs:
At Bayside Pavers, we love how Travertina Raw pavers bring natural elegance to San Mateo backyards, blending beauty with unbeatable performance.
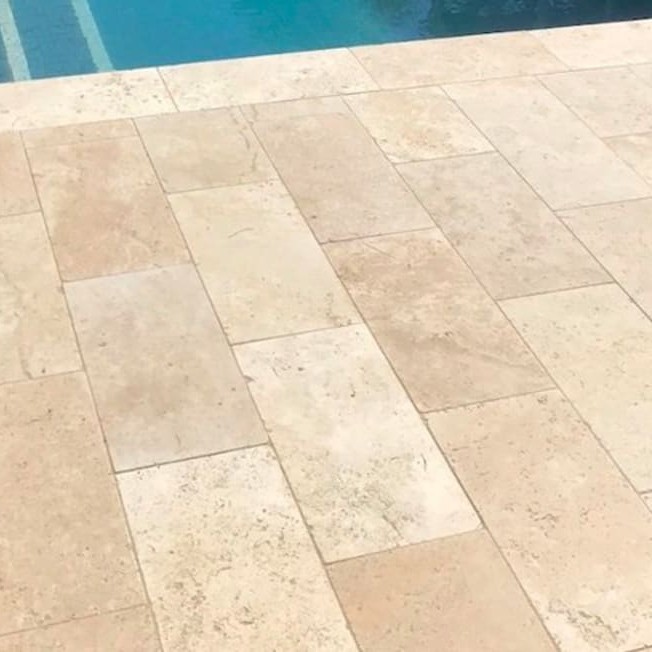
Design Possibilities: Crafting a Natural San Mateo Patio
Travertina Raw pavers are a designer’s dream, offering endless ways to create a patio that feels both natural and sophisticated. Their stone-like texture and color variety make them perfect for San Mateo’s upscale, coastal aesthetic. Here are some design ideas to inspire you:
These designs, built on a 6–8-inch gravel base (per UCPRC), ensure your patio is both stunning and durable.
San Mateo Patio Case Study: The Rivera Family’s Coastal Oasis
Let’s dive into a real San Mateo transformation that brought Travertina Raw pavers to life. The Rivera family had a cracked, faded concrete patio that was unusable for their dream of hosting coastal-inspired gatherings. It clashed with their modern San Mateo home and lacked the natural charm they craved.
Before: The patio was a dull, uneven slab, prone to pooling water and looking dated against their lush backyard. It frustrated their plans for family dinners and friend meetups.
The Transformation: We designed a 350-square-foot patio using Techo-Bloc Travertina Raw pavers in Riviera, laid in a running bond pattern for a natural, stone-like look. We excavated 8 inches deep, laid geotextile fabric to prevent weeds, and added a 6-inch crushed gravel base (3/4-inch aggregate), compacted in 2-inch layers to support 8,000 psi, per UCPRC. A 1-inch sand layer ensured a level bed, and polymeric sand locked the joints for stability. A 1–2% slope handled San Mateo’s rainy winters, and a small seating wall added functionality.
After: The Rivera patio is now a natural, elegant oasis, perfect for coastal gatherings and quiet evenings. It’s stayed vibrant through two seasons, blending seamlessly with their landscaping. “It feels like we’re on a Mediterranean vacation!” they said.
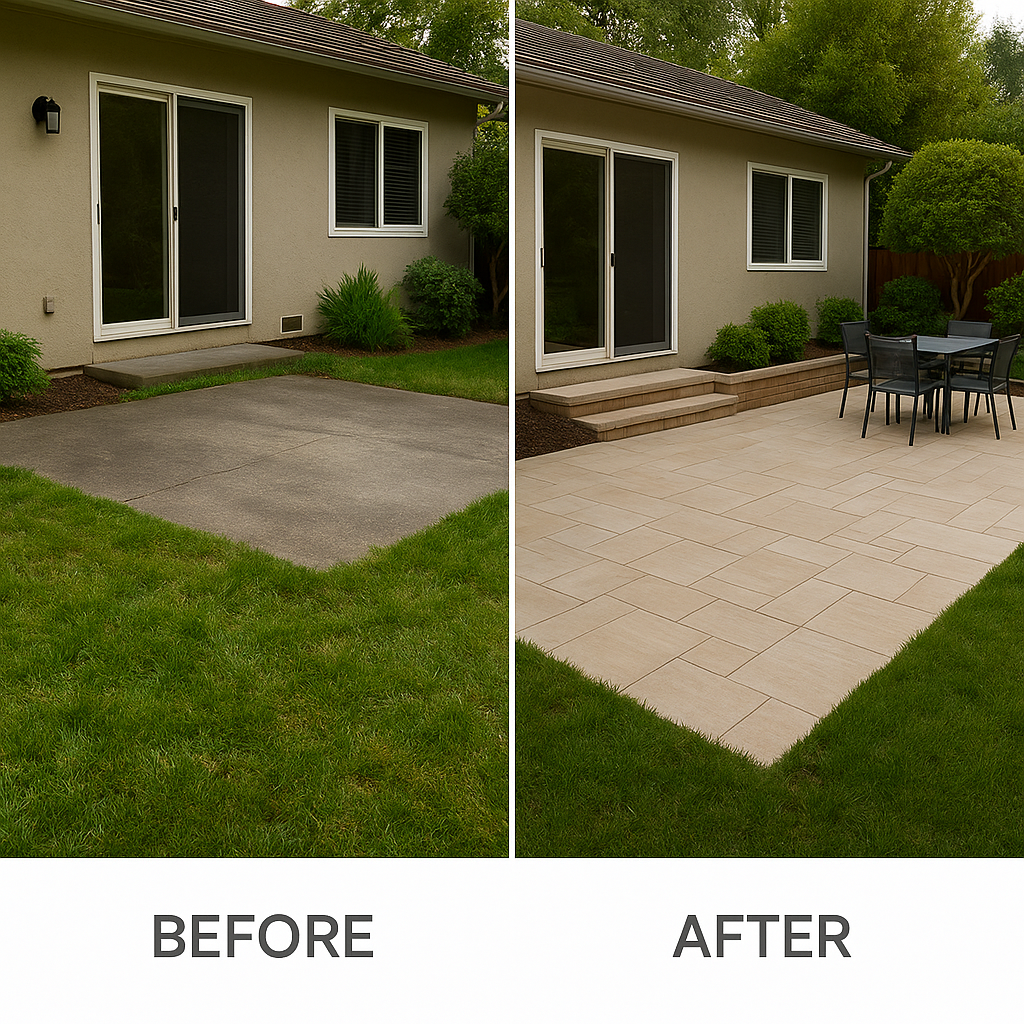
San Mateo Weather and Soil Considerations
San Mateo’s coastal climate and soil require careful planning to ensure your patio thrives:
These considerations make Travertina Raw pavers a perfect fit for San Mateo’s conditions.
Installation and Maintenance Tips: Keeping Your Patio Pristine
At Bayside Pavers, we craft Travertina Raw patios with precision to ensure natural elegance and lasting performance. Here’s our installation process and care tips, aligned with UCPRC guidelines:
Installation Process
Maintenance Tips
These steps ensure your patio stays elegant and durable for decades.
Comparing Travertina Raw Pavers to Other Options
Travertina Raw pavers are ideal for natural patios, but how do they stack up? Here’s a comparison for San Mateo homeowners:

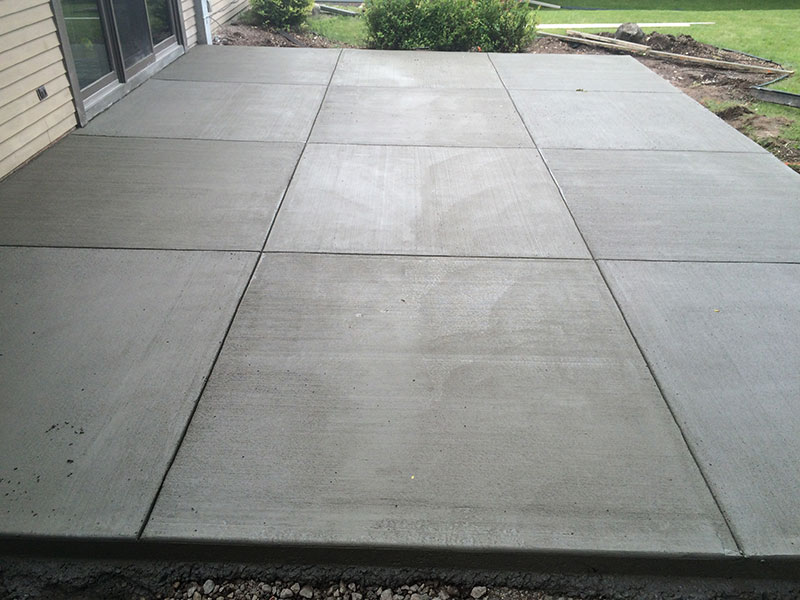
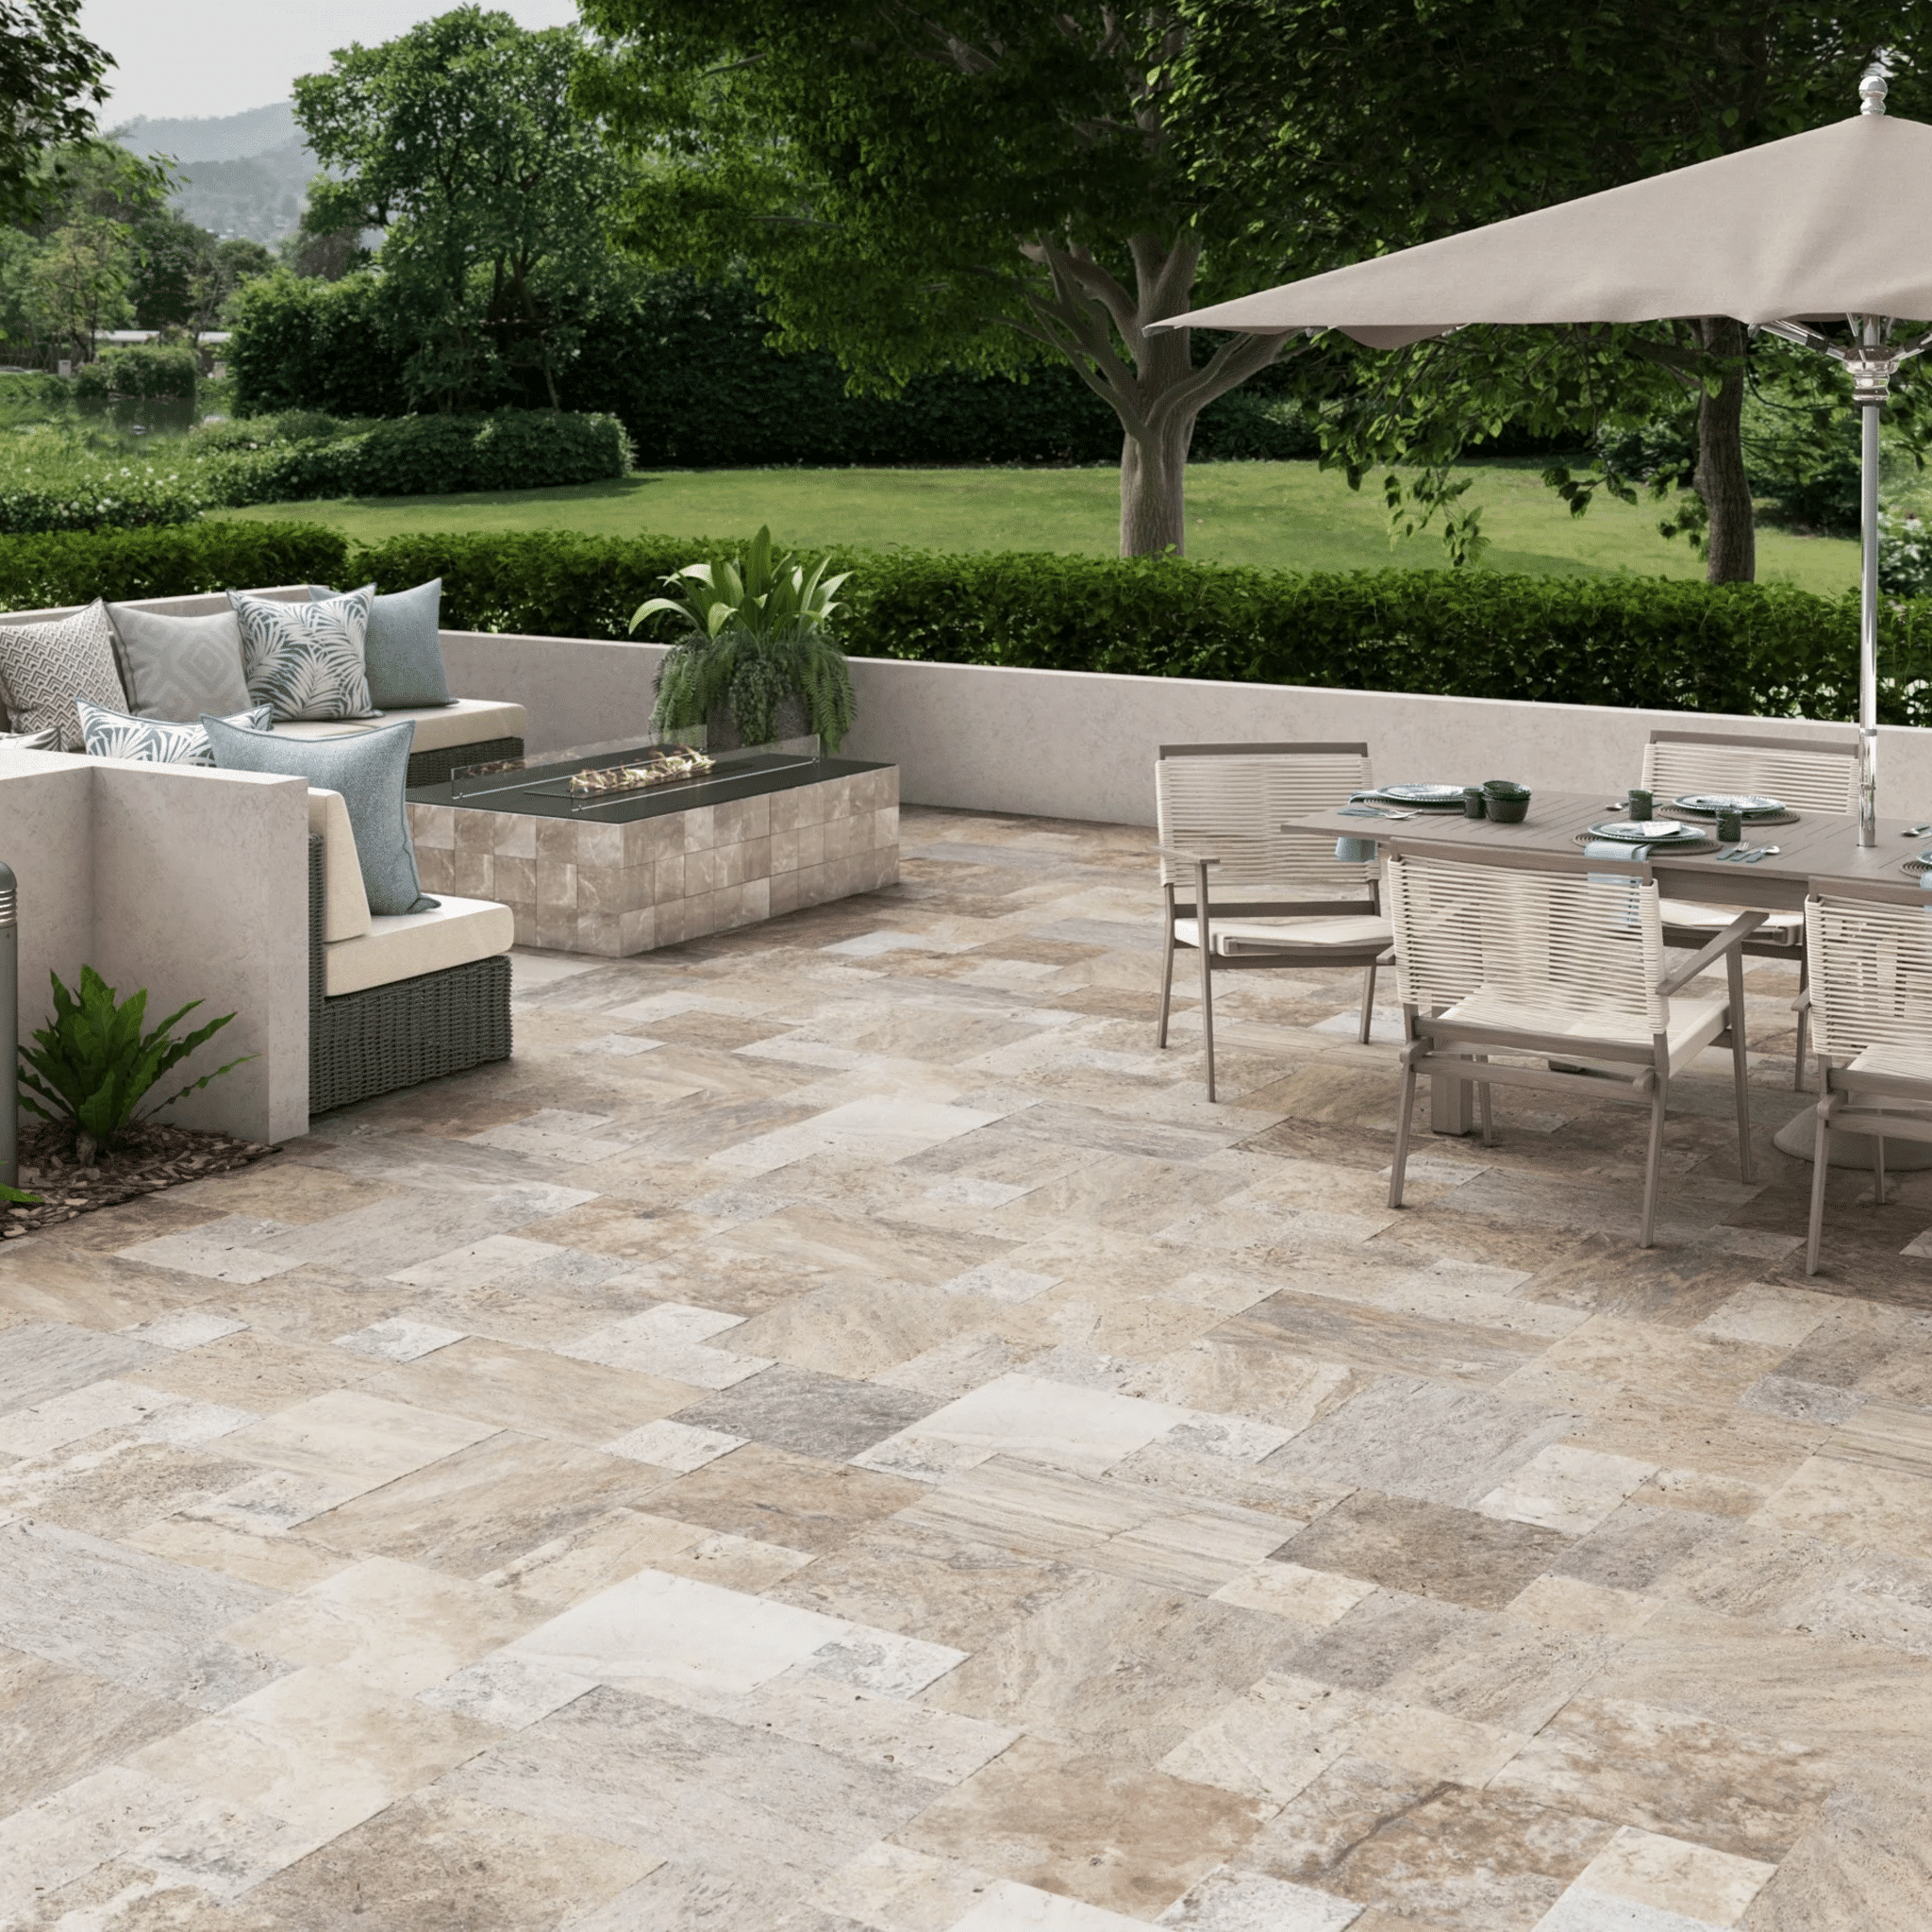
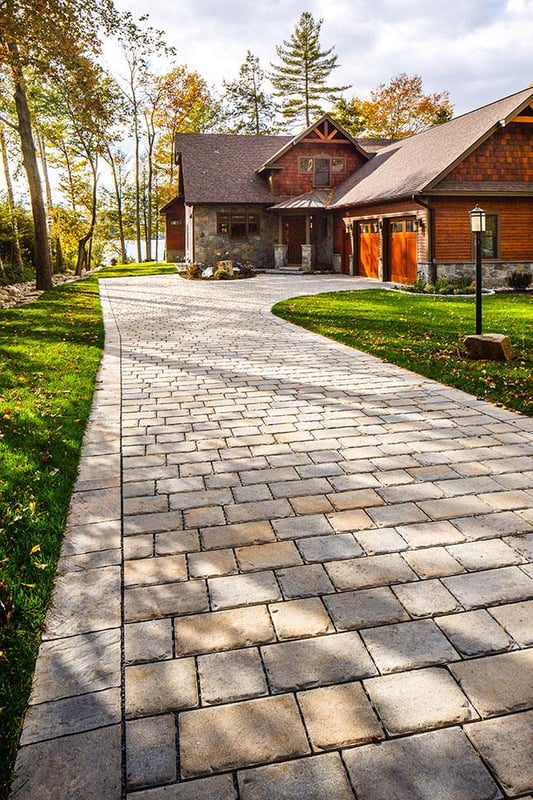
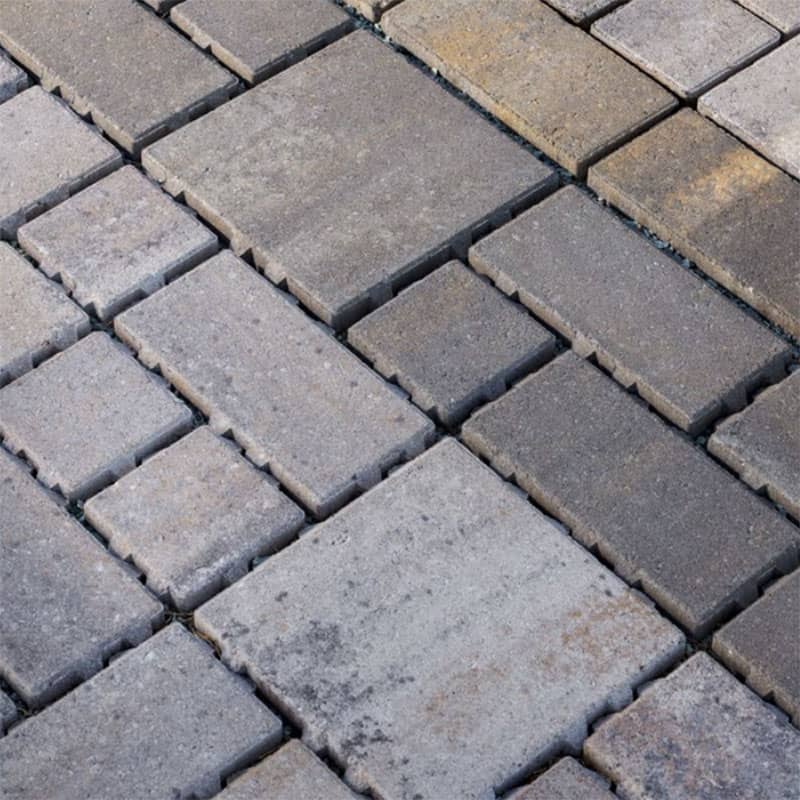
FAQs: Your Travertina Raw Paver Care Questions Answered
Got questions about caring for your Travertina Raw patio? We’ve got answers!
How do I keep Travertina Raw pavers looking natural? Sweep weekly, rinse annually, and seal every 2–3 years to enhance their stone-like texture and colors.
Are Travertina Raw pavers durable for San Mateo’s climate? Yes! With 8,000 psi strength and salt resistance, they handle fog, rain, and sun for 30–50 years, per UCPRC.
Can I clean stains on Travertina Raw pavers? Absolutely! Use paver-safe degreasers for spills to preserve the natural aesthetic.
What if a paver gets damaged? Individual Travertina Raw pavers can be replaced easily. Call +1 (866) 225-3512 for repairs!
How do I enhance the natural look? Pair with native plants, wooden furniture, or a fire pit to amplify the stone-like charm.
Create Your Elegant San Mateo Patio with Bayside Pavers
Your San Mateo backyard deserves a patio that blends natural elegance with coastal durability. With Techo-Bloc’s Travertina Raw pavers and Bayside Pavers’ expertise, we’ll craft a stunning, stone-like patio that’s perfect for Mediterranean-inspired gatherings or quiet moments, backed by UCPRC’s standards and Techo-Bloc’s lifetime warranty. Whether it’s a cozy retreat or a grand oasis, we’ve got you covered.
Curious about Travertina Raw pavers? Drop a comment or contact Bayside Pavers at +1 (866) 225-3512! Let’s make your San Mateo patio a natural masterpiece.
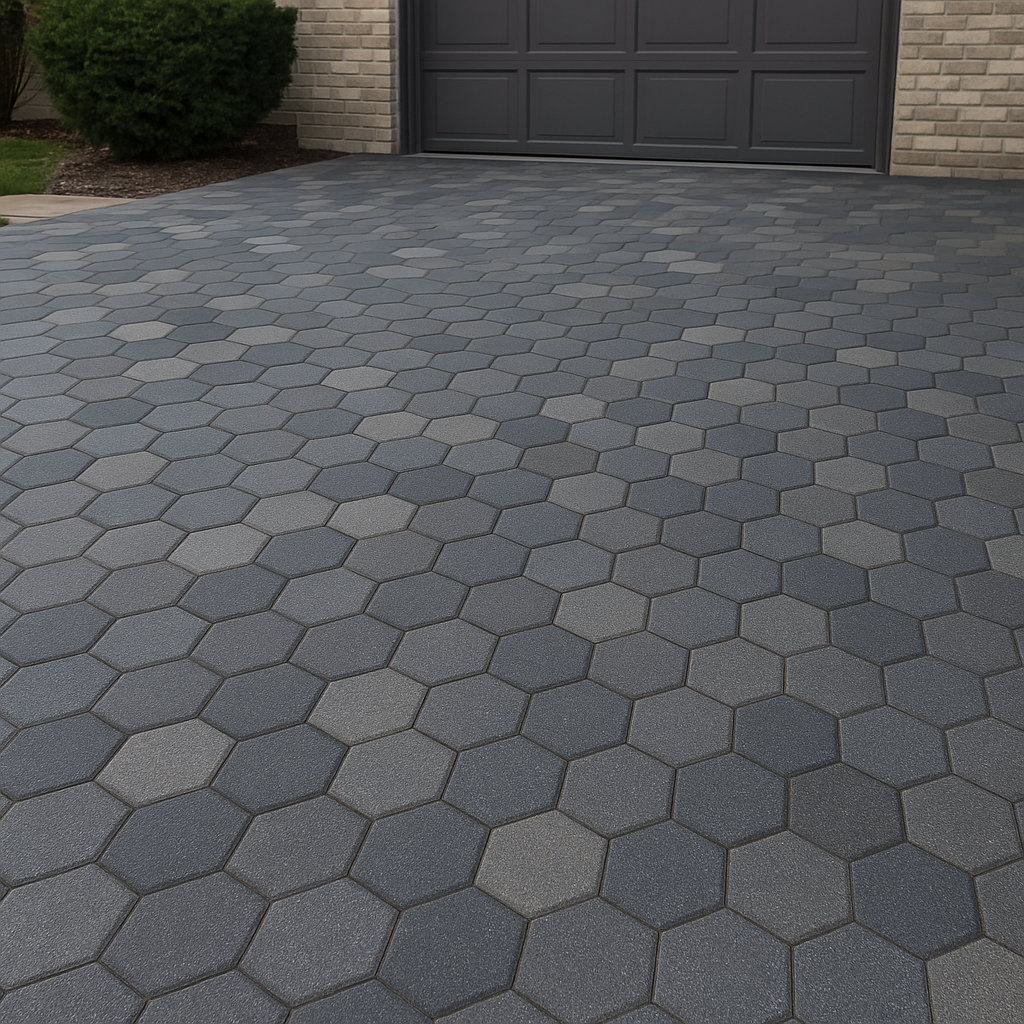
Picture pulling into your Los Altos driveway, where Techo-Bloc’s Hexa 100 pavers create a striking hexagonal pattern that’s as bold as a Silicon Valley startup. The geometric flair turns heads, and you know it’s built to handle everything from your Tesla to kids’ scooters. I had a friend in Los Altos whose cracked asphalt driveway was dragging down their home’s vibe—until they called Bayside Pavers. Now, their Hexa 100 driveway is a geometric masterpiece, blending modern style with rock-solid durability that’s perfect for their upscale neighborhood.
Techo-Bloc’s Hexa 100 pavers are the go-to choice for homeowners craving a driveway that’s both unique and tough enough for daily use. In this guide, we’ll explore the Hexa 100’s standout features, dive into geometric design trends, spotlight a Los Altos transformation, and share installation tips—all backed by UCPRC’s durability standards. Plus, we’ll include a pattern guide and answer your top questions about customization. Ready to make your driveway the talk of the block? Let’s get rolling!
Hexa 100 Features: Bold and Built to Last
Techo-Bloc’s Hexa 100 pavers are like the geometric superstars of driveway design, blending a bold, six-sided shape with heavy-duty performance. Their modern take on the classic hexagon makes them perfect for Los Altos’ tech-savvy, style-forward homes. Here’s why they shine, per UCPRC and Techo-Bloc specs:
At Bayside Pavers, we love how Hexa 100 pavers bring geometric flair and unbeatable strength to Los Altos driveways.
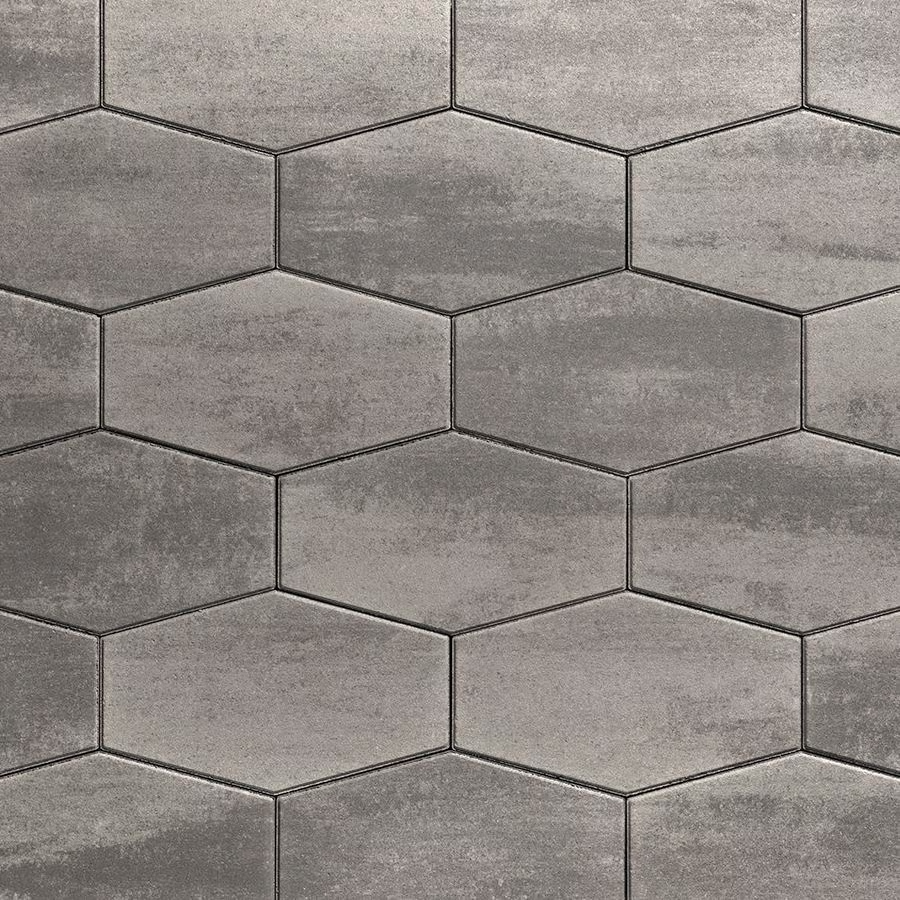
Geometric Design Trends: Making Your Driveway Pop
Geometric designs are all the rage in Los Altos, where clean lines and bold patterns align with Silicon Valley’s innovative spirit. Hexa 100 pavers are perfect for creating driveways that stand out. Here are some trending ideas to inspire you:
These designs, built on an 8-inch gravel base (per UCPRC), ensure your driveway is as durable as it is stylish.
Los Altos Project Spotlight: The Kim Family’s Geometric Driveway
Let’s dive into a real Los Altos transformation that brought Hexa 100 pavers to life. The Kim family had a worn-out asphalt driveway that was cracking and fading, clashing with their sleek, modern home. It couldn’t handle their busy lifestyle—two cars, kids’ bikes, and frequent guests—and it dulled their curb appeal.
Before: The driveway was a patchy, uneven mess, with puddles forming after Los Altos’ rainy winters. It looked dated and didn’t reflect their tech-forward aesthetic.
The Transformation: We designed a 600-square-foot driveway using Techo-Bloc Hexa 100 pavers in Greyed Nickel, laid in a uniform grid pattern for a clean, modern look. We excavated 10 inches deep, laid geotextile fabric to prevent weeds, and added an 8-inch crushed gravel base (3/4-inch aggregate), compacted in 2-inch layers to support 8,000 psi, per UCPRC. A 1-inch sand layer ensured a level bed, and polymeric sand locked the joints for stability. A 1–2% slope directed water away from the house, preventing pooling.
After: The Kim driveway is now a geometric showstopper, handling daily traffic with ease and boosting their home’s Silicon Valley curb appeal. It’s stayed flawless through two rainy seasons, and neighbors can’t stop asking about it. “Our driveway feels like a piece of modern art!” they said.
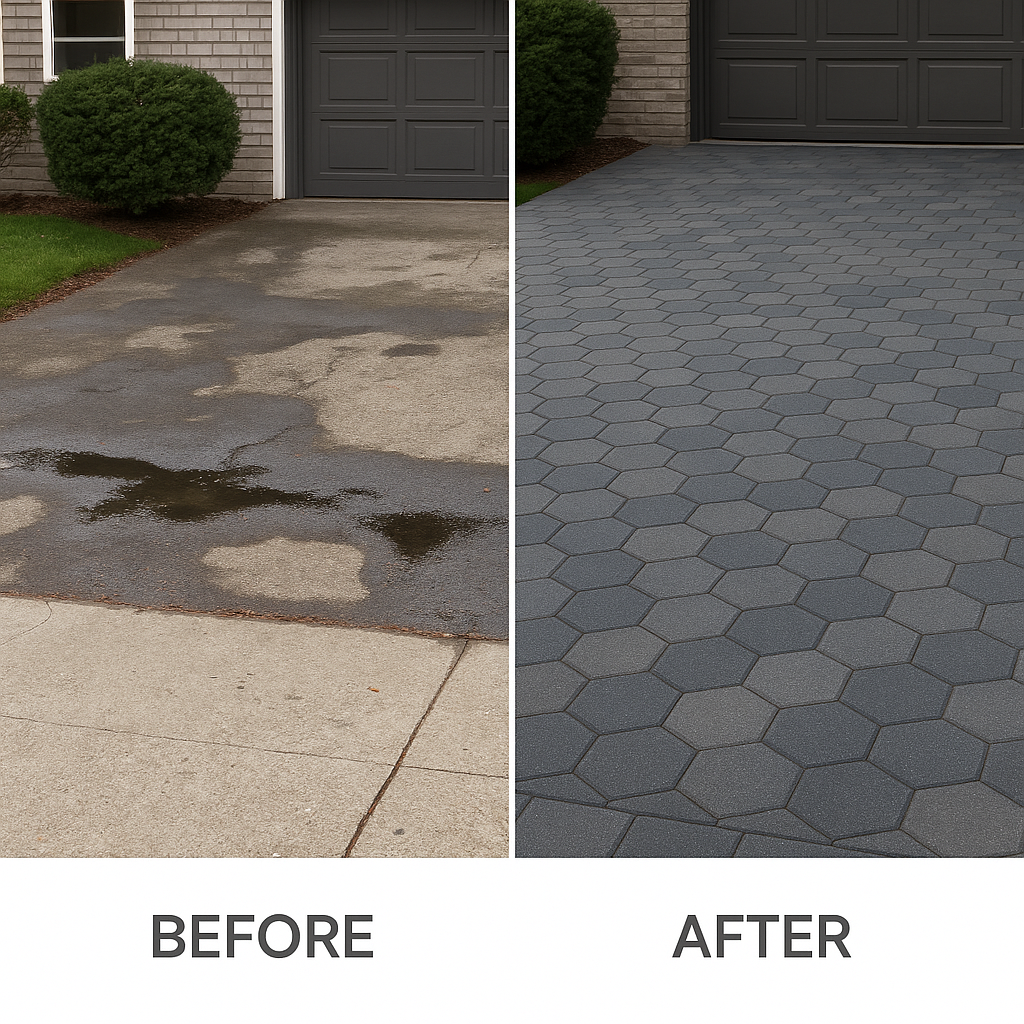
Los Altos Weather and Soil Considerations
Los Altos’ coastal climate and soil require careful planning to ensure your driveway thrives:
These considerations make Hexa 100 pavers a perfect fit for Los Altos’ conditions.
Installation Tips: Crafting a Geometric Hexa 100 Driveway
At Bayside Pavers, we build Hexa 100 driveways with precision to ensure bold design and lasting durability. Here’s our installation process, aligned with UCPRC guidelines, plus maintenance tips:
Installation Process
Maintenance Tips
These steps ensure your driveway stays striking and durable for decades.
Comparing Hexa 100 Pavers to Other Options
Hexa 100 pavers are ideal for geometric driveways, but how do they stack up? Here’s a comparison for Los Altos homeowners:

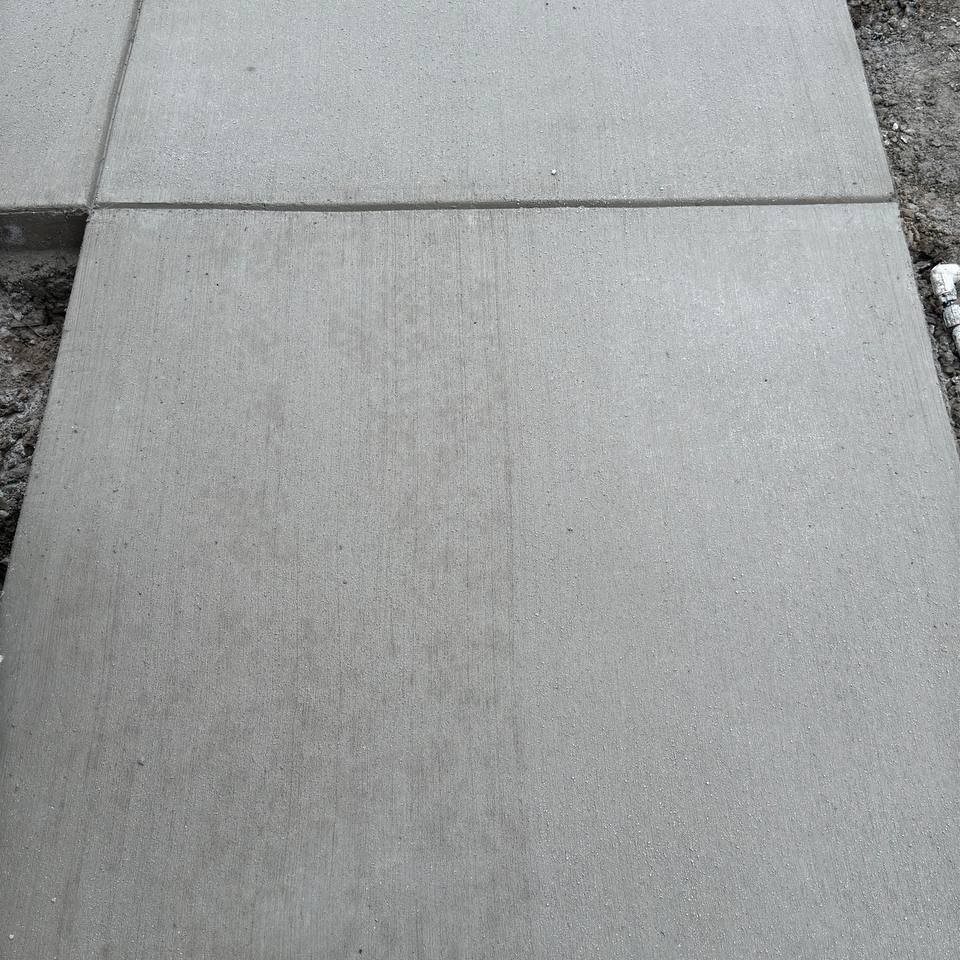
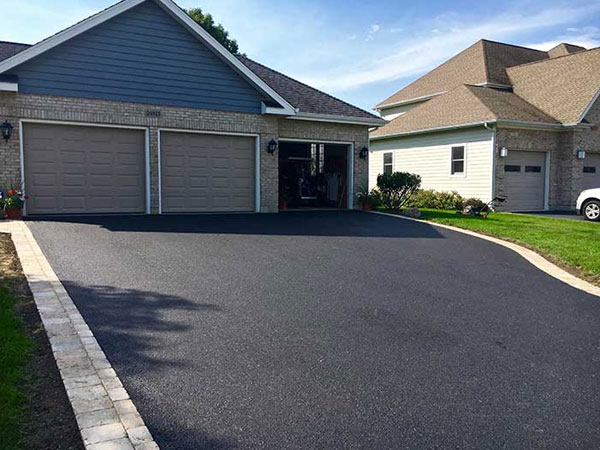
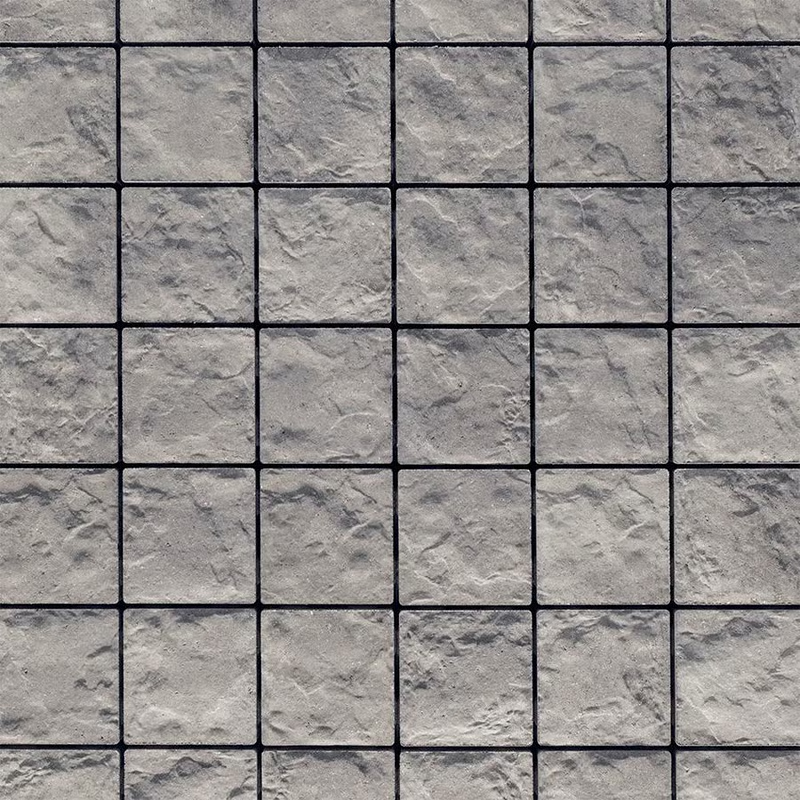
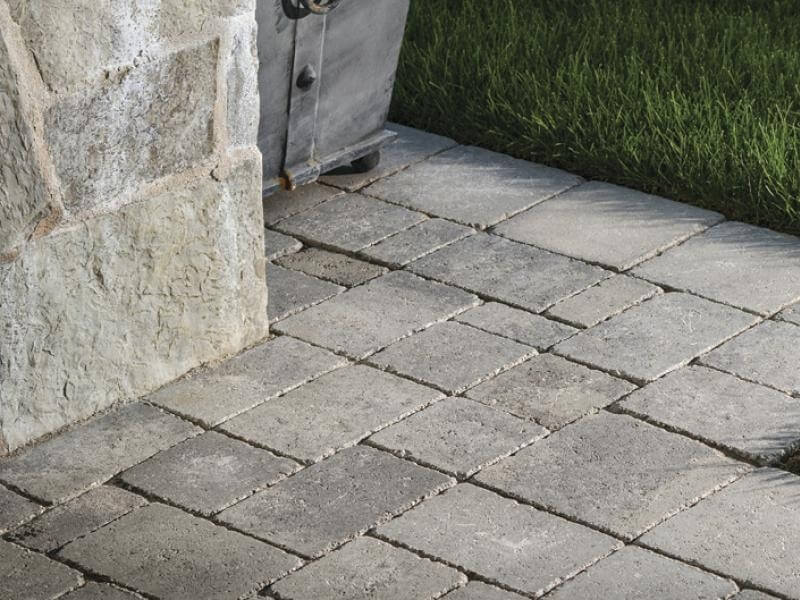
Hexa 100 pavers excel for Los Altos homeowners seeking bold, durable geometric designs.
FAQs: Your Hexa 100 Paver Customization Questions Answered
Got questions about customizing your Hexa 100 driveway? We’ve got answers!
Can I mix Hexa 100 paver colors? Yes! Combine Greyed Nickel and Onyx Black for a bold gradient or checkerboard look, per Techo-Bloc’s design guide.
What patterns work best with Hexa 100? Uniform grids, gradient mosaics, or radial patterns create striking geometric designs.
Can I add accents to a Hexa 100 driveway? Absolutely! Use Techo-Bloc Blu 80 as a border or central medallion for a custom, modern touch.
Are Hexa 100 pavers durable for Los Altos’ climate? Yes! With 8,000 psi strength and salt resistance, they handle fog, rain, and traffic for 30–50 years, per UCPRC.
How much does a Hexa 100 driveway cost? Expect $18–$40/sq ft, depending on design. Call +1 (866) 225-3512 for a free quote tailored to your Los Altos project!
Create Your Geometric Los Altos Driveway with Bayside Pavers
Your Los Altos driveway deserves to be a bold, geometric masterpiece that blends Silicon Valley style with unmatched durability. With Techo-Bloc’s Hexa 100 pavers and Bayside Pavers’ expertise, we’ll craft a driveway that turns heads, handles heavy traffic, and thrives in coastal weather, backed by UCPRC’s standards and Techo-Bloc’s lifetime warranty. Whether it’s a sleek grid or a vibrant mosaic, we’ve got your curb appeal covered.
Want a bold driveway design? Comment below or contact us at +1 (866) 225-3512 for a quote! Let’s make your Los Altos driveway a geometric showstopper.
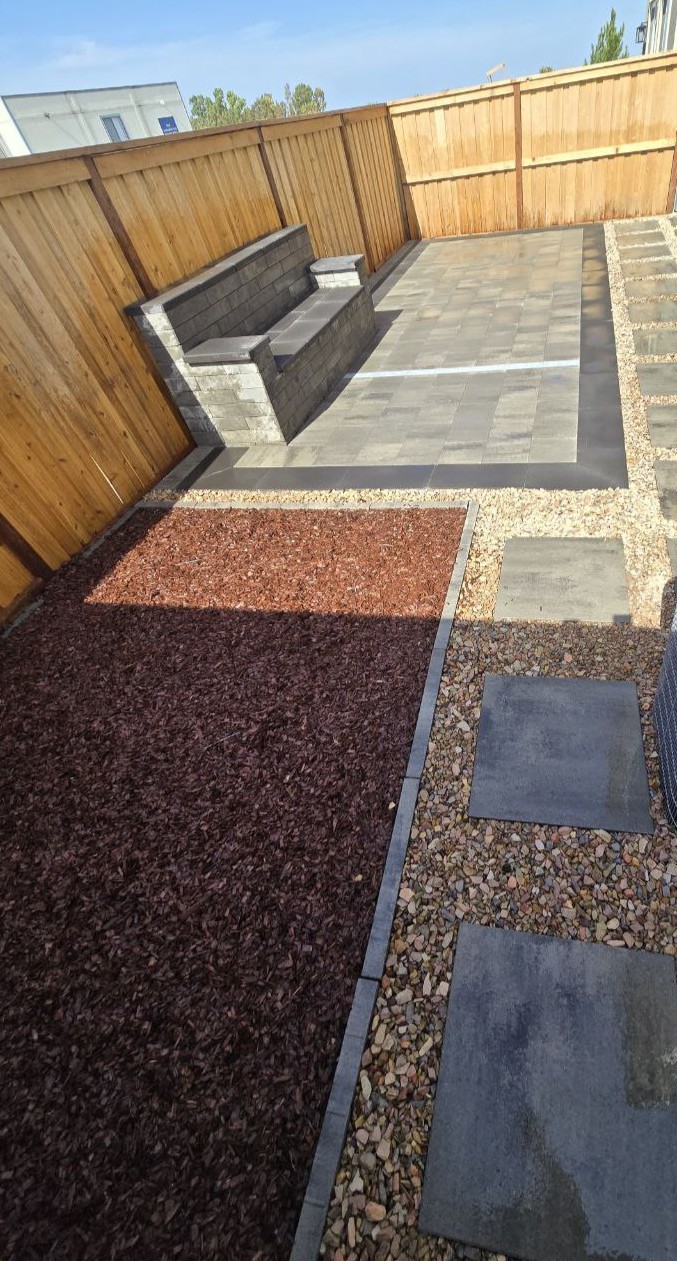
Picture this: your tiny Walnut Creek backyard feels more like a storage closet than a place to relax, but you’re dreaming of a cozy patio for intimate dinners or morning coffee under the East Bay sun. I had a friend in Walnut Creek whose small backyard was a patchy lawn that screamed “missed opportunity”—until they called Bayside Pavers. Now, their compact patio is a stylish oasis, perfect for hosting friends or unwinding with a book, proving you don’t need a big space to make a big impact.
Small backyards can be a challenge, but with smart design and the right pavers, they can become your favorite spot in the house. In this guide, we’ll share creative ideas for compact patios, highlight herringbone patterns and red brick-like Techo-Bloc pavers, and offer tips tailored for Walnut Creek’s cozy lots. Plus, we’ll showcase a local success story and answer your top questions about small-space challenges—all backed by UCPRC’s design standards. Ready to turn your tiny backyard into a stunning retreat? Let’s dive in!
Why Small Patios Shine in Walnut Creek
A small patio doesn’t mean small dreams. In Walnut Creek, where compact backyards are common, a well-designed paver patio can maximize space, boost curb appeal, and create a cozy vibe for East Bay living. According to the University of California Pavement Research Center (UCPRC), a properly installed patio with a 6–8-inch gravel base lasts 30–50 years, even in tight spaces. Here’s why a small patio is a game-changer:
At Bayside Pavers, we’re passionate about transforming small Walnut Creek backyards into big-impact oases. Let’s explore how to make it happen!
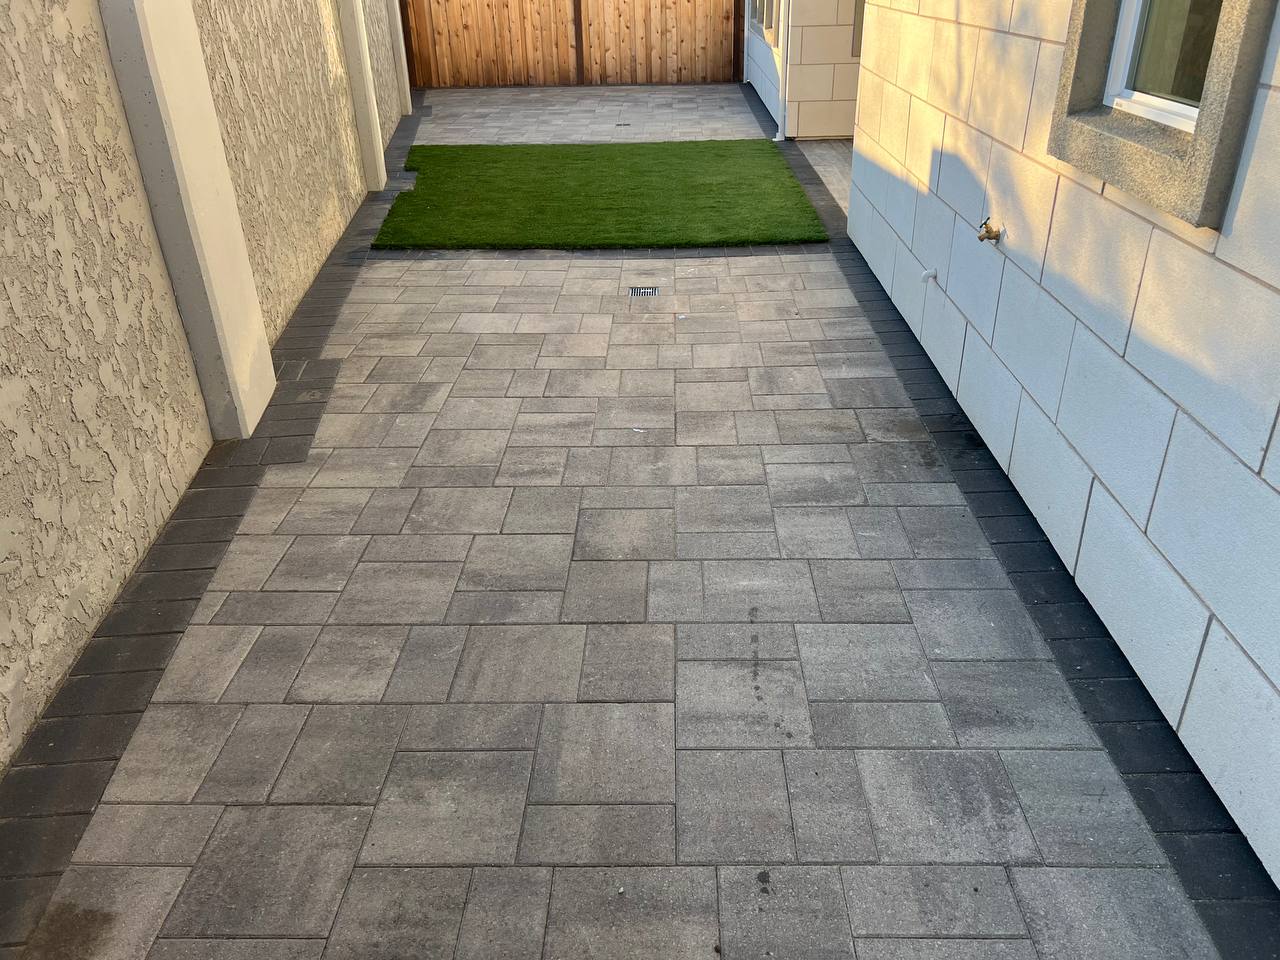
Small Patio Design Ideas
Even the tiniest backyard can feel like a luxury retreat with the right design. Here are creative ideas for maximizing small Walnut Creek patios:
These designs make your Walnut Creek patio feel spacious and stylish, no matter the size.
Pattern and Color Tips: Herringbone and Red Brick Vibes
Patterns and colors are like the personality of your patio—they set the mood. For small Walnut Creek backyards, herringbone patterns and red brick-like pavers are perfect for adding charm without clutter. Here’s how to nail it:
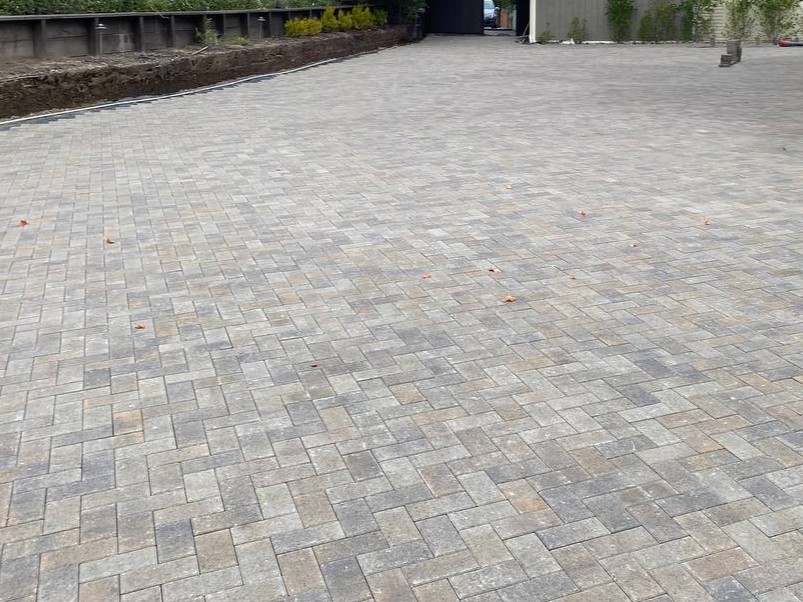
These choices create a timeless, elegant look that maximizes your small space.
Walnut Creek Space Solutions: Overcoming Small-Yard Challenges
Walnut Creek’s cozy lots and suburban vibe call for creative solutions to maximize small backyards. Here’s how we tackle common challenges:
These solutions turn your small backyard into a functional, stylish oasis.
Choosing Pavers: Red Brick-Like and Beyond
Picking the right pavers is like choosing the perfect outfit for your patio—it’s got to look good and perform well. Techo-Bloc offers options ideal for small Walnut Creek patios:
For small Walnut Creek patios, Mika’s red brick-like look in a herringbone pattern is a top pick for style and durability. (Suggested visual: A comparison chart of Techo-Bloc paver types, highlighting Mika’s red brick aesthetic.)
Installation: Building a Compact Patio
At Bayside Pavers, we craft small patios with precision to maximize space and style. Here’s our process, aligned with UCPRC guidelines:
Step 1: Design Consultation We visit your Walnut Creek backyard to measure your small space, discuss herringbone patterns, and recommend red brick-like Techo-Bloc pavers.
Step 2: Excavation We dig 8–10 inches deep to remove grass and clay-heavy soil, ensuring a stable foundation.
Step 3: Base Preparation We lay geotextile fabric, then add 6–8 inches of crushed gravel, compacting each layer to support 8,000 psi, per UCPRC.
Step 4: Bedding Layer A 1-inch layer of coarse sand is screeded smooth for a level paver bed.
Step 5: Paver Installation We lay Techo-Bloc Mika pavers in a herringbone pattern, cutting edges for a seamless fit in your small space.
Step 6: Finishing Touches We sweep polymeric sand into joints to prevent weeds, compact the surface, and add a slight slope for drainage.
A Walnut Creek Success Story: The Kim Family’s Patio
Let’s talk about a real Walnut Creek project that transformed a tiny backyard. The Kim family had a cramped, 150-square-foot lawn that felt unusable for their cozy East Bay gatherings. They wanted a stylish patio for intimate dinners and coffee mornings.
Before: The backyard was a patchy mess with no room for entertaining. It lacked style and function, disappointing their vision for Walnut Creek living.
The Transformation: We designed a 120-square-foot patio using Techo-Bloc Mika pavers in a herringbone pattern, mimicking classic red brick. We excavated 8 inches deep, added a 6-inch gravel base with geotextile fabric, and used polymeric sand for weed-proof joints. A corner bench maximized seating without eating space.
After: The Kim patio is now a cozy, stunning oasis, perfect for small gatherings. They’ve hosted family dinners and book club meetups, and the herringbone design adds elegance. “It feels like we doubled our space!” they said. (Suggested visual: Before-and-after photos of the Kim patio, plus a close-up of the herringbone pattern.)
FAQs: Your Small-Space Patio Questions Answered
Got questions about small patios? We’ve got answers!
How small can a patio be? As small as 100 sq ft works for cozy Walnut Creek setups, like a bistro table or lounge area.
Does herringbone work in small spaces? Yes! Its zigzag pattern adds visual depth, making tiny patios feel larger, per UCPRC design principles.
How do I maximize seating in a small patio? Use built-in benches or wall seating with Techo-Bloc Raffinato to save ground space.
Do small patios need permits in Walnut Creek? Patios under 500 sq ft typically don’t, but we’ll check local rules and handle any paperwork.
How much does a small patio cost? Expect $15–$30/sq ft, or $1,500–$3,000 for a 100 sq ft patio. Call +1 (866) 225-3512 for a free quote!
Transform Your Small Walnut Creek Backyard with Bayside Pavers
Your tiny Walnut Creek backyard deserves to be a stylish, functional retreat, not a wasted corner. With Techo-Bloc’s red brick-like pavers, herringbone patterns, and Bayside Pavers’ expertise, we’ll create a compact patio that maximizes space and charm, backed by UCPRC’s standards. Whether it’s a cozy dinner spot or a chic lounge, we’ve got your East Bay oasis covered.
Love small patio ideas? Comment below or contact us at +1 (866) 225-3512 for design inspiration! Let’s make your Walnut Creek backyard a stunning masterpiece.
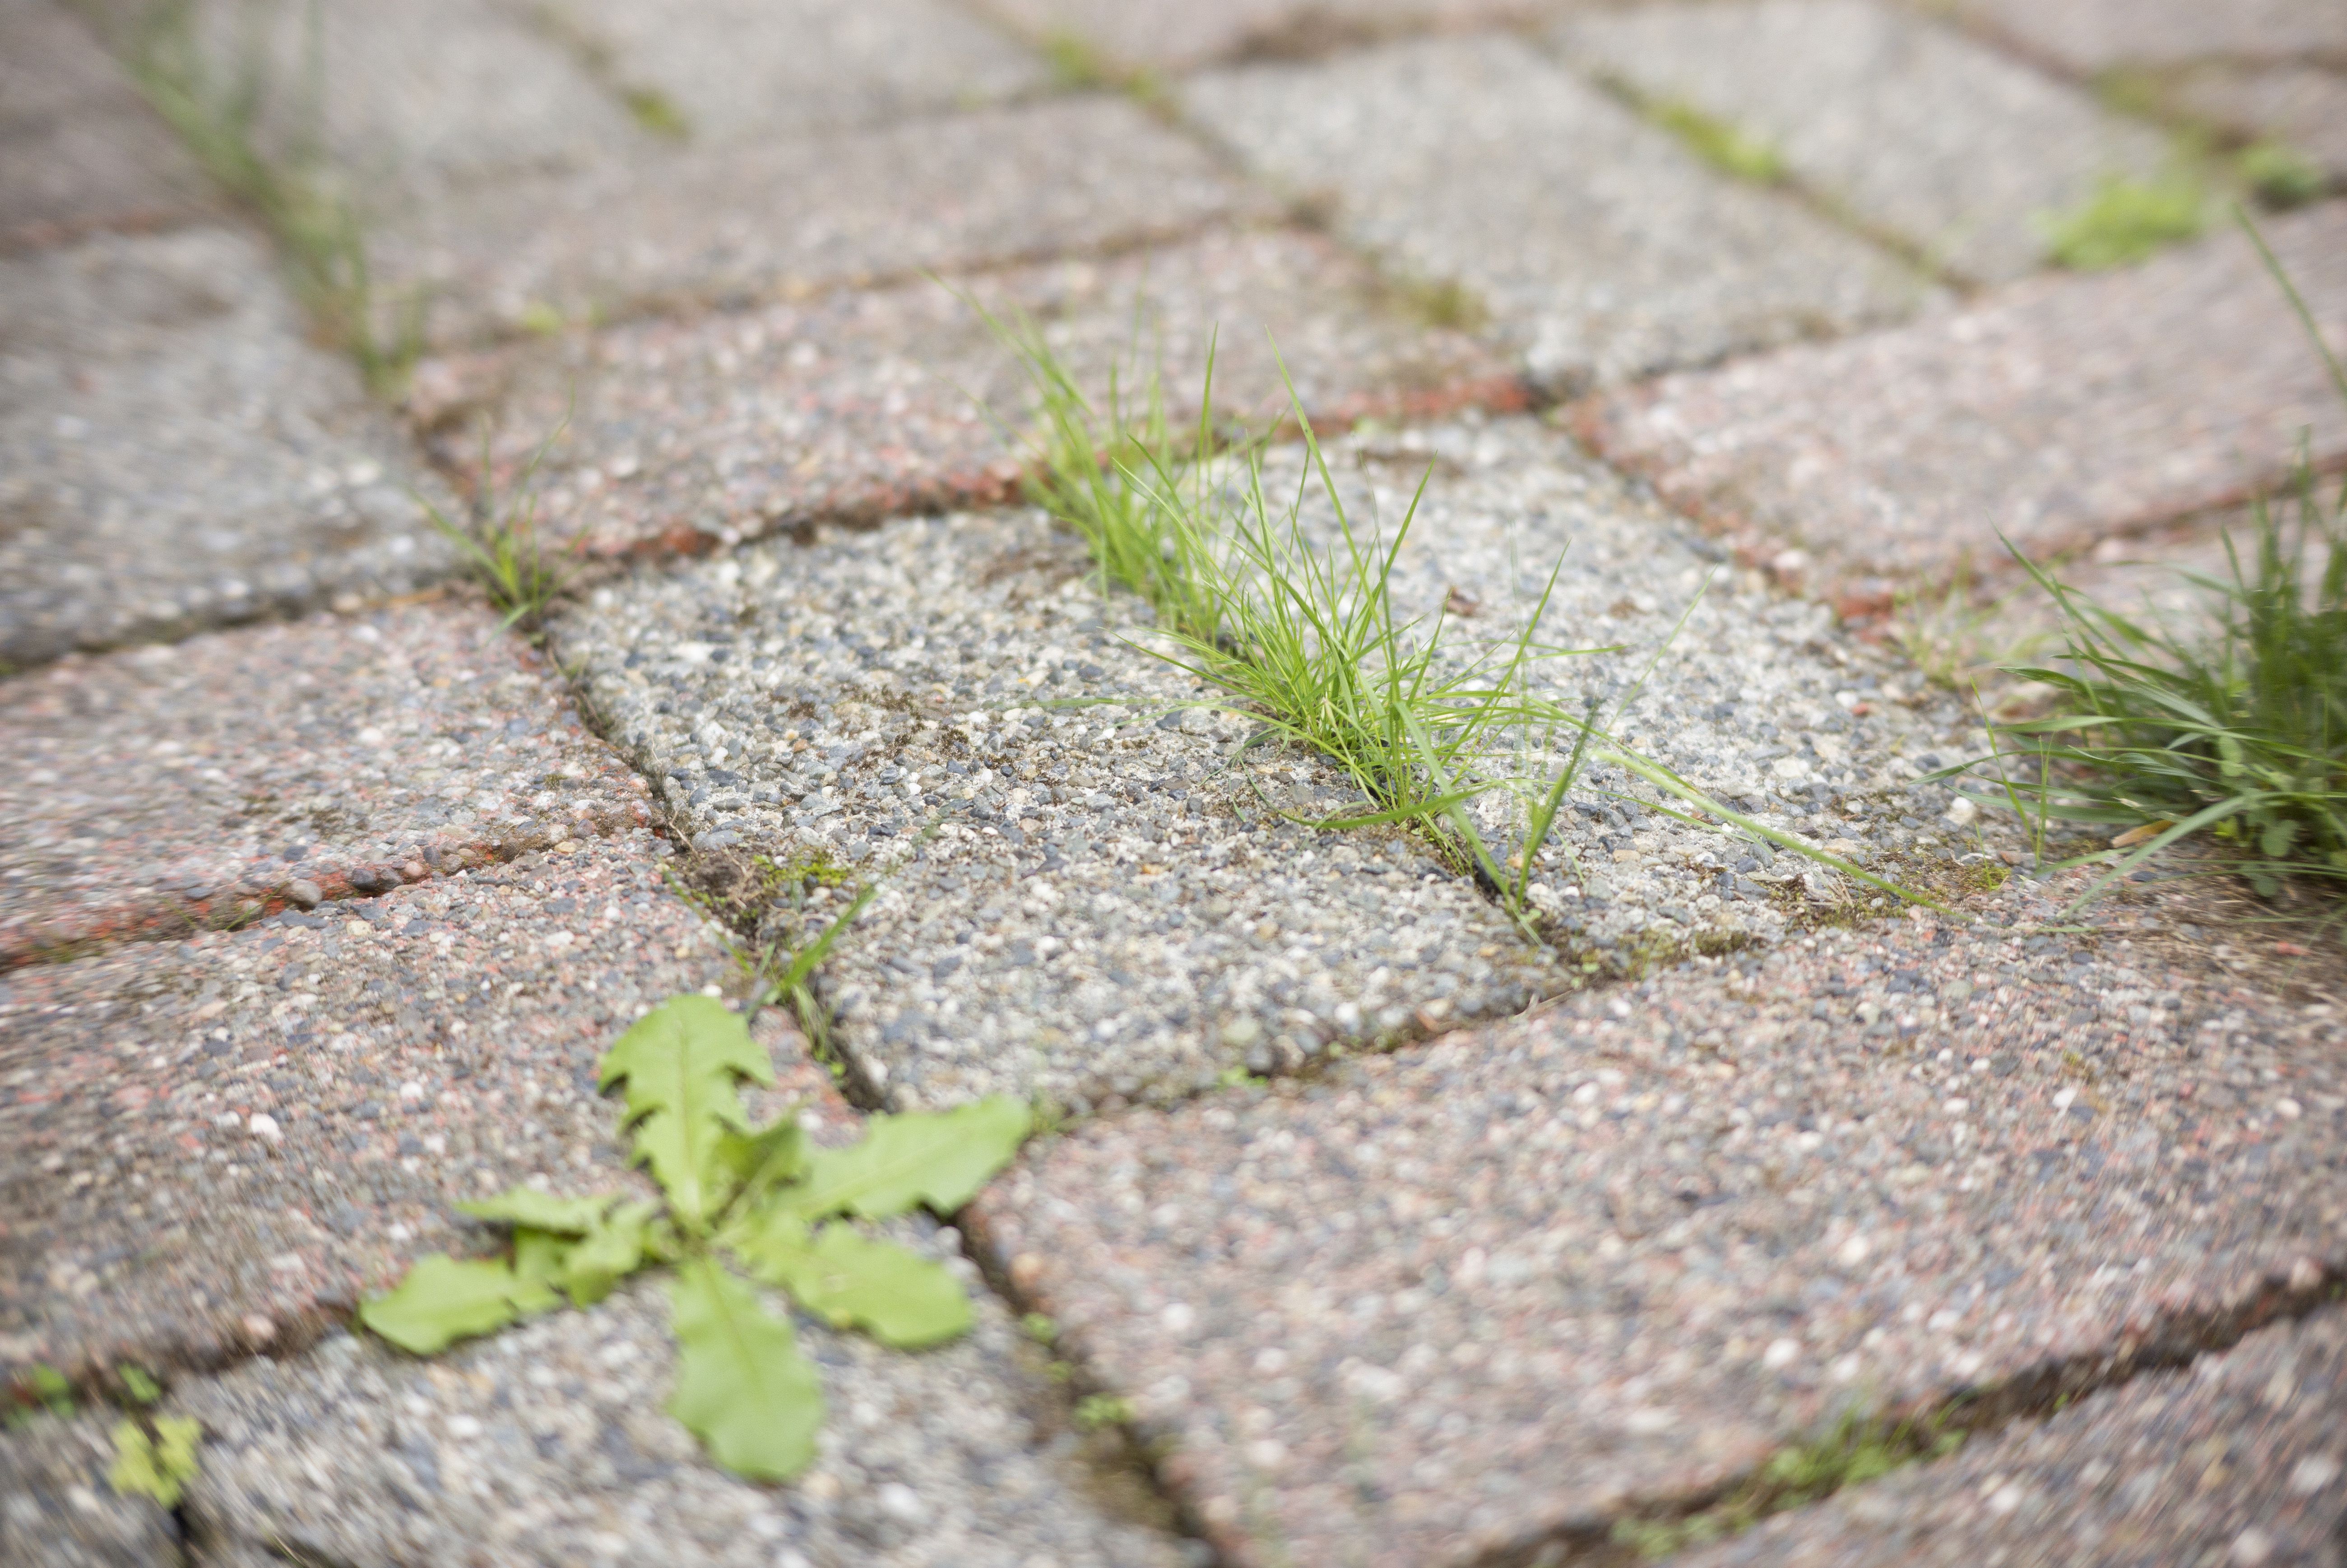
Imagine pulling into your Redwood City driveway, ready to unwind, only to spot a forest of weeds sprouting between your pavers. Ugh, talk about a buzzkill! I had a neighbor in Redwood City who spent every Saturday yanking weeds from their driveway, muttering, “There’s got to be a better way!” Spoiler alert: there is, and it’s called polymeric sand. At Bayside Pavers, we’ve helped countless homeowners banish weeds for good, turning their driveways into low-maintenance showpieces.
Nobody dreams of spending weekends battling driveway weeds, right? In this guide, we’ll walk you through how to keep your paver driveway weed-free using polymeric sand, from preparation to long-term care. We’ll share a Redwood City success story, compare weed-proofing methods, and answer your top questions—all in plain English. Plus, we’ll sprinkle in tips tailored for Redwood City’s coastal climate. Ready to say goodbye to weeds and hello to a pristine driveway? Let’s get started!
What Causes Weed Growth in Paver Driveways?
Weeds are like uninvited guests—they show up where they’re not wanted and make themselves at home. In paver driveways, weeds sneak into the joints (the gaps between pavers) because of:
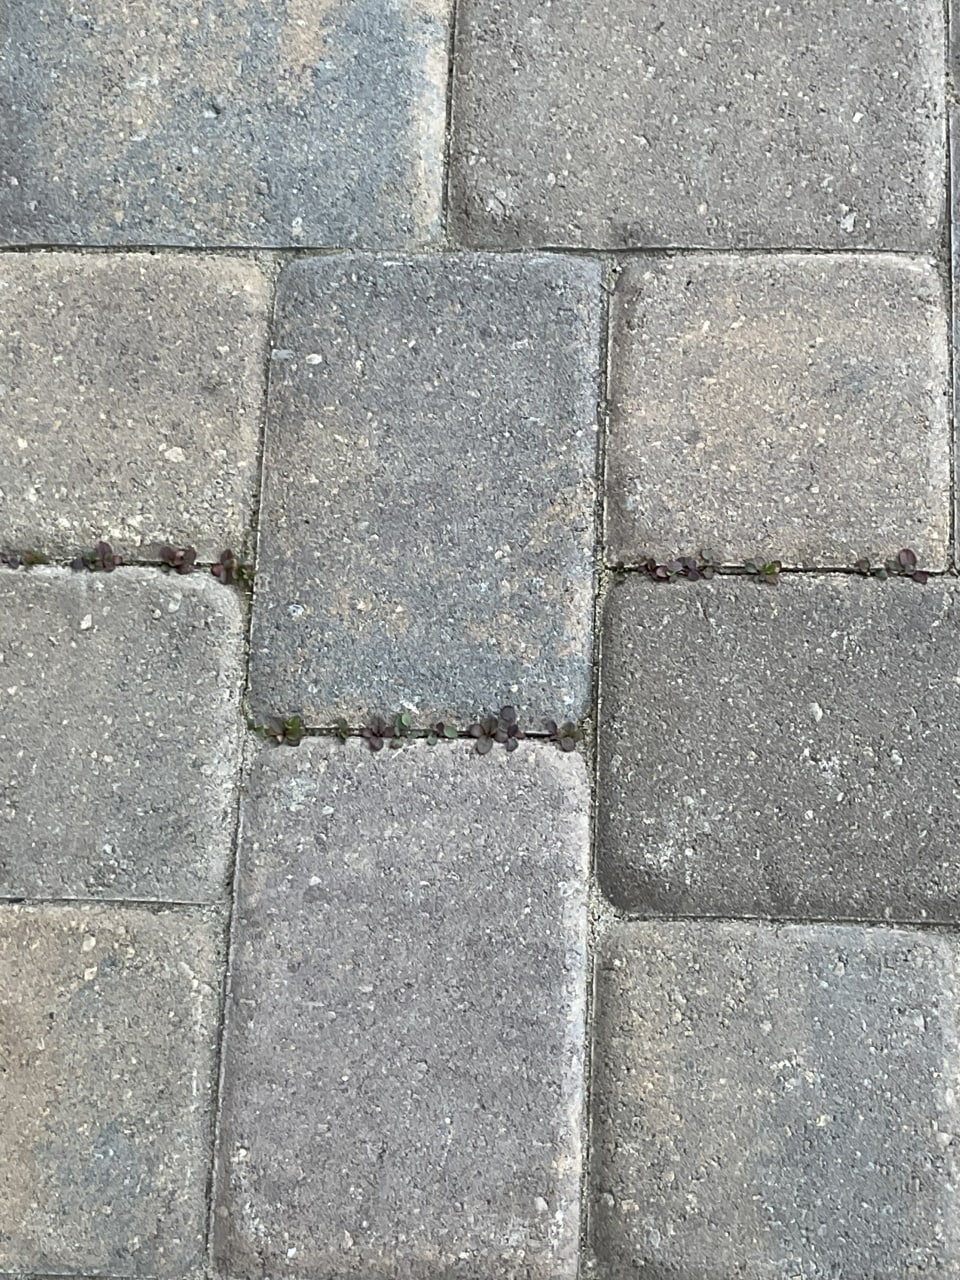
The University of California Pavement Research Center (UCPRC) emphasizes that stabilizing joints with polymeric sand is key to preventing weed growth while keeping pavers secure. Let’s dive into what makes polymeric sand so magical!
Polymeric Sand Explained: Your Weed-Blocking Superhero
So, what’s polymeric sand? It’s not your average sandbox stuff—it’s a high-tech mix of fine sand and a binding agent that hardens when wet, locking paver joints tight. Think of it like glue that keeps weeds out and pavers in place. At Bayside Pavers, we use top-quality polymeric sand (paired with Techo-Bloc pavers) to create driveways that stay weed-free for years. Here’s why it’s a game-changer:
The UCPRC notes that proper joint stabilization (like with polymeric sand) can extend a paver driveway’s life by decades. Ready to see how we make it happen? Let’s walk through the process!
Step-by-Step: Applying Polymeric Sand for a Weed-Free Driveway
At Bayside Pavers, we treat weed-proofing like an art form. Here’s how we apply polymeric sand to keep your Redwood City driveway pristine, step by step:
Step 1: Preparation We start by cleaning your driveway thoroughly. We sweep away debris, power-wash the pavers, and remove any existing weeds or old sand. It’s like giving your driveway a spa day to prep for the main event. We also check that the pavers are level and the base is stable, per UCPRC guidelines.
Step 2: Choosing the Right Sand We select high-quality polymeric sand that matches your paver color (like beige for Techo-Bloc’s Blu 80MM). The sand’s grain size matters—too coarse, and it won’t fill joints properly; too fine, and it might clog. We get it just right.
Step 3: Application We pour the polymeric sand over the driveway and sweep it into the joints with a stiff broom, ensuring every gap is filled to the brim. Think of it like frosting a cake—every nook needs coverage! We tap the pavers lightly to settle the sand.
Step 4: Compaction We use a plate compactor to press the sand deeper into the joints, creating a tight, stable bond. This step is crucial to prevent future settling or weed growth.
Step 5: Activation Here’s where the magic happens! We mist the driveway with a gentle spray of water to activate the binding agent in the polymeric sand. It hardens into a solid, weed-proof barrier within 24 hours. We’re careful not to over-wet, which could wash the sand out.
Step 6: Sealing (Optional) For extra protection, we recommend sealing the pavers with a breathable sealant. It enhances the color, protects against stains, and adds another layer of weed resistance. It’s like putting a raincoat on your driveway!
Step 7: Final Cleanup We sweep away excess sand and ensure your Redwood City driveway looks flawless. The result? A weed-free, polished surface ready for your next block party.
A Redwood City Transformation: The Lee Family’s Driveway
Let’s talk about a real Redwood City project that banished weeds for good. The Lee family had a paver driveway that looked great when they moved in, but within a year, weeds were sprouting like nobody’s business. Their weekends were spent pulling dandelions, and the driveway’s charm was fading fast. They called Bayside Pavers for help.
Before: The driveway was a mix of Techo-Bloc pavers with loose, regular sand in the joints. Weeds popped up constantly, and the uneven joints made the surface look sloppy.
The Transformation: We cleaned the driveway, removed the old sand, and applied high-quality polymeric sand in a color that matched their Techo-Bloc Blu 80MMpavers. We compacted the sand, activated it with a light mist, and added a sealant for extra durability. The driveway was laid in a classic herringbone pattern, perfect for Redwood City’s coastal vibe.
After: The Lees’ driveway is now weed-free, stable, and stunning. They love how it complements their Peninsula home, and they’ve reclaimed their weekends for family time instead of weeding. “It’s like we got a brand-new driveway!” they told us.
Comparing Weed-Proofing Methods
Polymeric sand isn’t the only way to fight weeds, but it’s the best for paver driveways. Here’s how it stacks up against other methods:
Polymeric sand, paired with Techo-Bloc pavers, is the gold standard for Redwood City driveways, offering durability and style with minimal upkeep.
Redwood City Maintenance Tips
Living in Redwood City means dealing with foggy mornings, rainy winters, and occasional heatwaves—all of which can invite weeds if you’re not careful. Here are our top tips to keep your paver driveway weed-free:
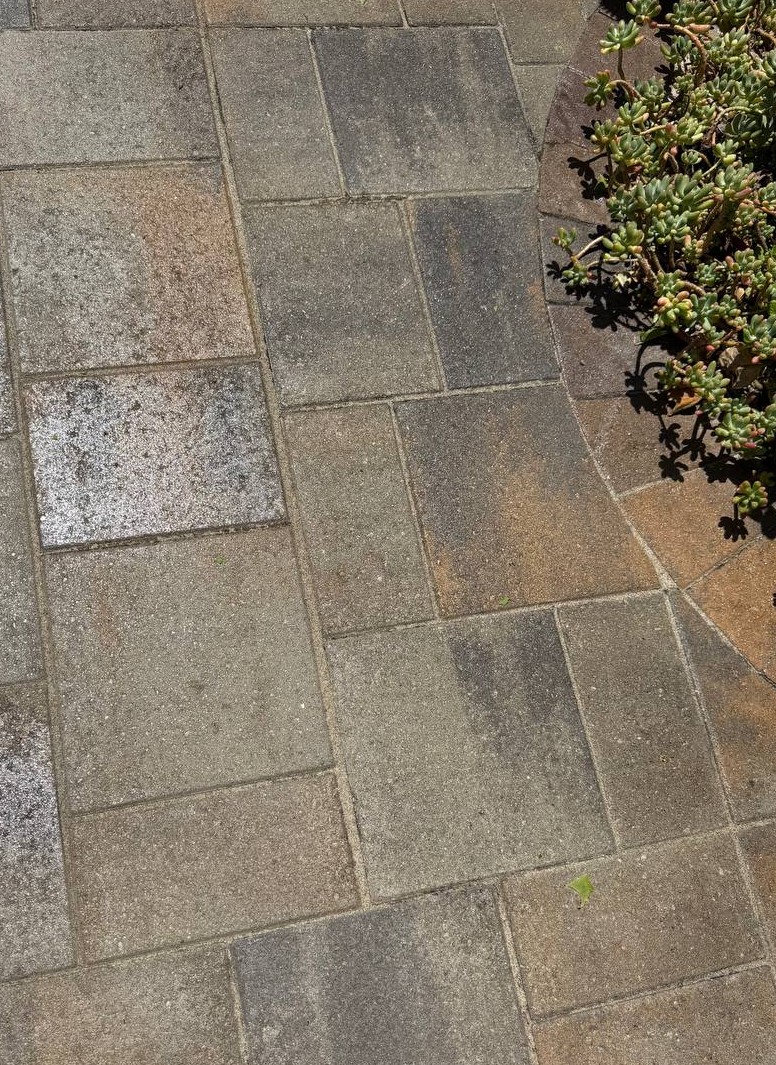
FAQs: Your Weed-Proofing Questions Answered
Got questions about keeping your driveway weed-free? We’ve got answers!
How long does polymeric sand last? With proper care, it lasts 5–10 years. Redwood City’s weather can wear it down over time, but regular maintenance keeps it strong.
Can I apply polymeric sand myself? You can, but it’s tricky! Incorrect application (like over-wetting) can weaken the bond. Let Bayside Pavers handle it for a flawless finish.
Will polymeric sand stop all weeds? It blocks most weeds, but occasional stragglers may appear. A quick pluck or spot treatment keeps them at bay.
Is polymeric sand safe for pets and plants? Yes, once it hardens, it’s non-toxic. We use eco-friendly brands to keep your Redwood City yard safe.
How much does weed-proofing cost? Costs depend on driveway size and condition. Call us at +1 (866) 225-3512 for a free quote tailored to your home!
Say Goodbye to Driveway Weeds with Bayside Pavers
Your Redwood City driveway should be a source of pride, not a weeding chore. With polymeric sand and Bayside Pavers’ expertise, you can enjoy a weed-free, stunning driveway that complements your Peninsula home. Using Techo-Bloc pavers and UCPRC-backed techniques, we create driveways that stay beautiful and low-maintenance for years, rain or shine.
Struggling with driveway weeds? Comment below or send us a message at +1 (866) 225-3512 for expert advice! Let’s make your Redwood City driveway the talk of the town—for all the right reasons.
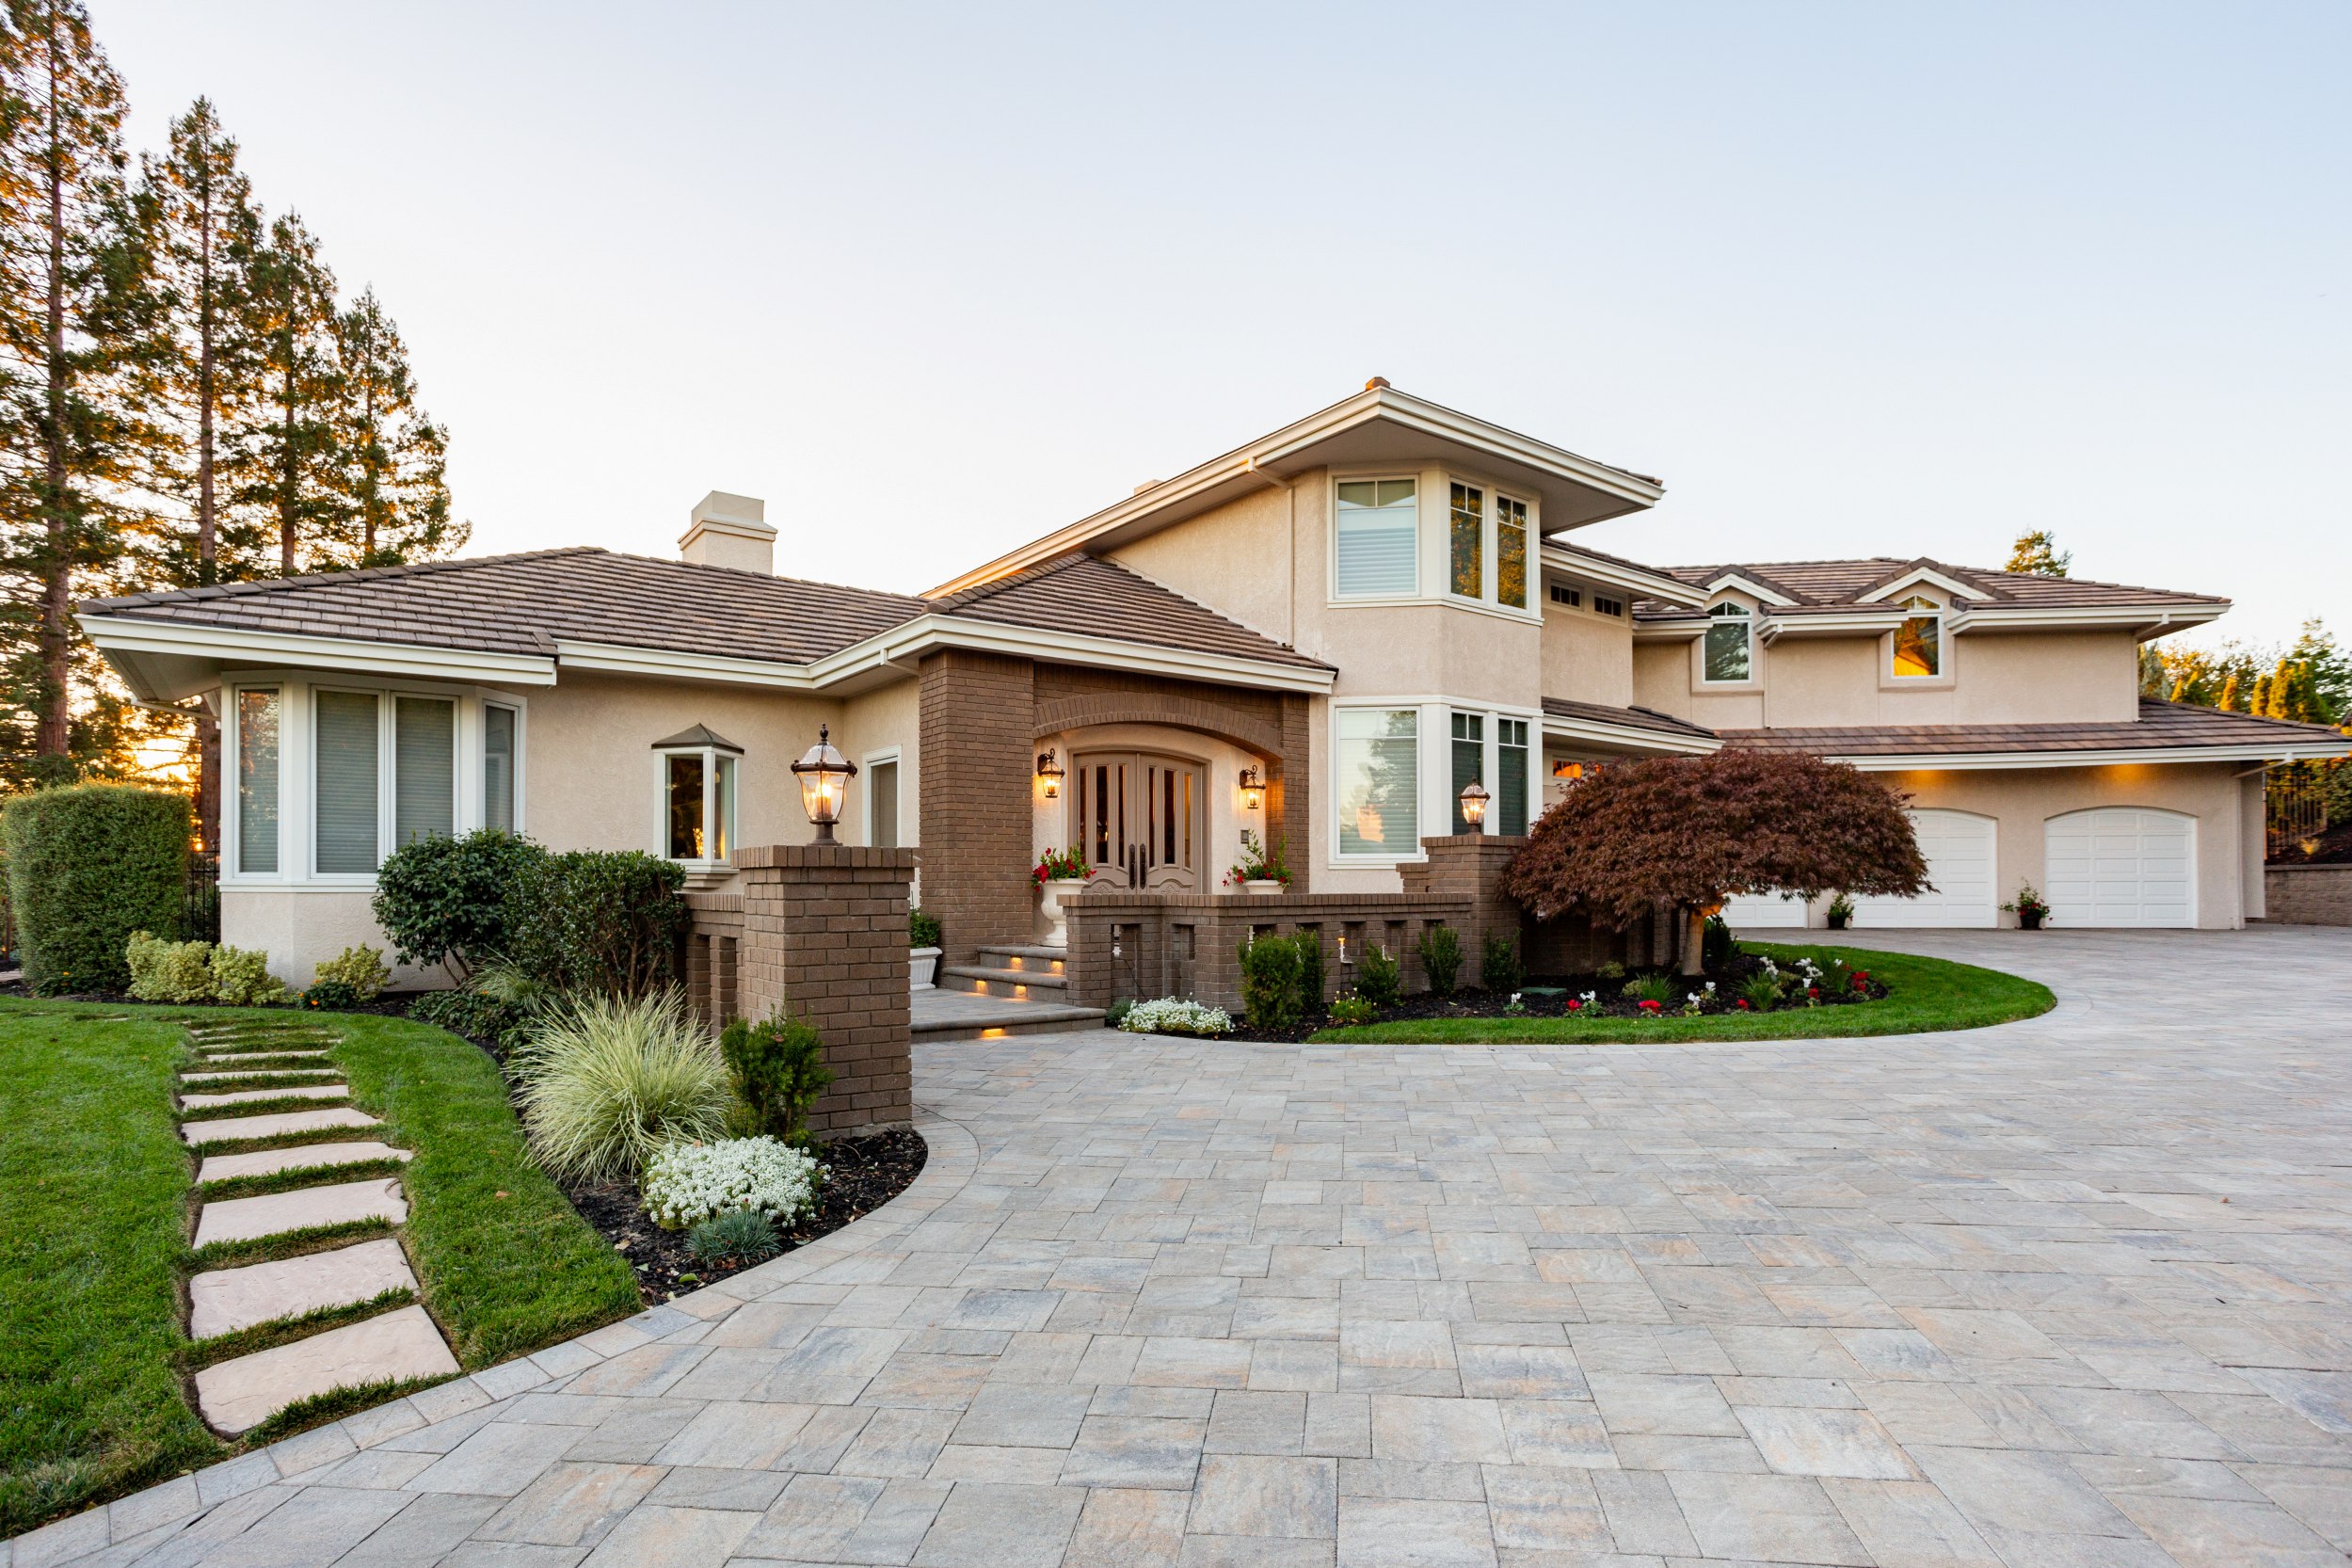
Why Drainage Matters for Your Danville Driveway
Ever wondered why some driveways turn into puddles while others stay dry as a bone? It’s all about drainage. Poor drainage can lead to erosion, cracked pavers, or even water seeping into your garage—yikes! In Danville, where winter rains can be intense, a well-drained driveway is a must. The University of California Pavement Research Center (UCPRC) emphasizes that effective stormwater management prevents damage and extends your driveway’s life. Here’s why drainage is a game-changer:
At Bayside Pavers, we’re passionate about creating driveways that handle Danville’s weather like champs. Let’s explore how to make it happen!
Permeable vs. Standard Pavers: What’s the Difference?
When it comes to drainage, not all pavers are created equal. Let’s break down the two main options—permeable and standard pavers—and why they matter for your Danville home.
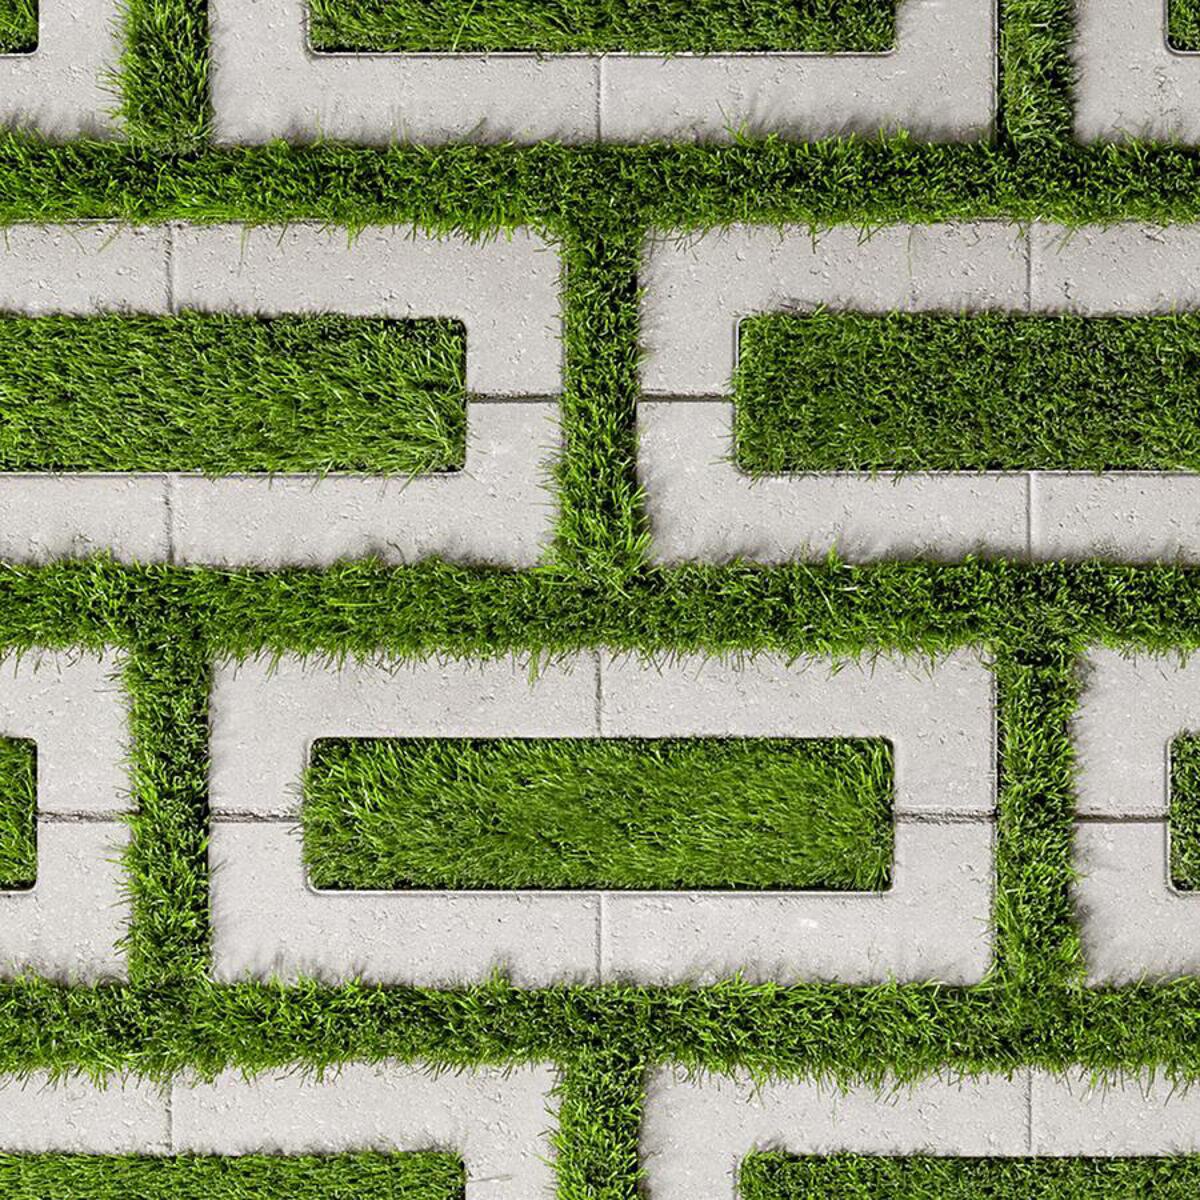
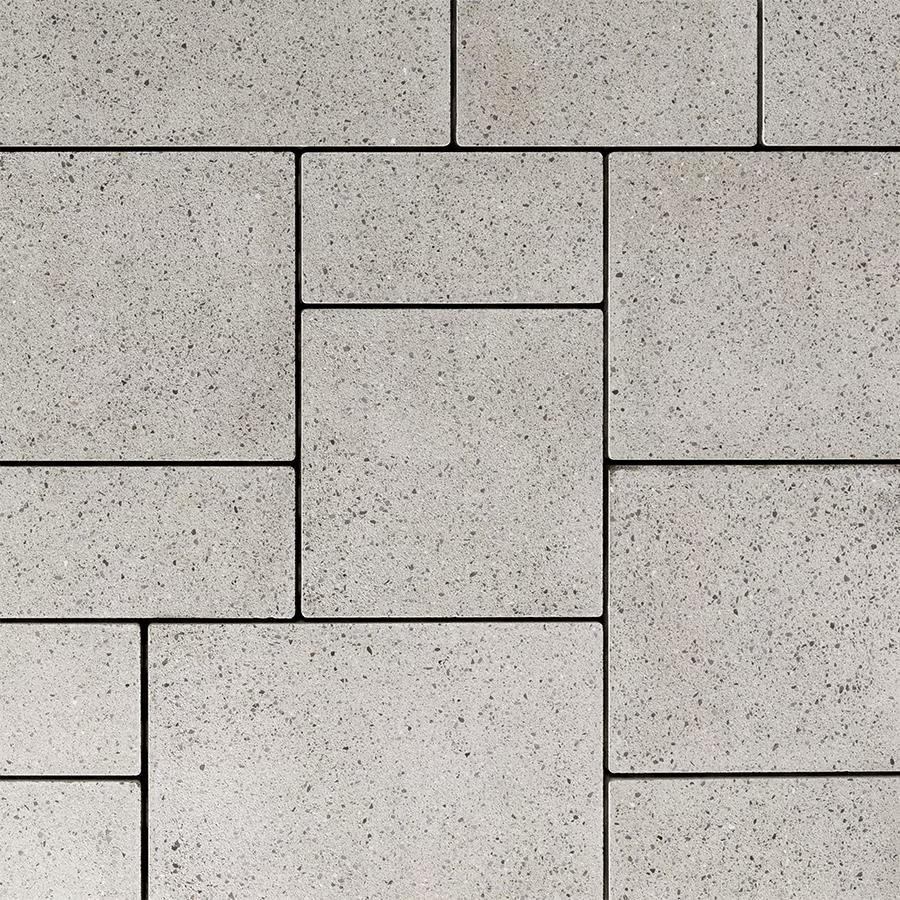
For Danville’s clay-heavy soils and rainy winters, permeable pavers are often the star of the show, but a well-sloped standard paver driveway can work wonders too.
Designing for Danville’s Climate
Danville’s weather—hot summers, wet winters, and clay-rich soil—demands smart drainage design. Here’s how we tackle it at Bayside Pavers:
These techniques keep your driveway dry and your home safe, all while looking like it belongs on a Danville postcard.
Installation Tips for a Water-Free Driveway
Ready to see how we build a drainage-friendly driveway? Here’s our step-by-step process, made simple for Danville homeowners:
Step 1: Site Assessment We visit your Danville home to check soil type, slope, and drainage patterns. We’ll ask about your flooding woes and design a solution tailored to your property.
Step 2: Excavation We dig 10–12 inches deep for permeable pavers (per UCPRC recommendations) or 8–10 inches for standard pavers. This removes clay-heavy soil and creates a stable base.
Step 3: Base Preparation For permeable pavers, we layer 8–10 inches of open-graded gravel (like 3/4-inch aggregate) to store water. For standard pavers, we use compacted gravel with a 1–2% slope. Compaction is key—think of it like packing a suitcase tightly to avoid shifting.
Step 4: Bedding Layer A 1-inch layer of coarse sand or fine gravel goes down, leveled perfectly to support the pavers. For permeable systems, we use larger granules to enhance water flow.
Step 5: Paver Installation We lay Techo-Bloc pavers (like Aquastorm for permeable or Mika for standard) in your chosen pattern. Permeable pavers have wider joints to let water through, while standard pavers are tightly interlocked.
Step 6: Finishing Touches For permeable pavers, we fill joints with fine gravel; for standard pavers, we use polymeric sand to lock them in place. We add channel drains if needed and clean up your Danville yard.
A Danville Transformation: The Thompson Family’s Driveway
Let’s talk about a real Danville project that solved a flooding nightmare. The Thompson family had an old concrete driveway that turned into a muddy mess every winter. Water pooled near their garage, and runoff damaged their front lawn. They called Bayside Pavers for a solution.
Before: The driveway was cracked and uneven, with standing water after every rain. It clashed with their elegant Danville home and frustrated the Thompsons.
The Transformation: We recommended Techo-Bloc’s Aquastorm permeable pavers for their eco-friendly drainage. We excavated 12 inches deep, added a layered gravel base, and installed Aquastorm in a running bond pattern. A channel drain near the garage caught any excess water, and the permeable system let rainwater soak into the ground.
After: The driveway is now puddle-free, stylish, and eco-conscious. The Thompsons love how it complements their Danville home’s charm, and they’ve hosted garden parties without worrying about mud. “It’s like we reclaimed our front yard!” they said.
FAQs: Your Drainage Questions Answered
Got questions about keeping your driveway water-free? We’ve got answers!
How do permeable pavers work? They act like a sponge, letting water pass through joints into a gravel base that stores it until it soaks into the ground. Techo-Bloc’s Aquastorm is a Danville favorite!
Will a sloped driveway look weird? Not at all! A 1–2% slope is barely noticeable but guides water away like a pro. We design it to blend seamlessly with your Danville property.
How often do permeable pavers need maintenance? Sweep and rinse annually, and vacuum the joints every 3–5 years to keep them clear. It’s super easy compared to concrete!
Can standard pavers handle Danville’s rains? Yes, with a proper slope and channel drains. We use Techo-Bloc’s Blu 80MM for durability and style, perfect for Contra Costa County weather.
Are permeable pavers more expensive? They can cost a bit more due to the deeper base, but they save money by preventing flood damage. Call us at +1 (866) 225-3512 for a custom quote!
Ready for a Flood-Free Danville Driveway?
Your driveway should be a source of pride, not a soggy headache. Whether you choose permeable pavers like Techo-Bloc’s Aquastorm or a sloped standard paver design, Bayside Pavers has the expertise to keep your Danville driveway dry, durable, and stunning. With UCPRC-backed techniques and our passion for quality, we’ll create a driveway that handles Contra Costa County’s rains while boosting your home’s East Bay elegance.
Want to learn more about permeable driveways? Share your questions in the comments or contact us at +1 (866) 225-3512 today! Let’s make your Danville home shine, rain or shine.

Imagine hosting a summer BBQ on your Redwood City patio, surrounded by friends, with no pesky weeds stealing the spotlight. Sounds like paradise, right? I had a neighbor in Redwood City who spent every weekend battling weeds on their patio, grumbling, “There’s got to be an easier way!” Spoiler alert: there is, and it’s a dynamic duo—geotextile fabric and polymeric sand. At Bayside Pavers, we’ve helped countless homeowners create low-maintenance, weed-free patios that stay stunning for years.
Nobody wants to play weed-whacker in their backyard oasis, especially in Redwood City’s vibrant community where outdoor living is king. In this guide, we’ll dive into how geotextile fabric and polymeric sand team up to keep weeds at bay, walk you through the application process, share a Redwood City success story, and offer maintenance tips tailored for the Peninsula’s climate. Backed by Techo-Bloc’s durable pavers and UCPRC’s joint stabilization tips, we’ll help you create a patio that’s as carefree as it is beautiful. Ready to kick weeds to the curb? Let’s get started!

Understanding Weed Growth in Paver Patios
Weeds are like uninvited guests—they show up where they’re not wanted and make a mess. In paver patios, weeds sneak into the joints (the gaps between pavers) and sometimes even sprout from below due to:
The University of California Pavement Research Center (UCPRC) emphasizes that stabilizing joints with polymeric sand and using geotextile fabric under the base are key to preventing weed growth from above and below while keeping pavers secure. Let’s explore how this combo works its magic!

Polymeric Sand and Geotextile Fabric Benefits: Your Weed-Blocking Superheroes
What’s the secret to a weed-free patio? It’s a two-part strategy: polymeric sand for the joints and geotextile fabric beneath the base. Polymeric sand is a high-tech mix of fine sand and a binding agent that hardens when wet, creating a weed-proof barrier in the joints. Geotextile fabric, a permeable woven or non-woven material laid under the gravel base, acts like a fortress, stopping weeds from growing up from the soil below. At Bayside Pavers, we pair these with Techo-Bloc pavers to create low-maintenance Redwood City patios. Here’s why they’re awesome:
Geotextile fabric enhances base stability and weed control, making it a must for long-lasting patios.
Application Guide: Installing Geotextile Fabric and Polymeric Sand
At Bayside Pavers, we treat weed-proofing like an art form, using geotextile fabric and polymeric sand for a flawless finish. Here’s our step-by-step guide for a weed-free Redwood City patio:
Step 1: Site Preparation We excavate 8–10 inches deep to remove loose soil, grass, and roots, creating a clean slate for your patio. This depth ensures room for the fabric and base layers.

Step 2: Geotextile Fabric Installation We lay a high-quality geotextile fabric over the compacted soil, overlapping seams by 6 inches to block weed roots from below. It’s like a weed-proof shield for your patio’s foundation.

Step 3: Base Layer We add 6–8 inches of crushed gravel (3/4-inch aggregate, per UCPRC), compacting each 2-inch layer over the fabric to create a stable base that supports 8,000 psi.

Step 4: Bedding Layer A 1-inch layer of coarse sand is screeded smooth over the gravel, providing a level bed for your pavers.

Step 5: Paver Installation We lay Techo-Bloc pavers (like Blu 60 or Villagio) in your chosen pattern, ensuring tight joints for polymeric sand.

Step 6: Polymeric Sand Application We pour polymeric sand over the patio, sweeping it into joints with a stiff broom to fill every gap. We compact it to settle the sand deeply.

Step 7: Activation We mist the sand lightly with water to activate its binding agent, which hardens within 24 hours to form a weed-proof barrier. The geotextile fabric below ensures no weeds sneak up from the soil.

Step 8: Sealing (Optional) We apply a breathable sealant to enhance color and add extra weed resistance, like a protective topcoat for your patio.

Step 9: Final Cleanup We sweep away excess sand and ensure your Redwood City patio is ready for your next gathering.
Comparing Weed-Proofing Methods
Geotextile fabric and polymeric sand are the gold standard for weed-proofing, but how do they compare to other methods? Here’s a breakdown:
The geotextile fabric and polymeric sand combo, paired with Techo-Bloc pavers, offers unmatched weed control for Redwood City patios.
Redwood City Maintenance: Keeping Your Patio Weed-Free
Redwood City’s coastal climate—foggy mornings, rainy winters, and sunny summers—can encourage weeds if you’re not proactive. Here’s how to maintain your weed-free patio with geotextile fabric and polymeric sand:
These simple steps ensure your patio stays weed-free and low-maintenance, letting you enjoy your Peninsula backyard.
A Redwood City Success Story: The Martinez Family’s Patio
Let’s talk about a real Redwood City project that banished weeds for good. The Martinez family had a paver patio that looked great at first, but weeds soon took over, sprouting through loose joints and even from the soil below, making their backyard BBQs less inviting. They called Bayside Pavers to restore their oasis.
Before: The patio was overrun with weeds pushing through regular sand joints and up from the soil below. Dirt and debris dulled the Techo-Bloc Villagio pavers, and the family was tired of constant weeding.

The Transformation: We cleaned the patio with a pressure washer, removed old sand, and retrofitted the base with geotextile fabric to block soil-based weeds. We applied high-quality polymeric sand to lock the joints and used Techo-Bloc’s Villagio pavers in a basketweave pattern, adding a sealant for extra weed protection. The patio was sloped slightly to handle Redwood City’s rainy winters.
After: The Martinez patio is now a weed-free, low-maintenance oasis, perfect for Peninsula gatherings. They’ve hosted family dinners and kids’ playdates without a weed in sight. “The geotextile fabric and sand combo is a game-changer!” they said.
FAQs: Your Weed-Proofing Questions Answered
Got questions about keeping your patio weed-free? We’ve got answers!
How does geotextile fabric help with weeds? It acts as a barrier under the gravel base, stopping weed roots from growing up from the soil, per UCPRC, while letting water pass through.
How does polymeric sand prevent weeds? It hardens into a barrier in joints, blocking weed seeds from sprouting for 5–10 years, complementing the fabric below.
Can I apply polymeric sand and geotextile fabric myself? It’s tricky—incorrect application can weaken the bond or barrier. Let Bayside Pavers ensure a flawless, weed-free finish.
How often should I reapply polymeric sand? Every 5–10 years, or if you see thinning sand or joint weeds. The geotextile fabric below stays effective for decades.
Is the fabric and sand combo safe for pets and plants? Yes, both are non-toxic and eco-friendly once installed, perfect for Redwood City yards. Call +1 (866) 225-3512 for a free quote!
Create Your Weed-Free Oasis with Bayside Pavers
Your Redwood City patio should be a low-maintenance haven for relaxation and gatherings, not a weed-pulling chore. With geotextile fabric, polymeric sand, and Techo-Bloc’s durable pavers, Bayside Pavers will create a weed-free oasis that stays beautiful for decades, backed by UCPRC’s joint stabilization tips. Say goodbye to weeds and hello to carefree Peninsula living!
Want a weed-free patio? Share your questions in the comments or reach out to us at +1 (866) 225-3512! Let’s make your Redwood City backyard a low-maintenance masterpiece.

Picture this: you’re pulling into your San Mateo driveway, expecting a smooth, stylish entrance, but instead, you hit a dip where the pavers have sunk. Not exactly the Peninsula welcome you had in mind, right? I had a friend in San Mateo who thought their new paver driveway was “good enough” until uneven patches and cracks started showing up after one rainy season. The culprit? A poorly prepared base. At Bayside Pavers, we know that a rock-solid foundation is the secret to a driveway that stays flat, strong, and beautiful for decades.

Base preparation might not sound glamorous, but it’s the unsung hero of every great paver driveway. Think of it like the foundation of your house—if it’s not done right, everything else wobbles. In this guide, we’ll walk you through why base prep matters, break down the step-by-step process, share a San Mateo success story, and tackle your top questions. Plus, we’ll throw in tips for handling San Mateo’s unique soil challenges. Ready to build a driveway that lasts? Let’s dig in!
Why Base Prep Matters for Your Driveway
Ever wondered why some driveways stay smooth and flawless while others sink or crack? It all comes down to the base—the layers of gravel and sand that support your pavers. According to the University of California Pavement Research Center (UCPRC), a properly prepared base of 6–12 inches of compacted gravel is critical for stability, load-bearing capacity (up to 8,000 psi), and preventing settling. Here’s why base prep is a game-changer for your San Mateo driveway:

At Bayside Pavers, we’re obsessed with getting the base right, using UCPRC guidelines and top-quality materials like Techo-Bloc pavers. Let’s break down how we do it:
Step-by-Step Guide to Base Preparation
Building a paver driveway is like baking a layered cake—every layer matters, and the base is the foundation that holds it all together. Here’s how Bayside Pavers creates a rock-solid base for your San Mateo driveway:
Step 1: Site Assessment We visit your home to check soil conditions, slope, and traffic patterns. San Mateo’s clay-heavy soil needs extra care, so we plan accordingly to ensure stability.

Step 2: Excavation We dig 8–12 inches deep, per UCPRC recommendations, to remove loose soil, roots, and debris. For most San Mateo driveways, 10 inches is ideal for balancing strength and cost.

Step 3: Subgrade Preparation We level and compact the native soil to create a firm subgrade. Think of it like prepping the ground for a sturdy house foundation.

Step 4: Gravel Base Installation We add 6–10 inches of crushed gravel (3/4-inch aggregate) in 2–4-inch layers, compacting each layer with a plate compactor. This creates a base strong enough to handle 8,000 psi, per UCPRC.

Step 5: Bedding Layer A 1-inch layer of coarse sand or fine gravel goes on top, leveled with a screed board for a smooth surface. It’s like a cozy bed for your pavers.

Step 6: Paver Installation We lay pavers in your chosen pattern, ensuring a tight fit. The base keeps them level and stable.

Step 7: Finishing Touches We sweep polymeric sand into the joints to lock pavers in place and prevent weeds, then compact the surface for a flawless finish.

Tools and Materials for a Rock-Solid Base
Creating a durable base requires the right tools and materials. At Bayside Pavers, we use professional-grade equipment and high-quality supplies to ensure your San Mateo driveway stands the test of time. Here’s what we bring to the table:
Using the right tools and materials is like cooking with fresh ingredients—it makes all the difference!
San Mateo Soil Challenges: How We Overcome Them
San Mateo’s coastal climate and clay-heavy soil can make driveway base prep tricky. Here’s how we tackle these challenges to ensure a stable, long-lasting driveway:
At Bayside Pavers, we know San Mateo’s unique conditions inside and out, ensuring your driveway is built to last.
A San Mateo Success Story: The Nguyen Family’s Driveway
Let’s talk about a real San Mateo project that showcases the power of proper base prep. The Nguyen family had an old asphalt driveway that was sinking and cracking, making their charming Peninsula home look tired. Every rain left puddles, and uneven patches were a tripping hazard. They called Bayside Pavers for a solution.
Before: The driveway was a mess of cracks and dips, with water pooling near the garage. The weak base couldn’t handle San Mateo’s clay soil and frequent traffic.
.jpg)
The Transformation: We excavated 10 inches deep, added an 8-inch gravel base (compacted in layers), and topped it with a 1-inch sand layer. We installed Techo-Bloc Mika pavers in a herringbone pattern for strength and style, finishing with polymeric sand. A slight slope ensured perfect drainage.
After: The Nguyens’ driveway is now smooth, stable, and stunning, perfectly matching their San Mateo home’s coastal vibe. They’ve hosted family BBQs without worrying about uneven pavers, and the driveway’s held up flawlessly through two rainy seasons. “It’s like we got a new front yard!” they told us. (Suggested visual: Before-and-after photos of the Nguyen driveway, plus a close-up of the herringbone pattern.)

FAQs: Your Base Prep Questions Answered
Got questions about driveway base preparation? We’ve got answers!
Why is the base so important? It’s the foundation that prevents settling and cracking. A 6–12-inch gravel base (per UCPRC) ensures your driveway stays level for decades.
How deep should the base be? For San Mateo driveways, we recommend 8–10 inches of gravel for standard pavers or 10–12 inches for permeable ones, depending on soil and traffic.
Can I skip base prep to save money? Not a good idea! A weak base leads to sinking pavers and costly repairs. Invest upfront for a driveway that lasts 30–50 years.
How do you handle San Mateo’s clay soil? We excavate deeper, use extra gravel, and compact thoroughly to combat clay’s moisture retention, ensuring a stable base.
How long does base prep take? For a typical San Mateo driveway (600–800 square feet), base prep takes 2–3 days of the 4–7-day installation process. Call +1 (866) 225-3512 for a custom timeline!
Build a Driveway That Lasts with Bayside Pavers
Your San Mateo driveway should be a source of pride, not a sinking, cracking headache. With proper base preparation, Bayside Pavers creates driveways that stay smooth, stable, and beautiful for decades, using Techo-Bloc pavers and UCPRC-backed techniques. Whether it’s handling San Mateo’s clay soil or heavy traffic, we’ve got you covered with a foundation built to last.
Questions about driveway base prep? Drop a comment or reach out to our team at +1 (866) 225-3512! Let’s create a San Mateo driveway that’s as strong as it is stunning.

What Drives Paver Driveway Costs?
Building a paver driveway is like ordering a custom meal—you can keep it simple or go all out, and the price reflects your choices. Here are the main factors that determine the cost, per UCPRC’s $18–$40/sq ft range:
At Bayside Pavers, we work with you to balance style, durability, and budget, ensuring your Mountain View driveway is both stunning and cost-effective.
Paver Type Comparisons: Finding the Right Fit
Choosing the right paver type is like picking the perfect car—it depends on your style and needs. Here’s a breakdown of popular Techo-Bloc pavers and their cost implications:
Permeable pavers like Aquastorm cost more due to deeper base requirements (10–12 inches), but they save on long-term maintenance and flood prevention. Standard pavers like Mika are budget-friendly yet durable.

Budgeting for Your Mountain View Driveway
Mountain View’s tech-savvy, eco-conscious vibe calls for a driveway that’s both stylish and practical. Here’s how to budget for your project, keeping UCPRC’s $18–$40/sq ft range in mind:
Cost-Saving Tips for Mountain View Homeowners
Want a stunning paver driveway without breaking the bank? Here are our top tips:
At Bayside Pavers, we’ll work with you to design a driveway that fits your budget and Silicon Valley style.
A Mountain View Success Story: The Patel Family’s Driveway
Let’s talk about a real Mountain View project that balanced cost and style. The Patel family had a cracked asphalt driveway that was an eyesore for their modern Silicon Valley home. They wanted a durable, stylish upgrade but were worried about costs. They called Bayside Pavers for a solution.
Before: The driveway was faded, cracked, and uneven, with puddles forming after every rain. It didn’t match their tech-savvy aesthetic and hurt their home’s curb appeal.
The Transformation: We designed a budget-friendly driveway using Techo-Bloc Mika pavers in a running bond pattern, costing around $20/sq ft. We excavated 10 inches deep, added an 8-inch gravel base (per UCPRC), and used polymeric sand for stability. A slight slope ensured drainage, and a simple design kept labor costs down.
After: The Patels’ driveway is now a sleek, durable masterpiece that complements their Mountain View home. They’ve hosted tech meetups without worrying about cracks, and the project came in at $16,000 for 700 sq ft. “It’s worth every penny!” they said.

FAQs: Your Financing Questions Answered
Got questions about paver driveway costs? We’ve got answers!
How much does a paver driveway cost in Mountain View? Expect $18–$40/sq ft, per UCPRC, or $10,800–$32,000 for a 600–800 sq ft driveway, depending on materials and design.
Are permeable pavers worth the extra cost? Yes, for eco-conscious homeowners! They reduce runoff and may qualify for rebates, saving on long-term maintenance.
Can I finance a paver driveway? Many homeowners use home improvement loans or financing plans. Call us at +1 (866) 225-3512 to discuss options!
How can I keep costs down? Choose simpler patterns, standard pavers like Techo-Bloc’s Mika, and schedule off-season installation for savings.
How long does installation take? A 600–800 sq ft driveway takes 4–7 days, depending on design and site conditions.
Plan Your Dream Driveway with Bayside Pavers
Your Mountain View driveway should reflect your Silicon Valley style without breaking the bank. Whether you choose budget-friendly Techo-Bloc Mika pavers or eco-friendly Aquastorm, Bayside Pavers will create a durable, stunning driveway that fits your budget. With UCPRC-backed techniques and our passion for quality, we’ll make your home the talk of the neighborhood.
Need a driveway cost estimate? Share your project details in the comments or contact Bayside Pavers at +1 (866) 225-3512! Let’s build a driveway that’s as smart and stylish as Mountain View.

Picture this: you’re driving home to your Cupertino house after a busy day in Silicon Valley, and your cracked, faded driveway is the last thing you want to see. It’s like the tech hub’s version of a bad first impression! I had a friend in Cupertino who groaned every time their asphalt driveway sprouted new cracks after a rainy winter—until they switched to a paver driveway with Bayside Pavers. Now, their driveway is a sleek, durable masterpiece that handles everything from heavy SUVs to Bay Area weather like a champ.
If you’re tired of patching up your driveway or worrying about it crumbling, concrete pavers are the answer. They’re not just tough—they’re practically indestructible, with features like salt resistance, color consistency, and freeze-thaw resilience. In this guide, we’ll dive into why paver driveways are the most durable choice for your Cupertino home, compare them to asphalt and concrete, and share a local success story that’ll inspire you. Plus, we’ll answer your top questions about lifespan and warranties. Ready to upgrade your driveway game? Let’s get to it!
What Makes Pavers So Durable?
Ever wondered why some driveways look flawless after decades, while others crack like a dropped phone screen? Concrete pavers, like those from Techo-Bloc, are built to last, thanks to a few key features:
At Bayside Pavers, we use Techo-Bloc’s high-performance pavers to ensure your driveway stays tough and beautiful, no matter what Cupertino throws at it.
Pavers vs. Asphalt and Concrete: The Durability Showdown
Not sure if pavers are worth the investment? Let’s compare them to asphalt and concrete to see why they’re the durability champs for Cupertino homes:
Pavers win for durability, style, and low maintenance, making them perfect for Cupertino’s tech-savvy, style-conscious homeowners. (Suggested visual: A comparison chart of pavers, asphalt, and concrete, highlighting durability metrics.)
Cupertino Weather Challenges: How Pavers Shine
Cupertino’s climate—sunny summers, rainy winters, and occasional chilly nights—can be tough on driveways. Here’s how paver driveways tackle these challenges:
At Bayside Pavers, we design driveways with Cupertino’s unique climate in mind, ensuring they stay tough and stunning year-round. (Suggested visual: A diagram of a paver driveway’s base layers, showing how they combat Cupertino’s weather.)
Installation: Building a Durable Paver Driveway
Creating a durable paver driveway is like building a house—you need a solid foundation and quality materials. Here’s how Bayside Pavers does it:
Step 1: Site Assessment We visit your Cupertino home to check soil conditions, slope, and traffic patterns. We’ll discuss your style preferences, like Techo-Bloc’s Mika paver for a classic look.
Step 2: Excavation We dig 8–10 inches deep (per UCPRC guidelines) to remove loose soil and create a stable base. This prevents settling in Cupertino’s clay-heavy ground.
Step 3: Base Preparation We layer 6–8 inches of crushed gravel, compacting it tightly to handle 8,000 psi loads. A slight slope ensures water drains away, avoiding puddles.
Step 4: Bedding Layer A 1-inch layer of coarse sand creates a smooth bed for the pavers, like a cozy mattress for your driveway.
Step 5: Paver Installation We lay Techo-Bloc pavers in a pattern like herringbone for extra strength. Each paver is cut precisely for a seamless fit.
Step 6: Finishing Touches We sweep polymeric sand into the joints to lock pavers in place and prevent weeds. A final compaction and cleanup leave your driveway ready to shine.
(Suggested visual: A photo of a Cupertino paver driveway installation in progress, showing the gravel base and paver placement.)
A Cupertino Success Story: The Chen Family’s Driveway
Let’s talk about a real Cupertino transformation that proves paver durability. The Chen family had an asphalt driveway that was fading and cracking under their busy household’s traffic—two cars, frequent visitors, and delivery trucks. They wanted a driveway that could handle the load and match their modern Cupertino home.
Before: The driveway was a patchwork of cracks and faded blacktop, with stains from oil leaks. It clashed with their sleek Silicon Valley aesthetic and needed constant repairs.
The Transformation: We installed Techo-Bloc Mika pavers in a herringbone pattern, chosen for their 8,000 psi strength and rich charcoal color. We excavated 10 inches deep, added a compacted gravel base, and used polymeric sand for stability. The pavers’ salt resistance and freeze-thaw resilience were perfect for Cupertino’s weather.
After: The Chens’ driveway is now a durable, stylish showpiece that handles their busy lifestyle with ease. They’ve hosted tech meetups without worrying about cracks, and the vibrant color hasn’t faded a bit. “It’s like our home got a major upgrade!” they said. (Suggested visual: Before-and-after photos of the Chen driveway, plus a close-up of the herringbone pattern.)
Long-Term Benefits of Paver Driveways
Choosing a paver driveway for your Cupertino home isn’t just about durability—it’s about making life easier and more beautiful. Here’s what you gain:
FAQs: Your Durability Questions Answered
Got questions about paver driveways? We’ve got answers!
How long do paver driveways last? With proper installation, 30–50 years! Techo-Bloc’s lifetime warranty covers structural integrity and color fading.
Will pavers crack in Cupertino’s weather? Nope! Their freeze-thaw resilience and 8,000 psi strength (per UCPRC) handle cold snaps and heavy traffic with ease.
Are pavers salt-resistant? Yes, Techo-Bloc pavers resist salt damage, perfect for Cupertino’s occasional icy conditions or coastal influences.
What’s covered by Techo-Bloc’s warranty? It guarantees structural integrity and color consistency for the life of the pavers. We’ll walk you through the details!
How much does a paver driveway cost? Costs vary by size and design. Call Bayside Pavers at +1 (866) 225-3512 for a free, custom quote!
Ready for a Durable Cupertino Driveway?
Your driveway should be as tough and stylish as your Cupertino lifestyle. With concrete pavers from Techo-Bloc, you get unmatched durability, vibrant color, and a surface that laughs in the face of Bay Area weather. At Bayside Pavers, we’re passionate about creating driveways that last decades, backed by UCPRC’s research and our commitment to quality.
Wondering about paver driveway durability? Share your thoughts in the comments or contact Bayside Pavers at +1 (866) 225-3512! Let’s build a driveway that makes your Cupertino home shine.

If you’re considering upgrading your outdoor space in the Bay Area, pavers might just be the perfect solution. At Bayside Pavers, we’ve been transforming California landscapes with beautiful, durable, and customizable hardscapes for years. Whether you’re dreaming of a sleek patio, a winding walkway, or a sturdy driveway, this blog post will walk you through every step of the paver installation process—perfect for someone who’s never had pavers installed before. We’ll also explain what pavers are, how they stand out from other hardscape surfaces, and why they’re an excellent choice for homes in our earthquake-prone region.
What Are Pavers, and How Are They Different?
Pavers are individual units—typically made from concrete, brick, or natural stone—that interlock to create a strong, attractive surface. Brands like Belgard and Calstone offer a wide range of styles, colors, and textures, letting you personalize your space down to the last detail. Unlike poured concrete or asphalt, which form a single, continuous slab, pavers are modular. This means they’re laid piece by piece, allowing for flexibility, creativity, and easy repairs.
So, how do pavers differ from other hardscape surfaces like concrete or gravel?
Durability with Flexibility: Pavers are earthquake resistant because their interlocking design allows them to shift slightly without cracking—perfect for California’s seismic activity. A concrete slab, by contrast, can fracture under pressure.
Permeable Options: Many pavers, like certain Belgard permeable styles, allow water to seep through, reducing runoff and helping with drainage—a big plus in the Bay Area’s variable climate.
Aesthetic Versatility: Pavers come in countless shapes and patterns (think herringbone or basketweave), while concrete is limited unless you add costly stamping or staining.
Maintenance: If a paver gets damaged, you can simply “unzip” the area, replace the unit, and lock it back into place—no need to repour an entire section like with concrete.
Now that you understand what makes pavers special, let’s dive into the installation process—step by step—so you know exactly what to expect when you work with Bayside Pavers.
Step 1: Demolition & Hauling
The journey to your new paver patio or driveway begins with clearing the slate. If there’s an old surface—say, cracked concrete, uneven gravel, or patchy grass—we start with demolition. Using specialized tools, we break up and remove the existing material. This isn’t just about aesthetics; it ensures a stable foundation for your pavers.
Once the old surface is demolished, we haul it away. In the Bay Area, we’re mindful of local regulations and sustainability, so debris is disposed of responsibly. This step leaves you with a clean, blank canvas ready for the next phase.
Step 2: Geo Sheet
Next, we roll out a geo sheet (short for geotextile fabric) over the cleared area. This thin, durable layer might not look like much, but it’s a game-changer. It prevents the base rock (which comes next) from mixing with the soil below, which could cause settling or unevenness over time. It also adds an extra barrier against weeds pushing up through your pavers—a common annoyance in the Bay Area’s fertile soil.
Step 3: Base Rock
With the geo sheet in place, we bring in base rock—a coarse, crushed stone material—and spread it evenly across the installation area. The thickness depends on the project: a walkway might need 4-6 inches, while a driveway could require 8-12 inches to handle heavier loads.
This layer acts like a sponge, draining water away to keep your pavers stable and permeable. It also distributes weight evenly, which is crucial in California where soil can shift during earthquakes. We grade the base rock to ensure proper slope for drainage—usually a 1-2% incline—so water flows away from your home.
Step 4: Compaction
Now it’s time to lock everything in place. Using a plate compactor—a heavy vibrating machine—we compact the base rock and geo sheet into a firm, level surface. This step is critical because any weak spots could lead to shifting or sinking later, especially under the stress of California’s seismic activity.
We compact in passes, checking the surface with a level to ensure it’s smooth and sloped correctly. A well-compacted base is what makes pavers earthquake resistant—it gives them the stability to flex without breaking.
Step 5: Concrete Base Beam Border
To keep your pavers contained, we install a concrete base beam border. This is like the frame of a puzzle, holding everything together. We pour a narrow strip of concrete around the perimeter, often reinforced with rebar for extra strength. This border prevents the pavers from spreading outward over time, especially in high-traffic areas like driveways.
For a polished look, we can tint or texture the concrete to match your Belgard or Calstone pavers. It’s both functional and stylish—a Bayside Pavers signature.
Step 6: Polymeric Sand
With the base and border ready, we spread a thin layer of fine sand over the compacted base rock to create a bedding layer. Then, after the pavers are laid, we use polymeric sand between the joints. This special sand contains polymers that harden when wet, locking the pavers together like glue.
Polymeric sand is a standout feature. It resists erosion from Bay Area rain, keeps weeds at bay, and stops ants from tunneling through—common issues with regular sand. Plus, it enhances that earthquake resistant flexibility by allowing slight movement without compromising the structure.
Step 7: Paver Laying
Here’s where the magic happens. We start laying your chosen Belgard or Calstone pavers, following the pattern you’ve selected—maybe a classic running bond or an intricate herringbone. Each paver is placed by hand, ensuring tight joints and a seamless fit. If you’ve opted for permeable pavers, we space them slightly to allow water infiltration.
This step is like assembling a giant jigsaw puzzle. We cut pavers as needed to fit curves or edges, using precise tools for clean lines. You can practically “unzip” and replace a section later if needed—another perk over solid concrete slabs.
Step 8: Compaction (Again!)
Once all the pavers are laid, we run the compactor over the surface again. This settles the pavers into the bedding sand and ensures they’re level. It also forces the polymeric sand deeper into the joints, creating that rock-solid interlock. We’re careful here—too much pressure could crack the pavers, but just the right amount makes them shine.
Step 9: Wash
Finally, we give your new paver surface a gentle wash. Using a hose, we lightly mist the area to activate the polymers in the joint sand, letting it harden over the next 24 hours. We also sweep away any excess sand and clean up the site, leaving you with a pristine, ready-to-enjoy hardscape.
Why Choose Pavers with Bayside Pavers?
Installing pavers isn’t just about creating a surface—it’s about building a lasting, beautiful addition to your Bay Area home. With brands like Belgard and Calstone, you get top-tier quality tailored to California’s unique needs. The process we’ve outlined ensures a permeable, earthquake resistant design that’s as practical as it is stunning.
Ready to transform your outdoor space? Contact Bayside Pavers today. We’ll guide you from demolition to that final wash, crafting a hardscape you’ll love for years to come. Let’s unzip the possibilities together!

Ever planned a summer barbecue in your Palo Alto backyard, only to find cracked concrete and muddy patches stealing the show? As a Silicon Valley homeowner, you dream of a vibrant outdoor space for kids’ playtime or entertaining, but pain points like dead grass, puddling, and uninspiring yards keep you indoors. Paver installation is the perfect solution, but Silicon Valley’s unique climate demands seasonal know-how to ensure success. In this guide, we’ll share actionable tips for paver projects year-round, tailored to Bay Area weather and ICPI standards, to solve issues like cracked surfaces and mud. Let’s transform your backyard remodel with Bayside Pavers’ local expertise!
Paver installation is ideal for Silicon Valley homes in Menlo Park, San Jose, and beyond, offering durability and style. Here’s a quick summary optimized for featured snippets:
Durability: Pavers resist cracking, per ICPI standards.
Low Maintenance: Easy to clean, perfect for busy families.
Eco-Friendly: Permeable pavers reduce puddling and runoff.
Aesthetic Appeal: Custom designs enhance your hardscape.
Climate-Friendly: Suits Silicon Valley’s mild, variable weather.
Pavers create functional, beautiful backyards for summer nights and kids’ sports.
Silicon Valley’s climate—mild winters, dry summers, and occasional rain—requires strategic planning for paver installation. Here are tips for each season, aligned with ICPI specifications.
Spring: Prepare for Optimal Conditions
Spring’s mild temperatures (50–70°F) and moderate rainfall make it ideal for paver projects in Los Altos or Danville. The ICPI recommends a 6-inch compacted gravel base to ensure stability, especially in moist soil conditions.
Tip: Schedule site prep early to avoid rain delays; use permeable pavers to manage runoff.
Why It Matters: Proper prep prevents settling and puddling.
Example: A San Ramon family installed a paver patio in spring, enjoying it by summer.
Dry, warm summers (70–90°F) in Silicon Valley, like in Walnut Creek, are great for paver installation but require precautions. ICPI advises working in early morning or late afternoon to avoid heat stress on materials and workers.
Tip: Choose light-colored pavers, like Belgard’s Catalina Grana, to stay cooler underfoot.
Why It Matters: Prevents heat-related cracking and ensures worker safety.
Stat: Light pavers reduce surface heat by 20%, per industry studies.
Fall: Take Advantage of Stable Weather
Fall’s consistent temperatures (60–80°F) and low rainfall in Portola Valley or Alamo make it a prime time for paver projects. ICPI standards require polymeric sand in joints to lock pavers, especially before winter rains.
Tip: Seal pavers post-installation to protect against winter moisture.
Why It Matters: Fall installations are ready for spring entertaining.
Example: A Los Altos Hills homeowner built a paver walkway in fall, avoiding winter delays.
Silicon Valley’s rainy season (November–March) brings challenges, with 10–20 inches of rain in San Jose. ICPI recommends permeable pavers and proper drainage (e.g., gravel backfill) to manage water, ensuring projects stay on track during dry spells.
Tip: Plan for dry windows (check 7-day forecasts) and use tarps to protect materials.
Pro Insight: Bayside Pavers schedules winter projects during dry periods for efficiency.
How Pavers Solve Silicon Valley Backyard Problems
A paver installation addresses common Bay Area pain points:
Cracked Concrete: Pavers flex without breaking, unlike rigid slabs.
Puddling and Pooling: Permeable pavers keep surfaces dry, per ICPI drainage specs.
Dead Grass and Mud: Pavers eliminate dirt tracking, ideal for kids and pets.
Uninviting Spaces: Stylish patios or walkways invite outdoor fun in Woodside or San Ramon.
These solutions create a backyard perfect for entertaining or sports.
Here’s how Bayside Pavers ensures a flawless paver project, meeting ICPI standards:
Consultation: Discuss your vision and seasonal needs with our team, using 3D renderings for clarity.
Site Preparation: Excavate and install a 6-inch gravel base, compacted to ICPI specs for stability.
Paver Installation: Lay pavers in patterns like herringbone, using polymeric sand for secure joints.
Drainage Planning: Incorporate permeable pavers or slopes to manage Silicon Valley rain.
Finishing Touches: Seal pavers and add lighting or borders for a polished hardscape.
Hiring a professional contractor ensures durability and compliance with ICPI guidelines.
Bayside Pavers is Silicon Valley’s trusted expert for paver installation, serving Palo Alto, Danville, and beyond. We use premium materials like Belgard pavers and follow ICPI standards (e.g., 8,000 psi compressive strength) for lasting results. Our local knowledge of Bay Area weather ensures year-round success. Visit Bayside Pavers to explore our services or find inspiration at Chris Pessy Miami Real Estate.
A well-planned paver installation transforms your Silicon Valley backyard into a beautiful, functional space for summer barbecues, kids’ play, or entertaining, no matter the season. By addressing pain points like cracked concrete, puddling, and dead grass with Bay Area-specific tips, you can enjoy a stunning backyard remodel year-round. With Bayside Pavers’ local expertise, your dream outdoor space is within reach. Ready to start? Book a free design consultation with Bayside Pavers today and let’s create a backyard you’ll love!
Q: When is the best time for paver installation in Silicon Valley?
A: Spring and fall offer ideal weather, but winter and summer work with planning.
Q: How do pavers handle Silicon Valley rain?
A: Permeable pavers and proper drainage prevent puddling, per ICPI specs.
Q: Can I install pavers in summer heat?
A: Yes, with early morning work and light-colored pavers to reduce heat.
Q: How long does a paver project take?
A: Most projects take 3–14 days, depending on size and season.
Q: Why hire a contractor like Bayside Pavers?
A: Our ICPI-compliant expertise ensures a durable, Bay Area-ready hardscape.

Ever gazed at your San Jose backyard, frustrated by uneven slopes or muddy patches that keep you from enjoying summer nights? As a Bay Area homeowner, you want a beautiful, functional outdoor space for kids’ play or entertaining, but issues like dead grass, puddling, and cracked concrete hold you back. Retaining wall pavers offer a stylish, practical solution to enhance your landscape while solving these pain points. In this guide, we’ll explore the functional and aesthetic benefits of paver retaining walls, share actionable tips for your backyard remodel, and show how Bayside Pavers’ expertise can bring your vision to life. Let’s create a backyard that invites you outside!
Why Paver Retaining Walls Are a Game-Changer
Retaining wall pavers are a top choice for homeowners in Palo Alto, Danville, and beyond, blending utility and beauty. Here’s a quick summary optimized for featured snippets:
Stability: Prevent soil erosion on slopes, per ICPI standards.
Aesthetic Appeal: Custom designs enhance your landscape.
Durability: Resist cracking and weathering for decades.
Eco-Friendly: Permeable options reduce runoff and puddling.
Functionality: Create usable spaces for patios or gardens.
These walls transform uneven yards into stunning, practical outdoor areas.
Benefits of Paver Retaining Walls for Your Landscape
1. Prevent Soil Erosion and Stabilize Slopes
Sloped yards in Los Altos Hills or Portola Valley are prone to erosion, especially during rainy seasons. Retaining wall pavers, built to ICPI specifications with proper base compaction (at least 6 inches of gravel base), hold soil in place, preventing mudslides and runoff.
Why It Matters: Protects your yard and reduces dirt tracked indoors.
Example: A Woodside homeowner used paver walls to stabilize a hilly backyard, creating a flat play area.
2. Create Functional Outdoor Spaces
Retaining walls turn sloped terrain into usable areas, like patios or gardens, perfect for Walnut Creek or Alamo homes. ICPI recommends walls up to 3 feet for non-critical applications, ideal for terraced seating or planting beds.
Why It Matters: Maximizes your backyard for kids’ sports or entertaining.
Stat: Outdoor living spaces can boost home value by 7%, per the National Association of Realtors.
3. Enhance Aesthetic Appeal
Paver retaining walls come in various colors and textures, like Belgard’s Tandem Wall, complementing any hardscape in Menlo Park or San Ramon. Choose stackable blocks or natural stone looks for a polished design.
Why It Matters: A beautiful yard invites summer gatherings.
Tip: Use curved walls for a softer, organic aesthetic.
4. Eco-Friendly Drainage Solutions
Puddling is a common issue in San Jose backyards. Permeable retaining wall pavers, with joints allowing water infiltration, reduce runoff and support groundwater recharge, per ICPI drainage guidelines.
Why It Matters: Keeps your yard dry and eco-friendly.
Example: A Danville family eliminated pooling with permeable paver walls.
5. Low Maintenance and Durability
Unlike cracked concrete, paver retaining walls resist wear and require minimal upkeep. ICPI advises sealing every 2–3 years to maintain color and strength, ensuring longevity for 30+ years.
Why It Matters: Less maintenance, more time for outdoor fun.
Tip: Sweep regularly to prevent debris buildup in joints.
Designing a Retaining Wall with Pavers: Key Tips
Here are actionable steps to create a stunning retaining wall with Bayside Pavers:
Choose Durable Materials: Select concrete paver blocks, like Belgard’s Tandem Wall, for strength and style, meeting ICPI’s 8,000 psi compressive strength standard.
Plan for Height and Stability: For walls over 3 feet, ICPI recommends geogrid reinforcement and professional engineering to ensure safety.
Incorporate Drainage: Use gravel backfill and perforated drainpipes behind the wall, per ICPI specs, to prevent water pressure buildup.
Select Aesthetic Finishes: Match paver colors to your home’s exterior, like sandstone for Los Altos or slate for Palo Alto.
Add Functional Features: Integrate seating ledges or planter boxes for a multi-purpose landscape.
Bayside Pavers customizes designs to fit your yard’s unique needs.
How Bayside Pavers Builds Your Retaining Wall
Ready to update your backyard? Here’s how Bayside Pavers creates a retaining wall pavers project:
Consultation: Discuss your goals and terrain with our team, using 3D renderings to visualize the design.
Site Prep: Excavate and level the area, installing a 6-inch gravel base per ICPI standards.
Wall Construction: Stack paver blocks with precise alignment, adding geogrid for taller walls.
Drainage Installation: Incorporate gravel backfill and drainpipes to manage water flow.
Finishing Touches: Add caps, lighting, or plants for a polished look.
Hiring a professional contractor ensures compliance with ICPI specifications and lasting results.
Why Choose Bayside Pavers for Your Retaining Wall
Bayside Pavers is the Bay Area’s trusted expert for retaining wall pavers, serving San Ramon, Los Altos, and beyond. We use premium materials like Belgard pavers and adhere to ICPI standards for safety and durability. Our custom designs and free consultations make your hardscape vision a reality. Visit Bayside Pavers to explore our services or get inspired by luxury outdoor designs at Chris Pessy Miami Real Estate.
Conclusion: Elevate Your Backyard with Retaining Walls
A paver retaining wall transforms your Bay Area backyard into a functional, beautiful space for entertaining, kids’ play, or summer nights. By solving pain points like dead grass, puddling, and uneven terrain, retaining wall pavers create a yard you’ll love to use. With Bayside Pavers’ expertise, your backyard remodel is just a step away. Ready to enhance your landscape? Book a free design consultation with Bayside Pavers today and let’s build a backyard that shines!
FAQ: Your Retaining Wall Paver Questions Answered
Q: What are the benefits of retaining wall pavers?
A: They prevent erosion, create usable spaces, and enhance your yard’s beauty.
Q: How tall can a paver retaining wall be?
A: Up to 3 feet without engineering; taller walls need geogrid, per ICPI.
Q: Do retaining walls help with puddling?
A: Yes, permeable pavers and proper drainage reduce water buildup.
Q: How long does a retaining wall project take?
A: Most projects take 1–2 weeks, depending on size and complexity.
Q: Why hire a contractor like Bayside Pavers?
A: Our ICPI-compliant expertise ensures a safe, durable backyard remodel.

Picture this: It’s a sunny summer day in your Danville backyard, but your pool deck is cracked, slippery, and surrounded by dead grass, making it a hazard instead of a haven. As a Bay Area homeowner, you want a pool area that’s safe for kids, perfect for entertaining, and free from issues like puddling or mud. Pool deck pavers offer a stylish, non-slip solution to transform your backyard into a functional oasis. In this guide, we’ll share actionable tips to create a stunning pool deck, solve pain points like cracked concrete and dirt tracking, and show how Bayside Pavers can bring your backyard remodel to life. Let’s make your pool area the heart of summer fun!
Why Non-Slip Pavers Are Perfect for Pool Decks
Non-slip pavers are a game-changer for pool decks in Palo Alto, San Jose, and beyond, blending safety and style. Here’s a quick summary optimized for featured snippets:
Safety: Textured surfaces prevent slips, even when wet.
Durability: Resist cracking and wear from pool chemicals.
Low Maintenance: Easy to clean, resisting algae and stains.
Eco-Friendly: Permeable pavers reduce puddling and runoff.
Aesthetic Appeal: Custom designs elevate your hardscape.
These benefits create a pool deck that’s safe, beautiful, and perfect for kids’ play or summer gatherings.
Benefits of Choosing Non-Slip Pavers for Your Pool Deck
1. Enhanced Safety for Worry-Free Fun
Wet pool decks can be slippery, especially for kids or pets in Walnut Creek or Los Altos. Non-slip pavers, like Belgard’s Mega-Arbel with textured finishes, provide grip even when wet, reducing the risk of falls. The ICPI recommends textured pavers for pool areas to ensure safety.
Why It Matters: Peace of mind for family swim days.
Example: A Menlo Park family swapped slick concrete for non-slip pavers, making their pool deck kid-friendly.
2. Durability Against Pool Chemicals and Weather
Pool chemicals and Bay Area weather can erode traditional concrete. Non-slip concrete pavers are engineered to resist chlorine, saltwater, and UV rays, lasting 30+ years with proper care, per ICPI standards.
Why It Matters: Avoid cracked surfaces that ruin your pool’s look.
Tip: Seal pavers every 2–3 years to maintain durability.
3. Low Maintenance for Busy Homeowners
Algae, stains, and weeds can plague pool decks in San Ramon or Portola Valley. Non-slip pavers are easy to hose down and resist mold growth, saving you time on upkeep. Polymeric sand in joints prevents weed growth.
Why It Matters: More time for poolside fun, less for cleaning.
Stat: Pavers require 50% less maintenance than concrete, per industry experts.
4. Stunning Aesthetics for Your Backyard
Non-slip pavers come in various colors and patterns, from slate-gray herringbone to sandstone running bond, perfect for Alamo or Woodside homes. Customize your pool deck to match your landscape for a cohesive, luxurious look.
Why It Matters: A beautiful pool deck enhances entertaining and home value.
Example: A San Jose homeowner chose a circular paver pattern for a resort-like vibe.
5. Eco-Friendly Drainage Solutions
Puddling around pools is common in Los Altos Hills. Permeable pool deck pavers allow water to drain, preventing slippery pools and supporting eco-friendly groundwater recharge, per EPA guidelines.
Why It Matters: A dry deck is safer and cleaner, reducing mud tracking.
Designing a Pet- and Kid-Friendly Pool Deck
Here are actionable tips to create a pool deck pavers design that’s safe and stylish:
Choose Non-Slip Textures: Opt for pavers with sandblasted or embossed finishes for extra grip, like Belgard’s Catalina Grana.
Select Light Colors: Lighter pavers, like beige or gray, stay cooler underfoot, ideal for kids and pets in Palo Alto summers.
Incorporate Patterns: Use herringbone or basket weave patterns to add visual interest without compromising safety.
Add Functional Features: Include paver borders or seating walls to define the pool area and enhance usability.
Ensure Proper Drainage: Use permeable pavers or slope the deck slightly to prevent water buildup.
Bayside Pavers can customize these elements to fit your lifestyle and aesthetic.
How to Install a Non-Slip Paver Pool Deck
Ready to update your backyard? Here’s how Bayside Pavers creates a stunning pool deck:
Design Consultation: Work with our team to select paver styles, colors, and layouts, using 3D renderings to visualize your design.
Site Preparation: Excavate the area, remove old concrete or grass, and install a stable base for drainage.
Paver Installation: Lay non-slip pavers in your chosen pattern, securing with polymeric sand for durability.
Add Features: Incorporate seating, lighting, or borders for a polished look.
Final Inspection: Ensure the deck is level, safe, and ready for poolside fun.
Hiring a professional contractor ensures a flawless, long-lasting hardscape.
Why Choose Bayside Pavers for Your Pool Deck
Bayside Pavers is the Bay Area’s trusted expert for pool deck pavers, serving San Ramon, Los Altos, and beyond. We use premium materials like Belgard pavers and follow ICPI safety standards to deliver durable, beautiful results. Our free consultations and custom designs make your pool area a reality. Visit Bayside Pavers to explore our services or find inspiration for luxury outdoor spaces at Chris Pessy Miami Real Estate.
Conclusion: Make a Splash with Your Pool Deck
A non-slip paver pool deck transforms your Bay Area backyard into a safe, stunning space for summer swims, kids’ play, and entertaining. Say goodbye to cracked concrete, puddling, and dead grass, and hello to a pool area that invites you outside. With Bayside Pavers’ expertise, your backyard remodel is within reach. Ready to dive in? Book a free design consultation with Bayside Pavers today and let’s create a pool deck you’ll love!
FAQ: Your Pool Deck Paver Questions Answered
Q: Are pool deck pavers safe for kids and pets?
A: Yes, non-slip pavers provide a textured, safe surface for wet feet and paws.
Q: How do pavers prevent puddling around pools?
A: Permeable pavers allow water to drain, keeping the deck dry and safe.
Q: How long does a paver pool deck installation take?
A: Most projects take 1–2 weeks, depending on size and complexity.
Q: Can I customize my pool deck design?
A: Absolutely! Bayside Pavers offers tailored patterns and colors.
Q: Why hire a contractor like Bayside Pavers?
A: Our expertise ensures a safe, durable pool deck that lasts.

The first thing you or your guests see when approaching your home is the driveway and front pathways leading to the front door.
Are they beautiful precursors to the paradise that’s your home? Or are they rickety roadways that don’t encourage a visitor to come in?
Having well-maintained walkways and driveways will not only charm your visitors, it will maximize your home’s curb appeal. Make the right choices when adding to your curb appeal and avoid the common mistakes.
Want the most value for your home for resale purposes? Make sure your driveway pavers are beautiful, modern, and clean. It’ll stick out to a buyer’s eye and increase their overall evaluation of the home.
Staying in the house for awhile? Create an atmosphere at the entrance that immediately welcomes and appeals to the organized, stylish side of your brain.
If you’ve got cracked or damaged walkways or driveways, they can downgrade the value of your home and actually create dangerous places to walk.
Boost your home’s curb appeal with new driveway pavers.
This is especially helpful when it comes time to resale your home. If a buyer approaches a home with broken and cracked pathways in front of the home, they will immediately think of lowering their offers.
When there is substantial work to do in terms of driveways or general yard work, they will calculate that into their repair monetary allotment and retract that from the offer.
Having pavers that are neat and laid down professionally will give a fresh, organized appearance to your home. It will let your buyers focus on the rest of the home instead of immediately trying to figure out yard repair costs before entering the front door.
This will help buyers because it will look already finished. They won’t immediately see the money they have to put into it.
A home with fresh driveway pavers will add major aesthetic appeal to your home. If what leads up to your house is a pathway that’s well-maintained and curated, it will make the home look more expensive and attractive.
Pulling in to a beautiful driveway and walking on a pathway that’s been cared for can create a relaxing atmosphere at the end of a long work day. Keep your pathways beautiful and clean, it will add beauty to your entire lot and home.
If there are parts of the exterior of your home that you aren’t pleased with and don’t have the money to fix yet, consider upping the ante for your driveway and pathways to add the wow factor to your home for a fraction of the cost.
People are drawn to homes that look modern and new. Driveway pavers can give a modern look to even a dated home. Regardless of when your home was built, new pavers can immediately add a modern design to the front of your home.
With updated design, you will increase your curb appeal which can get you a higher return on your investment in the home.
Is your home lacking a little personality? When most of us already have fairly mundane day to day routines, it can get a little tiresome leaving and returning to and from a home with little to no personality.
Driveway pavers can add a pop of appeal and a bit of personality to your home and your yard. Use bright colored pavers in modern tones and shades. Consider having them positioned in herringbone or houndstooth patterns on your pathways or in your driveway pavers.
A home owner who takes the time to care for the details of a home like the pathways will help create a more substantial look for their house. Creating an intriguing, tangible, solid presence with pavers will greatly up your curb appeal.
However, the happiest of homes don’t just look good- they also feel good. Having a home with pathways that support the way you live is important. Adding substance to your home with luxurious looking pavers will enrich your day to day living experience and quality of life.
For starters, it is actually the law that home owners must repair cracks, potholes, and uneven pavement in and around their home. You may even receive a notice from the city based on the condition of your walks.
Broken or cracked driveways can be harmful to you and your family members. It can also create potential problems for guests visiting your home. Especially if you there are women who wear heels who reside in the home.
Getting a heel caught in the cracks or tripping on broken sections during winter months can create harmful falls for anyone crossing those pathways. Eliminating potential falls with new driveway pavers will also eliminate future trips to the hospital for broken bones or sprained ankles.
Whether you are an Instagram fanatic and love design, or you are trying to sell your home with a stellar listing on Zillow, great photos of your home are important.
Taking pride in where you live and updating your driveway pavers and pathways will create a great set-up for photos of your home. The initial photos on most Zillow listings are of the exterior of a home.
The exterior of a home is what draws initial buyers and passer-bys to a house. Having professional photos taken of your home with updated walkways and driveways will not only get you more offers for curb appeal, it’ll draw more traffic to your home in general.
Driveway pavers can eliminate safety hazards, update your design, give your home some textural substance, and add beauty to your home.
Healthy pathways without cracks and broken roadways will also eliminate the possibility of mold, mushrooms, and other weeds from growing within them. Wild weeds and plants growing between cement blocks or through driveways will only create more problems for you as the roots grow and break your pathways further.

Ever looked at your Walnut Creek backyard and wished for a stunning patio, only to hesitate because you’re unsure about paver installation costs? As a Bay Area homeowner, you want a beautiful, functional outdoor space for summer nights or kids’ playtime, but concerns about cracked concrete, puddling, or budget unknowns hold you back. At Bayside Pavers, we believe transparency builds trust, so we’re here to break down the factors that influence paver installation costs. From material choices to design complexity, this guide will help you plan a backyard remodel that solves pain points like dead grass and mud while fitting your budget. Let’s pave the way to a backyard you’ll love!
Paver installation transforms Bay Area homes in Palo Alto, San Jose, and beyond, offering durability and style. Here’s a quick summary optimized for featured snippets:
Durability: Pavers resist cracking, unlike concrete slabs.
Low Maintenance: Easy to clean, saving time for busy families.
Eco-Friendly: Permeable pavers reduce puddling and runoff.
Curb Appeal: Boosts home value for entertaining or play.
Versatility: Custom designs fit any hardscape vision.
Pavers address issues like dead grass and mud, creating an inviting outdoor space.
Several elements determine the cost of your paver installation project. Understanding these helps you budget wisely for your Menlo Park or Danville backyard.
The type of paver you choose significantly impacts cost. Here’s a ranking of common hardscaping materials from lowest to highest cost:
Concrete Pavers: Most affordable, offering durability and versatile designs like Belgard’s Catalina Grana. Ideal for budget-conscious homeowners in San Ramon.
Brick Pavers: Mid-range option with a classic, warm aesthetic, popular in Los Altos for traditional homes.
Natural Stone (e.g., Flagstone, Slate): Higher cost due to sourcing and labor, offering a premium look for Woodside or Portola Valley properties.
Porcelain Pavers: Premium choice for modern aesthetics, often chosen in Palo Alto for sleek, high-end designs.
Why It Matters: Concrete pavers balance cost and style, while natural stone suits luxury budgets.
Larger areas, like expansive patios in Alamo, require more materials and labor than a small walkway in San Jose. Complex designs, such as curved paths or multi-level patios, also increase costs due to additional planning and installation time.
Tip: Start with a smaller project, like a fire pit area, to manage costs.
Backyards with uneven terrain, like those in Los Altos Hills, may need grading or excavation, adding to costs. Removing old concrete or dead grass also affects the budget.
Why It Matters: Proper prep ensures a durable landscape that lasts.
Simple patterns like running bond are more cost-effective than intricate designs like herringbone or circular patterns. Custom features, such as built-in seating or lighting, add to the budget but enhance functionality.
Example: A Danville family chose a simple basket weave for their patio to stay within budget.
Permeable pavers, which reduce puddling, may have a slightly higher upfront cost but save money long-term by minimizing drainage issues. They’re ideal for rainy areas like Portola Valley.
Stat: Permeable pavers can reduce runoff by up to 80%, per the EPA.
A paver installation addresses pain points Bay Area homeowners face:
Cracked Concrete: Pavers flex without breaking, unlike rigid slabs.
Puddling and Pooling: Permeable pavers ensure dry, safe surfaces.
Dead Grass and Mud: Replace grassy areas with pavers to eliminate dirt tracking.
Uninviting Spaces: A stylish patio invites outdoor entertaining and kids’ play.
These benefits make pavers a smart investment for a functional, beautiful backyard.
Ready to update your backyard? Here are actionable tips to plan your paver installation budget:
1) Get a Detailed Quote: Work with a contractor like Bayside Pavers for a transparent, itemized estimate tailored to your needs.
2) Choose Cost-Effective Materials: Opt for concrete pavers to balance quality and affordability.
3) Start Small: Begin with a walkway or patio, then expand later to spread costs.
4) Prioritize Permeable Pavers: Invest in drainage solutions to avoid future repair costs.
5) Plan for Long-Term Value: High-quality pavers increase home value, per the National Association of Realtors, offsetting initial costs.
When it’s time to hire a contractor, Bayside Pavers is the Bay Area’s trusted choice for paver installation. Serving Los Altos, San Ramon, and beyond, we offer premium materials like Belgard pavers and follow ICPI standards for durability. Our free consultations and 3D renderings help you plan a budget-friendly hardscape that fits your vision. Visit Bayside Pavers to explore our services or find inspiration for luxury outdoor designs at Chris Pessy Miami Real Estate.
Investing in paver installation transforms your Bay Area backyard into a beautiful, functional space for summer nights, kids’ sports, or entertaining. By understanding cost factors like materials and design, you can plan a backyard remodel that solves pain points like cracked concrete, puddling, and dead grass—all within your budget. With Bayside Pavers’ expertise, your dream outdoor space is closer than you think. Ready to start? Book a free design consultation with Bayside Pavers today and let’s create a backyard you’ll love without surprises!
A: Material type, project size, site prep, and design complexity determine costs.
A: Yes, concrete pavers are more affordable and offer similar durability and style.
A: Most projects take 3–14 days, depending on size and complexity.
A: Slightly higher upfront, but they save money by reducing drainage issues.
A: Our expertise ensures a cost-effective, durable backyard remodel.


If you’re a homeowner you’ve probably gone through the process of shopping around for homes and you’ve probably heard the term ‘curb appeal’ thrown around by your real-estate agent during that process. Curb appeal is essentially how appealing your property is to buyers from the outside and if you intend on selling your property any time soon, we recommend investing in repaving your driveway or entry walkway. Most people will look to spruce up their front yard with new plants; maybe a succulent or two would do the trick? But for the more discerning buyer, they’ll look past the quick fixes and look at the construction and hardscaping of the property.
It’s hard to put an exact dollar value to how much you can expect back from investing in a newly paved walkway or driveway. But you can be sure that the more attractive your property is when you list it for sale, the more offers you’ll receive. If you live in the Bay Area, you know that it’s quite common for a house to go $100,000+ over asking so make sure you attract the most buyers, go book a free paving estimate!

Did you know that most families spend 80% of their time together in the kitchen? Just think about your memories of being with family, how many of those memories were in a kitchen? Kitchens are one of the main points of scrutiny for buyers in a home. It’s reasonable to assume that a person would be willing to overlook a worn down sink in the bathroom but ugly cabinets? That’s gonna be an issue.
The quickest and most cost efficient kitchen remodeling projects are when you update the major aesthetic qualities. I.e: the cabinets, countertops, sink, and hardware. If you’re on a tight budget or timeline, stay away from changing any structural elements. If you’re thinking about remodeling your kitchen, we recommend checking out Home Quality Remodeling. They are home remodelers who work all over the Bay Area and are based in San Jose & Concord. They also offer a free home remodel estimate so visit their site to book an estimate.
If you’ve lived in your home for more than 4 years, it’s highly likely that your property is worth more than what you bought it for. You can tap into that equity through a Home Equity Line of Credit (HELOC) to pay for the above mentioned upgrades. Check out Renofi if you’re interested in learning more about a HELOC loan.

Are you looking for a material for your driveway, patio or walkway around your home?
The surroundings of your home should reflect your personal taste while being long-lasting and cost-effective.
For many years, people have chosen concrete to build driveways. And yet, nowadays pavers have become the best choice for many customers for many reasons.
Keep reading to find out why you should use pavers from San Mateo County Paver Contractor for your walkway, patio or driveway.
Do you want your driveway to connect with some steps that lead to your front door?
Or maybe, you want a small wall to corner off your flower bed?
Vertical features, such as pillars and walls are difficult to blend in with a concrete driveway. In contrast, pavers allow your decorative wall or steps to fit nicely.
If you want to build a walkway or a porch to complement your driveway, then it can be installed before or after your driveway without a problem.
If you hire a professional from San Mateo County Paver Contractor to install your pavers, it will last longer and be low maintenance.
Accidents happen, and stains and imperfections are permanent on concrete. If the concrete base shifts, the cracks that emerge are visible to anyone approaching your home. Fixing a concrete driveway is very costly.
However, if damage to your pavers happens there are many cost-effective and simple solutions to make it appear brand-new once again. If you spill oil, you can even flip over one of the paving stones and nobody will know.
And if after some years you notice a crack in one of the paving stone, you can just replace the single stone rather than the entire driveway.
There are hundreds of surface finishes, colors, designs, and shapes of pavers. Whether you’re looking for the historical European city appearance or the modern Umbriano finish, there is always a design to suit every home.
And don’t worry about losing the color over time, with pavers the surface treatments ensure that the colors last years after installation.
Unlike concrete and other materials for driveways, pavers come at many different prices. This means whether you are on a tight budget or have money to spare, you can find the right pavers to fit your price range.
Although, keep in mind you get what you pay for. Pavers with the most advanced technology are likely to last much longer than the standard product.
There are many considerations and difficult decisions when investing in your home and its surroundings.
However, choosing the material to build your driveway is a simple choice because of the overwhelming benefits of pavers over concrete.
Whether you value a unique and colorful appearance or a functional and long-lasting material, pavers are always the best option for your driveway or pathway.

Here at Bayside Pavers we always try to work with our Bay Area customers to help them to understand all of their options when it comes to creating the perfect outdoor living space to fit their family’s needs and lifestyle. When considering a new patio, walkway or driveway, it’s important to understand all of your options when it comes to design, features, materials, and color choices. After years of listening to our customer’s concerns, we’ve learned that there are many common misconceptions about concrete pavers that we’d like to address.
Here are seven common misconceptions about concrete pavers that you should be aware of when researching hardscaping materials for your Bay Area California home.
While the initial cost of installation can be higher than other materials, in the end, concrete pavers are actually a more cost-effective and aesthetically pleasing option. Concrete pavers are more durable and beautiful option than other options like poured concrete, or in the case of a driveway, blacktop. Blacktop will deteriorate over time and poured concrete can crack, requiring costly repairs. Concrete pavers need less frequent repair, and when they do, repairs are easier. Over the long-term, concrete pavers are the true cost-effective solution. And you’ll love the way they look!
The fact is, concrete pavers are a durable, flexible material that is up to three times stronger than a poured concrete slab. Correctly installed interlocking concrete pavers move and flex as the ground does. When professionally installed, high-quality concrete pavers can last 30 to 40 years with no significant issues.
This has been a concern for many of our customers over the years. The fact is, unlike hardscape which can need to be repaired in large section when it fails, or must be matched in order to patch repair, concrete pavers can be “spot repaired.” This means that the damaged paver can simply be removed and replaced. In fact, it’s so easy that most homeowners can perform the repair themselves without the need of a professional. Concrete pavers are durable, reliable and resilient. They absorb pressure, weight and force differently than other materials and as a result are less susceptible to damage in the first place.
In this case, the old saying “you get what you pay for” is true. While there are plenty of cheap, inferior quality bargain pavers available, that are susceptible to fading, chipping and cracking. Always invest in the highest quality paver you can afford. Make sure any paver you purchase is “colored through.” Pavers that are colored throughout will not fade. Ever.
This seems to be a persistent belief, but it’s entirely not true. Any exterior hardscape joints have the potential for weed growth, but you shouldn’t expect to see any more weeds in a paver installation than you would with any other material. Often, weeds thriving on a hardscape are a result of seeds falling on top of the material and germinating where they land. The truth is, if your pavers are properly installed by a professional installer using polymeric sand you should see less weed growth than with other materials.
This is a common complaint from homeowners who have done the installation themselves and often cut corners. Professional installation eliminates any slipping or heaving. The secret is proper preparation before installation. A professional landscaper will excavate, grade, install and compact the sub-grade, add a geotextile layer to inhibit weed growth. They will then prepare the base layer and again compact, perform sand prep, lay the pavers, perform a final compaction and then finish with polymeric sand. When professionally installed, concrete pavers will not heave, period!
The truth is, pavers come in hundreds of different combinations of colors, sizes, thicknesses, styles, patterns, and textures. No matter what your taste, aesthetic and home design, pavers are available in a range of colors from neutral and earth tones, to reds and terracotta. To further personalize your look you can choose from a variety of styles including brick, tile, antique, cobble, weathered stone and flagstone.

One of the questions that we get asked the most often here at Bayside Pavers is “What are the benefits of interlocking permeable pavers?” In this article, we will answer that question as well as provide you with plenty of information to help you learn all about permeable pavers.
Permeable pavers are strong and durable while filtering water at the same time. Instead of letting water sit on the surface, it seeps through the pavers and cracks. This allows the area to easily drain, preventing puddles and allowing the water to reach the soil below. Thus, permeable pavers are self-draining and they help to prevent runoff.
Their construction makes them very environmentally friendly, as they keep runoff from polluting waterways. They allow water to make its way back to the ground, continuing the water cycle. Using permeable pavers will also allow you to save money in the areas of retention and drainage systems since they are self-draining. This a major benefit of using them. The stone or sand underneath the pavers filters the water to the soil below, thus watering the ground. These pavers absorb water much in the same way as grass, dirt, or any other outdoor ground would. Because of this, any water that falls on your pavers is able to easily drain to the soil below.
Another benefit of interlocking permeable pavers is that even be installed to guide the water wherever you need it to go. The paver’s permeability prevents puddles and areas of standing water. In turn, this prevents bugs that are attracted to water. Plus, since there are no standing puddles, the pavers dry rather quickly, and there is no slippery surface. These pavers also help to prevent erosion.
Because they interlock, interlocking permeable pavers are quicker to install than many other materials. Therefore, the job moves along quickly, which saves you money. Interlocking permeable pavers also look pretty and add a touch of elegance to any home. Permeable interlocking pavers have a long and sturdy life. They last for much longer than other materials used in its place, such as concrete. Another benefit of interlocking permeable pavers do not absorb much heat, so they aren’t too hot to bare feet, even in the summer months.
They will add great curb appeal to your house and give it a clean and beautiful look, no matter where you choose to use them. These pavers will make your outdoor area much more attractive than if you used asphalt or concrete, which oftentimes can become an eyesore. Unlike concrete, permeable pavers do not crack. One reason for this is that they are simply very strong and durable. Another reason, however, is that they are flexible and move with the ground. If the ground shifts a bit, concrete will crack. Pavers, on the other hand, are just flexible enough to shift right along with the ground, which prevents them from cracking. They come in a wide variety of shapes, colors, styles, and textures, and they can be arranged in a number of designs. This allows you to transform your outdoor area, giving it whatever look that you please.
A big benefit of these pavers is that they are also very easy to clean. They can easily be hosed off, and they have very low maintenance. To replace a paver that has become damaged or stained, it can simply be removed and a new paver can be set in its place. Pavers are good for a lifetime! You won’t need to redo your areas where you use pavers. Driveways, pool decks, patios, and walkways are a few of the areas where you might use interlocking permeable pavers. Adding appeal and practicality, using pavers in your yard will increase the value of your home. With their self-drainage, low maintenance, durability, and beauty, interlocking permeable pavers are a great material to use for many of your outdoor areas.
We would love to share our ideas with you! Call us today at 1-(866) 225-3814 or get in touch with us online here.

If you’re dreaming of a lush, green lawn that stays pristine year-round without the hassle of mowing or watering, artificial turf might be the perfect fit for your Bay Area home. At Bayside Pavers, we specialize in transforming outdoor spaces with durable, low-maintenance solutions like synthetic turf. This blog post will walk you through every step of the turf installation process—ideal for someone who’s never had turf installed before. We’ll also explain what turf is, how it differs from other grass surfaces, and why it’s a fantastic choice for pet owners, busy families, and eco-conscious Californians.
Artificial turf—also known as synthetic grass—is a man-made surface designed to mimic the look and feel of natural grass. Made from durable materials like polyethylene or polypropylene, it’s built to withstand heavy use while staying green and vibrant. Unlike traditional grass lawns or sod, turf doesn’t grow, so it requires no water, fertilizers, or constant upkeep.
Low Maintenance: Natural grass needs mowing, watering, and weeding—time-consuming tasks in the Bay Area’s varied climate. Turf stays clean and neat with minimal effort.
Pet Friendly: Our turf is designed with anti-microbial properties to resist bacteria and odors, making it a safe, pet-friendly playground for your furry friends.
Water Conservation: California droughts are no match for turf—it doesn’t need irrigation, saving you money and helping the环境(environment).
Durability: Unlike sod, which can wear thin or turn patchy, synthetic turf holds up to heavy foot traffic without losing its lush look.
Cleanliness: Muddy paws and tracked-in grass clippings? Not with turf. It stays clean even after rain, a big plus for busy households.
Ready to see how we bring this hassle-free lawn to life? Let’s break down the installation process step by step.
The first step to your new artificial turf lawn is clearing the old one. Whether you’ve got tired natural grass, patchy sod, or even bare dirt, we start with demolition. Using tools like sod cutters or shovels, we remove the existing surface—grass, roots, and all—down to the soil. This ensures a fresh, stable base for your turf.
We haul away the debris, keeping sustainability in mind with responsible disposal practices common in the Bay Area. By the end of this step, your yard is a clean slate, ready for transformation.
Next, we lay down a permeable fabric over the cleared soil. This lightweight layer might seem simple, but it’s essential. It acts as a barrier to keep weeds from poking through your new turf while allowing water to drain freely—a must for California’s rainy seasons. This permeability keeps your lawn clean and prevents pooling, which is especially important for pet-friendly yards where drainage matters.
To frame your turf and keep everything tidy, we install bender board around the perimeter. This flexible, durable edging—often made from recycled plastic or wood—defines the shape of your lawn, whether it’s a sleek rectangle or a curving oasis. It holds the turf in place and prevents the base materials from shifting over time. Think of it as the outline that keeps your synthetic lawn looking sharp and clean.
Now we build the foundation with base rock, a layer of crushed stone spread evenly across the area. Depending on your yard’s needs—say, light foot traffic versus a play area for pets—we’ll add 2-4 inches of this material. The base rock provides stability and excellent drainage, keeping your turf permeable and ready for whatever the Bay Area weather throws at it.
We grade the base rock with a slight slope (about 1-2%) to direct water away from your home, ensuring a dry, clean surface even after a storm.
With the base rock in place, we bring out a plate compactor—a heavy, vibrating machine—to firm it up. This step locks the base into a solid, level foundation. Compaction is key to preventing dips or uneven spots in your turf, especially in high-traffic pet-friendly zones. We work in passes, checking with a level to make sure it’s smooth and stable—ready to support your new lawn for years.
Here’s where your vision comes to life. We roll out the artificial turf, carefully positioning it over the compacted base. Each section is cut to fit your space perfectly, whether it’s wrapping around a tree or hugging the bender board edges. We secure the turf with stakes or adhesive, ensuring it stays put.
Our synthetic turf comes with anti-microbial backing to keep bacteria at bay—perfect for pets and kids who love to roll around. The blades are soft yet tough, designed to feel natural while staying clean and vibrant.
The final touch is adding turf sand green hero, a special infill material spread over the turf. This fine sand—often infused with green tint to blend seamlessly—gets brushed into the blades to weigh the turf down and keep it upright. It also enhances drainage and adds a cushioned feel underfoot, making it extra pet-friendly.
The infill’s anti-microbial properties help fight odors and germs, ensuring your lawn stays clean even with daily use. After spreading the sand, we give the turf a final brush to fluff it up, revealing that lush, natural look you’ll love.
Installing artificial turf isn’t just about replacing grass—it’s about upgrading your lifestyle. With Bayside Pavers, you get a synthetic lawn that’s pet-friendly, clean, and built to last in the Bay Area’s unique climate. Our process ensures proper drainage, durability, and a flawless finish, all while incorporating anti-microbial features for peace of mind.
Ready to ditch the mower and enjoy a worry-free lawn? Contact Bayside Pavers today. We’ll guide you from demolition to that final brush of turf sand green hero, creating an outdoor space that’s as practical as it is beautiful. Let’s make your yard the envy of the neighborhood!

It happens all too often that pathway gaps are neglected leaving them the perfect place for weeds to grow and flourish. But you don’t have to have these awkward spaces. Instead, placing plants between pavers can give your space a lush and livable design.
There are plenty of plants out there that can successfully fill the gaps, but choosing the right ground cover depends on a lot.
Keep reading to learn the factors that you need to consider when you are choosing beautiful plants to live between your pavers.
When you install pavers for your patio, adding plants can add a lot to the look. Selecting the right one requires in-depth knowledge of many species.
To select a plant you should attempt to examine it through the eyes of a professional landscaper. They consider many aspects like height, hardiness, and upkeep.
Plants between pavers should be tough and durable. They will need to be able to withstand trampling by feet, paws, and tires.
They should also be no-fuss and require as little maintenance as possible. The last thing you want is to constantly be concerned about the ability of your plants to survive.
When you are selection plant options you will need to consider how much sun they will be getting before you make your decision.
For those whose pavers lie in full sun, creeping thyme can be a great option. It is considered one of the finest ground coverings and is often used between flagstones.
Chamomile is a wonderfully fragrant perennial that maintains a meadowy appearance. Its small white daisy flowers tower above the soft ferny leaves.
Whether you choose flagstone, pavers, or stepping stones you may have difficulty planting between them. Since the sand and soil underneath the pavers must be compacted, it is not ideal for plants.
To give your plants the amount of loose and nutrient-rich soil they require, you will need to make sure that they have at least six inches of loose soil beneath them. This is to ensure that roots grow properly keeping your plants growing strong.
They should also have gaps of about two inches between plants. Many people choose to plant from flats since it is the most economical choice. You can use scissors to cut two to three-inch chunks containing multiple plants and their root systems.
These chunks should be spaced about six to nine inches apart to ensure that they are able to expand. You should also cover any bare spots with light soil or compost. This will help the plants to retain surface moisture while they are filling in.
Finally, you will need to irrigate your plants. A great option for this is running a quarter inch drip line between your pavers. In addition, you could line the path with micro-sprayers that can pop-up to nourish your plants.
If you are looking to transform your outdoor space with the power of pavers, you should check us out at Bayside Pavers. We have been in business for years, helping homeowners create the perfect pavers.

Imagine stepping into your Bay Area backyard, where every detail—from the sleek lines of your patio to the elegant edges of your pool—exudes sophistication and functionality. For homeowners looking to elevate their outdoor living spaces with year-round beauty and practicality, Marina™ Coping from Bayside Pavers offers the perfect blend of style and durability. This premium material is more than just a finishing touch; it’s a transformative element for patios, pathways, driveways, and yards. Curious how Marina™ Coping can redefine your property? Let’s dive into its benefits, specs, and why it’s a top choice for Bay Area residents. Ready to bring your vision to life? Sign up for a free design consultation (#) with our expert designers today!
Marina™ Coping, part of Belgard’s esteemed hardscape lineup, is a versatile concrete coping designed to cap walls, pools, and steps with a refined, contemporary edge. Its smooth texture and modern aesthetic make it an ideal accent for Bay Area homes, seamlessly integrating with other paver systems to create a cohesive, upscale look. Whether you’re framing a luxurious poolside retreat or outlining a chic front yard feature, this coping delivers both form and function.
Dimensions: 12" L x 4" W x 2.5" H (per unit)
Material: High-quality concrete with a smooth, polished finish
Color Options: Neutral tones like Ashlar Gray, Coastal Beige, and Slate, tailored to Bay Area aesthetics
Weight: Approximately 10 lbs per piece, ensuring stability and ease of installation
Coverage: Sold by the pallet, covering up to 72 linear feet
Its sleek profile and robust construction make Marina™ Coping a standout choice for a variety of outdoor applications.

The Bay Area’s coastal climate—think foggy mornings and sunny afternoons—requires materials that endure. Marina™ Coping’s concrete build resists cracking, fading, and moisture damage, ensuring your outdoor space remains stunning through every season. It’s a low-maintenance solution for year-round enjoyment.
This coping isn’t just decorative—it serves a purpose. It protects wall edges from wear, prevents pool water from seeping into underlying structures, and provides a safe, rounded edge for steps or seating areas. For Bay Area homeowners, it’s a practical way to enhance usability while keeping everything polished.
With its smooth finish and clean lines, Marina™ Coping adds a touch of luxury to any setting. Its neutral tones complement the Bay Area’s architectural diversity, from minimalist Silicon Valley homes to classic San Mateo estates, making it a versatile style statement.
Concrete’s durability means fewer replacements, aligning with the sustainability goals of many Bay Area residents. Its light colors also reflect heat, keeping surfaces cooler—a bonus for summer poolside lounging.
A well-crafted hardscape elevates your home’s appeal. In the Bay Area’s premium real estate market, Marina™ Coping’s refined finish can make your property stand out, offering a luxurious edge that boosts resale potential.
Bay Area residents seek outdoor solutions that match their sophisticated lifestyles, and Marina™ Coping delivers. Here’s why it’s a favorite:
Contemporary Appeal: Its sleek design fits the region’s modern trends, perfect for homes in Palo Alto or Sausalito.
Versatility: From pool coping to garden wall caps, it adapts to diverse projects with ease.
Low Maintenance: Busy tech professionals and retirees love its wipe-and-go upkeep—more time enjoying, less time maintaining.
Regional Harmony: The color palette echoes the Bay Area’s natural hues, tying your space to its surroundings.

At Bayside Pavers, we adhere to Interlocking Concrete Pavement Institute (ICPI) standards for a flawless Marina™ Coping installation. Here’s our process:
Base Prep: We excavate and level the site, adding a 4-6 inch gravel base to ensure drainage—key for Bay Area clay soils.
Alignment: Each coping unit is set precisely, with tight joints, on a stable foundation to prevent shifting.
Securing: Adhesive or mortar locks the pieces in place, tailored to your project’s needs—like poolside safety or wall stability.
Finishing: Polymeric sand seals joints, enhancing durability while allowing flexibility for seasonal shifts.
Inspection: Our ICPI-certified team ensures every detail meets structural and aesthetic benchmarks.
This approach guarantees a coping installation that’s as robust as it is refined, customized for your Bay Area property.
Bayside Pavers is your trusted partner for Bay Area hardscaping. Here’s what we bring to the table:
Local Expertise: We know the Bay Area’s soils, climates, and styles—whether you’re in Oakland or Los Gatos.
Tailored Designs: Our team crafts solutions that fit your unique vision and lifestyle.
Top-Quality Materials: We source premium products like Marina™ Coping for lasting results.
Seamless Service: From concept to completion, we make your project effortless.
Marina™ Coping is more than a material—it’s the finishing touch that ties your outdoor space together with elegance and purpose. Whether you’re envisioning a chic patio, a defined driveway, or a backyard haven, Bayside Pavers can make it happen. Sign up for a free design consultation (#) today, and our expert designers will:
Show you how Marina™ Coping enhances your specific project
Pair it with complementary features like pavers or fire pits
Deliver a custom plan to elevate your Bay Area home
Don’t wait to create an outdoor space that’s beautiful, functional, and built for year-round enjoyment. Contact Bayside Pavers now—your dream hardscape is just a consultation away!

Nothing beats relaxing by the pool on a hot day in the California Bay Area. Installing a beautiful pool in your backyard is pretty exciting, and very labor intensive. While working with your landscape architect, contractor or design-build professional, the topic of hardscaping your pool surround, and patio will inevitably come up. Odds are your landscape professional will offer you several choices for materials like wood decking, stamped concrete, and concrete pavers.
There’s a bit of a debate in the hardscaping industry as to which of these materials are the best choice for around the pool. Here at Bayside, we believe that when you’re hardscaping the pool area, professionally installed pavers are always the best choice! Here are the top ten reasons why.
THEY WILL LAST A LIFETIME
When professionally installed, nothing can outlast high-quality pavers. They’re incredibly durable; in fact, no other material can withstand the wear and tear of daily use better. Wood can splinter and needs annual staining or painting, concrete slabs can crack, and natural stone can chip, but professionally installed pavers can last a lifetime.
THEY’RE PERFECT FOR AN OUTDOOR ENVIRONMENT
Here in the Bay area, you pool decking is subject to many factors that can contribute to wear and breakage like extreme weather, heat, drastic temperature changes, sunlight and of course water. Lesser materials can fade or fail, but color-through pavers won’t wear or fade even with constant exposure to the elements.
FAST, EASY INSTALLATION
A professional installer can prepare the site and install your decking in days, not weeks like other materials. Once placed, you can begin to enjoy your pool the day your decking is complete. Concrete can take days or even weeks to cure, and stained wood decking can’t be walked on for at least 48 hours after the last coat!
EASY REPAIR
When professionally installed, pavers can last a lifetime. However, accidents happen and a paver may get damaged. Luckily, because they are individually interlocking elements, it’s fast and easy to remove and replace a damaged paver.
THEY’RE SAFE
Tile or stone can be slippery when wet. Because of their texture, pavers are one of the safest alternatives for pool decking.
THEY ARE FLEXIBLE
Pavers are available in some textures, and sizes and can mimic natural stone. They can be arranged in a variety of patterns or designs. This gives you the flexibility to create a look that fits in perfectly with the rest of your landscaping and can meet your aesthetic needs.
PAVERS ARE AFFORDABLE
Installing a new pool is expensive. Pavers are an affordable option that can keep your project on budget. They rival the cost of stamped concrete or wood but are a much more durable, lower maintenance, affordable alternative.
PAVERS CAN BRING NEW LIFE TO AN OLD SPACE
Sometimes it’s time to renew or replace your existing pool decking, for example, if your old concrete decking is cracked and faded. Using a thin profile paver to create a layer on top of your existing decking can bring your pool area back to life.
PAVERS CAN BE MADE FROM A VARIETY OF STONES
Just because you’ve chosen to use pavers doesn’t mean you can’t have the look of natural stone. They can be constructed from a wide variety of stone allowing you to bring the sophistication and style of natural stone to your outdoor space affordably.
PAVERS ARE BEAUTIFUL
The most compelling reason to choose pavers for your pool surround is simply that they’re beautiful! They come in a wide variety of colors, textures, styles, and sizes. You can use pavers to create intricate designs that can bring a sophisticated and elegant look to your landscape, creating a beautiful outdoor environment that the whole family can enjoy.
Professionally installed pool deck pavers can improve the look and add value to your California Bay Area home. If you’d like to learn more about the benefits of using pavers around your pool, give Bayside Pavers a call and ask for a FREE ESTIMATE.
If you’re in the East Bay stop by our location in Concord, CA at 2455 Bates Ave, Ste K or if you’re in the North Bay, our Santa Rosa location at 1619 4th Street Ste 12.

An outdoor kitchen is an excellent addition to your outdoor living space that can be the perfect place to spend those warm summer nights with family and friends relaxing and enjoying great food and conversation.In the California Bay area, a well designed outdoor kitchen can help you enjoy preparing meals al fresco practically all year long!
At its best, your outdoor kitchen should be as beautiful and functional as your indoor kitchen. Whether you choose to create a simple kitchen with a dining area and a grill, or an elaborate fully fitted outdoor kitchen with built-in appliances, counter space for food prep, a smoker or even a wood burning pizza oven, and relaxing seating, it’s really up to your creative vision and budget.
Working with a professional can help you to create the ideal design based on your needs and existing landscaping, as well as choosing the proper materials and ensuring the highest quality construction. Here are some tips to get you thinking about your kitchen project.
Before you begin, you’ll need to design a floor plan. Think about your flooring. It’s the foundation on which the rest of your kitchen will rest. It’s also a major element in the aesthetics of your design. An excellent flooring option is concrete pavers. They’re available in a wide variety of sizes, shapes, textures, and colors. They are a durable material that can take the weight of any hardscaping, like grill surrounds, countertops and islands.
Remember, you’re building outside so you want a material that can stand up to the rainy, Bay area weather and offers a non-slip safe surface to walk on and work on. Concrete pavers can take plenty of traffic and stand up to everyday use. It’s a material that will stand up to grease spills and dropped foods, and if it is ever damaged, fixing the surface is as easy as popping out the damaged tile and replacing it with a new one.
Consider any existing hardscaping when choosing the location for your outdoor kitchen. Think about how you’ll use the space. You can purchase stakes and string and mark the area you’re considering for your kitchen. This can help you to visualize the size of the space and can help you to determine how many features you can fit into the available space.
Take into consideration the placement of items like the grill so that smoke doesn’t blow into your home. Will you need access to your indoor kitchen, or will you have the space for an outdoor refrigerator? Finally, consider the overall flow of your outdoor space and any future expansion, for example, adding a concrete paver and river stone walkway to an outdoor fireplace and seating area.
Also, take into account the infrastructure you’ll need. For example, a wet sink can be a great amenity when it comes to time to clean up. You’ll also want access to electricity for the margarita blender and outdoor lighting! The wiring and plumbing can be placed under concrete pavers. If there is ever a problem, you’ll need to remove the pavers over the utilities, unlike a poured concrete patio which would require a jackhammer to access the lines.
Like your indoor kitchen, you’ll want plenty of workspace, counter space and storage to keep your kitchen clutter-free. Make sure the materials you choose are waterproof and can stand up to the weather year round. Consider materials like stainless steel and stone or concrete countertops. Concrete pavers are an excellent material for covering not only the floor but even the grill surround or counter. Creating a long curved countertop with seating is easy using the same pavers as the flooring or incorporating a complementary color or texture.
Concrete pavers are the perfect solution for your outdoor kitchen. They’re a durable, beautiful and affordable way to create the perfect environment for enjoying your outdoor space with family and friends.
If you’re thinking about adding an outdoor kitchen to your home, give the experts at Bayside Pavers a call. We can help you design the perfect outdoor space to compliment your homes existing design.

Artificial grass is more popular than ever before. Thanks to advances in development, it looks incredibly authentic — but of course, it’s much easier to care for than the real thing.
In addition to sprucing up your front and back yards, artificial turf is also a wonderful solution when it comes to housebreaking your pets.
What other benefits does artificial grass have to offer?
Read on to find out five of the most popular reasons why so many people love it.
Did you know that the average professional lawn mowing service can cost up to $80 per visit? If you get your lawn mowed once a week, that’s a staggering cost of $4,160 per year.
Wouldn’t you rather be using that money to take a vacation or buy yourself a fabulous new wardrobe?
We thought so.
Of course, the upkeep cost of artificial grass is next to nothing. Obviously, you won’t need to water it, and most professional installation companies will offer you a warranty. That means that even if something does go wrong with your new grass, you won’t be responsible for covering the cost of fixing it.
Plus, you won’t have to fertilize or mow it, either — which can save you serious money and ensure that pets or children aren’t harmed by potentially dangerous chemicals in the fertilizer.
Especially if you have small children (or just like to host a lot of parties in your backyard) you need grass that can handle all of the paces you put it through.
Interestingly enough, artificial grass is actually much more durable than nature’s version.
This is incredibly helpful when it comes to preserving the look of your lawn (especially if you’re using your grass to make a great impression on clients outside of your office.)
Additionally, if you live in an area that’s prone to storms, you don’t want to have to worry about the look of trampled or damaged grass cramping your style. In addition to being durable, artificial turf also means less mess for you to clean up. Think about it: if there’s no mud and dirt underneath it, that’s far fewer animal paw prints you have to scrub off your kitchen floor.
So, if it’s not impacted by the rain like natural grass, you may be wondering how to keep it clean. This, too, is easy. All you need to do is hose it down, or simply spray it with a natural cleaning product for best results.
We know what you’re thinking: you really expect me to believe that fake grass is better than real grass?
When it comes to your household’s carbon footprint, absolutely.
We’ve already touched on the cost-saving benefits of artificial turf. But those benefits don’t just apply to your wallet. They also help Mother Earth.
Think about it: those lawn maintenance tasks, like mowing the lawn and running your sprinklers for several hours every week? They’re not exactly doing too much to decrease your impact on the environment.
Last time we checked, leaf blowers weren’t great for your neighborhood’s air quality. Plus, your neighbors probably aren’t huge fans of being woken up by the ear-shattering sound of your leaf blower on a Saturday morning.
Additionally, artificial turf is able to be recycled.
Many companies work with indoor and outdoor sports fields to either donate their unused grass or purchase grass that can be made as good as new.
So, your children have been begging you to buy them a swing set for years. This Christmas, you finally gave in.
You and your partner had more arguments than you’d care to admit to while figuring out how to set it up, but in the end, the kids are happy.
However, are they safe?
Lots of parents think that installing smooth pebbles or just relying on the natural grass underneath a children’s swing set will provide adequate cushioning in case of a tumble.
However, the opposite is usually the case. Plus, because of the mud underneath the grass, we’re willing to bet that your children will track in some serious dirt once they’re finished playing for the day.
Luckily, artificial turn provides an excellent cushion, ensuring that your kids are both safe and clean when they frolic in your backyard.
Thinking of putting your house on the market?
Especially in today’s ultra-competitive real estate market, you know that curb appeal is incredibly important. If your grass is withered, dead, patchy, or just not well-maintained, homeowners aren’t exactly going to come running to your property.
But let’s be real: when you’re trying to find a buyer, tour homes for your family to move into, and job hunt in a new city? Yeah. Mowing and mulching your front lawn isn’t at the top of your priority list.
With artificial grass, it doesn’t have to be.
Your home will look like you’ve constantly freshly mowed your lawn — even if you’re trying to sell your home during the colder months.
Plus, buyers will certainly be drawn to the convenience of moving into a home that will allow them to save both time and money because of artificial turf.
Now that you know just a few of the ways that artificial grass can make your life easier, increase your curb appeal, and save you serious time, how else can you improve the look of your home?
In addition to helping you to install artificial turf, we also offer services for driveway paving and walkway installation.

Do you want to add more style and creativity to your home? Consider pavers.
Whether you live in a cottage or a mansion, you’ll find endless options for paver walkways that will enhance the beauty, function, and safety of your home.
Pavers make it easy to update your main entry, improve a garden path or a build a connector walkway from the house to a backyard destination. You can even transform short utility paths into something special.
The variety of materials and designs available make improvements possible on any budget.
Keep reading for creative ideas for your new paver walkway.
The first thing to consider when planning your paver walkway is how it will be used. Ask yourself the following questions.
Walks that serve as main entryways should be at least 4 feet wide. This would include the front door or other main access. They can be wider if you have enough space and a wider walkway matches the scale of the house.
Less used garden paths, such as one from the driveway to the backyard, can be 3 feet wide. Minor paths can be as narrow as 2 feet wide.
Whether or not your walkway can be curved or straight is usually based on the location. If the available area will only accommodate a short path, there may not be enough room to use curves.
Another consideration is if you want a formal or casual look. Straight walkways are more formal and direct, but there are ways to add interest.
Curved paths are more casual. Add a few curves to a walkway and it seems to meander in a natural and inviting way.
Some walkways are a combination of straight and curved. For instance, a paved walkway may run perpendicular or parallel to the house before curving into the yard.
Choose materials that complement your house. If you have a brick house, a brick paver walkway in a similar pattern can be too much of the same thing.
Instead, you could choose concrete pavers that resemble cobblestone to provide a pleasing contrast.
Pavers come in many different styles, colors, sizes, and textures. Different color combinations produce various effects. You can make your walkway stand out, blend in, or match another element in your yard.
Paver walkways are popular because the prices are reasonable. They cost more than a concrete sidewalk, but less than natural stone. This makes pavers a good choice for many homeowners.
The square footage, design, and materials will determine the cost of your paver walkway. Steps, landings and retaining walls will add to the expense.
You can use an online calculator for a rough estimate of the cost. A better idea is to contact a reputable hardscape company for a free estimate.
Now that you know the basic questions, here are some creative ideas for putting pavers into your landscape.
Forget about plain concrete sidewalks and matchy-matchy monotone stones. It’s time to use color, patterns, and accessories to jazz up your paver walkway!
Create a one-of-a-kind look with a mix of colors and sizes. Choose one main color, and then use contrasting stones to create a pattern inside the walkway. The images could be a geometric design, floral pattern or animal. You could incorporate a house number or monogram.
Use grass, small stones or mulch to fill space intentionally left between large pavers. This will create a casual look that can be less expensive because you use fewer pavers. Geometric shapes in various sizes add visual interest.
Create a fun and funky walkway by arranging large, small and irregular paver sizes so they randomly jut out on each side. Who says the edges have to be even or straight?
There are a variety of standard patterns used to create paths. Create circular patterns or waves to suggest motion. Lead your guests down your paver walkway with implied motion.
Space the pavers so there’s room between the stones to grow flowers or herbs. Moss and tiny flowers will turn your path into a fragrant casual walkway.
Mix and match different materials to create a checkerboard pattern. The classic choice is square pavers and green grass. This traditional arrangement is easy to build using brick, stone or concrete pavers.
If you install a walkway that travels around the house, make the junction where it turns interesting. Add a circle, square or rectangle where the walkway sections meet to create a focal point. Consider adding a fountain, planter or bench.
Walkways can have steps and landings in steep areas. It’s the perfect place to change the shape, width or design to add interest. Turn the landing into a destination.
You should consider the other elements in your yard before deciding on a pattern for your paver walkway. You’ll want to determine how the siding on your house, adjacent walls, patios, and other walkways will look together.
You can enhance your new walkway with lighting, arbors, and gates. Soften the edges by adding plants. Create destinations with seating areas, and focal points with a garden sculpture, birdhouse or specimen plants.
If you enter “DIY paver walkway” into a Google search you’ll find plenty of online instructions on how to install a walkway on your own. But unless you’re truly experienced, it makes more sense to hire a professional.
A hardscape pro has the knowledge, experience, and tools needed to make your vision a reality.
If you’re in the San Francisco Bay Area, contact us at Bayside Pavers for a free 3D Consultation on your project.
We look forward to creating your unique paver walkway design!

A retaining wall is more than just a landscape design. It protects your home and yard from earth and water. A retaining wall can also provide terracing and landscaping beds. It’s most important for the structure and integrity of your property.
Drainage, erosion, and landscaping are all design factors that your Napa County Paver Contractor will discuss with you upon evaluation of your retaining wall.
Learn more about retaining walls and why they’re so important below.
Retaining walls can fail. This generally happens with the build-up of pressure from behind the wall. This pressure is caused by groundwater or soil accumulation when the force of groundwater exceeds the resisting force of the wall.
It’s important that your retaining wall is constructed to remove the groundwater that can collect behind the wall with gravel drainage. You can also have a pipe installed behind the wall. This will divert the water to a lower spot beyond the wall structure.
If your home or yard sits on a slope, maintaining your retaining wall is especially important. A properly installed wall can prevent erosion materials. These are materials such as soil, trees, and rocks from sliding, which can cause serious problems for your home.
If you live in an earthquake zone, you might consider fault lines around your property. Even if erosion isn’t an issue now, it could be under the right catastrophic conditions.
A Napa County Paver Contractor can provide you peace of mind and ensure the stability of your retaining wall.
A retaining wall will maintain erosion around your home’s foundation, too. If you live on a hill there’s a chance that the soil could wash away around a downhill foundation. It can also cause compaction with an uphill foundation which will prevent water and other materials from properly draining away from the wall.
A well-built and maintained retainer wall is one of the most important landscaping features to consider for your home’s safety.
Considering a terraced design creates usable land space for gardening or other landscaping needs. A retaining wall from your Napa County Paver Contractor can also highlight your current landscape designs. It will add privacy and screen views of unsightly areas around your home.
A retaining wall can be an aesthetic and functional space in your yard with built-in seating and other features, too. Discuss the design of your retaining wall with your contractor before the work gets underway to ensure all details are considered.
Make sure to maintain your retaining wall to ensure the best safety for your home and family. Add dimension to your home and landscape and expand usable space that’s already in your yard.

Today, pool deck design is a creative art. Not long ago, the typical pool deck was made from poured concrete or timber, and they all pretty much looked the same. Today, thanks to a variety of materials and creative design techniques, your pool deck can match your existing outdoor hardscaping, draw inspiration from the color palette or architectural details of your home and be a reflection of your style.
Before you begin, take some time to think about how you’ll use the space. Will you be entertaining family and friends poolside? Will you be adding to an existing outdoor living area, or will the pool deck be a separate space? Consider:
• Size – Consider the size, placement, and amount of furniture you’d like to incorporate into your design.
• Elevation – If you’d like to add multilevel areas, plan the placement of any steps or additional features, like a fire pit, water features, or a retaining wall as a part of the design
• Drainage – Drainage is an essential feature of any hardscaping project. Grade the area to drain away from the pool and your home. If your pool is in an area that is difficult to grade, install a drainage system to move excess rainwater to an appropriate location.
The best solution is to work with a professional hardscaping company. We can help you to visualize your project, guide you through the design process, and help you choose the perfect pavers to meet your needs.

Once you’ve decided on the size, elevation, and drainage, it’s time to consider your creative design. Here are some fun paver patio ideas you can incorporate into your design.
Your pool paver installation contractor can help you make the right paver choice. Choose a safe, non-slip, textured paver. Lighter colors stay cooler and are an excellent choice in hot climates. Look for a paver with non-abrasive edges for pool coping. To increase safety, incorporate inset borders into your design to help define the edge of the pool.

Today, one of the fastest-growing trends in outdoor living is eco-friendly design. When it comes to your pool area, using a geothermal or solar heating system along with permeable concrete pavers can increase the eco-friendliness of your pool deck.
Permeable pavers allow rainwater to filter through the joints into the aggregate base, rather than running off into ditches or storm drains. A permeable paver system can be designed to harvest and recycle rainwater. Reducing your reliance on groundwater supplies for your landscaping needs.

If you’re planning on using your pool deck for entertaining, incorporate built-in seating into your design. Built-in seating can add extra comfort, while not taking up valuable patio space.
Retaining walls perform an essential function in landscape design by helping to control erosion, converting sloped terrain into usable space, and in terms of pool design, creating multi-level spaces for seating, gardens, dining areas, fire pits, water features, and more!

In the not-too-distant past, your only choice for pool edging was brick or bullnose coping. While both of these choices are still popular, new creative designs and alternative materials are becoming increasingly popular with homeowners.
Many California Bay Area homeowners choose to create a pool deck that mimics a natural setting. This is often achieved by using natural stone. Today, concrete pavers are available that have the look and feel of natural stone, but offer benefits like lower material and patio paver installation costs and safe, non-slip surfaces.
No one wants to spend valuable time and energy on extensive pool maintenance. If you’re looking for a low-maintenance material, interlocking concrete pavers are the perfect choice. They’re designed to prevent fading and staining, can stand up to even the harshest weather conditions, and can take the wear and tear of heavy traffic.

With concrete pavers, you can match your home’s exterior colors and style to add a cohesive look to your landscape. Concrete pavers are the ideal materials for expressing your personal style and creating functional, slip and heat-resistant decking around your pool.

1. Concrete Pavers are Durable
When properly installed, quality concrete pavers can last a lifetime. No material can stand up to the weather and daily wear and tear better! Wood can splinter and needs annual maintenance. Concrete can fracture, and natural stone can chip, but professionally installed concrete pool pavers will look as good as new for years with minimal maintenance.
2. Concrete Pavers Won’t Fade
Here in the Bay Area, your pool decking is subject to many natural factors that can contribute to wear and tear, like extreme weather, heat, wide temperature swings, sunlight, and water. Materials like concrete or wood can fade, rot, and crack, but pavers will hold up to even the most extreme conditions.
A professional hardscaping contractor can prepare the site and install your pool surround in days, not weeks like other materials. With concrete pavers, you can enjoy your pool as soon as the truck is pulling out of your driveway! Concrete can take days or weeks to cure, and stained wood can’t be walked on for at least 48 hours after the last coat.
When properly installed, concrete pavers can last a lifetime. However, accidents can happen, and your pavers can get stained, cracked, or chipped. But repair is easy. Because they are installed using an individually interlocking system, if damage happens, simply remove the damaged paver and replace it.
Tile or stone can be slippery when wet, which is not the best outcome for a pool surround! Because they are textured, pavers are a safe, slip-resistant alternative for your pool surround.
Pavers can mimic natural stone and can be arranged in any number of patterns or designs. This flexibility allows you to create a customized look that fits in perfectly with your existing hardscape. It will give your yard a cohesive look and meet your aesthetic and functional needs.
Installing a pool is an expensive undertaking. Concrete pavers are an affordable option that can keep your project on budget. They are comparable with wood decking or stamped concrete, but require much less maintenance over time, and are a more durable and affordable alternative.
Your landscaping is an excellent way to up the look and value of your home. Interlocking concrete pavers are a great way to renew your yard and bring a new aesthetic to your space. When it’s time to renew or replace your cracked or fading concrete pool decking. Using a thin profile paver installed directly over your old decking is an affordable way to bring your pool area back to life.

Porcelain is a material with a history that goes back over 2000 years with early pieces being traced back to the Han Dynasty in China. It is a manufactured material that is created by taking natural materials like minerals or clay and firing them at high temperatures. The results can range from delicate French Limoge porcelain tea sets to the incredibly dense, durable, and non-porous material used to make the porcelain tile you’d find in your bathroom or kitchen at home.
Porcelain has come a very long way since its ancient roots in China. Today, manufacturers are creating porcelain pavers that mimic natural stone, or wood and look incredible. As modern manufacturing techniques have given us a thicker more durable product, porcelain has been gaining popularity as an outdoor material. Here at Bayside Pavers, we offer porcelain pavers from a variety of manufacturers like Belgard. Their porcelain paver line offers several styles that are perfect for creating contemporary outdoor living spaces.
Outdoor porcelain pavers are similar to their indoor cousins, except they are thicker and more durable. They are the perfect material to use when creating a pool surround. Outdoor porcelain pavers are available in a wide range of sizes, styles, textures, and colors including planks, and large modular shapes, as well as a variety of interpretations of natural stone and wood. Outdoor porcelain pavers are flexible and can be dry laid onto grass, gravel, dirt, and sand.
Here are 10 reasons why porcelain pavers are an excellent choice for creating the perfect pool surround.
Porcelain is completely non-porous. Because of this, it’s moisture resistant and it can be created with a texture that makes it highly slip-resistant. Because it’s an anti-slip surface, it’s a great choice for use on walkways, highly trafficked areas, and pool surrounds.
Its non-porous pavers don’t absorb moisture which means in times of extreme cold, they’re frost resistant, and in the hot sun, porcelain pavers stay cool on your feet. Because of these same principles, porcelain doesn’t fluctuate with extreme heat and cold, meaning it avoids getting damaged from expansion and contraction. Because it’s non-porous, it’s far denser than other materials of comparable dimensions. That makes it tougher and far more resistant to erosion, scratching, and chipping.
Because there are no pores, porcelain is anti-microbial and that makes them perfect for use around your pool as they resist mold and bacteria.
Porcelain doesn’t accumulate dirt like other surfaces. It’s easy to clean, simply hose off your tiles. Dirt and bacteria have nowhere to hide on porcelain, unlike concrete or stone pavers.
One of the biggest benefits of porcelain pavers is that it’s a composite material that is created, not harvested, so it can be made to look like almost any other hard surface like stone or wood. It’s incredibly versatile. You can use oversized tiles surrounded by grass, sand, or gravel to create a stylish walkway, or use a mix of marble-looking tiles of various sizes to create a classic pool deck. With countless colors styles, finishes, and sizes to choose from the possibilities are limitless!
Outdoor porcelain tiles are both UV and fade-resistant. This means they’ll look as perfect as the day you installed them ten years down the road. Because the glaze is fired in excess of 1200 degrees F, the surface is hard, resistant to wear, and the color will remain intact through decades of sun exposure.
Because it’s a manufactured material, it can have the look and feel of any natural material like wood or stone. This has made it incredibly popular with homeowners, and perfect for creating a design statement in your outdoor space.
Thanks to modern manufacturing techniques, outdoor porcelain is considerably thicker than indoor tiles making them tough and durable. Because they are non-porous, they are perfect for use around the pool, patio, outdoor kitchen, and more. They’re also available in a wide range of colors, styles, thicknesses, sizes, shapes, textures, and patterns.
It holds up to water much better than natural stone or cement. That makes porcelain the perfect choice for use in pool decking or areas that are subject to heavy rain, or irrigation systems. You can customize your surface, so choose a slip-resistant model making them safe AND beautiful.
Porcelain pavers are a lower-priced alternative to natural materials like marble, granite, slate, or travertine. You can achieve the look of these natural materials, at a much lower price point.
Porcelain pavers are an excellent alternative to natural materials. They look incredible, are durable, stylish, non-porous, won’t fade, and are an affordable choice. If you’re considering hardscaping around your pool, look no further than outdoor porcelain pavers!

If you are searching for the best Bay Area pool paver installers near you, contact Bayside Pavers at +1 866 225 38149 for a Consultation.
Professional paver installation will ensure a long, trouble-free life for your pool deck. A professional hardscape contractor understands the soil conditions for your location and can properly prepare the site for installation. This includes excavating the site, creating a compacted aggregate sub-base, a sand base and installing your pavers. Selecting the right specialist is an important element of your project. Make sure that anyone you choose understands your creative vision and will work with you to create the perfect design, choose the right paver material and deliver you a pool deck that will exceed your expectations!

Transform Your Backyard into an Eco-Friendly Oasis
Picture this: It’s a warm summer evening in Palo Alto, and your backyard is a muddy mess from last week’s rain. The kids are tracking dirt inside, and that cracked concrete patio just isn’t inviting for family barbecues. Sound familiar? If you’re a Bay Area homeowner tired of dead grass, puddling water, or an uninspiring outdoor space, it’s time to consider a backyard remodel that’s both beautiful and sustainable. By choosing to install turf paired with permeable pavers, you can create a low-maintenance, eco-friendly backyard that’s perfect for entertaining, playing, or simply soaking up those California summer nights. In this guide, we’ll explore the environmental and practical benefits of permeable pavers, share actionable tips for your backyard remodel, and show how Bayside Pavers can bring your vision to life.
Why Permeable Pavers Are a Game-Changer for Your Backyard
Permeable pavers are more than just a stylish hardscaping choice—they’re an eco-conscious solution that addresses common backyard pain points. Unlike traditional concrete, these innovative pavers allow water to seep through, reducing runoff and promoting sustainability. Here’s a quick summary of why they’re ideal for Bay Area homeowners:
Prevent Puddling: Say goodbye to water pooling on your patio or driveway.
Eco-Friendly: Reduce stormwater runoff and protect local waterways.
Durable and Low-Maintenance: Withstand heavy use without cracking.
Aesthetic Appeal: Pair with artificial turf for a polished, functional look.
Whether you’re in Menlo Park or Walnut Creek, permeable pavers can transform your outdoor space while tackling issues like cracked concrete and dead grass.
The Environmental Benefits of Permeable Pavers
Reducing Stormwater Runoff
In the Bay Area, heavy rains can lead to flooding and erosion, especially in neighborhoods like Los Altos Hills or Portola Valley. Permeable pavers act like a sponge, allowing rainwater to filter through to the ground below. According to the EPA, permeable paving can reduce runoff by up to 80%, helping protect local creeks and the San Francisco Bay from pollutants.
Supporting Groundwater Recharge
By letting water infiltrate the soil, permeable pavers help replenish groundwater supplies—a critical benefit in drought-prone California. This eco-friendly feature makes them a smart choice for homeowners in San Jose or Danville who want to contribute to sustainable water management.
Cooling Your Backyard
Traditional concrete absorbs heat, making your backyard feel like an oven during summer. Permeable pavers, paired with backyard artificial turf, stay cooler and create a more comfortable space for kids to play or guests to gather.
Pairing Permeable Pavers with Artificial Turf for a Stunning Backyard Remodel
If you’re dreaming of a backyard that’s both functional and inviting, combining permeable pavers with artificial turf is a winning strategy. Here’s why this duo works so well:
Low Maintenance: Artificial turf eliminates the hassle of mowing or watering, while permeable pavers resist weeds and require minimal upkeep.
Kid- and Pet-Friendly: Create a safe, durable surface for sports, playtime, or pets to roam without tracking mud inside.
Customizable Design: Choose from various paver patterns and turf styles to match your aesthetic, whether you’re in Woodside or Alamo.
Imagine hosting a summer barbecue on a sleek paver patio with lush, green turf where the kids can play soccer—no dead grass or muddy shoes in sight!
Addressing Common Backyard Pain Points
Permeable pavers and artificial turf directly tackle the challenges Bay Area homeowners face:
Dead Grass: Replace patchy lawns with vibrant backyard artificial turf that stays green year-round.
Puddling and Pooling: Permeable pavers prevent water buildup, keeping your patio or driveway dry and safe.
Cracked Concrete: Unlike traditional concrete, permeable pavers are designed to flex and resist cracking, even in high-traffic areas.
Uninviting Backyards: A thoughtfully designed hardscape with pavers and turf creates a space you’ll love for entertaining or relaxing.
By installing turf and pavers, you’re not just updating your backyard—you’re creating a functional, beautiful space that enhances your lifestyle.
How to Install Turf and Permeable Pavers: A Step-by-Step Guide
Ready to update your backyard? Here’s a simplified guide to the process, which Bayside Pavers expertly handles for homeowners in San Ramon, Walnut Creek, and beyond:
Consultation and Design: Work with a contractor to plan your layout, choosing paver styles and turf that suit your home’s aesthetic.
Site Preparation: Clear the area, level the ground, and install a base layer to ensure proper drainage.
Paver Installation: Lay permeable pavers in your chosen pattern, ensuring gaps are filled with permeable joint material.
Turf Installation: Roll out high-quality artificial turf, securing it for a seamless look.
Final Touches: Add edging, lighting, or other features to complete your backyard remodel.
Hiring a professional contractor like Bayside Pavers ensures precision and durability, saving you time and stress.
Why Choose Bayside Pavers for Your Eco-Friendly Hardscape
When it comes to installing turf and permeable pavers, Bayside Pavers stands out as the Bay Area’s trusted expert. With years of experience serving Palo Alto, Los Altos, and San Jose, we specialize in sustainable hardscape solutions that blend beauty and function. Our team listens to your needs, designs custom layouts, and uses top-quality materials to ensure your backyard is both eco-friendly and stunning. Plus, we’re committed to transparency—our free design consultations help you plan your project with confidence.
Conclusion: Create Your Dream Backyard Today
Transforming your backyard doesn’t have to mean sacrificing sustainability or style. By choosing to install turf with permeable pavers, you can solve pain points like puddling, cracked concrete, and dead grass while creating a space your family will love. Whether you’re hosting summer nights in Menlo Park or playing sports with the kids in Danville, a backyard remodel with Bayside Pavers delivers lasting beauty and eco-friendly benefits. Ready to get started? Book a free design consultation with Bayside Pavers today and take the first step toward your dream outdoor space!
FAQ: Your Questions About Permeable Pavers and Turf Answered
Q: How long does it take to install turf and permeable pavers?
A: Depending on the project size, installation typically takes 1–2 weeks with a professional contractor like Bayside Pavers.
Q: Are permeable pavers more expensive than traditional concrete?
A: While initial costs may be slightly higher, their durability and low maintenance save money over time.
Q: Can I use permeable pavers for my driveway?
A: Absolutely! They’re strong enough for driveways and prevent water buildup, perfect for Bay Area homes.
Q: Is artificial turf safe for kids and pets?
A: Yes, high-quality backyard artificial turf is non-toxic, durable, and designed for safe play.
Q: How do I hire a contractor for my backyard remodel?
A: Start with a trusted local expert like Bayside Pavers. Contact us for a free consultation to discuss your vision!

Upgrade Your Walkway with Confidence
Ever stepped out of your Palo Alto home only to trip on cracked concrete or slip on muddy grass? It’s frustrating when your walkway isn’t inviting or functional, especially for Bay Area homeowners who love outdoor entertaining or playing with kids. A paver walkway made of concrete pavers can transform your front or backyard into a durable, beautiful path that solves issues like puddling, dead grass, and cracked surfaces. But why choose concrete pavers over natural stone? In this guide, we’ll explore the durability, cost-effectiveness, and versatility of concrete pavers, address your backyard pain points, and show how Bayside Pavers can create a stunning hardscape. Let’s pave the way to a better outdoor space!
Why Concrete Pavers Are Ideal for Walkways
Concrete pavers are a top choice for walkways in San Jose, Walnut Creek, and beyond, offering unmatched benefits over natural stone. Here’s a quick summary optimized for featured snippets:
Durability: Resist cracking and wear, even in high-traffic areas.
Cost-Effective: More affordable than natural stone without sacrificing style.
Versatile Designs: Endless colors, shapes, and patterns for customization.
Low Maintenance: Easy to clean and repair compared to stone.
Eco-Friendly: Permeable options reduce runoff and puddling.
A paver walkway enhances your landscape, making it perfect for summer nights or kids’ outdoor play.
Key Benefits of Concrete Pavers Over Natural Stone
1. Superior Durability for Bay Area Walkways
Concrete pavers are engineered to withstand heavy foot traffic and Bay Area weather, from Danville’s sunny summers to Portola Valley’s rainy winters. Unlike natural stone, which can crack or chip, concrete pavers are less prone to damage. The Interlocking Concrete Pavement Institute (ICPI) notes that concrete pavers can last 30+ years with proper care.
Why It Matters: No more cracked walkways that ruin your home’s curb appeal.
Example: A Menlo Park homeowner replaced a crumbling stone path with concrete pavers, enjoying a flawless walkway for over a decade.
2. Cost-Effectiveness Without Compromising Style
Natural stone, like flagstone or slate, can cost $25–$50 per square foot, while concrete pavers typically range from $10–$20, per HomeAdvisor. Despite the lower price, concrete pavers mimic the look of stone with options like Belgard’s Mega-Arbel, perfect for Los Altos Hills homes.
Why It Matters: Save money while achieving a high-end backyard remodel.
Tip: Choose textured pavers for a natural stone aesthetic at a fraction of the cost.
3. Versatile Design Options for Any Aesthetic
Concrete pavers come in countless colors, shapes, and patterns, from herringbone to basket weave, allowing customization for any style in Woodside or Alamo. Natural stone offers limited consistency in color and shape, making it harder to create uniform designs.
Why It Matters: Create a paver walkway that matches your home’s vibe, whether modern or rustic.
Example: A San Ramon family chose slate-gray pavers in a running bond pattern for a sleek front path.
4. Low Maintenance and Easy Repairs
Unlike natural stone, which requires frequent sealing and is costly to replace, concrete pavers are low-maintenance. Sweep regularly, seal every 2–3 years, and replace individual pavers if damaged. This ease of care is ideal for busy households in San Jose or Walnut Creek.
Why It Matters: Spend more time enjoying your walkway, not maintaining it.
Stat: Concrete pavers require 50% less maintenance time than natural stone, per ICPI.
5. Eco-Friendly Features for Sustainability
Permeable concrete pavers allow water to filter through, reducing puddling and runoff in rainy areas like Los Altos. This eco-friendly option supports groundwater recharge, unlike non-porous natural stone, which can contribute to flooding.
Why It Matters: Address puddling and contribute to a sustainable landscape.
Tip: Pair with proper drainage planning for a dry, safe walkway.
How Concrete Pavers Solve Common Walkway Problems
Bay Area homeowners face walkway challenges that a paver walkway can fix:
Cracked Concrete: Concrete pavers flex without breaking, unlike rigid concrete slabs.
Puddling and Pooling: Permeable pavers prevent water buildup, keeping paths safe.
Dead Grass and Mud: Replace grassy paths with pavers to eliminate dirt tracked indoors.
Uninviting Spaces: A stylish walkway encourages outdoor time for kids’ play or entertaining.
These solutions create a functional, beautiful path that enhances your lifestyle in Danville or Portola Valley.
Steps to Install a Concrete Paver Walkway
Ready to update your backyard or front yard? Here’s how Bayside Pavers creates a stunning paver walkway:
Design Consultation: Work with our team to choose paver styles, colors, and patterns, using 3D renderings to visualize your design.
Site Preparation: Excavate the area, level the ground, and install a compacted base for stability.
Paver Installation: Lay concrete pavers in your chosen pattern, securing with polymeric sand for durability.
Finishing Touches: Add edging or lighting to enhance functionality and aesthetics.
Inspection: Ensure the walkway is level, safe, and built to last.
Hiring a professional contractor like Bayside Pavers guarantees a flawless, long-lasting result.
Why Choose Bayside Pavers for Your Walkway Project
When it’s time to hire a contractor, Bayside Pavers is the Bay Area’s trusted expert for paver walkway installations. Serving Palo Alto, San Ramon, and beyond, we offer premium concrete pavers like Belgard’s Catalina Grana and follow ICPI standards for quality. Our team provides tailored designs and free consultations to bring your vision to life.
Conclusion: Step Up Your Outdoor Space with Concrete Pavers
A paver walkway made of concrete pavers transforms your Bay Area home, solving pain points like cracked concrete, puddling, and dead grass while creating an inviting path for summer nights or kids’ outdoor fun. With durability, affordability, and endless design options, concrete pavers outshine natural stone for walkways in Menlo Park, Alamo, or anywhere in between. Ready to elevate your hardscape? Book a free design consultation with Bayside Pavers today and let’s create a walkway that welcomes you home!
FAQ: Your Paver Walkway Questions Answered
Q: How much does a paver walkway cost?
A: Costs vary by size and design, but Bayside Pavers offers free quotes for accurate estimates.
Q: Are concrete pavers better than natural stone for walkways?
A: Yes, they’re more durable, cost-effective, and versatile, with easier maintenance.
Q: How long does it take to install a paver walkway?
A: Most walkways take 3–7 days, depending on complexity and size.
Q: Can permeable pavers be used for walkways?
A: Absolutely! They reduce puddling and support eco-friendly drainage.
Q: Why hire a contractor like Bayside Pavers?
A: Our expertise ensures a durable, beautiful walkway tailored to your needs.

Make Your Backyard a Year-Round Retreat
Imagine a crisp evening in your San Ramon backyard, but instead of gathering around a cracked concrete slab, you’re stuck indoors because your outdoor space feels uninspiring. Sound familiar? As a Bay Area homeowner, you crave a backyard that’s perfect for summer barbecues, kids’ playtime, or cozy winter nights, but issues like puddling, dead grass, and an outdated patio keep you inside. A custom paver fire pit area paired with a paver patio can turn your backyard into a functional, inviting oasis. In this guide, we’ll show you how to create a stunning fire pit area, solve pain points like cracked concrete and mud, and inspire your backyard remodel with Bayside Pavers. Let’s light up your outdoor living space!
Why a Paver Fire Pit and Patio Are Perfect for Your Backyard
A paver fire pit and patio combo is a dream upgrade for homes in Palo Alto, Walnut Creek, and beyond. Here’s a quick summary optimized for featured snippets:
Social Hub: Ideal for entertaining or family bonding around a warm fire.
Low Maintenance: Pavers resist weeds and require minimal upkeep.
Durable: Withstands weather and heavy use without cracking.
Eco-Friendly: Permeable pavers reduce runoff and puddling.
Curb Appeal: Enhances your home’s value and aesthetic.
This setup transforms your backyard into a space for sports, relaxation, and outdoor fun, addressing common issues like dead grass and mud.
Benefits of a Custom Paver Fire Pit and Patio
Create an Inviting Gathering Space
A fire pit surrounded by a paver patio becomes the heart of your backyard in Menlo Park or Danville, perfect for hosting friends or family game nights. Choose a circular or rectangular fire pit to suit your style. It’s great for s’mores with kids or evening cocktails with neighbors.
Solve Backyard Pain Points
Dead grass and mud tracking are common in Portola Valley or Alamo. A paver patio eliminates these issues, creating a clean, stable surface that’s kid- and pet-friendly. Permeable pavers prevent puddling, ensuring your backyard stays dry and usable year-round.
Increase Property Value
Per the National Association of Realtors, outdoor features like fire pits and patios can boost home value by up to 7%. A well-crafted hardscape makes your property shine in competitive Bay Area markets like Los Altos Hills or San Jose.
Designing Your Paver Fire Pit and Patio: Key Considerations
To craft a fire pit and patio that matches your lifestyle, consider these factors:
Size and Shape: A 48-inch round fire pit (like Belgard’s Melville™ Fire Pit Kit) suits most backyards, with a 10x12-foot patio for seating. Rectangular designs fit modern homes in Palo Alto.
Fuel Type: Wood offers a classic glow, while propane or natural gas provides cleaner, low-maintenance burning, popular in Walnut Creek.
Paver Style: Choose durable concrete pavers in colors like slate or sandstone to enhance your landscape. Bayside Pavers offers options like Belgard’s Catalina Grana.
Safety: Position the fire pit 10–15 feet from structures, per ICPI safety guidelines, and include a spark screen for protection.
A cohesive paver patio design ties the fire pit into your backyard’s overall aesthetic.
How to Build a Paver Patio and Fire Pit Area
Ready to update your backyard? Here’s a step-by-step guide to creating your fire pit and patio, expertly executed by Bayside Pavers:
Plan Your Design: Collaborate with a contractor to select paver patterns, fire pit style, and patio layout. 3D renderings bring your vision to life.
Prepare the Site: Excavate the area, level the ground, and install a compacted base with geo-tech fabric for stability.
Lay Patio Pavers: Arrange pavers in a pattern like herringbone or running bond, using polymeric sand for secure joints.
Install the Fire Pit: Set up the fire pit kit, ensuring proper alignment and safety features like a concrete bond beam.
Finalize: Add seating, lighting, or planters to complete your backyard remodel.
Professional installation guarantees a durable, polished result.
Maintaining Your Paver Patio for Long-Lasting Beauty
A paver patio is low-maintenance, but simple care keeps it stunning:
Sweep Regularly: Remove debris weekly to prevent stains, especially in dusty San Ramon backyards.
Control Weeds: Apply polymeric sand every 2–3 years to block weeds between pavers.
Seal Pavers: Seal every 2–3 years to protect against fading and wear, per ICPI recommendations.
Fix Shifting: Replace or reset loose pavers promptly to maintain a smooth surface.
These steps ensure your fire pit and patio remain inviting for years, perfect for kids’ play or entertaining in Los Altos or Alamo.
Why Choose Bayside Pavers for Your Fire Pit and Patio Project
When it’s time to hire a contractor, Bayside Pavers is the Bay Area’s trusted choice for custom fire pit and patio installations. Serving Woodside, San Jose, and beyond, we use premium materials like Belgard pavers and adhere to ICPI standards for lasting quality. Our team creates tailored designs with 3D renderings to match your vision. Visit Bayside Pavers to explore our services or get inspired by luxury outdoor designs at Chris Pessy Miami Real Estate.
Conclusion: Spark Joy in Your Backyard Today
Your backyard should be a place for connection, from summer barbecues in Palo Alto to cozy firelit evenings in Danville. A custom paver fire pit and paver patio solve pain points like dead grass, puddling, and cracked concrete, creating a space that invites family fun and entertaining. With Bayside Pavers, your backyard remodel is just a step away. Ready to ignite your outdoor living space? Book a free design consultation with Bayside Pavers today and let’s create a backyard you’ll love!
FAQ: Your Paver Fire Pit and Patio Questions Answered
Q: How much does a paver patio and fire pit cost?
A: Costs vary by size and materials, but Bayside Pavers offers free consultations for accurate quotes.
Q: Can a paver patio handle heavy furniture?
A: Yes, high-quality pavers are durable enough for tables, chairs, and more.
Q: How long does it take to build a fire pit and patio?
A: Most projects take 1–2 weeks, depending on size and complexity.
Q: Are permeable pavers good for fire pit areas?
A: Absolutely! They reduce puddling and enhance eco-friendliness.
Q: Why hire a contractor like Bayside Pavers?
A: Our expertise ensures a flawless, safe installation that lasts.

Imagine stepping into a backyard that’s no longer a muddy mess or a cracked concrete eyesore. Instead, it’s a stunning, functional space perfect for summer barbecues, kids’ playtime, or quiet evenings under the stars. For Silicon Valley and East Bay homeowners, installing pavers is a game-changer for tackling dead grass, puddling water, or uninspiring outdoor spaces. This DIY guide walks you through how to install pavers the right way, following Interlocking Concrete Pavement Institute (ICPI) standards. Whether you’re updating your driveway or creating a dreamy backyard patio, you’ll get actionable steps to make it happen. Ready to elevate your outdoor lifestyle? Let’s dive in!

Pavers are more than just a pretty face—they’re a practical solution for Bay Area homeowners. They’re durable, low-maintenance, and versatile, perfect for our region’s sunny summers and occasional rainy spells. According to the ICPI Foundation, properly installed pavers can last decades, resisting cracks and weathering better than traditional concrete. Plus, they add serious curb appeal, boosting your home’s value and making your backyard a go-to spot for entertaining.
But here’s the real draw: pavers solve common pain points. Sick of tracking mud into your house? Pavers create a clean, stable surface. Tired of puddles pooling on your driveway? Their permeable designs improve drainage. Dreaming of a backyard remodel that screams “Silicon Valley chic”? Pavers let you customize colors, patterns, and textures to match your vibe.

Before you grab a shovel, planning is key to a successful paver installation. Here’s how to start:
Define Your Space: Decide where your pavers will go—driveway, patio, or walkway? Measure the area to estimate materials. For inspiration, check out Bayside Pavers’ driveway designs.
Choose Your Pavers: Select pavers that suit your style and needs. Options like Antiqued Flat-Top offer a timeless look, while Dimensions pavers add modern flair.
Check Local Codes: Some Bay Area cities require permits for hardscape projects, especially driveways. Contact your local permitting office to stay compliant.
Budget Wisely: Factor in pavers, base materials, tools, and optional pro help. ICPI recommends budgeting for high-quality materials to ensure longevity.
Pro Tip: Sketch your design or use a free online tool to visualize your layout. It’s like playing architect for your backyard remodel!

You don’t need a contractor’s toolbox, but having the right gear makes DIY paver installation smoother. Here’s what you’ll need:
Tools: Shovel, wheelbarrow, tamper, level, rubber mallet, string line, and a plate compactor (rentable at Home Depot).
Materials: Pavers, gravel (Class II road base), sand, edge restraints, and polymeric joint sand.
Safety Gear: Gloves, safety glasses, and sturdy boots.
For ICPI-standard results, use a 4–6-inch gravel base and 1-inch bedding sand layer, as outlined by Eminent Pavers. This ensures stability and proper drainage—crucial for Bay Area homes dealing with puddling.
Personal Note: When I helped a friend install pavers in their Fremont backyard, we underestimated the gravel needed. Don’t skip double-checking quantities—it saves headaches!

Now, let’s get to work. Proper site prep is the foundation of a long-lasting paver project.
Mark the Area: Use stakes and string to outline your project. Add 6 inches beyond the paver area for edge restraints.
Excavate: Dig 7–9 inches deep (4–6 inches for the base, 1 inch for sand, plus paver thickness). Remove grass, roots, and debris.
Slope for Drainage: Create a 1–2% slope (about ¼ inch per foot) to prevent water pooling, a common issue for Bay Area driveways.
Compact the Soil: Use a tamper to firm up the ground. A stable base prevents sinking later.

The base is where ICPI standards shine. A solid base prevents shifting and cracking, especially under heavy use like driveways.
Add Gravel: Spread 4–6 inches of Class II road base in 2-inch layers. Compact each layer with a plate compactor.
Check Level: Use a level and string line to ensure the base is even and sloped correctly.
Install Edge Restraints: Place plastic or metal edging along the perimeter and secure with spikes. This keeps pavers locked in place.

This is where your vision comes to life! Follow these steps:
Spread Bedding Sand: Add a 1-inch layer of coarse sand over the gravel. Screed it smooth with a straight board.
Place Pavers: Start in a corner and lay pavers in your chosen pattern (e.g., herringbone or basketweave). Press gently; don’t slide them.
Cut Pavers as Needed: Use a masonry saw (rentable) to trim pavers for edges or curves.
Check Alignment: Use a level and string line to keep rows straight.
Explore Bayside Pavers’ paver options for patterns that elevate your backyard or driveway.

You’re almost there! These final steps ensure durability and polish.
Fill Joints: Spread polymeric sand over the pavers and sweep into joints. Mist lightly with water to activate the binding agent.
Compact Again: Run the plate compactor over the surface to set the pavers and sand.
Seal (Optional): Apply a paver sealer for extra protection against stains and weathering. Reapply every 2–3 years.
Congratulations—you’ve transformed your Bay Area home with a stunning paver installation! By following these ICPI-standard steps, you’ve created a durable, beautiful space that solves muddy yards, cracked concrete, and uninspiring backyards. Now, picture hosting summer barbecues, watching your kids play, or sipping coffee on your new patio. Doesn’t that feel worth it?
If DIY feels daunting or you want a pro’s touch, book a free design consultation with Bayside Pavers today. Our team specializes in custom hardscape solutions for San Jose, Silicon Valley and East Bay homes. What’s your dream outdoor project? Drop it in the comments—I’d love to hear!
How long does it take to install pavers?A 100-square-foot patio takes about 2–3 days for DIYers, depending on prep and weather. Pros can often finish faster.
Can I install pavers over existing concrete? Yes, but the concrete must be stable and level. Add a 1-inch sand layer and follow ICPI guidelines for overlay projects.
How much do pavers cost in the Bay Area? Costs vary, but expect $15–$25 per square foot for materials and DIY labor. Get a quote for professional installation.
What’s the best paver pattern for a driveway? Herringbone is popular for driveways due to its strength and classic look. Explore options at Bayside Pavers.
Do pavers require maintenance? Minimal! Sweep regularly, rinse stains, and reapply polymeric sand or sealer every few years.

f you want to add a hardscape that helps reduce the impact of heavy rainfall, then our permeable paver installation service is for you! Permeable pavers are a great solution for improving stormwater drainage, as they allow it to seep back into the ground. To do this, we’ll install them with layers of varying-sized stone or aggregate underneath. We can use permeable pavers to build various features, including patios, driveways, and walkways. Our team can even help you harvest and recycle rainwater with them!
We offer permeable pavers near you in residential and commercial properties, along with HOAs, in San Francisco, Oakland, San Jose, Santa Rosa, and surrounding areas in California. Give us a call today at (866) 225-3044 to get started
The key to making sure your permeable pavers can do their job is by installing them with layers of aggregate or varying-sized stone underneath, which is just what our team at Bayside Pavers does.
These layers ensure proper drainage by allowing stormwater to be absorbed and directed to underground aquifers rather than running off and overwhelming storm drains, also helping to reduce erosion. Not only that, but it ensures that any excess water seeps through the pores of the stones or between the gaps in the aggregate instead of gathering on top of your pavers.


The key to permeable pavers lies in the installation process. A typical installation consists of four separate layers which act as a filtration system to clean stormwater runoff.
First Layer: The top layer consists of the concrete pavers
Second Layer: The layer just below the pavers is a 6 to an 8-inch gravel bed
Third Layer: The third layer is filter fabric
Fourth Layer: The bottom layer is a bed of compacted sand.
Permeable concrete is not a new invention. First seen in the 1800s in Europe, it was used for structural purposes like load-bearing walls, infill panels, and pavement surfacing. Permeable paving, specifically, has been used in Europe for over fifty years, gaining traction again after World War II when cement was scarce.
Its adoption in the U.S. began in the 1960s when pervious concrete and permeable pavers were proposed as a way to reduce floods, raise water tables, and replenish aquifers. In the 1970s, civil engineer John Paine developed Portland Cement Pervious Pavement, further advancing the field. Around the same time, the EPA began testing to determine its cost and efficiency. The first viable design guide was written in 1977, laying the groundwork for permeable pavement education and serving as a reference even today. If you’re searching for pervious pavers in your area, these advancements have made it easier than ever to find solutions tailored to your needs.
Today, permeable concrete is used in multiple cities throughout the US and residential use has grown drastically in the past ten years.
Permeable pavers are made using cement, a coarse aggregate, and water, with little to no fine aggregates like sand or clay. That’s why permeable concrete often has a rough, uneven appearance. The American Society for Testing and Materials has set standards for both pervious and impervious concrete.
The ASTM standard calls for the following percentages of air content or voids within pervious concrete:
• 20% +/- 5% for low porosity, high strength
• 30% +/- 5% for high porosity, low strength
The higher void percentage for pervious concrete lets stormwater easily pass through the material and seep into the ground below. Typical flow rates can range from two to 18 gallons per minute.
Because of their unique design, permeable pavers make it possible to build some great hardscape features for your property. For example, we can install the following using this material:
Driveways: Our permeable pavers are a great option for your new driveway. Not only does this material provide functional benefits, but it’ll also boost its curb appeal!
Walkways: If you want to make it easier to go between different areas on your property, our permeable pavers are perfect for creating beautiful walkways.
Patios: A patio is a great spot to gather with others while enjoying the fresh air, and our permeable pavers will give you a stylish feature while also ensuring proper stormwater drainage.


The first step in installing a permeable paver driveway is deciding which design will work best for you. You have a wide range of choices today when creating a permeable paver driveway design. Open-cell pavers are concrete pavers with holes that can be filled with a pervious material like vegetation, which can soften your design and add a bit of green to your driveway.
However, it’s really what’s underneath the pavers that count! A solid base is a key to minimizing heaving and cracking. The typical construction starts with a 6-inch sub-base of 1 1/2 inches of clean rock, topped with a 4-inch base of 3/4 of an inch of clean rock to make the driveway strong and stable enough to handle vehicles. The permeable pavers go on top of that. If you need to control water flow, a polyurethane liner should be used near any foundation walls or concrete needs to be protected.
Tabs are formed into each paver to provide the correct joint width. Joints are filled with aggregate to allow water to pass through. Ceramic pavers can actually be porous as well, allowing water to pass directly through the pavers as well as the gaps.
When creating your driveway design you can mix and match surfaces, for example, open-cell pavers filled with gravel alternating with concrete strips to add visual interest. When you’ve decided on your design and the system and are ready to install it, make sure you focus on drainage s well as aesthetics, and redirect as much water from your patio, downspouts, and roofline to the new permeable area so you can capture as much water as possible.
We offer permeable concrete and grass pavers to accommodate your aesthetic preferences!
Not only do permeable pavers help control runoff, but it also makes it possible to harvest and recycle rainwater! If this is something you’re interested in doing, you’ll want to talk to our experts about it!
Because permeable pavers are designed to absorb water, it’s much easier to collect once it starts raining.
Our experts can help you reap these benefits, and you can store the water you gather to use later for watering plants or anything else you may need.
It’s a great way to save money and resources without having to rely on city water all the time!

Good storm water management is crucial to almost all outdoor and/or landscaping design projects. Permeable pavers help rainwater absorb and irrigate the soil beneath them. Without these permeable pavers, the sewer systems become flooded in a rainstorm. Any developer who pursues a LEED certification should consider using permeable pavers.
In California’s Bay Area, water quality is a crucial issue for everyone. Studies have indicated that permeable pavers can remove between 65 and 85% of undissolved pollutants and up to 95% of sediment from stormwater runoff. Unlike traditional pavers, permeable pavers allow oxygen, carbon dioxide, water, and nutrients to pass freely. This means you can plant trees and shrubs closer to a surface paved with permeable pavers to create beautiful, lush, low maintenance gardens.
At Bayside Pavers, we strive to exceed your expectations every time, and you can trust that we do the same with our permeable paver installation service near you. We’ve been providing high-quality services for 14 years and have an A+ rating with the BBB. Combine that with our top-of-the-line materials, and we can build a hardscape feature you can enjoy for years to come!
We offer our permeable paver installation service to residential and commercial properties, plus HOAs, in San Francisco, Oakland, San Jose, Santa Rosa, and nearby areas in California. Call us today at (866) 225-3044 to schedule our service!

Having a pool can create summer memories for the whole family. To really maximize on a pool you can lounge around in and entertain company with, you’ll need to pay attention to your pool patio.
Having a brilliantly built pool patio with all the bells and whistles will increase the value and use of your entire pool.
A Sonoma County paver contractor can build, renovate and add to your pool patio in ways you couldn’t imagine.
To make the most out of your pool patio, read on and use the tips presented.
In order to really ramp up your pool patio, you should contact a Sonoma County paver contractor that focuses on resurfacing.
Your patio is a candidate for resurfacing any time that you notice materials stripping, peeling, cracking and otherwise showing signs of age. Resurfacing a pool patio becomes a health and safety issue if you’re dealing with corrosion or rust.
Contact a Sonoma County paver contractor that can show you some options — to include fresh paint and brand new materials installation.
Seek out some reliable estimates so that you can plan out a budget.
The functions that you add to your pool patio make a huge difference in the way you use it.
Installing some beautiful, eco-friendly lights allows you to create a vibe with your pool that lets the party last well into the night. These energy efficient lights will help you create a wonderful mood without your electric bills getting out of control.
You can use technology to your advantage when you need your pool patio to also have some functionality.
For instance, you can install some apps that let you control the jets, pool temperatures and other matters inside of your pool. Stay on par with app updates, so you’re constantly increasing these functions.
Without a doubt, the best thing you can do for your pool patio is to keep it clean and well maintained.
To get the most from your patio, stay away from chemicals that will strip it and break it down. Instead, stock up on some essential oils and soft soaps that will get rid of dirt, while maintaining the materials.
You can also bring in a pool patio contractor that can offer routine cleanings and maintenance plans. This way, you won’t have to worry about your patio becoming a dingy eyesore due to constant use.
The biggest part of these tips to keep in mind is that you can’t leave your pool patio work to just anybody.
A Sonoma County Paver Contractor will work hard to keep your patio in pristine condition while increasing its functionality. Contact our professional patio team for more information today.

Your home’s driveway is one of the most noticeable and expensive investments you make as a homeowner. Driveway edging is one of the best ways to protect that investment. As the name suggests, driveway edging involves creating a protective edge along the borders of your driveway. It’s one of the best ways to increase your driveway’s durability as well as protect your lawn as a driveway border discourages people from driving or parking on your lawn.
Edging a driveway made of stone or brick pavers will keep those pavers in place and is a great way to protect your driveway paver installation investment. One of the first decisions you need to make when edging your driveway is choosing between raised vs flat driveway edging.
Flat edging sits level with your driveway and relies on color and shape to create a contrast. Belgian block, brick, or stone pavers are the most common choices for flat edging. Raised edging extends above your driveway. This helps to create a visual border and a better barrier between your lawn and driveway. Large Belgian blocks are a common choice for attractive raised edging.
If your driveway is gravel or loose stone, consider steel driveway edging that will help to contain the material. If your driveway is narrow, consider planting the bricks in concrete to save you the aggravation of constantly re-edging areas you accidentally drive across.


If you’re thinking of selling your home, one of the best ways to increase your home’s value is to upgrade its outside appearance, much the same as retaining walls. Driveway edging is a simple and relatively inexpensive way to beautify your property. Along with proper lawn maintenance, this could help contribute to a higher asking price.
Plus, driveway edging is a fantastic way to boost the curb appeal of your home. Attractive driveway edging boosts curb appeal not only for your home but for the entire neighborhood. There are tons of paver edging ideas that can help upgrade your landscape design and help divide the areas of your yard for better appeal and flow.
Benefits of Driveway Edging
Do you find that when it rains parts of your lawn and mulch get washed down the driveway? Edging helps to keep mulch, soil, and plants where they belong. By acting as an effective barrier, it prevents your lawn from washing or blowing away. This will also help to keep your driveway cleaner during rainy or muddy seasons.
Are the edges of your driveway crumbling? Since most types of edging are set several inches into the ground, it can also help to restrict the growth of tree roots or grass into your driveway, helping prevent asphalt or concrete driveways from cracking or chipping.

.jpg)
Picture this: your backyard transformed from a patchy, muddy mess into a vibrant, low-maintenance oasis perfect for summer barbecues, kids’ soccer games, or relaxing under the stars. For homeowners in Palo Alto, San Jose, Danville, and beyond, installing artificial turf is the key to solving dead grass, tracking dirt indoors, and uninspiring outdoor spaces. This DIY guide shows you how to install turf the right way, following Interlocking Concrete Pavement Institute (ICPI) standards for a durable, beautiful result. Whether you’re updating your backyard or creating a play-friendly lawn, these actionable steps will get you there. Ready to make your outdoor dreams a reality? Let’s get started!

Why Artificial Turf is Perfect for Bay Area Homes
Artificial turf is a game-changer for Bay Area homeowners who crave beauty and function without the hassle. It’s durable, water-saving, and pet-friendly, making it ideal for our sunny climate and occasional droughts. According to MSI Surfaces, high-quality turf can last 15–20 years with minimal upkeep, unlike natural grass that demands constant mowing and watering. For families in Menlo Park or Walnut Creek, turf means no more muddy footprints or cracked concrete ruining your vibe.
Turf also tackles your pain points head-on. Tired of puddling water in your backyard? Turf’s permeable backing improves drainage. Want a backyard remodel that invites summer nights with friends? Turf creates a lush, inviting space. Curious about premium options? Check out Emerald Green Turf 45mm 110oz for a natural look and feel.
.jpg)
Step 1: Plan Your Turf Installation
A successful turf project starts with a solid plan. Here’s how to set yourself up for success:
Choose Your Space: Decide where the turf will go—backyard, front yard, or play area. Measure the area to estimate materials.
Select Your Turf: Pick a turf type that matches your needs. Bayside Pavers’ turf options include durable, lush varieties perfect for kids and pets.
Check Local Regulations: Cities like Los Altos or San Ramon may have rules on artificial turf, especially in front yards. Contact your local permitting office.
Budget Smart: Account for turf, base materials, tools, and optional pro help. ICPI standards emphasize quality materials for longevity.
Pro Tip: Sketch your layout or use a free design app to visualize your backyard remodel. It’s a fun way to plan your outdoor oasis!
Step 2: Gather Tools and Materials
You don’t need a pro’s toolbox, but the right gear makes DIY turf installation easier. Here’s your checklist:
Tools: Shovel, wheelbarrow, tamper, utility knife, rake, broom, and a plate compactor (rentable at hardware stores).
Materials: Artificial turf, gravel (Class II road base), decomposed granite or sand, seam tape, adhesive, and turf nails.
Safety Gear: Gloves, knee pads, and safety glasses.
ICPI recommends a 4–6-inch base for stability and drainage, critical for Bay Area homes dealing with puddling. For detailed specs, see MSI Surfaces’ turf guide.
Personal Note: When I helped a neighbor in Portola Valley install turf, we forgot to order extra seam tape. Double-check your material list to avoid last-minute runs!

Step 3: Prepare the Site
Proper site prep ensures your turf lasts. Follow these steps:
Mark the Area: Use stakes and string to outline your turf area. Add 6 inches beyond the turf for anchoring.
Excavate: Dig 5–7 inches deep (4–6 inches for the base, plus turf thickness). Remove grass, rocks, and roots.
Slope for Drainage: Create a 1–2% slope (¼ inch per foot) to prevent water pooling, a common issue in Woodside yards.
Compact the Soil: Use a tamper to firm up the ground, preventing future sinking.
Visual Placeholder: [Insert image of a homeowner marking a backyard with stakes and string.]
Step 4: Build the Base
The base is critical for ICPI-standard turf installation, ensuring stability and proper drainage.
Add Gravel: Spread 4–6 inches of Class II road base in 2-inch layers. Compact each layer with a plate compactor.
Add a Fine Layer: Spread ½ inch of decomposed granite or sand and screed it smooth for a level surface.
Check Level: Use a level and string line to confirm the base is even and sloped correctly.
Engagement Hook: What’s your dream backyard activity—kids’ playtime or hosting friends? Share in the comments!
.jpg)
Step 5: Install the Turf
Now for the fun part—laying your turf! Here’s how:
Roll Out the Turf: Unroll the turf over the base, ensuring it fits the area. Let it sit for 1–2 hours to relax any wrinkles.
Trim to Fit: Use a utility knife to cut the turf to shape, leaving a slight overlap at edges.
Seam Sections: For large areas, join pieces with seam tape and adhesive. Press firmly for a seamless look.
Secure the Turf: Anchor with turf nails every 6–12 inches along edges and seams.
Brush the Fibers: Use a stiff broom to brush up the turf fibers for a natural look.
Explore Bayside Pavers’ turf services for premium options like Emerald Green, perfect for Bay Area backyards.
Visual Placeholder: [Insert infographic showing turf installation steps, from rolling to brushing.]
Step 6: Finish and Maintain
You’re almost done! These final touches ensure a polished, long-lasting result.
Add Infill: Spread silica sand or rubber infill (optional) to weigh down the turf and support the fibers. Brush it in evenly.
Compact and Inspect: Lightly compact the surface and check for loose edges or seams.
Clean Up: Rinse the turf with a hose to remove dust and settle the infill.
Maintenance is a breeze—sweep debris, rinse stains, and fluff fibers occasionally. Your backyard is now ready for summer nights and kids’ sports!
.jpg)
Enjoy Your Low-Maintenance Backyard Oasis
You did it—your Bay Area backyard is now a lush, functional paradise! By installing artificial turf with these ICPI-standard steps, you’ve eliminated dead grass, muddy messes, and uninspiring spaces. Picture hosting friends in Los Altos, watching kids play in San Jose, or relaxing in Danville’s evening breeze. Your new turf makes it all possible.
If DIY feels overwhelming or you want a professional finish, book a free design consultation with Bayside Pavers today. Our team crafts custom hardscape solutions for Palo Alto, Walnut Creek, and beyond. What’s your favorite way to enjoy your new backyard? Drop it in the comments—I’d love to hear!
FAQ: Your Turf Installation Questions Answered
How long does it take to install artificial turf? A 200-square-foot backyard takes 2–4 days for DIYers, depending on prep and team size. Pros can often complete it faster.
Can I install turf over concrete? Yes, if the concrete is stable. Add a thin foam underlay and follow ICPI guidelines for adhesion.
How much does artificial turf cost in the Bay Area? DIY costs range from $8–$15 per square foot, including materials. Contact Bayside Pavers for pro installation quotes.
Is artificial turf safe for kids and pets? Absolutely! Premium options like Emerald Green Turf are non-toxic and durable for play.
How do I maintain artificial turf? Rinse spills, sweep leaves, and brush fibers monthly. Reapply infill every 1–2 years for best results.
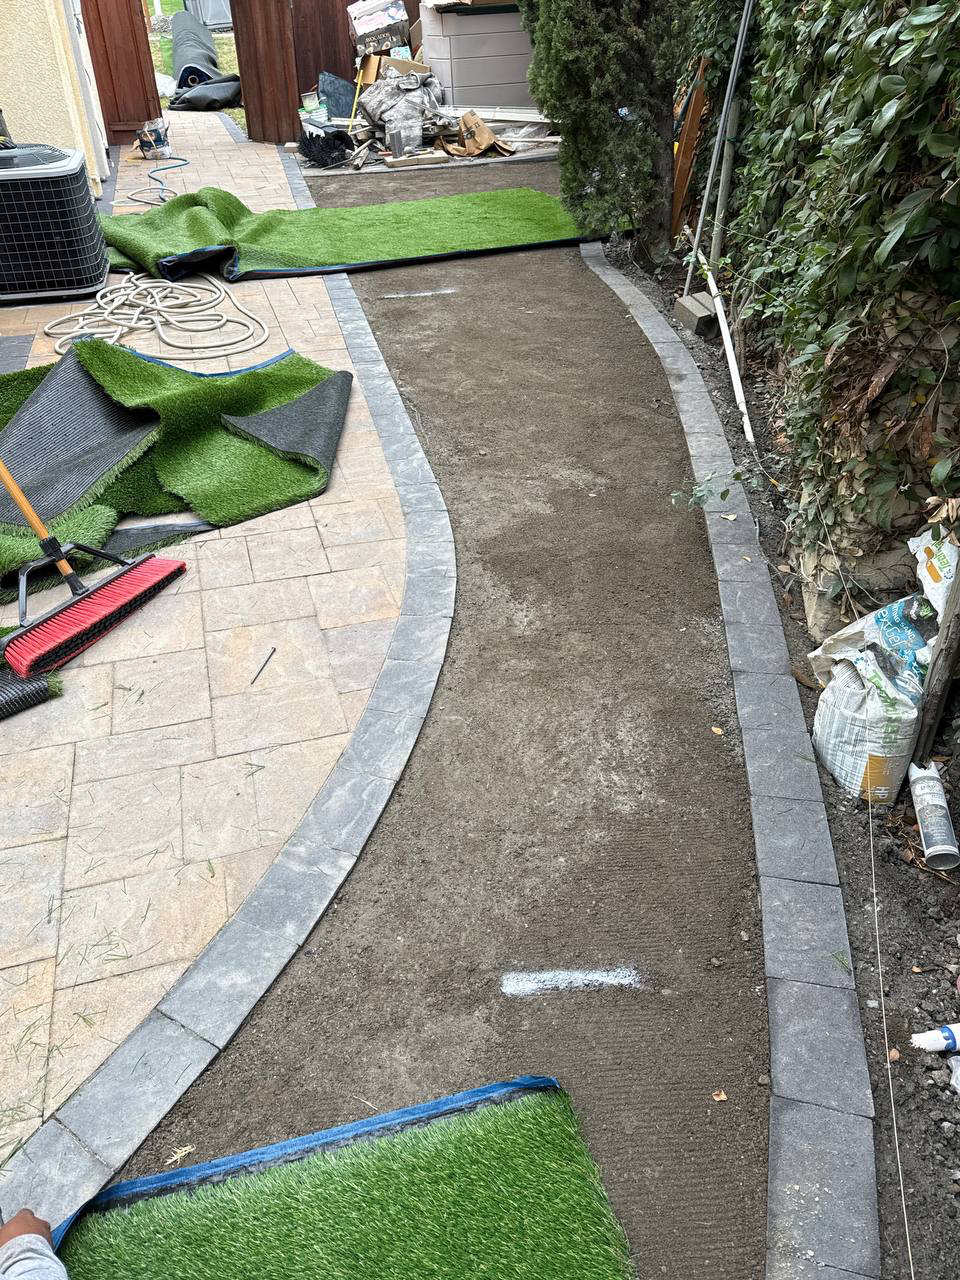
<iframe id="form-Acuity" src="https://app.acuityscheduling.com/schedule.php?owner=14814513&ref=embedded_csp" title="Schedule Appointment" width="100%" height="800" frameBorder="0"></iframe><script src="https://embed.acuityscheduling.com/js/embed.js" type="text/javascript"></script>
.png)
We are a small, dynamic team of the best designers, project managers & construction crews in the Bay Area. We pride ourselves on efficiency, beautiful design & streamlined construction and exceptional communication.